Pizza, a culinary cornerstone enjoyed globally, boasts a history as rich and diverse as its toppings. While its modern iteration is undeniably Italian, its origins are surprisingly debated. Some trace its roots back to ancient flatbreads consumed in various cultures, from the Egyptians’ khubz to the Roman pinsa. These early versions, however, lacked the characteristic tomato sauce and cheese we associate with pizza today. The Neapolitan flatbread, often cited as pizza’s direct ancestor, emerged in the 16th century, evolving from a simple food for the poor into a beloved regional specialty. The addition of tomato, initially a controversial ingredient, marked a pivotal moment in pizza’s development, transforming it into the dish we recognize today.
The late 19th and early 20th centuries witnessed pizza’s explosive popularity, largely thanks to Naples, Italy. Pizza vendors, or pizzaioli, became a ubiquitous sight, selling their creations from simple street stalls. Immigration played a crucial role in spreading pizza’s fame beyond Italy’s borders. Italian immigrants, carrying their culinary traditions with them, introduced pizza to the United States, where it quickly gained popularity, particularly in New York City. By the mid-20th century, pizza had transcended its humble beginnings, becoming a global phenomenon, with estimated annual sales exceeding $40 billion in the United States alone. This remarkable success speaks to pizza’s versatility and broad appeal; its adaptability to diverse tastes and cultures has ensured its enduring popularity.
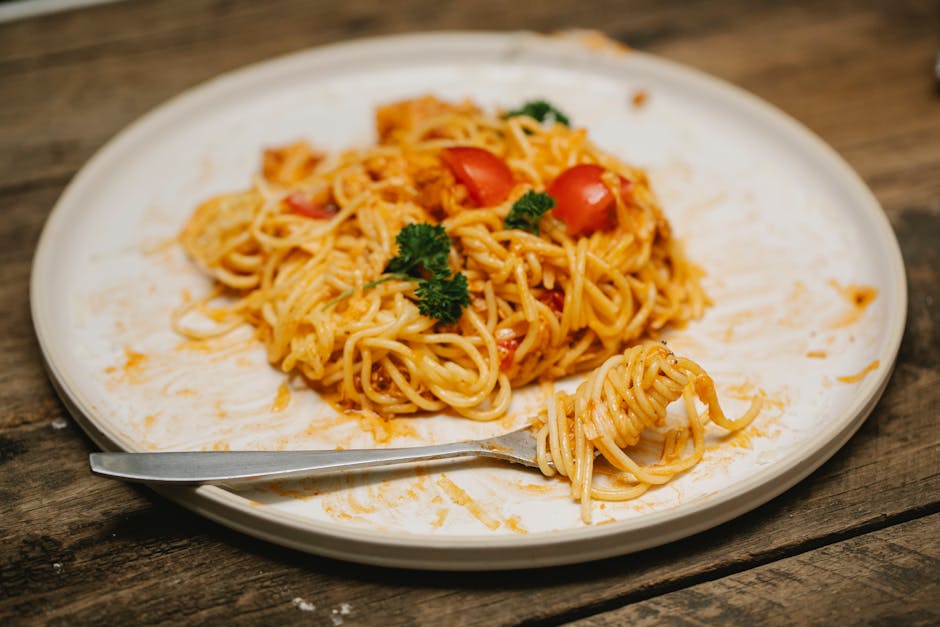
Today, pizza’s cultural significance is undeniable. It’s more than just a food; it’s a symbol of community, celebration, and comfort. From casual family dinners to elaborate celebrations, pizza serves as a unifying force, bringing people together around a shared culinary experience. Its versatility allows for endless customization, reflecting individual preferences and cultural influences. Whether it’s the classic Margherita, the meat-lover’s delight, or innovative fusion creations, pizza continues to evolve, adapting to ever-changing tastes and culinary trends. This recipe, The Ultimate Homemade Pizza, aims to capture the essence of this beloved dish, allowing you to create your own perfect pizza from scratch, unlocking the secrets to a truly authentic and delicious experience. Get ready to embark on a culinary journey that blends tradition with innovation, resulting in a pizza that’s as unique as you are.
Ingredients and Measurements
This section details the ingredients and precise measurements for creating the ultimate homemade pizza. Accuracy is key to achieving the perfect crust and overall flavor profile. We’ve broken down the ingredients into categories for clarity.
For the Pizza Dough:
Flour: We recommend using 4 cups (500g) of all-purpose flour, or a blend of all-purpose and bread flour for a chewier crust. Bread flour’s higher protein content contributes to gluten development, resulting in a more robust texture. If using bread flour, reduce the all-purpose flour quantity slightly, perhaps to 3.5 cups (437.5g), and adjust as needed based on your flour’s absorbency.
Water: 1 1/4 cups (300ml) of lukewarm water is ideal. The temperature is crucial; too hot and it will kill the yeast, too cold and the yeast won’t activate properly. Use a thermometer to ensure the water is between 105-115°F (40-46°C).
Yeast: 2 teaspoons (7g) of active dry yeast or 1 teaspoon (4.5g) of instant yeast. Always check the expiration date on your yeast package. Fresh yeast will yield the best results. If using active dry yeast, proof it in the warm water with a pinch of sugar (1 teaspoon) before adding the flour.
Salt: 1 1/2 teaspoons (9g) of fine sea salt enhances the flavor of the dough. Don’t skimp on the salt! It’s essential for balancing the sweetness and other flavors in the pizza.
Olive Oil: 2 tablespoons (30ml) of extra virgin olive oil adds flavor and helps create a tender crust. Use a good quality olive oil for the best results. You can also substitute with other neutral oils.
For the Pizza Sauce:
Canned Crushed Tomatoes: 1 (28 ounce) can of high-quality crushed tomatoes. Look for brands with minimal added ingredients for a richer, more authentic tomato flavor.
Garlic: 2 cloves of minced garlic. Fresh garlic is always best, but you can substitute with 1 teaspoon of garlic powder if needed.
Dried Oregano: 1 teaspoon of dried oregano. Fresh oregano is preferable if available.
Salt and Pepper: To taste. Season generously to your preference.
Olive Oil: 1 tablespoon (15ml) of extra virgin olive oil. This helps to sauté the garlic and enhance the sauce’s flavor.
For the Toppings:
Mozzarella Cheese: 8 ounces (227g) of fresh mozzarella cheese, shredded or sliced. Fresh mozzarella offers the best flavor and melt.
Other Toppings: This is where you can get creative! Use your favorite toppings such as pepperoni, mushrooms, onions, peppers, etc. The quantity will depend on your preference and the size of your pizza.
Remember to adjust the quantities based on the number of pizzas you’re making and the size of your pizza pan.
Dough Preparation (including kneading and proofing)
The foundation of any great pizza lies in its dough. This recipe uses a simple yet versatile dough that yields a perfectly crisp crust with a chewy interior. We’ll be making enough dough for two 12-inch pizzas.
Ingredients:
- 1 cup (240ml) warm water (around 105-115°F/40-46°C)
- 1 teaspoon sugar
- 2 teaspoons active dry yeast
- 2 1/2 cups (300g) all-purpose flour, plus more for dusting
- 1 teaspoon salt
- 2 tablespoons olive oil
Instructions:
1. Activate the Yeast: In a large bowl, combine the warm water, sugar, and yeast. Let it stand for 5-10 minutes until foamy. This indicates the yeast is alive and active. If it doesn’t foam, your yeast may be old and you’ll need to start again with fresh yeast.
2. Combine Dry Ingredients: In a separate bowl, whisk together the flour and salt. This ensures even distribution of salt throughout the dough, preventing a salty patch.
3. Mix Wet and Dry Ingredients: Gradually add the dry ingredients to the yeast mixture, mixing with a wooden spoon or your hands until a shaggy dough forms. Don’t be tempted to add all the flour at once; the dough should be slightly sticky at this stage.
4. Kneading the Dough: Turn the dough out onto a lightly floured surface. Knead the dough for 8-10 minutes, or until it becomes smooth and elastic. Kneading develops the gluten in the flour, resulting in a stronger, more pliable dough that will hold its shape during baking. If the dough is too sticky, add a tablespoon of flour at a time until it’s manageable. If it’s too dry, add a teaspoon of water at a time.
5. First Rise (Bulk Fermentation): Place the kneaded dough in a lightly oiled bowl, turning to coat. Cover the bowl with plastic wrap and let it rise in a warm place for 1-1.5 hours, or until doubled in size. A warm place (around 75-80°F/24-27°C) is ideal for optimal yeast activity. You can even place the bowl in a turned-off oven with the oven light on for gentle warmth.
6. Shaping and Second Rise (Proofing): Once the dough has doubled, gently punch it down to release the air. Divide the dough in half. Shape each half into a ball. Place the dough balls on a lightly floured baking sheet, cover with plastic wrap, and let them rise for another 30-45 minutes, or until almost doubled in size. This second rise allows the dough to develop its final texture and flavor.
Professional Tip: For a richer flavor, let the dough rise overnight in the refrigerator after the first rise. This slow fermentation process enhances the taste and texture of the crust.
Important Note: The rising times may vary depending on the temperature and humidity of your environment. Observe the dough; when it’s visibly increased in size, it’s ready for the next step.
Sauce Preparation (including simmering and seasoning)
The sauce is the heart and soul of a great pizza, so don’t skimp on this crucial step! We’ll be making a simple yet flavorful tomato sauce from scratch, highlighting the fresh taste of tomatoes. This recipe yields approximately 2 cups of sauce, enough for two 12-inch pizzas.
Ingredients:
- 28 ounces (794g) canned crushed tomatoes (San Marzano tomatoes are ideal for their sweetness)
- 1/2 medium yellow onion, finely chopped
- 2 cloves garlic, minced
- 2 tablespoons extra virgin olive oil
- 1 teaspoon dried oregano
- 1/2 teaspoon dried basil
- 1/4 teaspoon red pepper flakes (optional, for a touch of heat)
- 1 teaspoon salt
- 1/2 teaspoon black pepper
- 1 tablespoon sugar (optional, to balance acidity)
Instructions:
Begin by heating the olive oil in a medium saucepan over medium heat. Add the finely chopped onion and cook, stirring occasionally, until softened and translucent – about 5-7 minutes. Don’t brown the onions; we’re aiming for a gentle softening.
Next, add the minced garlic and cook for another minute, until fragrant. Be careful not to burn the garlic, as this will impart a bitter taste.
Pour in the crushed tomatoes, oregano, basil, red pepper flakes (if using), salt, pepper, and sugar (if using). Stir well to combine all ingredients thoroughly.
Bring the sauce to a gentle simmer, then reduce the heat to low. Simmering is key to developing the flavors. Partially cover the saucepan with a lid to allow some steam to escape, preventing the sauce from becoming too watery. Let the sauce simmer gently for at least 30 minutes, or up to 1 hour for a richer, more complex flavor. Stir occasionally to prevent sticking.
Taste and adjust seasoning as needed. You might want to add more salt, pepper, sugar, or herbs depending on your preference. Remember, the sauce should be well-seasoned but not overpowering – it should complement the other flavors of the pizza, not dominate them.
Once the sauce has simmered to your liking, remove it from the heat and let it cool slightly before using. You can also prepare the sauce ahead of time; it will keep in the refrigerator for up to 3 days or can be frozen for longer storage.
Professional Tip: For an even richer flavor, consider adding a splash of red wine (about 1/4 cup) along with the tomatoes. Allow it to reduce slightly during the simmering process.
Professional Tip: If using fresh herbs instead of dried, add them during the last 5 minutes of simmering to preserve their vibrant color and flavor.
Topping Preparation (including chopping and pre-cooking)
The success of your homemade pizza hinges not only on the perfect dough but also on the vibrant, flavorful toppings. Proper preparation is key to achieving optimal texture and taste. This section will guide you through the essential steps for prepping your chosen toppings.
Vegetables: Start by washing all your vegetables thoroughly. This removes any dirt or pesticides and ensures a clean, fresh taste. For optimal cooking and texture, pre-chop your vegetables to roughly the same size. This ensures even cooking on the pizza. For example, if you’re using onions, bell peppers, and mushrooms, aim for ½-inch dice. This size allows for good distribution across the pizza without overwhelming any single bite. Approximately 1 cup of diced vegetables per pizza is a good starting point, but adjust to your preference.
Onions: Thinly slicing or dicing onions allows them to soften and caramelize during baking, adding a subtle sweetness. Consider pre-cooking your onions gently in a pan with a little olive oil until they soften and slightly caramelize. This prevents them from being raw and overpowering on the finished pizza. About ½ a medium-sized onion, thinly sliced, is a good amount for one pizza.
Mushrooms: Mushrooms release a lot of water when cooked. To prevent a soggy pizza, sauté your mushrooms in a pan over medium heat until most of their moisture has evaporated. About 8 ounces of sliced mushrooms, sautéed until tender, will add a lovely earthy flavour.
Bell Peppers: Bell peppers can be added raw, but pre-cooking them enhances their flavor and softens their texture. Dice them into ½-inch pieces and sauté them along with the onions and mushrooms for a few minutes until slightly tender. One medium bell pepper, diced, is a good addition.
Meats: Pre-cooking meats is crucial for food safety and preventing a raw or undercooked center. Brown ground beef or Italian sausage thoroughly in a pan before adding it to your pizza. Drain off any excess grease. For other meats like pepperoni or cooked salami, you can skip the pre-cooking step; simply slice them thinly for even distribution. Use about 4-6 ounces of cooked meat per pizza. Ensure your meat is fully cooked before adding it to the pizza.
Cheese: Shredding your cheese before adding it to the pizza is recommended. This allows for even melting and distribution across the surface. Pre-shredded cheese often contains cellulose, which can affect the melt, so shredding your own is best. Use about 1 ½ cups of your favorite shredded cheese (mozzarella is a classic choice) per pizza. Consider adding some grated Parmesan or Pecorino Romano for extra flavor.
Herbs: Fresh herbs add a wonderful aroma and flavor to your pizza. Chop fresh basil, oregano, or rosemary finely just before adding them to the pizza for the best flavor and color. A tablespoon or two of chopped fresh herbs is usually sufficient.
Important Note: Always ensure your toppings are completely cool before adding them to your pizza dough. Adding hot ingredients can cause the dough to become soggy. Prepare all your toppings in advance to make the pizza assembly process smoother and more efficient.
Pizza Assembly: Building Your Masterpiece
With your perfectly prepared dough and vibrant sauce ready, it’s time for the most creative and arguably the most fun part of pizza making: assembly! This stage allows you to personalize your pizza to your exact liking, so don’t be afraid to experiment.
Begin by lightly dusting your pizza peel (or a large baking sheet) with semolina flour or cornmeal. This prevents the dough from sticking and ensures easy transfer to your oven. Using a peel is highly recommended for easier handling, especially with thinner crusts.
Gently transfer your prepared pizza dough onto the floured surface. Using your fingertips, carefully stretch and shape the dough into your desired size and thickness. Avoid using a rolling pin, as this can make the crust tough. Instead, work the dough from the center outwards, gently rotating and stretching it until it reaches your desired diameter (typically 12-14 inches for a standard pizza).
Once the dough is shaped, carefully spread your pizza sauce evenly across the surface, leaving about a half-inch border for the crust. Don’t overload the sauce; a thin, even layer is key to preventing a soggy crust. Aim for approximately 1/2 cup to 3/4 cup of sauce, depending on the size of your pizza.
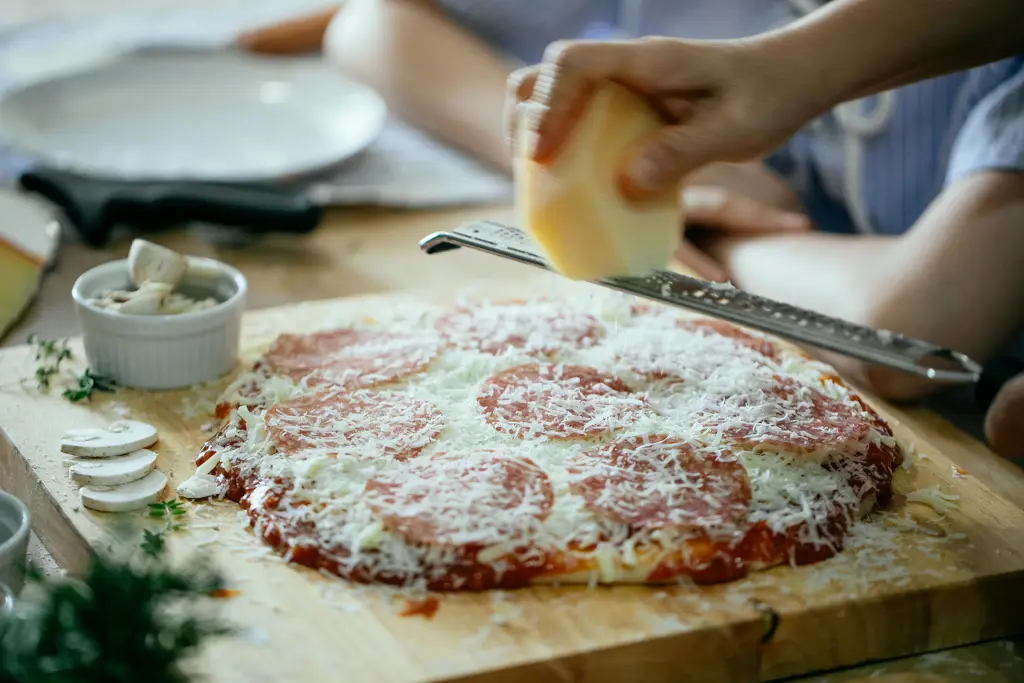
Now comes the fun part – adding your toppings! Start with your cheese. We recommend using a blend of mozzarella and provolone for optimal flavor and melt. Shred your cheese yourself for the best results; pre-shredded cheese often contains cellulose which can prevent proper melting. Use approximately 1 1/2 to 2 cups of shredded cheese, distributing it evenly over the sauce. Avoid piling the cheese too high in one area, as this can lead to uneven baking.
Next, add your chosen toppings. Remember to consider the order of your toppings. Heavier toppings should go on first, followed by lighter ones. For example, if you’re using mushrooms and pepperoni, place the mushrooms down first, then the pepperoni. This prevents the lighter toppings from getting lost or burning under heavier ones. Use approximately 1/2 cup to 1 cup of toppings depending on your choice and preference.
Once all your toppings are arranged to your liking, carefully slide the pizza from the peel onto a preheated pizza stone or baking sheet. If you’re using a pizza stone, preheat it in the oven for at least 30 minutes at the highest temperature your oven allows. This ensures a crispy crust.
And there you have it! Your pizza is ready for the oven. Follow the baking instructions in the next section to achieve a perfectly cooked, delicious homemade pizza. Remember to have fun and experiment with different toppings and combinations to create your signature pizza.
Pro Tip: Don’t be afraid to get creative with your toppings! Consider using fresh herbs, roasted vegetables, or even gourmet cheeses to elevate your pizza to the next level.
Baking Techniques (including oven temperature and baking time)
Achieving that perfect, crispy-crusted, bubbly-topped pizza requires mastering the art of baking. This section details the techniques and crucial temperature and time considerations for baking your homemade pizza to perfection.
Oven Temperature: The ideal oven temperature for baking pizza is between 450°F (232°C) and 500°F (260°C). Higher temperatures promote a crispier crust, while lower temperatures risk a soggy bottom. If your oven has a pizza setting, use it! Otherwise, preheat your oven to the highest temperature it can reach, ensuring it’s thoroughly heated for at least 30 minutes before placing your pizza inside. A pizza stone or steel significantly enhances heat retention and contributes to a crispier crust; preheat it along with the oven.
Baking Time: Baking time depends on several factors including your oven’s heat output, the thickness of your crust, and the amount of toppings. As a general guideline, expect a baking time of 8-15 minutes. For a thinner crust, aim for the shorter end of the range. Thicker crusts will require more time. The pizza is ready when the crust is golden brown and crisp, and the cheese is melted, bubbly, and slightly browned. Don’t overbake! Overbaked pizza will have a dry, hard crust and potentially burnt toppings.
Baking Method: Using a pizza stone or steel is highly recommended. These materials retain heat exceptionally well, resulting in a more evenly cooked and crispier crust. If you don’t have a pizza stone or steel, you can still bake your pizza on a baking sheet, but the crust may not be as crisp. If using a baking sheet, lightly grease it with olive oil to prevent sticking. For optimal results, carefully slide the pizza onto the preheated pizza stone or baking sheet using a pizza peel (a long-handled wooden or metal paddle). This prevents sticking and ensures even baking.
Monitoring the Baking Process: Keep a close eye on your pizza while it’s baking. Start checking for doneness around the 8-minute mark. You can use a pizza cutter to gently lift a small edge of the crust to check for crispness. If the bottom is still pale or soft, continue baking in 1-2 minute intervals. If the crust is browning too quickly but the cheese isn’t fully melted, you can temporarily reduce the oven temperature slightly.
Professional Tip: For extra crispy crust, you can par-bake your crust for a few minutes before adding toppings. This prevents a soggy bottom by partially pre-cooking the dough before adding the weight of the toppings. Simply bake the plain crust for 4-5 minutes at the high temperature before adding your sauce and toppings and returning it to the oven to finish baking.
Troubleshooting: If your pizza crust is burning before the cheese is melted, reduce the oven temperature or move the pizza to a lower rack. If your crust is soggy, your oven temperature may be too low, or your crust may be too thick. Try pre-baking the crust before adding toppings next time. Experimentation is key to perfecting your pizza-baking technique!
Recommendations for The Ultimate Homemade Pizza Recipe
This recipe yields one 12-inch pizza, approximately 8 servings. Nutritional information is an approximation and will vary based on specific ingredients used. A single serving (1/8th of the pizza) contains approximately 450-550 calories, 20-25g of fat, 50-60g of carbohydrates, and 15-20g of protein. These figures are estimates and may be higher or lower depending on the toppings chosen. For a more precise nutritional breakdown, utilize a nutrition calculator with your specific ingredient quantities.
Serving Suggestions: For a truly elevated pizza experience, consider serving your masterpiece immediately after baking, while the cheese is still bubbly and the crust is delightfully crisp. Avoid letting the pizza sit for extended periods as this can make the crust soggy. We recommend serving it on a wooden cutting board or a pizza stone to maintain optimal temperature. Individual slices can be served directly on plates. For a more casual gathering, you can cut the pizza into smaller squares for easy sharing.
Storage Conditions: Leftover pizza should be stored properly to maintain its quality. Allow the pizza to cool completely before storing. Wrap the pizza tightly in plastic wrap, followed by aluminum foil, to prevent it from drying out. Store the pizza in the refrigerator for up to 3 days. Reheat slices individually in a skillet over medium heat for a crisp crust, or in a microwave for a quicker, though potentially less crisp, result. Avoid freezing your homemade pizza, as this can significantly affect the texture of both the crust and toppings.
Complementary Dishes: Your homemade pizza is a star on its own, but there are several dishes that make excellent pairings. A crisp, refreshing salad with a light vinaigrette is an ideal accompaniment, cutting through the richness of the pizza. Consider a simple Caprese salad with fresh mozzarella, tomatoes, and basil, or a vibrant arugula salad with parmesan cheese and lemon dressing. For a heartier pairing, serve your pizza alongside a simple garlic bread or a small portion of minestrone soup. The possibilities are endless, depending on your taste preferences and the types of toppings you’ve used on your pizza.
Tips for Success: To achieve the perfect crust, ensure your dough is properly kneaded and has risen sufficiently. Don’t overload the pizza with toppings, as this can prevent the crust from cooking evenly and may lead to a soggy bottom. Use high-quality ingredients for the best flavour and texture. Experiment with different cheeses, sauces, and toppings to find your own perfect pizza creation. Consider using a pizza peel for easy transfer of the pizza to and from the oven. Most importantly, have fun and enjoy the process of making your own delicious homemade pizza!