Ramen, a seemingly simple bowl of noodles in broth, holds a surprisingly rich and complex history. Originating in China, as a wheat-noodle soup, it evolved significantly after making its way to Japan in the early 20th century. While the exact origins are debated, its popularity exploded after World War II, becoming a staple of Japanese cuisine and a symbol of postwar recovery. Instant ramen, invented in 1958 by Momofuku Ando, further propelled its global reach, with an estimated 100 billion servings consumed annually worldwide.
The cultural significance of ramen extends far beyond mere sustenance. It’s deeply interwoven into Japanese society, representing comfort, community, and a sense of place. From humble street food stalls to upscale restaurants, ramen shops, or ramen-ya, are ubiquitous across Japan, offering a vast array of regional variations and styles. Each bowl tells a story, reflecting the chef’s skill, the quality of ingredients, and the subtle nuances of regional traditions. The art of making ramen, from crafting the broth to perfectly preparing the noodles, is a testament to dedication and culinary expertise. The simple act of sharing a bowl of ramen fosters connection and builds lasting memories.
Today, ramen’s popularity continues to soar globally. Beyond its traditional forms, innovative chefs constantly experiment with flavors and ingredients, creating exciting fusions that cater to diverse palates. But amidst this culinary evolution, the core essence of ramen remains: the perfect harmony of savory broth, springy noodles, and carefully selected toppings. This recipe aims to capture that essence, guiding you through the process of creating a truly authentic and delicious homemade ramen experience, from scratch. Prepare to embark on a culinary journey that is both rewarding and deeply satisfying.
Ingredients and Measurements
This recipe yields approximately 6 servings of delicious homemade ramen. Accurate measurements are crucial for achieving the perfect balance of flavors, so please use a kitchen scale whenever possible for the most precise results. For liquid measurements, a liquid measuring cup is recommended.
Broth:
- 6 cups (1.4L) Chicken Broth (preferably homemade for a richer flavor. You can substitute with vegetable broth for a vegetarian option. Note: Low-sodium broth is recommended to allow for better flavor control.)
- 4 cups (950ml) Water
- 6 oz (170g) Pork Bones (pork shoulder bones or marrow bones are ideal, providing a deep, savory flavor. Tip: Roasting the bones before simmering will enhance their flavor significantly.)
- 4 oz (115g) Dried Shiitake Mushrooms (rehydrate in hot water for at least 30 minutes before using. Reserve the soaking liquid for added umami.)
- 2 large pieces (approx. 4 inches/10cm) Kombu Kelp (a type of seaweed that adds a subtle sweetness and depth of flavor)
- 4 cloves Garlic, smashed
- 2 inch piece Ginger, peeled and smashed
- 2 scallions, roughly chopped (white and light green parts only, reserving the dark green parts for garnish)
- 2 tbsp Soy Sauce (adjust to taste)
- 1 tbsp Mirin (sweet rice wine, adds a touch of sweetness and depth)
- 1 tsp Fish Sauce (optional, but adds a savory umami boost)
Noodles:
- 1 (16 oz/450g) package fresh ramen noodles (or make your own if you’re feeling adventurous!) Recommendation: Look for noodles specifically labeled as ramen noodles for the best texture.
Toppings (choose your favorites!):
- 4 slices Chashu Pork (braised pork belly, recipe can be found online or in many cookbooks. Alternative: Use leftover roasted chicken or tofu)
- 1 cup Menma (fermented bamboo shoots, readily available at Asian grocery stores)
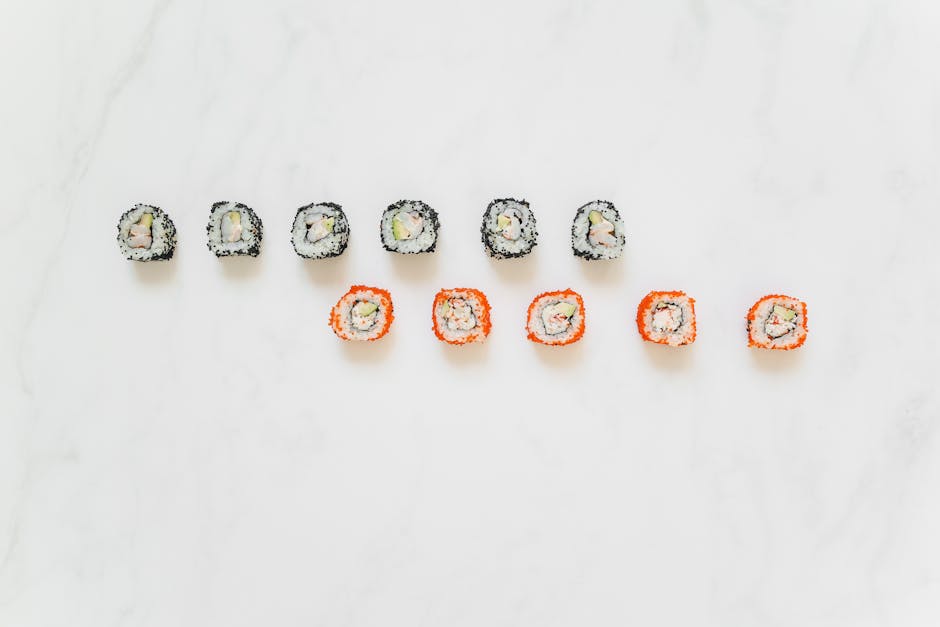
- 1/2 cup Nori Seaweed Sheets, cut into strips
- 4 soft boiled eggs, halved
- Chopped scallions (dark green parts reserved from broth)
- Sesame seeds
- Sriracha or other chili oil (optional, for added spice)
Important Note: Adjust the quantities of soy sauce, mirin, and fish sauce to your own taste preferences. Start with the suggested amounts and add more gradually until you achieve your desired level of saltiness and sweetness. Remember to taste the broth frequently throughout the cooking process.
Equipment List
Crafting the perfect bowl of homemade ramen requires the right tools. While some items might seem optional, they significantly impact the final product’s quality and ease of preparation. Investing in a few key pieces of equipment will elevate your ramen-making experience from good to exceptional.
Large Stockpot (8-12 quarts): This is your workhorse. You’ll need ample space for the broth, which will likely involve a sizeable quantity of bones, water, and aromatics. A heavier-bottomed pot is recommended for even heat distribution and to prevent scorching. Stainless steel or enameled cast iron are excellent choices.
Fine-Mesh Sieve or Chinois: After simmering your broth for hours, you’ll need to strain it to remove all the solids. A fine-mesh sieve will catch even the smallest bone fragments and ensure a perfectly clear broth. A chinois is a professional-grade option providing superior filtration.
Immersion Blender (Optional but Recommended): While you can certainly mash ingredients by hand, an immersion blender provides a much smoother and more efficient way to emulsify your broth, creating a richer, more luxurious texture. If you opt against an immersion blender, a regular blender can work, but be cautious when transferring hot liquids.
Large Mixing Bowls (at least 2): You’ll need bowls for preparing the tare (seasoning sauce), mixing the noodles, and assembling the final ramen bowls. Choose bowls that are large enough to accommodate your ingredients comfortably.
Measuring Cups and Spoons: Accurate measurements are crucial for balancing the flavours in your ramen broth and tare. Invest in a reliable set of measuring cups and spoons to ensure consistent results. Precise measurements are especially important for the seasoning components.
Wooden Spoon or Spatula: A sturdy wooden spoon or spatula is ideal for stirring the broth during the long simmering process. Avoid using metal utensils, as they can scratch the surface of your pot and potentially affect the flavor.
Ramen Bowls: While not strictly necessary, using authentic ramen bowls enhances the presentation and dining experience. These bowls are typically deep and wide, providing ample space for the noodles, broth, and toppings.
Sharp Knife: For prepping your vegetables and other ingredients, a sharp knife is essential for efficiency and safety. A chef’s knife is a versatile choice.
Cutting Board: A sturdy cutting board will protect your countertops and provide a stable surface for chopping ingredients.
Tongs or Ladle: These are helpful for transferring noodles and toppings into the bowls.
Optional: Thermometer: A kitchen thermometer can help monitor the temperature of your broth during simmering, ensuring it stays within the ideal range for optimal flavor extraction.
Broth Preparation (including stock making)
The foundation of any great ramen is its broth, and this recipe emphasizes a rich and flavorful chicken-based broth. We’ll build this in stages, starting with a flavorful chicken stock, then enhancing it with aromatics and seasonings.
Making the Chicken Stock: Begin by preparing your ingredients. You’ll need a whole chicken (about 3-4 lbs), roughly chopped; 8 cups of water; 2 large onions, quartered; 4 carrots, roughly chopped; 2 celery stalks, roughly chopped; 4 cloves garlic, smashed; 2 inches of ginger, peeled and smashed; 1 teaspoon black peppercorns; and 1 bay leaf. Using a whole chicken yields a richer, more flavorful stock than using just parts.
Combine all ingredients in a large stockpot. Bring to a boil over high heat, then reduce heat to low, cover, and simmer for at least 2 hours, or up to 4 for a deeper flavor. Skim off any foam or impurities that rise to the surface during the simmering process. This is crucial for a clear and flavorful stock. The longer you simmer, the more intense the flavor will become.
Once simmered, carefully remove the chicken from the pot and set aside to cool. Once cool enough to handle, shred the chicken meat, discarding the skin and bones. Strain the stock through a fine-mesh sieve or cheesecloth lined colander into a clean container. Discard the solids.
Building the Ramen Broth: Now we’ll build upon the chicken stock to create our ramen broth. Return 6 cups of the strained chicken stock to the stockpot. Add 2 cups of water, 1/4 cup soy sauce, 2 tablespoons mirin (sweet rice wine), 1 tablespoon sake (optional, adds depth), 1 tablespoon fish sauce (for umami), 1 teaspoon dried shiitake mushrooms (rehydrated and finely chopped), and 1 inch piece of kombu kelp (dried seaweed).
Bring the mixture to a gentle simmer, then reduce heat to the lowest setting and let it simmer uncovered for at least 30 minutes, allowing the flavors to meld. This slow simmering is key to developing a complex and harmonious broth. Taste and adjust seasonings as needed, adding more soy sauce for saltiness, mirin for sweetness, or fish sauce for umami.
Finishing Touches: Before serving, remove the kombu kelp. You can strain the broth again for a perfectly clear result, though a slight cloudiness is acceptable. Add the shredded chicken back to the broth just before serving to keep it warm. Remember to taste and adjust the seasoning before adding the noodles and toppings. A well-balanced broth is the heart of a delicious ramen.
Tare Preparation (Flavoring Sauces)
The tare is the soul of your ramen, providing the foundational flavor profile. A well-crafted tare elevates a simple bowl of noodles and broth into an unforgettable culinary experience. We’ll focus on two essential tares: a rich shoyu (soy sauce) tare and a savory tonkotsu (pork bone broth) tare. You can adapt and experiment with these to create your own signature ramen.
Shoyu Tare (Soy Sauce Tare): This tare is relatively simple yet deeply flavorful. It provides a salty, umami base that complements many ramen broths. For this recipe, we’ll make a classic shoyu tare.
Ingredients:
- 1/2 cup soy sauce (preferably a high-quality Japanese soy sauce)
- 1/4 cup mirin (sweet rice wine)
- 2 tablespoons sake (Japanese rice wine)
- 1 tablespoon light brown sugar
- 1 teaspoon grated ginger
- 1 clove garlic, minced
Instructions: In a small saucepan, combine all ingredients. Bring to a simmer over medium heat, stirring until the sugar dissolves. Reduce heat to low and simmer for 5-7 minutes, or until the sauce slightly thickens. Remove from heat and let cool completely. Strain the tare through a fine-mesh sieve to remove solids for a smoother texture. Store in an airtight container in the refrigerator for up to a week.
Tonkotsu Tare (Pork Bone Broth Tare): This tare adds a layer of intense richness and depth to your ramen. It’s crucial to use a high-quality pork bone broth as a base for this tare. If you’re making your own tonkotsu broth, this tare is best made the day after to allow the fat to solidify and be easily skimmed off.
Ingredients:
- 1 cup rich tonkotsu broth (homemade or store-bought)
- 2 tablespoons soy sauce
- 1 tablespoon mirin
- 1 teaspoon sesame oil
- 1/2 teaspoon fish sauce (optional, for added umami)
Instructions: Skim off any excess fat from the cooled tonkotsu broth. In a small saucepan, combine the skimmed tonkotsu broth, soy sauce, mirin, sesame oil, and fish sauce (if using). Heat gently over medium-low heat, stirring occasionally, until warmed through. Do not boil, as this may curdle the broth. Let cool completely before using. Store in an airtight container in the refrigerator for up to 3 days.
Important Note: The amount of tare you add to your ramen bowl will depend on your personal preference. Start with a small amount and adjust to your liking. Taste and adjust seasoning as needed before serving. Experiment with different combinations of ingredients to create your own unique tare!
Noodle Preparation (Homemade or Store-Bought)
The noodles are the heart of any ramen, and while store-bought options offer convenience, homemade noodles provide an unparalleled depth of flavor and texture. This section guides you through both methods, ensuring you achieve perfectly cooked noodles for your ramen masterpiece.
For Homemade Noodles: This recipe yields approximately 8 servings of noodles. You’ll need 2 cups of all-purpose flour (plus extra for dusting), 1/2 teaspoon of salt, and 3/4 cup of warm water. In a large bowl, whisk together the flour and salt. Gradually add the warm water, mixing with a fork until a shaggy dough forms. Knead the dough for 8-10 minutes on a lightly floured surface until it becomes smooth and elastic. Wrap the dough in plastic wrap and let it rest at room temperature for at least 30 minutes. This allows the gluten to relax, resulting in more tender noodles.
After resting, roll out the dough using a pasta machine or rolling pin to your desired thickness. Aim for a thickness of about 1/16 inch. Cut the dough into your preferred noodle shape – either using a pasta cutter or a sharp knife. For a classic ramen experience, aim for long, thin noodles. Dust the cut noodles with flour to prevent sticking. You can cook these fresh immediately, or let them dry slightly for later use. Fresh homemade noodles cook much faster than dried noodles.
For Store-Bought Noodles: A wide variety of ramen noodles are available –fresh, dried, and even frozen. Read the package instructions carefully as cooking times vary significantly. Avoid overcooking, as this will result in mushy noodles. Generally, fresh noodles require only 1-2 minutes of boiling, while dried noodles may take 3-5 minutes. For best results, cook the noodles in a large pot of rapidly boiling water, ensuring they are not overcrowded. Once cooked, immediately rinse the noodles under cold water to stop the cooking process and prevent sticking. Properly drained and rinsed noodles are crucial for preventing a soggy ramen bowl.
Regardless of your noodle choice (homemade or store-bought), remember these key points: Always use a large pot of boiling water to ensure even cooking. Don’t overcrowd the pot; cook the noodles in batches if necessary. Rinse the noodles thoroughly under cold water after cooking to prevent sticking and maintain a firm texture. The perfectly cooked noodle should be firm yet tender, offering a delightful chewiness to complement your ramen broth.
Toppings Preparation
The beauty of ramen lies in its customizable toppings. While the broth and noodles are the foundation, the toppings elevate the experience to a truly personalized bowl of deliciousness. Here’s how to prepare some classic and flavorful options:
Soft Boiled Eggs (Ajitama): For perfectly soft-boiled eggs, gently place 6 eggs in a saucepan and cover with cold water. Bring to a boil over medium-high heat, then immediately remove from heat and cover the pan. Let the eggs sit in the hot water for exactly 6 minutes for a perfectly runny yolk. After 6 minutes, transfer the eggs to an ice bath to stop the cooking process. Once cool, gently peel the eggs. For a richer flavor, marinate the peeled eggs in a mixture of 1/4 cup soy sauce, 2 tablespoons mirin, and 1 tablespoon sake for at least 30 minutes, or up to overnight in the refrigerator.
Chashu Pork (Braised Pork Belly): This is a more involved topping, but well worth the effort! Start with 1 lb pork belly, skin scored. Sear the pork belly in a pan until golden brown on all sides. In a pot, combine 2 cups of water, 1/2 cup soy sauce, 1/4 cup mirin, 1/4 cup sake, 2 tablespoons brown sugar, 1 inch ginger (sliced), and 2 cloves garlic (crushed). Add the seared pork belly, bring to a simmer, then reduce heat to low, cover, and braise for 2-3 hours, or until the pork is incredibly tender. Remove the pork, let it cool slightly, then slice thinly against the grain. For extra flavor depth, you can add a star anise and a few dried shiitake mushrooms to the braising liquid.
Nori Seaweed Sheets: Simply cut 2-3 sheets of dried nori seaweed into strips or squares. These add a salty, umami element to the ramen. Ensure you use high-quality nori for the best flavor and texture.
Menma (Fermented Bamboo Shoots): These are readily available at Asian grocery stores. Just drain and rinse the menma before adding to your ramen. If using canned menma, consider rinsing it thoroughly to reduce the saltiness.
Scallions: Thinly slice 2-3 scallions, both white and green parts, for a fresh, pungent counterpoint to the rich broth. Adding the scallions just before serving ensures they retain their vibrant green color and crispness.
Other Optional Toppings: Consider adding other toppings based on your preference, such as bean sprouts, corn, mushrooms, or even a sprinkle of sesame seeds. The possibilities are endless!
Recommendations
This Best Homemade Ramen recipe is designed to be a delicious and customizable experience. For optimal flavor, we recommend allowing the broth to simmer for at least 4 hours, allowing the flavors to meld fully. Don’t be afraid to experiment with different protein additions; pork belly, chicken thighs, or even tofu all work wonderfully. For a vegetarian option, omit the meat and add extra vegetables like mushrooms, spinach, or bok choy.
Serving suggestions are plentiful! Garnish generously with sliced scallions, fresh cilantro, and a soft-boiled egg for a classic presentation. A sprinkle of toasted sesame seeds adds a nice nutty aroma and texture. Consider adding chili oil for an extra kick, or a squeeze of fresh lime juice for a touch of acidity. For a truly authentic experience, serve with a side of Japanese pickled ginger (gari) to cleanse the palate between bites.
Storage: Leftover ramen broth can be stored in an airtight container in the refrigerator for up to 3 days. Reheat gently on the stovetop or in the microwave. Noodles should be cooked fresh, as they tend to become mushy when reheated. Toppings can be stored separately and added just before serving.
Complementary Dishes: This hearty ramen is a complete meal on its own, but you could pair it with lighter appetizers like edamame or gyoza (dumplings). For a more substantial meal, consider serving it alongside a simple side salad with a light vinaigrette.
Nutritional Information (per serving, approximate): The calorie count and nutritional information will vary significantly depending on the ingredients used and portion size. A typical serving might contain approximately 500-700 calories, with varying amounts of protein, carbohydrates, and fat. Specific nutritional information should be calculated based on your exact ingredients and recipe adjustments. This recipe is rich in protein and carbohydrates, providing sustained energy. Note that sodium content can be high due to the soy sauce; adjust accordingly to your dietary needs.