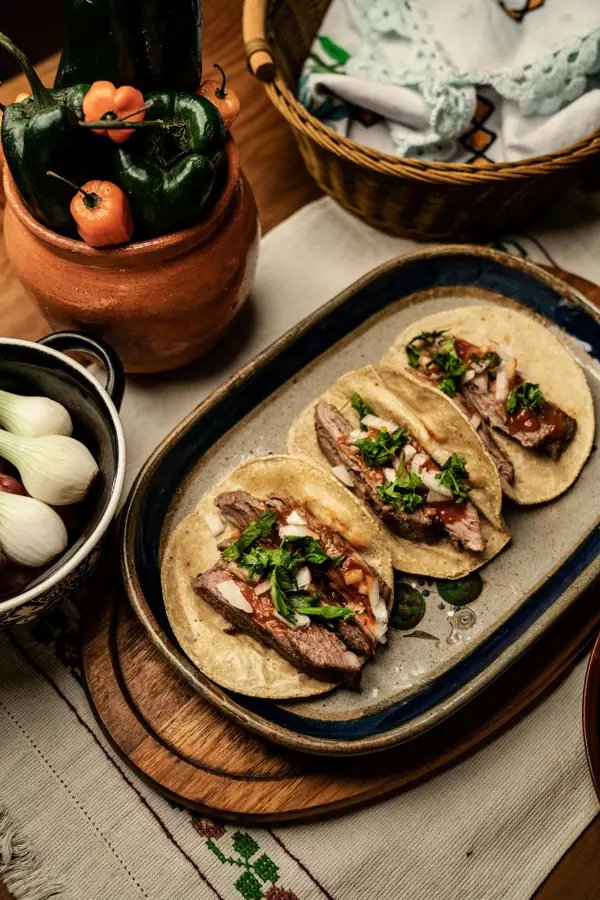
Prepare yourself for a culinary journey into the heart of Mexican cuisine with The Best Homemade Chicken Enchiladas. This iconic dish, a cornerstone of Mexican-American comfort food, boasts a rich history interwoven with cultural significance and delicious simplicity. While pinpointing the exact origin is difficult, enchiladas, in their various forms, have existed for centuries, evolving from pre-Hispanic traditions involving corn tortillas filled with various ingredients. The word enchilada itself derives from the Nahuatl words chilli (chile) and en- (in), literally meaning in chili. Early versions likely involved simpler fillings and sauces, reflecting the readily available ingredients of the time.
The evolution of the chicken enchilada, as we know it today, is a testament to culinary adaptation and cultural exchange. The introduction of chicken, a protein source less prevalent in pre-Columbian times, significantly shaped the dish. The use of cheese, another later addition, further enriched the flavor profile, creating the creamy, savory combination we crave. Today, enchiladas are far more than just a meal; they represent a significant part of Mexican culinary heritage, deeply ingrained in family traditions and celebrations. Statistics show that enchiladas are one of the most popular Mexican dishes in the United States, with countless variations found across different regions and families.
What sets these homemade chicken enchiladas apart? It’s the dedication to authentic flavors and techniques. We’ll delve into the nuances of crafting the perfect red chili sauce, ensuring a balance of heat and depth. We’ll explore the art of properly layering the tortillas to prevent breakage and achieve that satisfying, melt-in-your-mouth texture. This recipe transcends simple instructions; it’s a celebration of culinary heritage, a journey through the layers of flavor, and ultimately, a chance to create a dish that will bring people together and spark cherished memories. Our recipe emphasizes fresh ingredients and traditional methods, resulting in an enchilada experience that’s both comforting and unforgettable. Get ready to experience the best homemade chicken enchiladas you’ve ever tasted!
Ingredients and Measurements
This recipe yields approximately 12 generous chicken enchiladas. Accurate measurements are crucial for achieving the perfect balance of flavors and textures. We recommend using a kitchen scale for the most precise results, especially when measuring spices.
For the Chicken Filling:
- 1.5 lbs boneless, skinless chicken breasts (approximately 3 large breasts): Choose high-quality chicken for optimal flavor.
- 1 medium yellow onion, finely chopped (approximately 1 cup): Use a sharp knife for consistent chopping to ensure even cooking.
- 2 cloves garlic, minced: Fresh garlic provides the best flavor.
- 1 (10 ounce) can diced tomatoes and green chilies (Rotel), undrained: The undrained juice adds moisture and flavor to the filling.
- 1 teaspoon ground cumin: Use freshly ground cumin for the best aroma and taste.
- 1/2 teaspoon chili powder: Adjust the amount to your preferred spice level.
- 1/4 teaspoon smoked paprika: Smoked paprika adds depth of flavor.
- 1/4 teaspoon oregano: Dried oregano works well in this recipe.
- Salt and freshly ground black pepper to taste: Season generously, tasting as you go.
- 1/2 cup chicken broth: Use low-sodium broth to control the salt content.
For the Enchilada Sauce:
- 1 (28 ounce) can crushed tomatoes: San Marzano tomatoes are ideal for a rich, flavorful sauce.
- 1 (4 ounce) can diced green chilies: Adjust the amount based on your preferred level of heat.
- 1/4 cup vegetable oil: Use a high-heat oil with a neutral flavor.
- 2 tablespoons chili powder: Adjust to your spice preference. Start with less and add more to taste.
- 1 tablespoon cumin: Use freshly ground cumin for the best results.
- 1 teaspoon oregano: Dried oregano is perfectly suitable.
- 1/2 teaspoon garlic powder: Use garlic powder in addition to the fresh garlic for a stronger garlic flavor.
- Salt and freshly ground black pepper to taste: Taste and adjust seasoning as needed.
Other Ingredients:
- 12 corn or flour tortillas (6-8 inch diameter): Choose your preferred type of tortilla. Warming them slightly before using makes them more pliable.
- 2 cups shredded Monterey Jack cheese: Other Mexican cheeses like cheddar or queso quesadilla also work well.
Note: All measurements are approximate. Adjust quantities to your liking and the size of your baking dish.
Equipment List
Making the best homemade chicken enchiladas requires the right tools for the job. While you might have many of these items already in your kitchen, having the correct equipment will streamline the process and ensure a superior outcome. This list includes both essential and recommended items.
Essential Equipment:
You’ll need at least these items to successfully create your enchiladas. Failing to have these will significantly hinder the process. First, a large (12-inch or larger) skillet is crucial for cooking the chicken and preparing the sauce. A non-stick surface is highly recommended to prevent sticking and make cleanup easier. You’ll also need a 9×13 inch baking dish, the standard size for this recipe, though a slightly larger one can accommodate more enchiladas if you are making a larger batch. A large mixing bowl (at least 5-quart capacity) is necessary for combining the chicken and sauce mixture. Finally, you’ll need several sturdy 8-10 inch corn tortillas; the number will depend on the size of your baking dish and your desired number of enchiladas. Two measuring cups (one liquid, one dry) and a set of measuring spoons are also essential for accurate ingredient measurement.
Recommended Equipment:
While not strictly necessary, these items will significantly enhance your cooking experience and the final product. A food processor can greatly speed up the process of chopping onions and other vegetables for the sauce. If you don’t have a food processor, a sharp chef’s knife and a sturdy cutting board are essential. A set of tongs will be helpful for gently handling the hot tortillas and placing them in the baking dish. Having a rubber spatula will ensure you scrape all the delicious sauce and chicken mixture from the bowl. For easy cleanup, consider using parchment paper to line your baking dish. This prevents sticking and makes post-meal cleanup a breeze. Finally, a oven mitt or gloves are a must to protect your hands from the heat when removing the baking dish from the oven.
Optional but Helpful:
While not essential, a small saucepan can be useful for melting butter or oil separately if you prefer to add it to the tortillas before filling them. A can opener, if using canned ingredients, is also essential. Aluminum foil can be useful for covering the dish during baking, if desired, to prevent the top from browning too quickly.
Important Note: Always ensure your equipment is clean and in good working order before you begin cooking. This will prevent any accidents and help ensure a smooth and enjoyable cooking process.
Chicken Preparation (including cooking and shredding)
The foundation of delicious chicken enchiladas lies in perfectly cooked and shredded chicken. We’ll use about 2.5 lbs of boneless, skinless chicken breasts for this recipe, ensuring ample filling for your enchiladas. You can use thighs, but breasts offer a leaner, more easily shredded texture.
Begin by placing the chicken breasts in a large pot or Dutch oven. Cover them completely with about 6 cups of chicken broth. Add 1 teaspoon of salt and 1/2 teaspoon of black pepper. Bring the mixture to a boil over high heat, then reduce the heat to low, cover, and simmer for approximately 20-25 minutes, or until the chicken is cooked through and easily shreds with a fork. Internal temperature should reach 165°F (74°C).
Once cooked, carefully remove the chicken breasts from the pot and let them cool slightly. This cooling step is crucial; hot chicken is difficult and dangerous to handle. Once cool enough to handle, use two forks to shred the chicken. Work against the grain of the meat for the most tender and easily manageable shreds. Discard any large pieces of fat or gristle that may remain.
Professional Tip: For extra flavor, consider adding a bay leaf or two to the simmering broth. Remove the bay leaf before shredding the chicken. You can also add other aromatics like a small diced onion or a couple of cloves of garlic to the broth while simmering for a richer chicken flavor.
Once shredded, you can set the chicken aside. Reserve about 1 cup of the cooking liquid. This flavorful broth can be added to your enchilada sauce to enhance its depth and richness, or used to moisten the filling if it seems too dry. Avoid adding too much liquid, however, as this can make your enchiladas soggy.
Important Note: Never reuse the cooking liquid if it has been sitting at room temperature for more than two hours. Always prioritize food safety and discard any questionable liquid.
With your perfectly cooked and shredded chicken ready, you’re one step closer to creating the most amazing homemade chicken enchiladas! Now, let’s move on to preparing the delicious enchilada sauce.
Sauce Preparation (including specifying type of chili)
For the most authentic and flavorful chicken enchilada sauce, we’ll be using a blend of ancho and guajillo chiles. These chiles offer a rich, complex flavor profile that perfectly complements the chicken and cheese filling. Avoid using only one type of chili, as the blend creates a more nuanced taste. You can find these dried chiles in most Latin American grocery stores or online.
To begin, carefully clean 10-12 dried ancho chiles and 8-10 dried guajillo chiles. Remove any stems and seeds. Be mindful of the dust; it can be irritating to the eyes and lungs. It’s best to wear a mask while handling them. Once cleaned, place the chiles in a large bowl and cover them with enough boiling water to completely submerge them. Allow them to rehydrate for at least 30 minutes, or until completely softened. This process is crucial for achieving a smooth and flavorful sauce.
After rehydration, carefully drain the chiles, reserving about 1 cup of the soaking liquid. This liquid adds depth and richness to the sauce. Transfer the softened chiles to a blender along with 1 medium-sized white onion, roughly chopped, 4 cloves garlic, and 1 teaspoon of cumin. For a smoother sauce, you might want to remove the stems from the rehydrated chiles before blending. This will reduce the chance of stringy bits in your final product.
Blend all ingredients until completely smooth. This may require adding a little of the reserved chili soaking liquid to help the blender process everything easily. Once smooth, pour the mixture into a medium-sized saucepan. Add 2 cups of chicken broth (or water, for a slightly less rich sauce), 1/2 cup of vegetable oil, and 1 teaspoon of salt. Adjust the salt to your preference.
Bring the sauce to a simmer over medium heat, stirring occasionally. Reduce the heat to low and let it simmer gently for at least 15 minutes, or up to 30 minutes, stirring occasionally. This allows the flavors to meld and deepen. The longer it simmers, the richer the flavor will become. Taste and adjust seasoning as needed before using. You can add a pinch of sugar to balance any acidity if necessary. The sauce should have a rich, slightly smoky flavor with a pleasant heat.
Once the sauce is ready, you can proceed with assembling your delicious chicken enchiladas! Remember to keep the sauce warm while you prepare the filling and assemble the enchiladas for optimal flavor.
Enchilada Assembly (Including Tortilla Preparation)
With your delicious chicken filling prepared and your sauce simmering, it’s time to assemble the enchiladas! This step requires a bit of finesse, but don’t worry, with a little practice, you’ll be rolling like a pro. We’ll start with preparing the tortillas.
Tortilla Preparation: For the best results, use corn tortillas. They hold their shape better and provide a delightful textural contrast to the creamy filling and sauce. To soften the tortillas and make them pliable, you have two excellent options: warming them individually in a dry skillet over medium heat for about 15-20 seconds per side, or wrapping them in a damp paper towel and microwaving them for 30-45 seconds. Experiment to find your preferred method; the goal is to make them flexible enough to roll without breaking, but not so soft they become mushy.
Filling and Rolling: Once your tortillas are warmed, you’re ready to assemble. Grab a large, flat surface (like a cutting board or baking sheet) to work on. Have your prepared chicken filling, enchilada sauce, and a small bowl of shredded cheese ready. For a 9×13 inch baking dish, you’ll need approximately 12-15 corn tortillas, depending on their size. Use a generous spoonful (about 1/4 cup) of the chicken filling, spreading it evenly across the center of each tortilla.
Rolling Technique: Carefully roll up each tortilla tightly, starting at one end and tucking in the sides as you go. This prevents the filling from spilling out during baking. Place the rolled enchiladas seam-down in your prepared 9×13 inch baking dish. Arrange them snugly but not overcrowded. You may need to slightly adjust the amount of filling depending on your tortilla size to achieve a consistent roll.
Sauce and Cheese: Once all the enchiladas are in the dish, generously pour the enchilada sauce over them, ensuring each one is fully coated. Don’t be shy with the sauce! This is what gives them that rich, flavorful coating. Finally, sprinkle the shredded cheese evenly over the top. You can use a combination of cheddar, Monterey Jack, and pepper jack for a delicious flavor profile. About 1 1/2 cups of shredded cheese should be sufficient.
Baking: Your enchiladas are now ready for the oven! Bake at 375°F (190°C) for 20-25 minutes, or until the cheese is melted, bubbly, and slightly browned. Let them rest for 10-15 minutes before serving. Enjoy your delicious homemade chicken enchiladas!
Baking Instructions (including temperature and time)
Once your enchiladas are assembled in the baking dish, the final step is baking them to perfection. This crucial stage ensures the cheese is melted and bubbly, the tortillas are soft and pliable, and the sauce is heated through, creating a wonderfully harmonious dish.
Preheat your oven to 375°F (190°C). This temperature is ideal for achieving a gentle, even bake that prevents burning while ensuring the filling is thoroughly heated. Using a preheated oven is critical for consistent results. A cold oven will shock the enchiladas, leading to uneven cooking and potentially a soggy bottom.
Carefully place the baking dish containing your assembled enchiladas into the preheated oven. Bake for 20-25 minutes, or until the cheese is melted, bubbly, and lightly golden brown. The internal temperature of the chicken filling should reach 165°F (74°C) to ensure it’s fully cooked and safe to eat. Use a food thermometer to check the internal temperature in several places for accuracy.
Keep a close eye on your enchiladas during the last 5-10 minutes of baking. Ovens can vary, and some may brown faster than others. If the cheese is browning too quickly, you can loosely tent the top of the baking dish with aluminum foil to prevent over-browning. Don’t open the oven door frequently as this can cause temperature fluctuations and affect the baking process.
Once the cheese is golden and bubbly and the internal temperature of the chicken reaches 165°F (74°C), your enchiladas are ready! Remove the baking dish from the oven and let it rest for 5-10 minutes before serving. This allows the filling to set slightly, making it easier to serve without the filling spilling out. Allowing the enchiladas to rest also helps the flavors meld together, enhancing the overall taste experience.
Serve immediately and enjoy your delicious homemade chicken enchiladas! They are best served hot, but leftovers can be stored in an airtight container in the refrigerator for up to 3 days. Reheat gently in the oven or microwave before serving.
Recommendations for The Best Homemade Chicken Enchiladas
For the ultimate culinary experience, we highly recommend serving these enchiladas piping hot, straight from the oven. Garnish generously with fresh cilantro, a dollop of Mexican crema or sour cream, and a sprinkle of shredded cheese. A squeeze of fresh lime juice adds a vibrant zing, balancing the richness of the dish. Consider serving them with a side of your favorite Mexican rice and refried beans for a truly authentic taste.
To complement the savory flavors of the enchiladas, we suggest a simple and refreshing salad. A crisp green salad with a light vinaigrette or a vibrant pico de gallo will cut through the richness of the filling and sauce. Alternatively, a side of roasted vegetables like corn, bell peppers, and onions adds a colorful and flavorful accompaniment. For a spicier kick, consider serving alongside a jar of your favorite pickled jalapeños.
Leftovers can be stored in an airtight container in the refrigerator for up to 3 days. To reheat, simply place the enchiladas in a baking dish, cover with foil, and heat in a preheated oven at 350°F (175°C) for about 15-20 minutes, or until heated through. You can also reheat individual enchiladas in the microwave, adding a tablespoon or two of water to prevent them from drying out.
Nutritional information (per serving, approximate): Calories: 450-500; Protein: 25-30g; Fat: 25-30g; Carbohydrates: 40-50g; Fiber: 5-7g. Note: Nutritional information will vary depending on the specific ingredients used and portion size. This is an estimate and should not be considered medical advice. For precise nutritional values, we recommend using a nutrition calculator with your specific recipe ingredients.
Important Note: Always ensure your chicken is cooked thoroughly to an internal temperature of 165°F (74°C) to prevent foodborne illness. Adjust the spice level of the chili sauce to your preference – feel free to add more or less chili powder to suit your taste.


