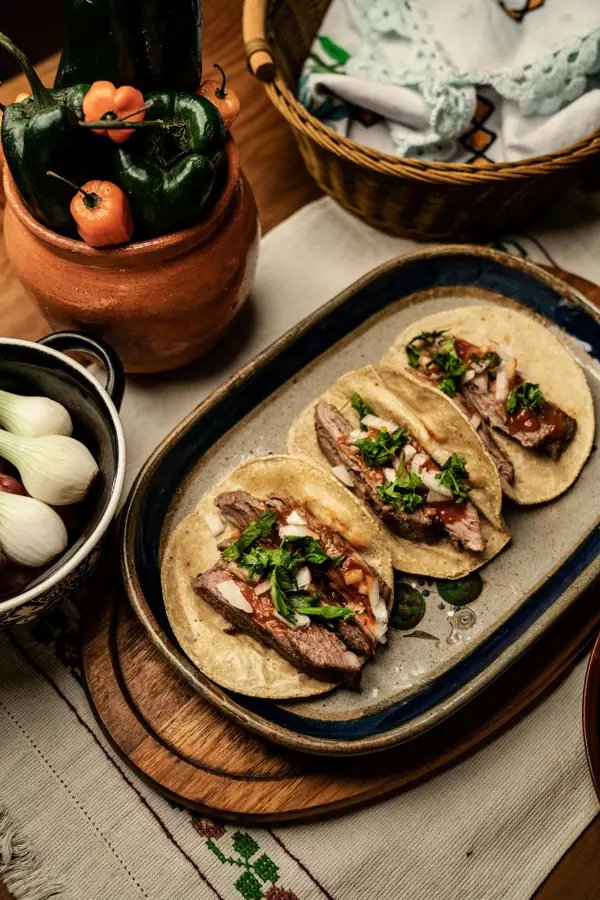
The humble burrito, a culinary icon synonymous with Mexican-American cuisine, boasts a surprisingly rich and complex history. While pinpointing its exact origin is difficult, many trace the burrito’s roots back to northern Mexico, specifically the state of Chihuahua, in the late 19th or early 20th century. Early burritos were likely simple affairs, consisting of basic fillings wrapped in a flour tortilla—a practical and portable meal for laborers and cowboys. The name itself, burrito, translates to little donkey, a playful moniker possibly referencing the burrito’s humble beginnings or its shape resembling a donkey’s ears.
The burrito’s journey to its current widespread popularity is a testament to its adaptability and deliciousness. Initially a regional specialty, it gained traction in the United States during the mid-20th century, fueled by Mexican immigration and the growing popularity of Mexican food across the country. By the 1960s and 70s, the burrito had exploded onto the American food scene, evolving from a simple street food to a customizable culinary canvas. Today, the burrito is a staple in fast-casual restaurants and a beloved home-cooked meal, a testament to its enduring appeal.
The cultural significance of the burrito is undeniable. It represents a fusion of cultures, a blend of Mexican culinary traditions adapted and embraced by American palates. The sheer variety of fillings – from classic beans and rice to more adventurous combinations incorporating carne asada, carnitas, or even breakfast ingredients – reflects a vibrant cultural exchange and a testament to culinary creativity. According to the National Restaurant Association, Mexican food, including burritos, is among the most popular cuisines in the United States, with an estimated annual revenue exceeding $80 billion. This statistic underscores the burrito’s profound impact on the American culinary landscape and its enduring place in our collective food culture. This recipe, however, focuses on a homemade approach, allowing for complete control over ingredients and a superior flavor experience.
Ingredients and Measurements
Creating the perfect beef burrito hinges on using high-quality ingredients and precise measurements. Below, you’ll find a detailed list to ensure consistent, delicious results every time. Don’t be tempted to substitute key ingredients, as they significantly impact the final flavor profile.
For the Beef Filling:
- 1.5 lbs Ground Beef (80/20 blend recommended for optimal juiciness and flavor): Using a leaner ground beef can result in a dry filling. An 80/20 blend strikes the perfect balance.
- 1 large Onion, finely chopped (approximately 1 cup): Finely chopping the onion ensures it cooks evenly and doesn’t overpower the other flavors.
- 2 cloves Garlic, minced: Freshly minced garlic provides the best flavor.
- 1 (15 ounce) can Diced Tomatoes, undrained: The juice from the canned tomatoes adds moisture and richness to the filling.
- 1 (15 ounce) can Kidney Beans, rinsed and drained: Rinsing the beans removes excess sodium and starch.
- 1 (15 ounce) can Pinto Beans, rinsed and drained: A combination of kidney and pinto beans adds textural complexity and a more robust flavor profile.
- 1 tablespoon Chili Powder: Adjust to your spice preference. Start with 1 tablespoon and add more to taste.
- 1 teaspoon Cumin: Ground cumin adds warmth and depth to the filling.
- 1/2 teaspoon Oregano: Dried oregano complements the other spices beautifully.
- 1/4 teaspoon Cayenne Pepper (optional): For those who prefer a spicier burrito.
- 1 teaspoon Salt: Adjust to your taste. Start with 1 teaspoon and add more as needed.
- 1/2 teaspoon Black Pepper: Freshly ground black pepper enhances the overall flavor.
- 2 tablespoons Olive Oil: Use a high-quality olive oil for the best flavor.
For the Burritos:
- 12 large Flour Tortillas (12-inch diameter): Choose tortillas that are soft and pliable for easy wrapping.
- Your favorite toppings (e.g., shredded cheese, sour cream, salsa, guacamole, lettuce): Quantities depend on personal preference.
Important Note: These measurements are for approximately 12 burritos. Adjust the quantities as needed depending on the number of burritos you want to make. Always taste and adjust seasonings to your preference throughout the cooking process.
Equipment List
Creating the perfect homemade beef burritos requires the right tools to ensure efficiency and a high-quality final product. This equipment list details everything you’ll need, from prep work to assembly and even reheating.
Large skillet (12-inch or larger): A large skillet is crucial for browning the beef and sautéing the vegetables. A non-stick surface is highly recommended to prevent sticking and ensure even cooking. The larger size allows for comfortable movement of ingredients without overcrowding.
Large pot (6-quart or larger): If you prefer to simmer your beef in a flavorful broth, a large pot is necessary. This allows for even cooking and prevents the meat from becoming dry. Ensure your pot is oven-safe if you plan to transfer it to the oven for a longer, slow cooking method.
Cutting board (large): A spacious cutting board is essential for efficient chopping of onions, peppers, and other vegetables. Choose a durable, food-safe cutting board made of plastic or wood. Having a separate cutting board for raw meat is a recommended food safety practice.
Sharp chef’s knife (8-inch): A sharp chef’s knife makes quick work of chopping vegetables and slicing the cooked beef. A dull knife is dangerous and inefficient; ensure your knife is properly sharpened before beginning. Consider having a smaller paring knife for more delicate tasks.
Measuring cups and spoons: Accurate measurements are key to achieving the desired flavor balance. Use standard measuring cups and spoons to ensure consistency in your recipe. A kitchen scale can also be helpful for precise measurements of ingredients.
Mixing bowls (various sizes): You’ll need several mixing bowls for prepping ingredients. A large bowl for combining the cooked beef and filling ingredients is essential. Using separate bowls for different ingredients helps maintain hygiene and prevents cross-contamination.
Large baking sheet: A large baking sheet is helpful for keeping assembled burritos warm while you finish preparing the rest. Line the baking sheet with parchment paper for easy cleanup.
Aluminum foil or plastic wrap: For wrapping and storing leftover burritos. Aluminum foil is ideal for reheating in the oven, while plastic wrap is suitable for refrigeration.
Spatula or large spoon: For stirring and flipping ingredients in the skillet and pot. Choose a heat-resistant utensil that can withstand high temperatures.
Microwave (optional): Convenient for quickly reheating individual burritos.
Beef Preparation (Seasoning and Browning)
The foundation of any great burrito lies in its flavorful filling, and for beef burritos, that starts with perfectly seasoned and browned beef. We’ll be using 1.5 lbs of beef chuck, a cut that’s both flavorful and affordable, and ideal for browning and shredding. Cut the chuck into 1-inch cubes to ensure even cooking and browning.
Seasoning is key. Don’t skimp! In a large bowl, combine the cubed beef with 2 tablespoons of chili powder, 1 tablespoon of cumin, 1 teaspoon of smoked paprika, 1 teaspoon of garlic powder, 1 teaspoon of onion powder, 1/2 teaspoon of oregano, 1/2 teaspoon of cayenne pepper (optional, for a little heat), 1 teaspoon of salt, and 1/2 teaspoon of black pepper. Thoroughly toss the beef to ensure every cube is evenly coated. Let the seasoned beef rest for at least 15 minutes, allowing the spices to penetrate the meat. This step significantly improves the flavor.
Now, for the browning. Heat 2 tablespoons of vegetable oil in a large, heavy-bottomed skillet or Dutch oven over medium-high heat. Avoid overcrowding the pan; work in batches if necessary to ensure proper browning. Add about half of the seasoned beef to the hot oil, making sure not to overcrowd the pan. Sear the beef cubes for 3-4 minutes per side, until they are nicely browned and slightly caramelized. This browning process develops a rich depth of flavor. Remove the browned beef from the pan and set aside. Repeat with the remaining beef.
Important Tip: Don’t be tempted to cook the beef all the way through at this stage. We’ll be simmering it later to achieve tenderness. The goal here is to develop a flavorful crust on each cube. Once all the beef is browned, you can proceed to the next step, where we’ll simmer the beef to perfection, creating a tender and delicious filling for your burritos.
Professional Recommendation: For an even deeper flavor, consider adding a tablespoon of tomato paste to the skillet after browning each batch of beef. Stir it into the browned bits (fond) at the bottom of the pan before adding the next batch. This will add a rich, umami depth to your beef filling.
Rice Preparation
Perfectly cooked rice is crucial for a fantastic burrito. While you can certainly use pre-cooked rice, making it from scratch guarantees the best flavor and texture for your recipe. For this recipe, we’ll be using 1 ½ cups of long-grain white rice. You can substitute with brown rice, but be aware that it will require a longer cooking time and may result in a slightly different texture.
Begin by rinsing the rice thoroughly under cold water. This removes excess starch, preventing the rice from becoming sticky and gummy. Rinse the rice in a fine-mesh sieve until the water runs clear. This simple step significantly improves the final product.
In a medium saucepan, combine the rinsed rice with 2 ½ cups of water. The ratio of water to rice is key; using too little water will result in dry, hard rice, while too much will leave it mushy. Add a pinch of salt (approximately ¼ teaspoon) to enhance the flavor. You can also add other seasonings at this stage, such as a bay leaf or a small piece of onion, for a more complex rice flavor profile. However, for a classic burrito experience, simple salt is perfect.
Bring the water to a rolling boil over high heat. Once boiling, immediately reduce the heat to the lowest setting, cover the saucepan tightly with a lid, and simmer for 15-18 minutes. Do not lift the lid during this time, as this will allow steam to escape and prevent the rice from cooking evenly. The cooking time might vary slightly depending on your stove and the type of rice you use. After 15 minutes, check the rice for doneness. If it is still slightly firm, continue simmering for a few more minutes.
Once cooked, remove the saucepan from the heat and let the rice stand, covered, for 5-10 minutes. This allows the remaining water to be absorbed, resulting in fluffy, separated grains. After this resting period, fluff the rice gently with a fork to separate any clumps. Avoid over-fluffing, as this can break the grains.
Before adding the rice to your burritos, allow it to cool slightly to room temperature. This prevents the filling from becoming soggy and ensures that your burritos stay intact. Once cooled, your perfectly cooked rice is ready to be incorporated into your delicious homemade beef burritos!
Bean Preparation (if using)
While many prefer their beef burritos sans beans, adding a flavorful bean component significantly enhances the overall richness and texture. For the best results, we recommend using dried pinto beans or black beans, as they offer a superior depth of flavor compared to canned varieties. However, if time is short, canned beans can be used – just be sure to rinse them thoroughly under cold water to remove excess sodium and starch.
Using Dried Beans: For optimal flavor and texture, start by sorting through 1 cup of dried beans, discarding any damaged or discolored ones. Rinse them well under cold water. Then, place the beans in a large bowl and cover them with at least 4 cups of cold water. Soak the beans overnight (at least 8 hours) for easier cooking and improved digestibility. After soaking, drain the water.
In a large pot, combine the soaked beans with 6 cups of fresh water. Add 1 teaspoon of salt, 1 bay leaf, and 1/2 teaspoon of cumin. Bring the mixture to a boil, then reduce heat to low, cover, and simmer gently for 60-90 minutes, or until the beans are tender but not mushy. Check the beans frequently and add more water if necessary to prevent sticking or burning. The cooking time may vary depending on the type of bean and age of the beans. Once cooked, remove the bay leaf and mash approximately 1/4 of the beans with a potato masher or fork to create a slightly thicker consistency. This adds texture to your burrito filling.
Using Canned Beans: If using canned beans (15 ounces, approximately 2 cups), drain and rinse them thoroughly under cold water to remove excess sodium and any slimy texture. Before adding them to your burrito filling, gently warm them in a saucepan over medium heat for a few minutes. You can also enhance their flavor by adding a touch of cumin, chili powder, or your favorite seasonings. Avoid overcooking canned beans, as they can become mushy.
Seasoning your beans: Regardless of whether you use dried or canned beans, season them to your liking. In addition to salt, cumin, and chili powder, consider adding other spices such as garlic powder, onion powder, or smoked paprika. A small amount of lime juice or a dash of your favorite hot sauce can also add a delicious kick.
Important Note: Properly prepared beans are key to a delicious burrito. Don’t rush the process, and adjust seasoning to your preference for the perfect flavor profile.
Salsa and Other Toppings Preparation
The success of a truly great burrito hinges not just on the filling, but also on the vibrant and flavorful toppings. Let’s craft some delicious accompaniments to elevate your homemade beef burrito experience.
Classic Pico de Gallo: This fresh and zesty salsa is a must-have. Combine 2 cups finely diced ripe tomatoes, 1/2 cup finely chopped white onion, 1/2 cup chopped cilantro, 2 jalapeños, seeded and minced (adjust to your spice preference), and the juice of 2 limes. Season generously with salt (about 1 teaspoon) and freshly ground black pepper (1/2 teaspoon). Gently toss everything together and let it sit for at least 15 minutes to allow the flavors to meld. This allows the tomatoes to release their juices and the flavors to blend beautifully. For a smoother salsa, you can pulse the mixture briefly in a food processor, but be careful not to over-process.
Creamy Avocado Crema: This rich and creamy topping provides a wonderful counterpoint to the spicier elements. Combine 1 ripe avocado, 1/2 cup sour cream or Greek yogurt (for a lighter option), 1/4 cup chopped cilantro, 2 tablespoons lime juice, and a pinch of salt in a food processor or blender. Blend until completely smooth and creamy. Adjust the consistency by adding a tablespoon or two of water if needed. This crema is best made fresh, but can be stored in an airtight container in the refrigerator for up to 2 days.
Quick Pickled Onions: These add a delightful tangy crunch. Thinly slice 1/2 cup red onion. In a small bowl, combine 1/4 cup white vinegar, 1 tablespoon water, 1 teaspoon sugar, and a pinch of salt. Pour the mixture over the onions and let them sit for at least 15 minutes, or up to an hour for a stronger flavor. Drain well before serving to avoid excess liquid in your burrito.
Other Topping Suggestions: Don’t limit yourself! Consider adding other favorites like shredded lettuce (iceberg or romaine), shredded cheese (cheddar, Monterey Jack, or a Mexican blend), diced bell peppers (any color), or a dollop of your favorite hot sauce. Remember to prep all your toppings before assembling your burritos to ensure a smooth and efficient process. This will also help prevent your toppings from wilting.
Storage: Store any leftover salsa and crema in airtight containers in the refrigerator. They will generally keep for 2-3 days. Pickled onions can be stored in the refrigerator for up to a week.
Recommendations for The Best Homemade Beef Burritos
For the ultimate culinary experience, we highly recommend serving your homemade beef burritos immediately after preparation. The warmth of the fillings and the soft texture of the tortillas are best enjoyed fresh. However, if you need to prepare them in advance, assemble the burritos without the sauce and wrap them tightly in foil or plastic wrap. Refrigerate for up to 2 days. When ready to serve, reheat gently in a skillet or microwave until heated through, adding your favorite sauce just before serving to prevent sogginess.
To enhance your burrito experience, consider these complementary dishes. A vibrant and refreshing pico de gallo adds a delightful contrast of textures and flavors. A simple guacamole or a creamy Mexican rice will complement the richness of the beef. For a spicier kick, serve with a side of jalapeños or a fiery salsa. A dollop of sour cream or Greek yogurt adds a cooling element, balancing the heat.
Storage: Leftover burritos should be stored in an airtight container in the refrigerator for up to 3 days. For longer storage, freeze the assembled, un-sauced burritos for up to 3 months. Thaw overnight in the refrigerator before reheating.
Nutritional Information (per burrito, approximate values may vary based on ingredients): Calories: Approximately 500-700, depending on the size and ingredients used. This includes a significant amount of protein from the beef, carbohydrates from the tortillas and rice, and fat from the beef and cheese. The nutritional content also depends on the specific ingredients you use, such as the type of cheese, beans, and vegetables. For a more precise nutritional breakdown, we recommend using a nutrition calculator and inputting your specific recipe details.
Serving Suggestions: For a casual meal, serve your burritos family-style, allowing everyone to customize their own with additional toppings. For a more elegant presentation, you can slice the burritos in half and arrange them on a platter with the accompanying sides. Consider garnishing with fresh cilantro and a squeeze of lime for an extra touch of freshness.