The simple pleasure of a warm, soft dinner roll, yielding effortlessly to the bite, is a culinary experience enjoyed across the globe. While pinpointing the exact origin of the dinner roll is difficult, its history is deeply intertwined with the evolution of bread-making itself. Evidence suggests that early forms of leavened bread, precursors to today’s rolls, emerged in ancient Egypt as early as 4000 BC. These weren’t the fluffy, buttery creations we know today, but rather flatbreads and simple loaves, nonetheless representing humanity’s early mastery of fermentation and baking. Over centuries, techniques evolved, and through the spread of grains and baking traditions across continents, the humble roll diversified. Different cultures developed their own variations, reflecting their unique ingredients and culinary preferences.
The rise of commercial baking and industrialization in the 19th and 20th centuries significantly impacted the production and consumption of dinner rolls. Mass production techniques allowed for the creation of standardized, relatively inexpensive rolls, making them a staple in households and restaurants alike. This period also saw the development of commercially produced yeast and other baking aids that simplified the process, further increasing accessibility. Interestingly, the popularity of dinner rolls is reflected in various statistics: the average American consumes approximately 100 dinner rolls per year. This number varies across regions and demographics, but it underscores the enduring appeal of this seemingly simple food item.
Dinner rolls hold significant cultural importance in many societies. They’re often central to festive meals, embodying abundance and sharing. In many Western cultures, they’re an integral part of Thanksgiving, Christmas, and other celebratory dinners, symbolizing togetherness and family traditions. Beyond the Western world, similar rolls or bread accompaniments hold equally important roles in various cuisines. For instance, dinner rolls in various forms are commonly served with stews and other main courses in many parts of Europe and Asia. The act of breaking bread together, even in the simple form of sharing dinner rolls, often transcends mere sustenance and becomes a powerful symbol of community and shared experience.
This recipe aims to capture the essence of the perfect dinner roll: soft, fluffy, and bursting with a delicate, slightly sweet flavor. We’ll delve into the techniques that produce that signature airy texture and golden-brown crust, ensuring a homemade experience that rivals—and perhaps even surpasses—the commercial versions. Prepare to be amazed by how simple it is to create these delightful additions to your next meal.
Ingredients and Measurements
This recipe yields approximately 12 soft and fluffy dinner rolls. Precise measurements are key to achieving the perfect texture, so please use a kitchen scale for the most accurate results. While volume measurements are provided as an alternative, they may vary depending on your measuring techniques and the type of flour used. Always spoon your flour into the measuring cup and level it off with a straight edge, rather than scooping directly from the bag. This prevents packing, which can lead to dense rolls.
For the Dough:
- 1 cup (240ml) lukewarm milk (105-115°F): Lukewarm milk activates the yeast properly. Too hot, and you’ll kill the yeast; too cold, and it won’t activate efficiently. Use a thermometer to ensure the correct temperature.
- 2 ¼ teaspoons (7g) active dry yeast: Ensure your yeast is fresh. Check the expiration date. If it’s old, it may not rise properly. You can test it by dissolving it in a small amount of warm water with a pinch of sugar; it should foam within a few minutes.
- ¼ cup (50g) granulated sugar: This provides food for the yeast and contributes to the rolls’ sweetness and browning. You can adjust this amount to your preference.
- 1 large egg: The egg adds richness and helps bind the dough together, contributing to a softer crumb. Bring it to room temperature for optimal mixing.
- 4 tablespoons (57g) unsalted butter, softened: Softened butter is crucial for ease of mixing and creating a tender crumb. Don’t melt it; you want it soft enough to easily incorporate into the dough.
- 1 teaspoon salt: Salt balances the sweetness and enhances the flavor of the rolls. Don’t skip this important ingredient!
- 4 ½ – 5 cups (565-630g) all-purpose flour, plus more for dusting: The range in flour amount accounts for variations in flour absorption. Start with the lower amount and add more gradually until the dough is smooth and slightly tacky, but not sticky. Using a kitchen scale is highly recommended for the most accurate results.
For Egg Wash (Optional, but recommended):
- 1 large egg, beaten: A simple egg wash brushed onto the rolls before baking gives them a beautiful golden-brown color and a slightly glossy finish.
- 1 tablespoon milk: Adding a tablespoon of milk to the egg wash creates a smoother, more even coat on the rolls.
Important Note: The success of this recipe heavily relies on the accuracy of your ingredients and measurements. Using a kitchen scale is highly recommended for the best results, especially for the flour. Always check the freshness of your yeast and ensure your milk is the correct temperature. Happy baking!
Preparation of the Yeast (if using active dry yeast)
Active dry yeast is a convenient ingredient for baking, but requires proper activation to ensure your dinner rolls rise beautifully. Improperly activated yeast will result in flat, dense rolls, so this step is crucial for success. We’ll be using 2 ¼ teaspoons (7 grams) of active dry yeast for this recipe.
The Bloom Test: This is the most reliable method to check if your yeast is still viable. Before incorporating the yeast into the dough, we perform a simple bloom test. This test ensures the yeast is alive and active, ready to leaven your dough.
First, in a small bowl, combine ¼ cup (60ml) of lukewarm water – crucially, not hot! Hot water will kill the yeast – with 1 teaspoon of granulated sugar. The sugar provides food for the yeast, encouraging its activity. The water temperature should be around 105-115°F (41-46°C). You can test this with your finger; it should feel comfortably warm, not hot.
Sprinkle the 2 ¼ teaspoons (7 grams) of active dry yeast evenly over the sugar water mixture. Do not stir immediately. Let the mixture sit undisturbed for 5-10 minutes. During this time, the yeast will absorb the water and begin to ferment, producing a foamy head on the surface.
Observe the mixture carefully. A successful bloom will show a noticeably foamy and bubbly surface. If the mixture remains relatively still and shows little to no activity after 10 minutes, your yeast is likely dead or inactive. Discard the mixture and start again with fresh yeast. This is a critical step to prevent baking failures.
If the yeast blooms successfully, gently stir it into the sugar water to ensure all the yeast is incorporated. This activated yeast mixture is now ready to be added to the remaining ingredients for your dough. Avoid over-mixing the yeast mixture after the bloom, as this can damage the delicate yeast cells.
Important Considerations: Always check the expiration date on your yeast package. Even if within the expiration date, yeast can lose its potency if stored improperly – in damp or overly warm conditions. Proper storage in a cool, dry place is essential for maintaining yeast viability.
Using fresh, properly activated yeast is the foundation for achieving soft and fluffy dinner rolls. Don’t skip the bloom test; it’s a small step that guarantees a big difference in the final product. Take your time and ensure your yeast is ready before you proceed with the rest of the recipe. Happy baking!
Mixing the Dough
This section details the crucial process of mixing your soft and fluffy dinner roll dough. Precise measurements and technique are key to achieving the perfect texture. We’ll be using the stand mixer method for ease and efficiency, but hand-mixing is certainly possible (though more labor-intensive).
Begin by ensuring all your ingredients are at room temperature. This is particularly important for the yeast and butter. Cold ingredients can hinder yeast activation and result in a dough that’s slow to rise and less fluffy. Room temperature is generally considered to be between 68-72°F (20-22°C).
In the bowl of your stand mixer, combine 1 cup (240ml) of warm water (105-115°F or 41-46°C), 2 ¼ teaspoons (7 grams) of active dry yeast, and 1 tablespoon (12 grams) of granulated sugar. Gently stir to combine, and let the mixture stand for 5-10 minutes until foamy. This confirms your yeast is alive and active. If it doesn’t foam, your yeast may be dead, and you’ll need to start again with fresh yeast.
Once the yeast mixture is foamy, add 2 large eggs and 1 teaspoon (5ml) of salt to the bowl. Give it a quick whisk to incorporate these ingredients. Then, gradually add 4 cups (500 grams) of all-purpose flour, one cup at a time, mixing on low speed with the dough hook attachment. Avoid adding all the flour at once, as this can lead to a tough dough.
After the flour is mostly incorporated, add 6 tablespoons (85 grams) of unsalted butter, cut into small cubes. This is best done one or two cubes at a time, allowing the mixer to fully incorporate the butter before adding more. This ensures the dough doesn’t become overly greasy or lumpy. Continue mixing on low speed until the dough starts to pull away from the sides of the bowl. This will take approximately 5-7 minutes.
Once the dough is mostly formed and relatively smooth, increase the mixer speed to medium and knead for another 3-5 minutes. The dough should be smooth, elastic, and slightly sticky. If it seems too sticky, add a tablespoon of flour at a time until it becomes manageable. However, be cautious about adding too much flour, as this can result in a dry and tough dough.
After kneading, lightly grease a large bowl with oil. Transfer the dough to the bowl, turning to coat it evenly with the oil. Cover the bowl with plastic wrap and let the dough rise in a warm place for 1-1.5 hours, or until doubled in size. The rising time may vary depending on the temperature of your environment. A slightly warmer room will result in a faster rise.
Once the dough has doubled, it’s ready for shaping and baking! Remember, patience and attention to detail during this mixing stage will significantly contribute to the final outcome of your soft and fluffy dinner rolls.
First Rise (Bulk Fermentation)
The first rise, or bulk fermentation, is a crucial step in achieving soft and fluffy dinner rolls. This is where the yeast works its magic, transforming the dough’s simple ingredients into a light and airy structure. Proper bulk fermentation ensures optimal flavor development and texture. For this recipe, we’ll be aiming for a 1-1.5 hour rise, but this can vary slightly depending on your environment.
After gently kneading the dough (as described in the previous section), place it in a lightly oiled large bowl. Make sure to use a bowl large enough to accommodate the dough as it will nearly double in size during this phase. Flip the dough once to coat it evenly with the oil. This prevents sticking and helps maintain a smooth surface.
Cover the bowl tightly with plastic wrap. Avoid using a completely airtight seal, as the dough needs to breathe slightly. Alternatively, you can cover the bowl with a damp kitchen towel. This helps to retain moisture and prevent a skin from forming on the dough’s surface.
Find a warm, draft-free location for your dough to rise. A warm kitchen counter or an oven with the light turned on (no heat!) works well. Avoid placing the bowl in direct sunlight or near a heat source that could cause the dough to rise too quickly and unevenly. Rapid rising can lead to a less flavorful and less tender final product.
The ideal temperature for bulk fermentation is around 75-80°F (24-27°C). If your kitchen is cooler, you may need to increase the rising time. Conversely, in a warmer environment, the dough may rise faster, requiring a shorter fermentation time. The key indicator of readiness is a noticeable increase in dough volume—approximately double its initial size.
To check for doneness, gently poke the dough with a lightly floured finger. If the indentation slowly springs back, the dough is ready for shaping. If the indentation remains, it needs more time to rise. Be patient; rushing this stage can negatively impact the final texture and flavor of your rolls.
Once the dough has doubled in size, gently deflate it by punching it down a few times. This releases some of the built-up gases and helps to even out the dough’s consistency. Be careful not to be too aggressive; you want to deflate it, not destroy its structure. Now you are ready to proceed to the next step: shaping your dinner rolls.
Remember that the environment plays a significant role in fermentation time. Adjust the rising time as needed based on your kitchen’s temperature and humidity. Observing the dough’s rise is key to achieving the perfect texture and flavor. Don’t be afraid to experiment and find what works best in your specific conditions.
Shaping the Rolls
Once your dough has completed its second rise and is beautifully puffy and doubled in size, it’s time to shape your dinner rolls. This step requires a gentle touch to avoid deflating the delicate air pockets within the dough, resulting in less fluffy rolls. We’ll be making classic round rolls, but feel free to experiment with other shapes once you’ve mastered this technique.
Begin by lightly flouring your work surface. This prevents sticking and ensures easy handling of the dough. Avoid using too much flour, as this can dry out the dough and make the rolls tough. Gently turn the dough out onto the floured surface. Using a bench scraper or a sharp knife, divide the dough into 12 equal pieces (approximately 2.5 ounces each). You can weigh the dough for precise portions, but a visual estimation works well with practice.
Now comes the shaping. Take one piece of dough and gently roll it into a smooth ball. The best way to achieve this is to cup your hand around the dough and use your fingertips to tuck the edges underneath, rotating the dough as you go. Avoid kneading the dough during this process. Just gently guide it into a round shape. Place the formed roll onto a prepared baking sheet. Repeat this process for all 12 pieces of dough, arranging them evenly spaced on the baking sheet.
For perfectly round rolls, you can use a simple trick. After forming each ball, gently place it seam-side down into a small, lightly floured bowl. This will help create a smooth, round shape without any visible seams. Gently remove the roll from the bowl and place it on the baking sheet. This method is especially helpful for beginners.
Prepare your baking sheet properly. Line it with parchment paper to prevent sticking and for easy cleanup. You can also lightly grease the baking sheet, but be mindful not to overdo it, as excess grease can hinder browning. Leave about 1-1.5 inches between each roll to allow for expansion during the final proof.
Once all the rolls are shaped and arranged on the baking sheet, cover them loosely with plastic wrap or a clean kitchen towel. Let them proof for another 30-45 minutes, or until they have visibly puffed up and increased in size by about 50%. This final proof is crucial for achieving the softest, fluffiest texture. Avoid placing the baking sheet in a warm or drafty area, as this can lead to uneven rising and potentially collapse.
After the final proof, your rolls are ready for baking! Preheat your oven to the temperature specified in the recipe (usually around 375°F or 190°C). Brush the rolls with milk or egg wash for a beautiful golden-brown sheen, if desired. Bake according to the recipe instructions until golden brown and cooked through. Enjoy your freshly baked, soft and fluffy dinner rolls!
Second Rise (Proofing)
The second rise, or proofing, is crucial for developing the soft and fluffy texture of your dinner rolls. This stage allows the yeast to further ferment the sugars in the dough, producing carbon dioxide gas that creates those delightful airy pockets. A properly proofed dough will be noticeably puffy and almost doubled in size, indicating the yeast is actively working and ready for baking.
After the first rise, gently deflate the dough by gently pressing down on it with your fist. This releases some of the built-up gas and helps to even out the dough for a more uniform rise during the second proofing. Don’t be too aggressive; a gentle deflate is all that’s needed.
Prepare your proofing environment: A warm, humid environment is ideal for the second rise. A good range is between 75-85°F (24-29°C). Too cold, and the yeast will be sluggish; too hot, and the yeast can be killed, resulting in a dense, under-risen dough. You can achieve this in a few ways:
- Oven Proofing: Preheat your oven to 100°F (38°C) for a few minutes, then turn it off. Place the dough in a lightly greased bowl inside the warm oven. The residual heat will create a humid environment perfect for proofing.
- Microwave Proofing: Place a cup of boiling water in a microwave-safe bowl. Place the dough in a lightly greased bowl on top of the water. Close the microwave door (but don’t turn it on!). The steam created will provide the necessary humidity.
- Warm, Draft-Free Location: A warm corner of your kitchen, away from drafts, can suffice. However, monitor the temperature carefully, as it’s harder to control the humidity in this method.
Shape your rolls: Once the dough has been gently deflated, divide it into 12 equal portions (approximately 2 ounces or 57 grams each). Roll each portion into a smooth ball. Place the shaped rolls in a lightly greased 9×13 inch baking pan, leaving a little space between each roll for expansion. Lightly brush the tops of the rolls with melted butter or oil to prevent them from drying out during proofing.
Second Rise Time: The second rise typically takes 45-60 minutes, depending on the temperature and humidity of your proofing environment. The rolls are ready when they are almost doubled in size and spring back slowly when gently poked with a finger. This indicates a well-proofed dough ready for baking. If they rise too quickly, the dough may be too warm; if they rise slowly or not at all, the dough may be too cold.
Important Note: Avoid over-proofing. Over-proofed rolls will have a slightly sour taste and a less desirable texture. They will also collapse during baking. It’s better to slightly under-proof than over-proof.
Once the rolls have proofed to the desired size, they are ready for baking. Preheat your oven to the temperature specified in your recipe, and bake until golden brown and cooked through. Enjoy your soft and fluffy dinner rolls!
Recommendations for Soft and Fluffy Dinner Rolls
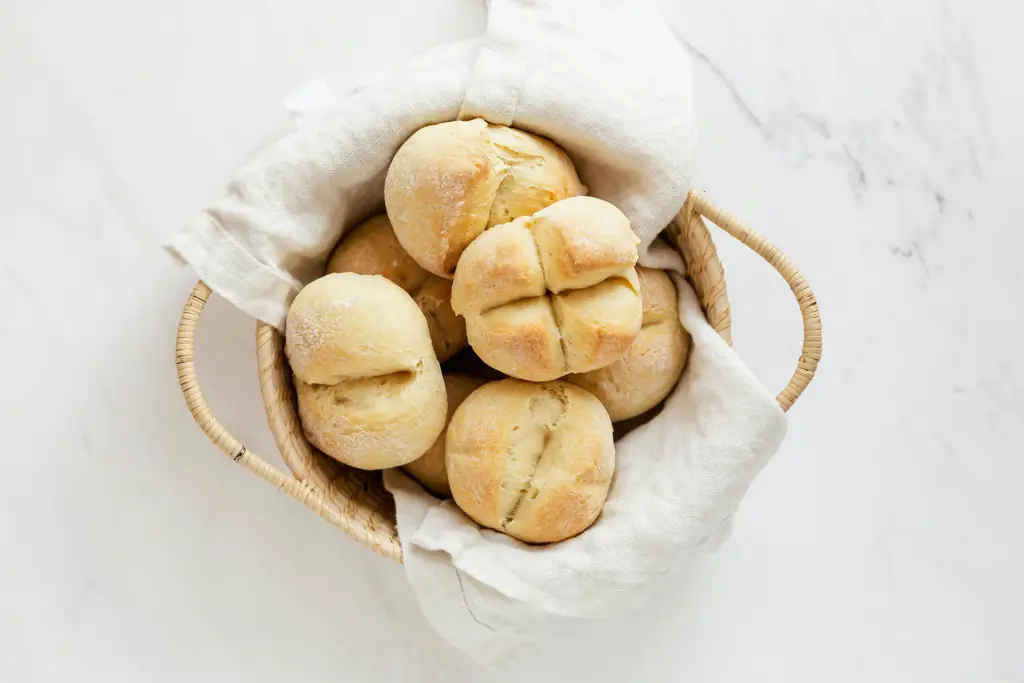
These soft and fluffy dinner rolls are perfect for any occasion, from casual weeknight dinners to elegant holiday feasts. Their delicate texture and slightly sweet flavor make them a crowd-pleaser. To ensure optimal enjoyment, follow these recommendations carefully.
Serving Suggestions: These rolls are incredibly versatile and pair well with a wide array of dishes. Serve them warm alongside hearty soups and stews, such as a comforting beef stew or a creamy tomato soup. They also complement roasted meats beautifully, particularly chicken, turkey, or pork. For a more elegant touch, serve them with a rich gravy or butter sauce. Consider splitting the rolls and adding fillings such as ham and cheese, or even using them as the base for sliders.
Storage Conditions: For the best flavor and texture, consume the rolls within 24 hours of baking. To store leftover rolls, allow them to cool completely before placing them in an airtight container at room temperature. For longer storage (up to 3 days), store them in the refrigerator. To refresh slightly stale rolls, lightly sprinkle them with water and reheat them in a 350°F (175°C) oven for a few minutes until warm and soft.
Complementary Dishes: The delightful softness of these rolls makes them an excellent accompaniment to a variety of cuisines. They pair particularly well with dishes featuring rich sauces and savory flavors. Consider serving them with:
- Roasted vegetables: The rolls’ subtle sweetness complements the savory earthiness of roasted root vegetables like carrots, potatoes, and parsnips.
- Pasta dishes: Their fluffy texture provides a delightful contrast to creamy pasta sauces like Alfredo or pesto.
- Pot pies: The rolls are a perfect scoop for enjoying the flavorful filling of a chicken pot pie or a shepherd’s pie.
- Grilled meats: Their soft interior makes them ideal for soaking up delicious BBQ sauces or marinades.
Nutritional Information (per roll, approximate): Please note that the exact nutritional content will vary depending on the specific ingredients and quantities used.
- Calories: Approximately 150-200 calories
- Fat: Approximately 4-6 grams
- Carbohydrates: Approximately 25-35 grams
- Protein: Approximately 4-6 grams
Important Note: These values are estimates and may vary based on the specific ingredients used and portion sizes. For precise nutritional information, use a nutrition calculator with your specific recipe details.
Freezing Rolls: For longer storage, you can freeze the baked rolls. Allow them to cool completely, then wrap them individually in plastic wrap and place them in a freezer-safe bag. They can be stored in the freezer for up to 3 months. Thaw overnight in the refrigerator and reheat gently in the oven or microwave before serving.
Enjoy these delightful dinner rolls with your favorite meal! We hope you enjoy baking and sharing them with loved ones.