Prepare to embark on a culinary journey to the vibrant streets of the Middle East, where the humble falafel reigns supreme! This seemingly simple chickpea fritter boasts a surprisingly rich history and cultural significance, far exceeding its unassuming appearance. Falafel’s origins are debated, with some tracing it back to ancient Egypt, where similar chickpea-based dishes existed centuries ago. However, its modern form is widely credited to the Middle East, particularly Egypt and the Levant region, gaining popularity in the 19th and 20th centuries. It’s a vegetarian staple, making it a cornerstone of many diets, and its adaptability ensures its continued relevance in a globalized food landscape.
The rise of falafel is intrinsically linked to religious and cultural practices. In many Middle Eastern countries, particularly those with significant Muslim populations, falafel provides a delicious and readily available protein source during periods of fasting, such as Ramadan. Its affordability and ease of preparation contribute to its widespread consumption across socioeconomic strata. Interestingly, while the exact figures are difficult to pinpoint, estimates suggest that billions of falafel are consumed globally each year, highlighting its enduring appeal. This impressive statistic speaks volumes about its versatility and deliciousness, transcending cultural boundaries and appealing to a wide range of palates.
Beyond its nutritional value and religious significance, falafel holds a special place in the cultural identity of many communities. It’s a street food icon, often sold from bustling carts and small family-run restaurants, representing a vibrant and lively aspect of daily life. The variations in recipes across different regions are a testament to its adaptability, with spices, herbs, and even the type of chickpea used contributing to unique flavours and textures. From the crispy exterior to the soft, flavorful interior, falafel offers a sensory experience that is both satisfying and memorable. This recipe aims to capture the essence of this beloved dish, providing a simple yet delicious way to experience the magic of falafel at home.
Ingredients and Measurements
This recipe yields approximately 20-24 falafel balls. Accurate measurements are crucial for achieving the perfect texture and flavor. Use a kitchen scale for the most precise results, especially for the dry ingredients. Substituting ingredients might alter the final product, so sticking to the listed items is recommended.
Dried Chickpeas (1 cup): Start with 1 cup of dried chickpeas. Soaking them overnight is essential for optimal texture. Do not skip this step! Soaking reduces cooking time and results in softer, more palatable falafel. Rinse the chickpeas thoroughly before soaking and again after soaking.
Fresh Parsley (1 cup, packed): Use fresh, vibrant parsley for the best flavor. Packed means firmly pressing the parsley into the measuring cup. Avoid using wilted or yellowed parsley. Roughly chop the parsley before adding it to the mixture.
Fresh Cilantro (½ cup, packed): Similar to the parsley, use fresh, vibrant cilantro. The cilantro adds a distinctive, zesty flavor that complements the chickpeas. Again, pack the cilantro firmly into the measuring cup for accurate measurement. Chop it roughly before incorporating it into the mixture.
Onion (½ medium, finely chopped): A ½ medium yellow onion provides a subtle sweetness and enhances the overall flavor profile. Finely chopping the onion ensures it blends seamlessly into the falafel mixture without leaving large chunks. Avoid using red onion, as its strong flavor might overpower the other ingredients.
Garlic (2 cloves, minced): Two cloves of garlic add a pungent, savory aroma and flavor. Mincing the garlic ensures even distribution throughout the falafel. Fresh garlic is always preferred for the best flavor.
Flour (¼ cup, all-purpose): All-purpose flour acts as a binder, helping to hold the falafel together. Using too much flour can result in dry falafel, while too little can lead to crumbling. Use a level measuring cup for accurate measurement.
Baking Powder (1 teaspoon): A teaspoon of baking powder adds a slight leavening effect, resulting in lighter and fluffier falafel. Ensure the baking powder is fresh for optimal results.
Spices (to taste): This recipe calls for 1 teaspoon of ground cumin, ½ teaspoon of ground coriander, and ½ teaspoon of salt. Adjust to your preference. Freshly ground spices are always recommended for the best flavor. You might also consider adding a pinch of cayenne pepper for a subtle kick.
Vegetable Oil (for frying): Use enough vegetable oil to completely submerge the falafel balls during frying. Choose a high-smoke-point oil like canola or sunflower oil.
Preparation of the Falafel Mixture (Soaking, Blending, etc.)
The key to perfectly crisp and flavorful falafel lies in the proper preparation of the chickpea mixture. We’ll start with soaking the chickpeas, a crucial step that softens them for easy blending and contributes to the final texture.
Soaking the Chickpeas: Begin by measuring out 1 cup of dried chickpeas. Rinse them thoroughly under cold water to remove any debris. Transfer the chickpeas to a large bowl and cover them with at least 4 cups of cold water. Ensure the water level is at least 2 inches above the chickpeas. Soak for at least 8 hours, or preferably overnight (12-24 hours). This soaking process significantly reduces cooking time and improves the texture of the falafel.
Draining and Preparing the Ingredients: After soaking, drain the chickpeas completely. You should notice they’ve significantly increased in size. Now, gather your other ingredients: 1/2 cup finely chopped fresh parsley, 1/4 cup finely chopped fresh cilantro, 1 small onion (finely chopped), 2 cloves garlic (minced), 1 teaspoon ground cumin, 1/2 teaspoon ground coriander, 1/4 teaspoon cayenne pepper (optional, for a touch of heat), 1/2 teaspoon baking powder, and salt to taste (about 1 teaspoon). Adjust the spices to your preference.
Blending the Mixture: Add the drained chickpeas, herbs, onion, garlic, and spices to a food processor. Start blending on a low speed, gradually increasing to high. Blend until the mixture is a coarse paste, with some small pieces of chickpeas still visible. Avoid over-blending, as this can result in a gummy texture. The ideal consistency should be slightly coarse, not completely smooth. If the mixture is too dry, add 2-3 tablespoons of ice water, one tablespoon at a time, while blending until you achieve the desired consistency. Finally, stir in the baking powder; this acts as a leavening agent, contributing to the airy texture of the falafel.
Resting the Mixture (Optional but Recommended): For optimal flavor development and easier shaping, cover the mixture and refrigerate for at least 30 minutes, or up to 2 hours. This resting period allows the flavors to meld and makes the mixture easier to handle when forming the falafel balls or patties.
Important Note: The amount of water needed might vary slightly depending on the type of chickpeas and their soaking time. Always check the consistency and add water as needed to achieve a workable paste.
Shaping the Falafel Balls
Now that your falafel mixture is ready, it’s time to shape those delicious little balls! This step is crucial for achieving perfectly crispy falafel with a tender interior. The size and consistency of your balls will directly impact the cooking time and final texture.
Start with clean, slightly damp hands. This will prevent the mixture from sticking excessively to your hands. If you find the mixture is still too sticky, lightly oil your hands with a neutral-flavored oil like vegetable or canola oil.
Use a consistent size for even cooking. Aim for falafel balls that are approximately 1-1.5 inches (2.5-3.8 cm) in diameter. This ensures they cook evenly and don’t burn on the outside before the inside is cooked through. Smaller balls will cook faster, while larger ones will require a longer cooking time. Inconsistency in size will lead to uneven cooking.
There are several ways to shape the falafel: You can use your hands to roll the mixture into balls, or for a more uniform shape, you can use a small ice cream scoop or a tablespoon to portion out the mixture. Press the mixture gently into a ball shape, ensuring there are no cracks or air pockets. Air pockets can cause the falafel to burst during frying.
Avoid over-handling the mixture. Over-handling can lead to tough falafel. Once you’ve shaped the ball, gently place it on a plate or tray lined with parchment paper. Avoid stacking the falafel balls on top of each other before frying, as this can cause them to stick and deform.
For a slightly flatter falafel (for easier handling and quicker cooking), you can gently flatten the balls slightly after shaping them. This will increase the surface area, leading to crispier results. However, ensure they remain thick enough to cook through properly.
Prepare a sufficient number of falafel balls before you start frying. This will streamline the cooking process and prevent the already-shaped falafel from drying out. Having all your falafel balls ready will allow you to focus on frying them to perfection.
Once you’ve shaped all the falafel, you’re ready to move on to the frying or baking stage! Remember, consistent sizing and gentle handling are key to achieving perfectly crispy and delicious falafel.
Cooking the Falafel (Frying, Baking, Air Frying options)
Now that your falafel mixture is ready, it’s time to cook them! You have several delicious options: frying, baking, or air frying. Each method yields a slightly different texture and flavor, so choose your preferred method based on your preferences and equipment.
Frying (for the crispiest falafel): This classic method delivers the crispiest, most flavorful falafel. Heat about 1 inch of vegetable oil in a large, heavy-bottomed pot or deep fryer to 375°F (190°C). Use a thermometer to monitor the oil temperature – this is crucial for even cooking. Carefully drop spoonfuls (about 1 tablespoon each) of the falafel mixture into the hot oil, ensuring not to overcrowd the pot. Fry for 3-4 minutes, turning halfway through, until golden brown and crispy. Remove with a slotted spoon and place on a paper towel-lined plate to drain excess oil. Important: Never leave hot oil unattended.
Baking (for a healthier option): For a healthier alternative, bake your falafel. Preheat your oven to 400°F (200°C). Line a baking sheet with parchment paper. Shape the falafel mixture into small balls or patties (about 1 tablespoon each). Arrange them on the prepared baking sheet, leaving some space between each one for even baking. Bake for 20-25 minutes, flipping halfway through, until golden brown and cooked through. Recommendation: For extra crispiness, lightly brush the falafel with olive oil before baking.
Air Frying (for a quick and easy method): Air frying offers a convenient and relatively healthy way to cook falafel. Preheat your air fryer to 400°F (200°C). Shape the falafel mixture into small balls or patties (about 1 tablespoon each). Arrange them in a single layer in the air fryer basket, ensuring they are not overcrowded. Air fry for 12-15 minutes, shaking the basket halfway through, until golden brown and cooked through. Note: Cooking time may vary depending on your air fryer model. Keep an eye on them to prevent burning.
Regardless of your chosen cooking method: Always ensure the falafel are cooked through. A properly cooked falafel will be firm to the touch and have a golden-brown exterior. Serve immediately for the best texture and flavor. Enjoy your homemade falafel!
Making the Tahini Sauce (or other desired sauce)
The tahini sauce is what elevates a good falafel to a truly memorable experience. This recipe provides a classic, creamy, and tangy base, but feel free to experiment with additions to suit your taste!
For this recipe, you’ll need: 1/4 cup tahini (ensure it’s well-stirred before measuring to avoid lumps), 2 tablespoons lemon juice (freshly squeezed is best!), 2 tablespoons water (start with this amount and add more for desired consistency), 1 clove garlic, minced, 1/4 teaspoon salt, and a pinch of black pepper. Optional additions include a tablespoon of olive oil for extra richness, a teaspoon of ground cumin for a warm spice note, or a pinch of cayenne pepper for a touch of heat.
In a small bowl, whisk together the tahini and lemon juice vigorously until the mixture is smooth and well combined. This is crucial to prevent a gritty texture. Tahini can be quite thick, so you may need to use a fork at first to break up any clumps before switching to a whisk.
Slowly drizzle in the water while whisking continuously. The goal is to achieve a creamy, pourable consistency. Add more water, a teaspoon at a time, until you reach your desired thickness. Don’t add all the water at once, as it’s difficult to get back to a thicker consistency if you add too much.
Next, add the minced garlic, salt, and pepper. Whisk thoroughly to incorporate everything evenly. Taste the sauce and adjust seasoning as needed. You might want to add more lemon juice for extra tang, more salt for savoriness, or even a touch of sugar to balance the acidity if you prefer a sweeter sauce.
Professional Tip: For a truly luxurious tahini sauce, let it sit for at least 15-30 minutes after preparation. This allows the flavors to meld and deepen, resulting in a more complex and satisfying taste. If you’re short on time, a quick stir is fine, but the longer rest is highly recommended.
Alternative Sauces: If you’re not a fan of tahini, a simple yogurt sauce is a delicious alternative. Combine plain Greek yogurt with chopped fresh herbs like parsley and mint, a squeeze of lemon juice, a pinch of salt, and a clove of minced garlic. Or, for a spicier kick, try a harissa-based sauce, combining harissa paste with mayonnaise and a touch of lemon juice.
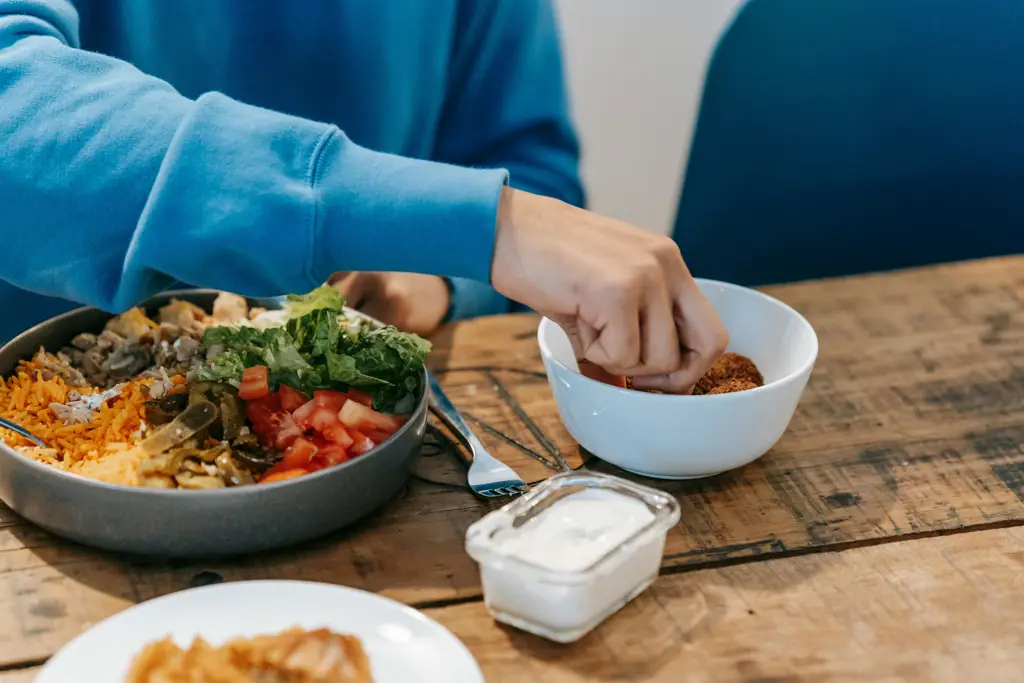
Serving Suggestions (with pita bread, salads, etc.)
Your freshly made falafel is best served immediately, while still warm and crispy. To truly elevate the experience, consider these serving suggestions, designed to complement the falafel’s earthy and savory notes.
Pita Bread: Warm 6-8 pita breads in the oven at 350°F (175°C) for 5-7 minutes, or until soft and slightly puffy. This enhances their texture and allows them to better absorb the flavorful sauces. Alternatively, you can heat them briefly in a dry skillet for a quicker method. Pro Tip: Lightly brush the warmed pita with olive oil before filling for extra richness.
Classic Israeli Salad: A vibrant and refreshing accompaniment, this salad typically includes 1 cup chopped cucumbers, 1/2 cup chopped tomatoes, 1/4 cup chopped red onion, 1/4 cup chopped fresh parsley, and the juice of 1/2 a lemon, all dressed with 2 tablespoons of olive oil and a pinch of salt and pepper. The contrasting textures and bright acidity cut through the richness of the falafel.
Tahini Sauce: No falafel is complete without a generous dollop of tahini sauce! Combine 1/2 cup tahini, 1/4 cup lemon juice, 2 tablespoons water (add more for desired consistency), 1 clove garlic (minced), and salt to taste. Whisk vigorously until smooth and creamy. For a richer flavor, add a tablespoon of olive oil.
Hummus: A smooth and creamy alternative to tahini, or a perfect addition alongside it! Store-bought hummus works perfectly, or you can easily make your own. A small bowl of hummus (about 1 cup) offers a different textural experience and complements the falafel beautifully.
Other Salad Options: Experiment with other fresh salads! A simple green salad with a light vinaigrette, a chopped cabbage and carrot slaw, or a fattoush salad (with toasted pita croutons) all make delicious additions. Remember to consider the balance of flavors and textures when selecting your accompaniments.
Serving Suggestion: Fill your warmed pita bread with 4-6 falafel balls, a generous spoonful of tahini sauce, a portion of Israeli salad, and a sprinkle of chopped fresh parsley or cilantro. Serve immediately and enjoy! Presentation is key! Arrange the falafel, salads, and sauces attractively on a platter for a visually appealing meal.
Leftovers: Store leftover falafel in an airtight container in the refrigerator for up to 3 days. They can be reheated in a skillet or oven until warmed through. Note: reheated falafel may not be as crispy as freshly made.
Recommendations
For the best results when making this Simple and Delicious Falafel recipe, ensure your chickpeas are thoroughly dried before processing. This will prevent a gummy texture and ensure perfectly crisp falafel. Don’t over-process the mixture; some texture is desirable. Aim for a coarsely ground consistency rather than a completely smooth paste.
Serving Suggestions: These falafel are incredibly versatile! Serve them in warm pita bread with hummus, tahini sauce, Israeli salad (a chopped tomato, cucumber, and onion salad), and amba (mango chutney). They also make a fantastic addition to salads, grain bowls, or as a side dish alongside roasted vegetables. Consider experimenting with different sauces – a spicy harissa mayo or a cool yogurt dip would be delicious additions.
Storage: Leftover falafel can be stored in an airtight container in the refrigerator for up to 3 days. For optimal freshness, avoid storing them with wet ingredients. To reheat, simply bake them in a preheated oven at 375°F (190°C) for about 10-15 minutes, or until heated through and crispy. You can also pan-fry them for a crispier exterior.
Complementary Dishes: This recipe pairs beautifully with a variety of Middle Eastern and Mediterranean dishes. Consider serving it with rice, couscous, or quinoa as a base for a hearty meal. Roasted vegetables like eggplant, zucchini, and bell peppers complement the falafel’s flavors perfectly. A simple green salad with a lemon vinaigrette adds a refreshing contrast to the richness of the falafel.
Nutritional Information (per serving, approximate): The exact nutritional information will vary depending on the specific ingredients used and serving size. However, a typical serving of falafel (approximately 3-4 falafel balls) might contain around 150-200 calories, 5-8g of protein, 15-20g of carbohydrates, and 8-12g of fat. This is a rough estimate, and it’s recommended to use a nutrition calculator for a more precise analysis based on your specific recipe ingredients and quantities. This recipe is a good source of fiber and plant-based protein.