Hummus, a cornerstone of Levantine cuisine, boasts a history as rich and creamy as the dish itself. Its origins are shrouded in some mystery, but evidence points to ancient Egypt as a possible birthplace, with chickpeas having been cultivated there for millennia. While precise recipes are debated, the basic components – chickpeas, tahini, lemon juice, garlic, and olive oil – have remained consistent across cultures and centuries. The earliest documented mention of a hummus-like dish dates back to the 13th century in Egypt, though its evolution likely spans far longer. The word hummus itself derives from the Arabic word ḥummus, meaning chickpea. Its spread throughout the Middle East and beyond is a testament to its adaptability and deliciousness.
The cultural significance of hummus is undeniable. It’s not merely a dip; it’s a staple food, a symbol of communal gatherings, and an integral part of daily life in many regions. In countries like Lebanon, Syria, Palestine, and Israel, hummus is ubiquitous – served as a breakfast spread, a midday snack, a side dish accompanying various meats and vegetables, or even as a filling for pita bread. Its versatility extends beyond the traditional; it’s found in modern fusion dishes worldwide, showcasing its adaptable nature. Globally, the hummus market is booming, with estimates exceeding billions of dollars annually. This reflects not only its popularity but also the growing global interest in Mediterranean and Middle Eastern cuisine.
This recipe for Quick and Easy Hummus Wraps offers a modern twist on this ancient delicacy, making it accessible and convenient for busy lifestyles. While traditional methods involve grinding chickpeas from scratch, this recipe utilizes store-bought hummus, drastically reducing preparation time. This allows you to enjoy the wholesome goodness and satisfying flavors of hummus without the time commitment. It’s the perfect example of how a dish steeped in history can seamlessly integrate into a fast-paced, contemporary world, providing a healthy and flavorful meal option in minutes. The wraps themselves are incredibly adaptable; you can customize fillings to suit your preferences, exploring a world of flavor combinations while honoring the rich heritage of hummus.
Ingredients and Measurements
This recipe for Quick and Easy Hummus Wraps yields approximately 4 servings. The ingredient quantities can be easily scaled up or down depending on your needs. We recommend using fresh, high-quality ingredients for the best flavor and texture.
For the Hummus (if making your own, otherwise use store-bought):
- 1 (15-ounce) can chickpeas, rinsed and drained thoroughly. Thorough rinsing is crucial to remove excess starch and achieve a smoother hummus.
- 1/4 cup tahini. Use a good quality tahini for the best flavor; it can be found in most grocery stores.
- 1/4 cup fresh lemon juice. Freshly squeezed lemon juice provides the brightest, most vibrant flavor.
- 2 cloves garlic, minced. Adjust the garlic to your preference. Start with less and add more if needed. Too much garlic can overpower the other flavors.
- 1/2 teaspoon ground cumin. Cumin adds warmth and depth to the hummus.
- 1/4 teaspoon salt. Adjust salt to your taste.
- 1/4 cup ice water, plus more as needed. Ice water helps to create a smooth, creamy texture. Add it gradually.
- 2 tablespoons olive oil, for drizzling (optional). A drizzle of olive oil adds richness and visual appeal.
For the Wraps:
- 8 large flour tortillas (or your preferred type of wrap, such as whole wheat). Choose tortillas that are large enough to comfortably hold all the fillings.
- 1 cup shredded carrots. Shredded carrots add a nice crunch and sweetness.
- 1 cup shredded red cabbage. Red cabbage adds a vibrant color and a slightly peppery flavor.
- 1/2 cup chopped cucumber. Cucumber provides refreshing coolness and hydration.
- 1/2 cup chopped bell pepper (any color). Bell peppers add sweetness and color.
- 1/4 cup crumbled feta cheese (optional). Feta cheese adds a salty, tangy element. You can substitute with another cheese or omit altogether.
- 2 tablespoons chopped fresh parsley (optional). Fresh parsley adds a pop of freshness and color.
Important Note: All measurements are approximate. Feel free to adjust the quantities of vegetables and toppings to your liking. If you are using store-bought hummus, adjust the amount based on your preferred level of hummus in the wrap. Consider the size of your tortillas when determining the amount of hummus to use; you want enough to spread evenly but not so much that it overflows.
Equipment List
Making delicious and quick hummus wraps requires minimal equipment, but having the right tools will significantly enhance your efficiency and the final product’s quality. This list details the essential and recommended equipment, along with explanations to help you make informed choices.
Essential Equipment:
1. Food Processor: A food processor is crucial for achieving the smooth, creamy texture characteristic of good hummus. While you *could* make hummus by hand using a mortar and pestle (a significantly more laborious process!), a food processor will save you considerable time and effort. Look for a food processor with a minimum capacity of 4 cups, ensuring sufficient space for all the ingredients. A powerful motor is highly recommended for effectively processing chickpeas and achieving a perfectly smooth consistency without overworking the motor.
2. Large Mixing Bowls (at least two): You’ll need at least two large mixing bowls. One will be used to prepare the hummus, and the other to assemble the wraps. Choose bowls that are large enough to comfortably accommodate all the ingredients without overcrowding. A 5-quart to 8-quart capacity is ideal for both the hummus preparation and wrap assembly stages. Stainless steel bowls are recommended for their durability and ease of cleaning.
3. Measuring Cups and Spoons: Accurate measurements are essential for achieving the desired consistency and flavor in your hummus. Invest in a set of standard measuring cups (1 cup, ½ cup, ¼ cup, and 1/3 cup) and spoons (1 tablespoon, 1 teaspoon, ½ teaspoon). Using accurate measuring tools is paramount for consistent results, particularly when working with ingredients like tahini and lemon juice which can significantly impact the final taste.
4. Sharp Knife: A sharp knife is necessary for chopping vegetables like onions, garlic, and peppers for additions to your hummus or for preparing your fillings for the wraps themselves. A chef’s knife (8-10 inches) is versatile and ideal for this task. A dull knife is dangerous and will make chopping more difficult. Always ensure your knife is sharp and handle it carefully.
5. Cutting Board: A sturdy cutting board is essential for safe and efficient food preparation. Choose a cutting board made from a durable material like wood or plastic that is large enough to comfortably accommodate your chopping tasks. Use separate cutting boards for raw meats and vegetables to prevent cross-contamination.
Recommended Equipment:
1. Rubber Spatula: A rubber spatula is helpful for scraping down the sides of the food processor bowl to ensure all ingredients are incorporated smoothly. It’s also useful for transferring the hummus to a serving bowl and for spreading the hummus evenly onto the wraps.
2. Large Flat Spatula: A large flat spatula, or a bench scraper, is useful for efficiently spreading the hummus onto the wraps. This ensures even coverage and prevents tearing of the tortillas or pita bread.
3. Measuring spoons for spices: Accurate measuring of spices is essential for consistent flavor. Having smaller measuring spoons, especially those measuring 1/8th and 1/4th of a teaspoon, is particularly helpful for small amounts of spice.
Cleaning and Maintenance: Always clean your equipment immediately after use. Food processors often have specific cleaning instructions, so it’s crucial to follow these carefully. Proper cleaning and maintenance will ensure the longevity of your equipment.
Preparation of Ingredients
Before you start assembling your delicious and quick hummus wraps, efficient ingredient preparation is key. This section details the steps to properly prepare all the components for optimal flavor and texture. We’ll be focusing on the vegetables, as they form a significant part of the wrap’s appeal.
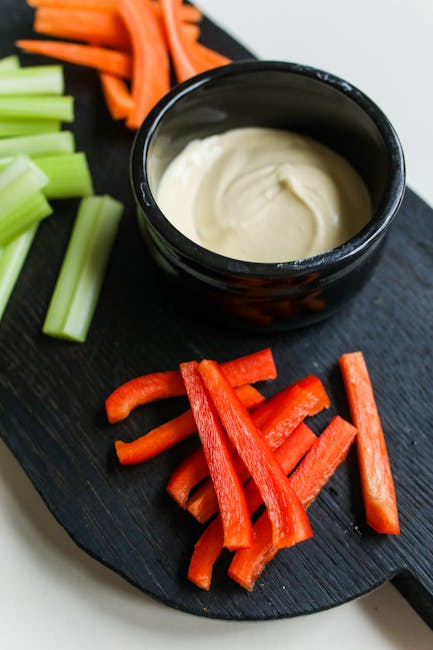
Vegetables: We’ll use a combination of crunchy and colorful vegetables for a vibrant and satisfying wrap. For this recipe, we need the following:
- 1 large red bell pepper (approximately 200g): Wash thoroughly and remove the stem, seeds, and membranes. Avoid leaving any white pith, as it can be bitter.
- 1 cucumber (approximately 200g): Wash well and trim the ends. If using a seedy cucumber, consider halving it lengthwise and scooping out some of the seeds to reduce excess moisture in the wrap.
- 1/2 cup cherry tomatoes (approximately 100g): Wash and halve or quarter larger tomatoes for easier eating. Smaller tomatoes can be used whole.
- 1/2 red onion (approximately 100g): Peel the onion. To minimize strong onion flavor, soak the thinly sliced onion in cold water for 10-15 minutes before using. This will help to remove some of the pungent compounds.
- 1/2 cup shredded carrots (approximately 50g): Pre-shredded carrots from a bag are perfectly acceptable for convenience. If shredding your own carrots, ensure they are peeled and washed.
Chopping Techniques: The way you chop your vegetables impacts both the visual appeal and the eating experience of the wrap. Aim for consistent sizes to ensure balanced flavors and textures in each bite.
For the bell pepper, slice it in half lengthwise, then remove the seeds and membranes. Next, slice the halves into thin strips, aiming for approximately 1/4-inch thickness. Consistent thickness ensures even cooking and prevents some pieces from being undercooked or overcooked.
The cucumber should be sliced into half-moons or thin sticks, depending on your preference. Again, aiming for approximately 1/4-inch thickness is ideal. For a crispier texture, do not salt the cucumber before using. Salting draws out moisture and can make the cucumber soggy.
The red onion should be thinly sliced, then soaked in cold water, as mentioned previously. This step is especially important for those sensitive to strong onion flavors. After soaking, gently pat the onion slices dry with paper towels to remove excess moisture.
Finally, the carrots and cherry tomatoes require minimal preparation. Simply halve or quarter the tomatoes if necessary and use pre-shredded or freshly shredded carrots as desired. Ensure all vegetables are thoroughly washed and dried before assembling your wraps.
By following these simple steps and paying attention to the details, you can ensure your hummus wraps are not only quick and easy to prepare but also visually appealing and bursting with fresh, vibrant flavors.
Hummus Preparation (if making from scratch)
While store-bought hummus is convenient, making your own allows for complete control over ingredients and flavor. This recipe yields approximately 2 cups of creamy hummus.
Ingredients:
- 1 cup dried chickpeas, soaked overnight (or 1 (15-ounce) can chickpeas, rinsed and drained)
- 1/2 cup tahini (ensure it’s fresh for best flavor and texture)
- 1/4 cup lemon juice (freshly squeezed is highly recommended)
- 2 cloves garlic, minced (adjust to your preference)
- 1 teaspoon ground cumin
- 1/2 teaspoon salt (or to taste)
- 1/4 cup ice water (or more, as needed for desired consistency)
- 2 tablespoons olive oil, plus extra for drizzling (optional)
- Paprika, for garnish (optional)
Instructions:
If using dried chickpeas: Rinse the soaked chickpeas thoroughly. Place them in a large pot, cover with fresh water by about 2 inches, and bring to a boil. Reduce heat to low, cover, and simmer for 60-90 minutes, or until very tender. Drain well and set aside. Properly cooking the chickpeas is crucial for a smooth hummus. Undercooked chickpeas will result in a grainy texture.
If using canned chickpeas: Rinse and drain the chickpeas thoroughly. This step removes excess starch and helps achieve a smoother hummus. You may optionally peel the skins off the chickpeas for an extra-smooth consistency, though this is time-consuming.
Combine the chickpeas (whether cooked from dried or canned), tahini, lemon juice, minced garlic, cumin, and salt in a food processor. Process until completely smooth, scraping down the sides as needed. Start on a low speed and gradually increase to avoid splattering.
With the motor running, slowly add the ice water, one tablespoon at a time, until you reach your desired consistency. Adding ice water gradually helps maintain a cool temperature, preventing the hummus from becoming oily. If using canned chickpeas, you may need less water than specified.
Once the hummus is smooth and creamy, drizzle in the olive oil while the food processor is running. This creates a beautiful swirl and adds richness. Taste and adjust seasoning as needed, adding more lemon juice, salt, or garlic to your preference.
Transfer the hummus to a bowl, cover, and refrigerate for at least 30 minutes to allow the flavors to meld. This step significantly enhances the taste. Before serving, drizzle with extra olive oil and sprinkle with paprika for a vibrant presentation. Serve chilled with your favorite hummus wraps!
Professional Recommendation: For an even smoother hummus, you can strain the cooked chickpeas through a fine-mesh sieve before blending. This removes any remaining skins or small particles for an ultra-silky texture. However, this will also remove some of the chickpeas’ natural fibers, slightly altering the final consistency.
Wrap Assembly: Building Your Perfect Hummus Wrap
With your delicious hummus and flavorful fillings prepared, it’s time to assemble your wraps! This seemingly simple step can significantly impact the overall eating experience, so let’s ensure we do it right. We’ll be aiming for a balanced, flavorful, and structurally sound wrap that won’t fall apart mid-bite.
Begin with the right tortilla: We recommend using large flour tortillas (around 10-12 inches in diameter). These offer a good balance of flexibility and sturdiness. Warming the tortillas slightly before assembly makes them more pliable and prevents cracking. You can achieve this by briefly microwaving them (10-15 seconds) or warming them in a dry skillet over medium-low heat for a few seconds per side. Avoid over-warming, as this can lead to dryness and tearing.
Hummus Application: Spread a generous, even layer of hummus across the center of the tortilla, leaving about a 1-inch border on all sides. Aim for approximately 2-3 tablespoons of hummus per wrap, adjusting according to your preference. A thinner layer might result in a drier wrap, while an overly thick layer could make it difficult to seal and potentially lead to messy spills.
Strategic Filling Placement: Arrange your fillings strategically on top of the hummus. Avoid overcrowding; too many ingredients will make the wrap difficult to roll and might cause it to burst. A good approach is to layer the ingredients: start with heartier vegetables like chopped bell peppers or cucumbers, followed by softer ingredients like spinach or sprouts. Then add your protein source (e.g., falafel, grilled chicken, or chickpeas), and finish with any extra toppings like feta cheese or a sprinkle of paprika.
The Rolling Technique: This is crucial for wrap integrity! Begin by folding the bottom edge of the tortilla over the fillings. Then, fold in the left and right sides, tucking them in tightly to create neat, contained edges. Finally, tightly roll the wrap from the bottom up, creating a firm cylinder. Don’t roll too tightly, as this can cause the wrap to crack, but ensure it’s secure enough to hold all the ingredients.
Optional Finishing Touches: Once rolled, you can lightly brush the outside of the wrap with olive oil for extra flavor and to prevent sticking. You can also cut the wrap in half diagonally for easier handling and a more aesthetically pleasing presentation. Consider using toothpicks or small skewers to secure the wrap, particularly if you’re using a lot of liquid ingredients or if the filling is particularly heavy.
Professional Tip: Experiment with different filling combinations and find your favorites. Don’t be afraid to get creative! The beauty of hummus wraps lies in their adaptability. If you’re making wraps ahead of time for lunch, consider wrapping them individually in plastic wrap or placing them in an airtight container to maintain freshness and prevent them from drying out.
Serving Suggestions
Your Quick and Easy Hummus Wraps are incredibly versatile and can be served in a variety of ways, depending on the occasion and your personal preferences. The following suggestions offer a range of options, from simple everyday meals to more elaborate presentations for gatherings.
For a quick and easy weekday lunch: Simply prepare your wraps as directed, ensuring the hummus is evenly spread and the fillings are distributed for optimal flavor and texture. A single wrap makes a satisfying and nutritious lunch. Consider adding a side of baby carrots or cucumber slices for extra crunch and freshness. Approximately 1/2 cup of chopped vegetables complements a single wrap perfectly.
Boosting the protein: To make your wraps more substantial and protein-rich, incorporate grilled chicken, chickpeas, or falafel. We recommend adding approximately 3-4 ounces of grilled chicken, 1/2 cup of cooked chickpeas, or 2-3 falafel balls per wrap. These additions not only add protein but also enhance the overall flavor profile. Ensure the protein is cut into bite-sized pieces for easy eating.
Elevating the presentation for a party or gathering: For a more visually appealing presentation, consider cutting the wraps into smaller, more manageable pieces. Cut each wrap into four triangles or six smaller rolls. Arrange these on a platter garnished with fresh herbs like parsley or cilantro, a sprinkle of paprika, and a drizzle of extra virgin olive oil. This creates an elegant and inviting appetizer spread. For a party of 10, we suggest preparing approximately 15-20 wraps.
Creative filling combinations: Don’t be afraid to experiment with different fillings to customize your wraps. Consider adding roasted red peppers (approximately 1/4 cup per wrap), sautéed mushrooms (1/4 cup per wrap), or sun-dried tomatoes (2-3 pieces per wrap) for extra flavor and color. A sprinkle of feta cheese (1 tablespoon per wrap) adds a salty and tangy element. Remember to balance the flavors and textures for the best eating experience.
Accompanying dips and sauces: While the hummus itself is a delicious dip, you can enhance the experience further with additional condiments. A dollop of tzatziki sauce, a spicy harissa paste, or a simple balsamic glaze adds a delicious contrast. Serve these dips in small bowls alongside the wraps for easy dipping. A small amount, approximately 2 tablespoons per person, is sufficient.
Storage and reheating: Leftover wraps can be stored in an airtight container in the refrigerator for up to 3 days. To reheat, gently warm them in a microwave for 30-60 seconds or in a skillet over medium heat for 1-2 minutes per side. Avoid over-heating, as this can make the wraps dry and brittle.
Dietary considerations: These wraps are easily adaptable to various dietary needs. For a vegan option, ensure all ingredients are plant-based. For gluten-free wraps, use gluten-free tortillas. Always check ingredient labels to ensure they meet your specific dietary requirements.
Recommendations for Quick and Easy Hummus Wraps
These Quick and Easy Hummus Wraps are a fantastic option for a light lunch, a quick snack, or even a satisfying dinner. Their versatility allows for endless customization, making them perfect for individuals with diverse dietary needs and preferences. To maximize enjoyment and nutritional value, we offer the following recommendations:
Serving Suggestions: For a complete and balanced meal, consider serving these wraps with a side salad. A simple green salad with a light vinaigrette or a colorful Mediterranean salad with chopped cucumbers, tomatoes, and olives would complement the flavors beautifully. Alternatively, a side of roasted vegetables, such as sweet potatoes or bell peppers, adds extra nutrients and a satisfying textural contrast. For a heartier meal, serve the wraps alongside a soup, like lentil soup or tomato soup. Consider adding a sprinkle of extra herbs or spices, such as paprika or za’atar, to enhance the flavor profile.
Storage Conditions: For optimal freshness, consume your hummus wraps immediately after preparation. However, if leftovers remain, store them properly to maintain quality. Wrap individual wraps tightly in plastic wrap or place them in an airtight container. Refrigerate the wraps for up to 2 days. Note that the tortilla may become slightly softer after refrigeration; you can gently reheat it in a microwave or pan for a crispier texture if desired. Do not freeze these wraps as the texture of the tortilla may significantly alter.
Complementary Dishes: The mild flavor of hummus makes it a wonderful base for a variety of additions. Consider experimenting with different fillings beyond the basic recipe. Grilled chicken or fish adds protein, while roasted vegetables provide added nutrients and flavor. A sprinkle of feta cheese adds a salty tang, while a drizzle of hot sauce provides a kick. Explore different types of hummus, such as roasted red pepper hummus or cilantro-jalapeño hummus, to vary the flavor profile of your wraps. The possibilities are truly endless!
Nutritional Information (Approximate per wrap, based on a standard recipe): The exact nutritional content will vary depending on the specific ingredients used. However, a typical hummus wrap might contain approximately 350-450 calories, 15-20g of protein, 40-50g of carbohydrates, and 15-20g of fat. This includes the calories from the tortilla, hummus, and any added fillings. This is an estimate, and it is recommended to use a nutrition calculator to determine the exact nutritional values based on your specific recipe and ingredient quantities. Please note that these are averages and can vary depending on the brand and type of ingredients used.
Important Note: Always check the nutritional information of individual ingredients to accurately determine the overall nutritional content of your hummus wraps, especially if you are using pre-made ingredients or substituting ingredients in the recipe.