Perfectly grilled pork ribs, a culinary delight enjoyed across the globe, boast a rich and fascinating history interwoven with various cultures. While pinpointing the exact origin is difficult, evidence suggests that the practice of cooking ribs dates back centuries, possibly even millennia. Early forms of barbecued meats, including ribs, were likely employed by various ancient civilizations as a practical way to preserve and cook tougher cuts of meat over open fires. Archaeological findings suggest that methods similar to grilling and smoking were used in ancient Egypt and parts of Asia as early as the Bronze Age. The specific preparation of pork ribs, however, likely evolved alongside the domestication and widespread consumption of pigs.
The development of distinct regional styles of pork rib preparation emerged later, heavily influenced by local traditions and available ingredients. In the American South, for example, the unique style of barbecue, often utilizing slow-smoking techniques over hickory or oak wood, became deeply ingrained in the culture and identity of the region. This tradition, born from necessity and ingenuity, transformed pork ribs into a celebrated centerpiece of Southern cuisine. The proliferation of barbecue joints and competitions speaks to the lasting impact of this culinary heritage. Statistics show that the barbecue industry in the United States alone generates billions of dollars annually, with pork ribs consistently being a top-selling item.
Beyond the American South, pork ribs hold cultural significance in numerous other parts of the world. In Korea, galbi, a grilled marinated short rib, is a beloved national dish, often served during celebrations and family gatherings. The Korean preparation emphasizes a flavorful marinade, typically incorporating soy sauce, garlic, ginger, and sesame oil, resulting in tender and intensely aromatic ribs. Similarly, in many parts of the Caribbean, ribs are frequently prepared using jerk seasoning, a blend of spices that includes scotch bonnet peppers, allspice, and thyme, reflecting the region’s diverse culinary influences. This highlights the adaptability of the dish and its capacity to integrate local flavors and traditions.
The enduring appeal of perfectly grilled pork ribs stems from a combination of factors. The tender, fall-off-the-bone meat, the smoky aroma, and the rich, savory flavors create a truly satisfying culinary experience. The versatility of the dish also contributes to its widespread popularity – it can be enjoyed as a casual meal, a celebratory feast, or even a sophisticated fine-dining offering. Whether prepared with a simple dry rub or an elaborate marinade, perfectly grilled pork ribs represent a timeless culinary tradition that continues to evolve and delight taste buds across the globe. It’s estimated that millions of pounds of pork ribs are consumed annually worldwide, a testament to its enduring popularity and universal appeal.
Ingredients and Measurements
The success of perfectly grilled pork ribs hinges on using high-quality ingredients and precise measurements. Don’t skimp on the quality of your ribs; the better the starting product, the better the final result. We’ll be focusing on a classic dry rub and a simple mop sauce, but feel free to experiment with your own favorites!
For the Pork Ribs (approximately 3-4 pounds):
We recommend using St. Louis style ribs for this recipe, as they provide a good balance of meat and bone. However, baby back ribs will also work well, just adjust cooking times accordingly. Ensure your ribs are fresh and have a good layer of fat covering the meat. This fat renders during cooking, adding incredible flavor and moisture.
For the Dry Rub:
- 1/4 cup packed light brown sugar
- 2 tablespoons paprika (smoked paprika is recommended for a deeper flavor)
- 2 tablespoons coarse ground black pepper
- 1 tablespoon garlic powder
- 1 tablespoon onion powder
- 1 tablespoon kosher salt
- 1 tablespoon cayenne pepper (optional, for heat)
- 1 teaspoon ground cumin
- 1 teaspoon dried oregano
Precise measurements are crucial for a balanced dry rub. Using a kitchen scale will ensure the most consistent results. Don’t be afraid to adjust the spices to your preference, but start with this recipe as a baseline.
For the Mop Sauce (optional, but highly recommended):
- 1 cup apple cider vinegar
- 1/2 cup apple juice
- 1/4 cup brown sugar
- 2 tablespoons Worcestershire sauce
- 1 tablespoon Dijon mustard
- 1 teaspoon liquid smoke (optional, adds a smoky depth)
The mop sauce adds moisture and flavor throughout the cooking process. Feel free to adjust the sweetness and tanginess to your liking. A sweeter mop sauce pairs well with a spicier rub.
Other necessary items:
- Aluminum foil
- Grill (charcoal or gas)
- Meat thermometer
- Basting brush
- Spray bottle (for the mop sauce)
Having the right tools makes a significant difference in the cooking process. A meat thermometer is essential for ensuring the ribs are cooked to a safe internal temperature. Using a spray bottle for the mop sauce allows for even application without interrupting the cooking process.
Remember to always prioritize food safety. Ensure your ribs reach an internal temperature of at least 145°F (63°C) before serving to ensure they are fully cooked.
Equipment List
Grilling perfectly tender and flavorful pork ribs requires the right tools. This list details the essential equipment, along with recommendations for optimal performance and substitutions where possible. Having the right equipment will significantly enhance your grilling experience and contribute to the overall quality of your ribs.
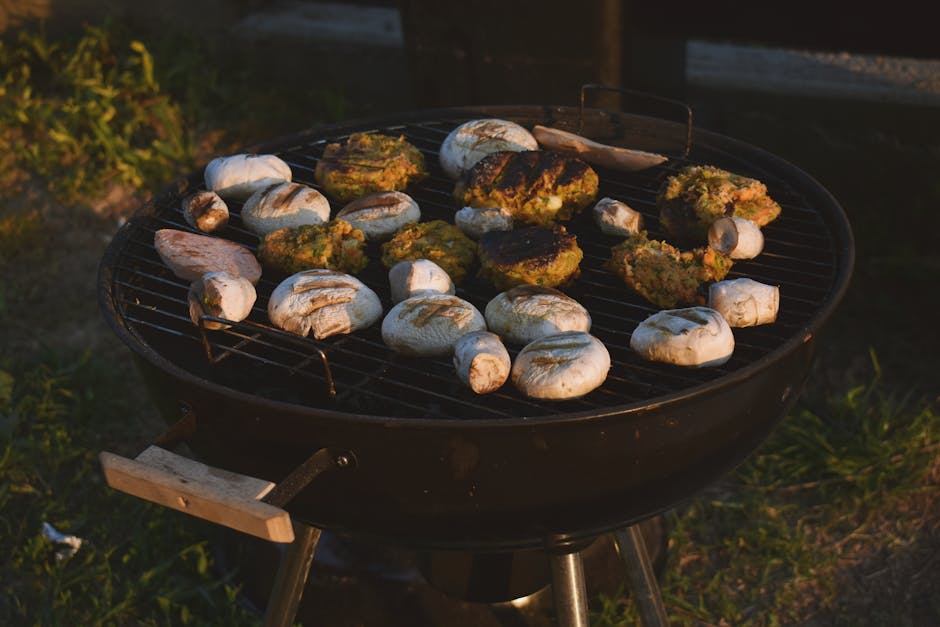
1. Grill: The foundation of any great rib cook is your grill. A charcoal grill is traditionally preferred for its ability to impart smoky flavor, but a gas grill can also produce excellent results with careful temperature control. For charcoal grilling, a standard 22-inch kettle grill or a larger offset smoker provides ample space for a full rack of ribs. If using a gas grill, ensure it has at least three burners to allow for indirect heat zones. Important: Regardless of your grill type, make sure it’s clean before you start. A dirty grill will impart unwanted flavors to your ribs.
2. Meat Thermometer: This is arguably the most important piece of equipment. A reliable instant-read meat thermometer, preferably with a probe that can be left in the meat during cooking, is essential for ensuring your ribs reach the perfect internal temperature of 195-205°F (90-96°C). A digital thermometer with a large, easy-to-read display offers superior accuracy. Avoid using a meat thermometer that relies on color changes as it is not reliable.
3. Grill Gloves: Protecting your hands from the heat is crucial. Heavy-duty grill gloves that are heat-resistant to at least 500°F (260°C) are a must-have for safely handling hot grates, pans, and ribs. Leather gloves offer excellent protection and durability. Never handle hot grill components without proper protection.
4. Grill Brush: Before you begin grilling, clean your grill grates thoroughly using a durable grill brush. A stiff-bristled brush is best for removing stubborn food residue. Important: Replace your grill brush regularly, especially if you notice any bristles are becoming loose or worn. Loose bristles can get embedded in food.
5. Basting Mop or Brush: A basting mop or a high-heat-resistant silicone basting brush is essential for applying your favorite rib glaze or sauce throughout the cooking process. A mop allows for more even distribution, particularly on larger cuts of meat. A silicone brush is easier to clean and can withstand higher temperatures. Consider having two: one for the initial basting and another for the final glaze to avoid cross-contamination.
6. Aluminum Foil: Heavy-duty aluminum foil is useful for creating a foil packet to wrap your ribs during the smoking/slow-cooking phase, helping to maintain moisture and tenderness. Use a large sheet, at least 18 x 24 , to ensure adequate coverage. Important: Avoid using flimsy foil as it may tear during handling.
7. Chimney Starter (for Charcoal Grills): If using a charcoal grill, a chimney starter is highly recommended for efficiently and safely lighting your charcoal. It allows for quick and even ignition, minimizing the need for lighter fluid. Avoid using lighter fluid as it can impart an undesirable taste to your ribs.
8. Meat Injector (Optional): While not strictly necessary, a meat injector can be used to inject a flavorful marinade into the ribs before grilling, enhancing their overall juiciness and flavor. Note: This is only recommended if you are comfortable with using this type of equipment.
9. Large Shallow Pan (Optional): A large, shallow pan placed beneath the ribs on the grill (especially during indirect cooking) can help catch any drippings, preventing flare-ups and keeping the grill clean.
Preparation of the Ribs (Trimming, etc.)
Before you even think about firing up the grill, proper preparation of your pork ribs is crucial for achieving that tender, fall-off-the-bone perfection. This involves trimming excess fat and membrane removal, both of which significantly impact the cooking process and final result.
Begin by inspecting your rack of ribs. Most racks will come with a thick layer of fat on the underside (the bone side) and a tough, silvery membrane on the back (meat side). Removing this membrane is essential. This membrane prevents the ribs from tenderizing properly and absorbing smoke and flavor effectively. Using a butter knife or a specialized rib membrane remover, carefully slide the knife under the membrane at one end of the rack. Once you get a good grip, gently but firmly peel it back, working your way across the entire length of the rack. It might tear in places, which is fine; just keep working until it’s completely removed.
Next, address the fat layer. Don’t remove all the fat. A thin layer of fat (about 1/8 to ¼ inch) is beneficial; it helps to keep the ribs moist during cooking and adds flavor. However, excessive fat can render the ribs greasy and hinder the browning process. Use kitchen shears or a sharp knife to trim away any excess fat. Aim for a relatively even layer across the entire rack. You want to remove any particularly thick chunks or sections that are significantly thicker than the desired ¼ inch. Remember, you can always trim more, but you can’t add it back!
Consider the size of your ribs. A full rack typically weighs around 3 to 4 pounds. If you are working with a particularly large rack (over 4 pounds), you might consider cutting it in half for easier handling and more even cooking. This is especially helpful when grilling on a smaller grill. To cut the rack, use a meat cleaver or a very sharp knife, cutting through the bones between the sections. You’ll end up with two roughly equal halves.
Once you’ve trimmed the fat and removed the membrane, it’s a good idea to give the ribs a quick rinse under cold water. This helps to remove any loose bits of fat or membrane that may remain. Pat the ribs thoroughly dry with paper towels. Ensuring the ribs are completely dry is vital, as this aids in achieving a good sear on the grill.
Finally, consider your preferred rib cut. While St. Louis-style ribs are popular (trimmed to a rectangular shape), you can leave them as they are. The trimming process focuses on removing excess fat and membrane, not necessarily shaping the rack into a specific form. The choice is entirely yours based on preference and desired aesthetics.
With your ribs properly trimmed and prepped, you’re now ready to move on to the next stage of creating perfectly grilled pork ribs. Remember, patience and attention to detail during this preparation phase will lead to a significantly better final product.
Dry Rub Preparation & Application
The dry rub is the cornerstone of delicious, flavorful ribs. A well-crafted rub penetrates the meat, adding depth and complexity during the cooking process. This section details the preparation and application of a versatile dry rub, perfect for pork ribs.
Recipe: Classic BBQ Pork Rib Rub (Yields enough for 2 racks of ribs)
- 1/4 cup packed light brown sugar
- 2 tablespoons paprika (sweet or smoked, depending on your preference)
- 2 tablespoons garlic powder
- 1 tablespoon onion powder
- 1 tablespoon black pepper, freshly ground
- 1 tablespoon kosher salt
- 1 tablespoon chili powder
- 1 teaspoon cayenne pepper (optional, for extra heat)
- 1 teaspoon dried oregano
- 1 teaspoon dried thyme
Preparation: In a medium bowl, whisk together all the dry rub ingredients until thoroughly combined. Ensure there are no clumps of spices. Proper mixing is crucial for even flavor distribution. You can adjust the amount of cayenne pepper to suit your spice preference; start with less and add more if desired. Store the unused rub in an airtight container in a cool, dark place for up to 6 months.
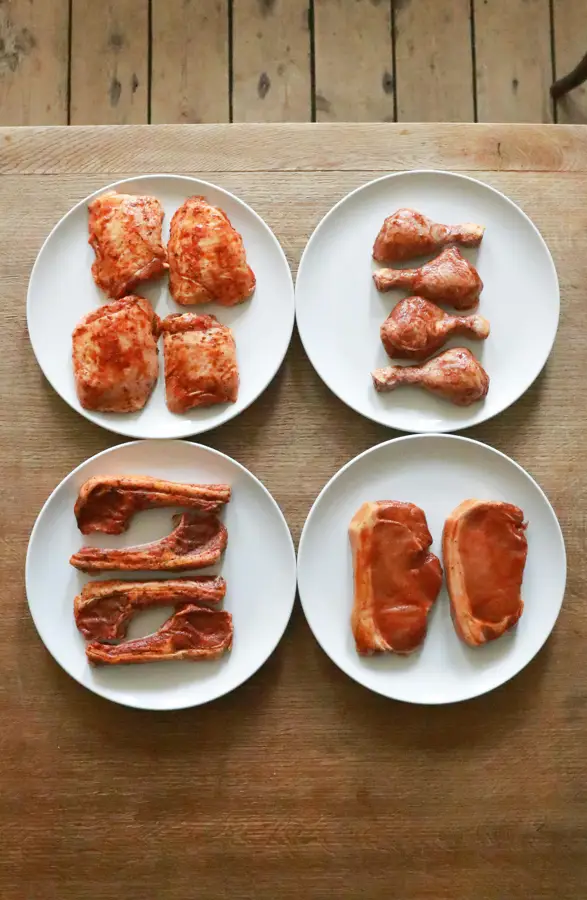
Application: The key to perfectly rubbed ribs lies in proper application. Begin by preparing your ribs. Remove the membrane from the back of the rack (this is crucial for tender ribs). Pat the ribs dry with paper towels; moisture hinders the rub’s ability to adhere properly. A dry surface is essential for optimal rub adhesion.
Generously apply the dry rub to all surfaces of the ribs, ensuring complete coverage. Use your hands to firmly press the rub into the meat; this helps the spices penetrate the surface and develop a flavorful crust. Don’t be shy with the rub; a thicker coating leads to more intense flavor. Work the rub into the crevices between the ribs as well.
After applying the rub, let the ribs rest uncovered in the refrigerator for at least 2 hours, or preferably overnight. This allows the rub to fully penetrate the meat and enhances the flavor profile significantly. This step is often overlooked, but it is vital for achieving maximum flavor development.
Professional Tip: For an extra layer of flavor, consider adding a thin layer of your favorite BBQ sauce to the ribs after the initial rub has rested. This adds moisture and enhances the caramelization process during grilling.
Important Note: The amount of rub you use can be adjusted based on your preference and the size of your ribs. This recipe is a guideline; feel free to experiment with different spice combinations to create your signature rub. The most important thing is to have fun and enjoy the process of creating delicious, perfectly grilled pork ribs!
Marinade (Optional) Preparation & Application
While perfectly grilled pork ribs can be delicious without a marinade, a well-crafted marinade can significantly enhance their flavor and tenderness. Marinades work by breaking down tough connective tissues in the meat, infusing it with flavor, and adding moisture. This section outlines how to prepare and apply a flavorful marinade to your ribs.
Choosing Your Marinade: The best marinade depends on your personal preference. A classic choice is a vinegar-based marinade, known for its ability to tenderize the meat. Alternatively, a sweeter marinade using brown sugar or honey adds a delightful caramelization to the ribs during grilling. You could also opt for a more savory marinade incorporating soy sauce, Worcestershire sauce, and garlic.
Recipe for a Classic Vinegar-Based Marinade: This recipe is designed for approximately 3 lbs of ribs. You can easily scale it up or down as needed.
- 1 cup apple cider vinegar
- 1/2 cup olive oil
- 1/4 cup Worcestershire sauce
- 4 cloves garlic, minced
- 2 tablespoons brown sugar
- 1 tablespoon paprika
- 1 teaspoon onion powder
- 1 teaspoon black pepper
- 1/2 teaspoon cayenne pepper (optional, for heat)
Preparing the Marinade: In a medium-sized bowl, whisk together all the ingredients until well combined. Ensure the brown sugar is fully dissolved for even flavor distribution. If you’re using a blender, you can blend the marinade for a smoother consistency. Taste the marinade and adjust seasonings as needed. Remember, you can always add more, but you can’t take it away.
Applying the Marinade: The longer the ribs marinate, the more flavorful and tender they will be. For optimal results, marinate the ribs for at least 4 hours, and ideally, overnight or even up to 24 hours. Place the ribs in a large resealable bag or a shallow dish. Pour the marinade over the ribs, ensuring they are fully coated. If using a bag, seal it tightly and turn it occasionally to ensure even distribution. If using a dish, cover it tightly with plastic wrap.
Important Considerations: Never marinate your ribs at room temperature, always refrigerate. Discard any leftover marinade after use. Do not reuse marinade that has been in contact with raw meat. When grilling, remove the ribs from the marinade and discard the excess. This prevents flare-ups on the grill caused by the sugar content in many marinades.
Alternative Marinade Application: For a drier rub-like application, you can reduce the liquid ingredients in the recipe, increasing the dry spices. Apply this liberally to the ribs and let them sit, refrigerated, for at least 4 hours before grilling. This method creates a flavorful crust while still enhancing moisture retention.
Experiment with different marinades to find your perfect flavor profile. The key is to use high-quality ingredients and allow ample time for the marinade to work its magic. Happy grilling!
Cooking Time & Temperature Guide (for different cooking methods)
Achieving perfectly tender and flavorful grilled pork ribs requires careful attention to cooking time and temperature. The method you choose – whether it’s low and slow on the smoker, a quicker grill method, or a combination – significantly impacts the results. This guide provides detailed information to help you navigate the process successfully.
Low and Slow (Smoker Method)
This method yields incredibly tender, fall-off-the-bone ribs. Ideal for: achieving maximum flavor and tenderness. Temperature: 225-250°F (107-121°C). Time: 6-8 hours, or even longer, depending on the thickness and size of the ribs. Important Note: Use a meat thermometer to ensure the internal temperature reaches 195-205°F (91-96°C) for optimal tenderness. Recommendation: Apply a generous amount of your favorite barbecue rub before smoking. Consider spritzing with apple cider vinegar or apple juice every hour to maintain moisture.
3-2-1 Method (Combination Method)
This popular technique combines smoking, wrapping, and grilling for a perfect balance of smoke and tenderness. Phase 1 (3 hours): Smoke uncovered ribs at 225-250°F (107-121°C). Phase 2 (2 hours): Wrap ribs tightly in aluminum foil with 1/4 cup of your favorite liquid (apple juice, beer, or broth). Continue cooking at 225-250°F (107-121°C). Phase 3 (1 hour): Unwrap ribs and return them to the smoker or grill (increase heat to 275-300°F (135-149°C)) to crisp the bark. Important Note: Monitor the internal temperature throughout the process. The final internal temperature should reach 195-205°F (91-96°C). Recommendation: Use a good quality butcher paper instead of aluminum foil for wrapping in Phase 2; it allows better moisture retention and results in a better bark.
Faster Grill Method (Direct Heat)
This method is ideal for a quicker meal but requires more attention to avoid burning. Temperature: Medium-high heat (around 350-400°F or 177-204°C). Time: Approximately 1.5-2 hours. Important Note: Because this method cooks much faster, it’s crucial to use a meat thermometer to check the internal temperature frequently. You’ll need to continuously flip the ribs to ensure even cooking and prevent burning. Recommendation: Use a marinade for extra flavor and moisture before grilling. This method is best suited for thinner, baby back ribs.
Tips for Success
Always use a meat thermometer: Don’t rely on visual cues alone. A meat thermometer is the only way to ensure your ribs are cooked to perfection. Let the ribs rest: After cooking, let the ribs rest for at least 15-20 minutes before slicing. This allows the juices to redistribute, resulting in more tender and flavorful meat. Consider your rib type: Baby back ribs are generally thinner and cook faster than St. Louis-style ribs. Adjust cooking times accordingly.
Remember, these are guidelines. Cooking times may vary depending on your equipment, the size and thickness of the ribs, and your desired level of doneness. Always monitor the internal temperature and adjust cooking time as needed to achieve your perfect grilled pork ribs.
Perfectly Grilled Pork Ribs: Recommendations
To ensure your perfectly grilled pork ribs remain a culinary triumph, follow these recommendations for optimal enjoyment and preservation.
Serving Suggestions: For a truly memorable experience, serve your ribs hot off the grill. Their tender meat will practically fall off the bone, making them incredibly easy to eat. Consider providing various accompaniments to enhance the flavors. We strongly recommend serving them with classic BBQ sauces, offering a range of spice levels to cater to different preferences. A tangy vinegar-based sauce, a smoky tomato-based sauce, and a sweet and spicy option will provide a delightful variety. Don’t forget napkins – these ribs are messy in the best possible way!
Complementary Dishes: The richness of the perfectly grilled pork ribs pairs beautifully with a variety of side dishes. Coleslaw is a timeless classic, offering a refreshing contrast to the richness of the meat. The creamy texture and slight tanginess cut through the fattiness beautifully. Consider adding a vibrant and fresh corn salad, perhaps with a lime vinaigrette, for a lighter and zesty counterpoint. For a more substantial side, baked beans, potato salad, or mac and cheese are all excellent choices. These provide a comforting and satisfying complement to the main course. A simple green salad with a light vinaigrette can also add a fresh and healthy element to the meal.
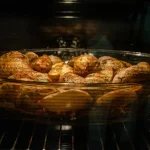
Storage Conditions: Leftover ribs should be stored properly to maintain their quality. Allow the ribs to cool completely before storing them in an airtight container in the refrigerator. They will keep for up to 3-4 days. To prevent them from drying out, consider wrapping them tightly in plastic wrap before placing them in the container. For longer storage, you can freeze the ribs. Wrap them tightly in freezer-safe plastic wrap and then place them in a freezer bag to prevent freezer burn. Frozen ribs will typically last for 2-3 months. When reheating, avoid the microwave, as this can make the meat tough. Instead, gently reheat them in a low oven or on a grill until warmed through.
Nutritional Information (per 3-ounce serving, approximate values): The nutritional content of grilled pork ribs can vary depending on the cooking method and cut of meat. However, a typical 3-ounce serving might contain approximately: Calories: 250-350; Protein: 20-25 grams; Fat: 15-25 grams; Saturated Fat: 5-10 grams; Cholesterol: 70-90 mg; Sodium: 200-400 mg. These values are estimates and may differ based on the specific recipe and ingredients used. It’s important to note that pork ribs are a relatively high-fat food, so moderation is key. Remember to check the nutritional information of any added sauces or side dishes to get a complete picture of your meal’s nutritional content.
Important Note: Always ensure your pork ribs are cooked to a safe internal temperature of 145°F (63°C) to prevent foodborne illness. Use a meat thermometer to check the temperature in the thickest part of the meat.