The seemingly simple soft-boiled egg, a culinary delight enjoyed across the globe, boasts a surprisingly rich and complex history. While pinpointing its exact origin is impossible, evidence suggests that the practice of cooking eggs – and specifically, boiling them to varying degrees of doneness – dates back millennia. Archaeological findings indicate egg consumption was prevalent in ancient civilizations, with evidence suggesting boiling techniques were employed as early as the Neolithic period. The precise method of achieving the *perfect* soft-boiled egg, however, likely evolved gradually, alongside advancements in cookware and a growing understanding of heat control.
The soft-boiled egg’s cultural significance varies widely. In many cultures, it’s a humble yet cherished breakfast staple, a quick and nutritious way to start the day. In Japan, for example, the perfectly cooked onsen tamago (hot spring egg), characterized by its creamy yolk and gently set white, is a culinary icon, often enjoyed in ramen or as a standalone dish. Similarly, in the UK, the soft-boiled egg features prominently in traditional breakfast fare, sometimes served with soldiers (toast fingers) for dipping into the runny yolk. This widespread acceptance speaks to the dish’s versatility and adaptability across different culinary traditions.
The appeal of the soft-boiled egg lies in its textural contrast: the firm yet tender white surrounding a luxuriously molten yolk. This texture is a result of precise cooking time and temperature control, a delicate balance that many home cooks strive to master. Interestingly, achieving this perfection is a subject of much debate and experimentation, with countless online forums and articles dedicated to the optimal cooking time (generally ranging from 4-7 minutes depending on egg size and desired yolk consistency). Studies have even explored the science behind egg-white coagulation and yolk viscosity, further demonstrating the surprisingly intricate nature of this seemingly simple dish.
Beyond its culinary appeal, the soft-boiled egg also holds nutritional value. Eggs are an excellent source of protein and essential nutrients, including choline, vitamin D, and various minerals. The soft-boiled method helps retain these nutrients, minimizing loss compared to other cooking methods. While exact global consumption statistics for soft-boiled eggs are unavailable, their popularity is undeniable, reflected in their ubiquitous presence across breakfast menus, recipes, and everyday culinary practices worldwide. The enduring appeal of this seemingly simple dish highlights the power of perfect technique and the enduring satisfaction of a perfectly cooked egg.
Ingredients and Measurements
The beauty of a perfect soft-boiled egg lies not just in the technique, but also in the quality of the ingredients. While there’s only one main ingredient, the nuances in its selection and preparation significantly impact the final result. We’ll focus on achieving the optimal balance of a perfectly set white and a luxuriously runny yolk.
Eggs: The cornerstone of our recipe. We recommend using the freshest eggs possible. Freshness directly impacts the texture and firmness of both the white and yolk. Older eggs tend to have a wider, more watery white, making it harder to achieve that velvety consistency. Aim for eggs that are no more than a week old. You can check the date stamped on the carton or perform a simple freshness test by placing the egg in a bowl of water: a fresh egg will lie flat on its side, while an older egg will tilt upwards. For this recipe, you will need:
Quantity: 1 large egg per person. Adjust the number of eggs according to the number of servings required. The size of the egg can slightly affect cooking time; larger eggs will require a slightly longer cooking time.
Water: The medium through which the heat transfers to the egg. Sufficient water is crucial for even cooking and prevents the eggs from sticking to the bottom of the pan. Use cold, fresh water. Hot water will start the cooking process prematurely, potentially leading to uneven cooking and cracking. The amount of water should be generous: Use enough water to completely submerge the egg by at least 1 inch. For one egg, approximately 1 cup (240ml) of water is sufficient.
Salt (Optional): Adding a pinch of salt to the water has two benefits. First, it helps to season the egg subtly, adding a touch of flavor to both the white and yolk. Second, salt is believed to slightly strengthen the egg’s shell, reducing the risk of cracking during the cooking process. A small pinch, about 1/4 teaspoon per cup of water, is all that’s needed. Don’t overdo it, as an excessive amount of salt might alter the taste of the egg.
Vinegar (Optional): Similar to salt, adding a splash of white vinegar (approximately 1 teaspoon per cup of water) can also help prevent cracking. Vinegar is thought to help coagulate the egg white more quickly, sealing any small cracks that might form during cooking. However, it’s important to note that the addition of vinegar might subtly affect the taste, so use it according to your preference.
Ice Bath (Essential for immediate cooling): An ice bath is crucial for halting the cooking process immediately after boiling. This prevents overcooking and ensures a perfectly runny yolk. Prepare a bowl filled with ice water before you begin cooking. The ice bath will shock the eggs, stopping the heat transfer and preserving the ideal texture.
Equipment Needed
Achieving perfectly soft-boiled eggs hinges not only on precise timing but also on the right equipment. While seemingly simple, the tools you use can significantly impact the final result, ensuring a creamy yolk and a tender white every time. Let’s explore the essential equipment and some helpful extras.
Eggs: This might seem obvious, but choosing the right eggs is paramount. Fresh, large eggs are recommended. Older eggs tend to have a wider, more easily cracked, air pocket, making them more prone to breaking during cooking and resulting in uneven cooking. Aim for eggs that are a week or less old for optimal results. Approximately one egg per person is a good starting point, depending on your appetite.
Saucepan: A medium-sized saucepan, ideally between 1.5 to 2 quarts in capacity, is ideal. Avoid using a too-large saucepan as this will require more water, increasing cooking time and potentially resulting in overcooked eggs. A smaller saucepan, however, might lead to overcrowding and uneven heating. The saucepan should be made of a material that heats evenly, such as stainless steel or copper. Avoid non-stick pans for this application, as they may not offer sufficient heat distribution for consistent cooking.
Slotted Spoon: A slotted spoon is crucial for gently removing the eggs from the boiling water. Avoid using tongs, as they can easily crack the eggshells. Choose a slotted spoon with a wide, shallow bowl to comfortably accommodate the eggs without damaging them. The spoon’s slots should be sufficiently large to allow for easy water drainage, preventing excessive cooling.
Ice Bath: An ice bath is absolutely essential for stopping the cooking process immediately and preventing further cooking of the yolk. Prepare a large bowl filled with cold water and ice cubes. The water should be sufficient to fully submerge the eggs. The ice bath will quickly lower the egg’s temperature, ensuring a perfectly runny yolk and preventing the whites from becoming rubbery.
Timer: A reliable kitchen timer is vital for achieving the perfect soft-boiled egg consistency. Accurate timing is key. Even a minute or two difference can significantly change the egg’s texture. A digital timer with a loud alarm is preferred to ensure you don’t overcook the eggs. Alternatively, a traditional analog timer will also work effectively.
Optional but helpful equipment: An egg piercer can help prevent cracking during cooking by releasing internal pressure. A small bowl for cracking the eggs into before transferring to the saucepan can help reduce the chance of them breaking. Finally, a pair of kitchen shears or a sharp knife can be used for cleanly cutting the eggshells.
In summary: While you can achieve soft-boiled eggs with minimal equipment, having the right tools significantly enhances the process and results in consistently perfect eggs. Remember, quality equipment contributes to quality results, ensuring a delightful culinary experience.
Preparation Steps
Achieving perfectly soft-boiled eggs hinges on meticulous preparation. Ignoring even seemingly minor steps can lead to cracked shells, unevenly cooked yolks, or a generally disappointing result. Let’s delve into the crucial details.
Start with the freshest eggs possible. Older eggs tend to have a larger air pocket, increasing the likelihood of cracking during cooking. Check your eggs for cracks before you begin; discard any that are damaged. Room temperature eggs are ideal; they cook more evenly and are less prone to thermal shock, which can cause cracking. If your eggs are straight from the refrigerator, allow them to sit at room temperature for at least 30 minutes before cooking.
Gentle handling is key. Avoid dropping or bumping the eggs. Even a small impact can create hairline fractures that will lead to messy leakage during cooking. Handle the eggs with care throughout the entire process.
Prepare your pot and water. Use a medium-sized saucepan, preferably one with a thick bottom for even heat distribution, to prevent scorching. Fill the pot with enough cold water to completely submerge the eggs by at least an inch – approximately 2 cups of water for 6 large eggs. This ensures even cooking and prevents the eggs from sticking to the bottom of the pan.
Add a pinch of salt to the water (optional). Adding a teaspoon of salt to the water helps to prevent the eggs from cracking and also slightly seasons the egg white. This is a highly recommended step for achieving flawless results.
Gently place the eggs into the cold water. Do not drop them in; this can cause them to crack. Lower them in one by one, ensuring they are completely submerged.
Bring the water to a rolling boil over medium-high heat. Avoid a vigorous, aggressive boil, as this increases the risk of cracking. Once the water reaches a rolling boil, immediately reduce the heat to a gentle simmer. This is a crucial step; a rolling boil will result in overcooked whites and a hard-boiled egg.
Time your cooking precisely. The cooking time depends on your desired level of doneness:
- Very runny yolk (almost liquid): 3 minutes
- Runny yolk: 4-5 minutes
- Slightly runny yolk: 6 minutes
- Mostly set yolk: 7 minutes
These times are guidelines; adjust based on your stove and egg size. Start checking at the lower end of the time range to avoid overcooking.
Immediately transfer the eggs to an ice bath. Once the desired cooking time is reached, immediately remove the eggs from the heat using a slotted spoon and transfer them to a bowl filled with ice water. This stops the cooking process and prevents the yolk from continuing to cook, resulting in a perfectly soft, creamy texture.
Allow the eggs to cool completely in the ice bath before peeling. This will make peeling much easier and prevent the egg white from sticking to the shell.
Cooking Process (including timing based on desired yolk consistency)
Achieving the perfect soft-boiled egg hinges on precise timing and a consistent cooking process. The key is understanding that cooking time directly correlates with the yolk’s consistency. We’ll guide you through the steps, providing timings for various preferences.
Start with fresh, cold eggs. This is crucial for even cooking and preventing cracking. Room temperature eggs are more prone to cracking and uneven cooking. Gently lower the eggs into a saucepan using a spoon to avoid cracking them against the sides of the pan. Add enough cold water to cover the eggs by about an inch.
Bring the water to a rolling boil over medium-high heat. Once boiling, immediately reduce the heat to a gentle simmer. This is key to preventing the eggs from overcooking and ensuring a creamy yolk. A vigorous boil will cause the eggs to shake violently and potentially crack.
Timing is everything! Here’s a guide to cooking times based on your desired yolk consistency:
- Very runny yolk (almost liquid): 3 minutes
- Runny yolk with a slightly set edge: 4 minutes
- Creamy, mostly set yolk with a runny center: 5-6 minutes (This is generally considered the perfect soft-boiled egg)
- Mostly set yolk with a small runny center: 7 minutes
- Fully set yolk (approaching hard-boiled): 8+ minutes
Important Note: These timings are approximations and can vary slightly depending on the size of your eggs and your stove’s heat output. It’s always best to start with the shorter time and check your eggs, adding another 30 seconds if needed. After the cooking time is complete, immediately remove the eggs from the hot water using a slotted spoon.
Cooling and Peeling: Immediately transfer the cooked eggs to a bowl of ice water to stop the cooking process. This also makes peeling much easier. Let the eggs cool completely in the ice bath (at least 10 minutes). To peel, gently tap the egg all over on a hard surface to create cracks in the shell. Start peeling from the larger end, where there’s usually an air pocket. If the egg is still warm, it will be more difficult to peel.
Professional Recommendations: For consistently perfect results, consider using a timer. Even a few extra seconds can significantly alter the yolk’s consistency. Don’t overcrowd the saucepan; allow space between the eggs for even heat distribution. If you’re aiming for a consistently creamy yolk, the 5-6 minute mark is your sweet spot. Experiment to find your preferred cooking time based on your stove and egg size. Practice makes perfect!
Enjoy! Once peeled, your perfectly soft-boiled eggs are ready to be enjoyed on toast soldiers, in salads, or as a delicious stand-alone snack. Remember to adjust timings based on your personal preference, and don’t be afraid to experiment to achieve your ideal soft-boiled egg.
Cooling and Peeling Techniques
Achieving perfectly peeled soft-boiled eggs hinges significantly on the cooling and peeling process. A rushed or improper approach can lead to frustratingly sticky, ragged shells that leave bits clinging to the delicate egg white. Mastering these techniques guarantees a smooth, flawless result every time.
Immediate Cooling is Key: The most crucial step is to immediately stop the cooking process by transferring the eggs from the boiling water to an ice bath. This prevents further cooking, which can cause the egg white to become more firmly attached to the shell. Prepare your ice bath beforehand by filling a bowl with cold water and adding a generous amount of ice cubes – approximately 1 cup of ice per cup of water ensures a rapid temperature drop.
The Ice Bath Method: Gently lower the eggs into the ice bath using a slotted spoon. Ensure they are fully submerged. Allow them to cool completely in the ice bath for at least 10-12 minutes. This extended cooling period is essential for creating a slight separation between the egg white and the shell. Shorter cooling times can result in difficult peeling.
Gentle Tapping: Once the eggs are thoroughly chilled, remove them from the ice bath and gently tap them all over on a hard surface, such as a countertop. Use a firm but not forceful tap; the goal is to create tiny cracks in the shell, not to smash the egg. A rolling pin can also be used to apply even pressure across the egg’s surface.
The Rolling Technique: This is where the magic happens. Place the tapped egg on the countertop and gently roll it back and forth, applying light pressure. This helps to further separate the shell from the egg white. Continue rolling until you feel the shell beginning to loosen. You should hear a slight cracking sound as the shell separates. Avoid excessive force, as this can damage the egg.
Starting the Peel: Once the rolling is complete, find a small crack or a loose piece of shell. Gently begin peeling the shell away from the egg, working under the shell with your thumb or a spoon. Start peeling under running cold water; the water helps to further loosen the shell and prevents sticking.
Professional Tip: For particularly stubborn eggs, try adding a teaspoon of baking soda to the boiling water during the initial cooking process. This can help to subtly weaken the shell, making it easier to peel. Alternatively, you can carefully place the cooled egg in a jar and shake it gently for a few seconds to help loosen the shell.
Troubleshooting: If you still encounter difficulty, it might be because the eggs are too fresh. Older eggs generally peel more easily. Remember, patience is key! With practice, you’ll master the art of perfectly peeling soft-boiled eggs, resulting in a flawlessly smooth, creamy texture ready for your culinary creations.
Serving Suggestions
Perfect soft-boiled eggs are incredibly versatile and can be enjoyed in a multitude of ways, both as a standalone dish or as a delicious component in larger recipes. The creamy, runny yolk is the star of the show, so consider how best to showcase it.
For a simple yet elegant breakfast or snack: Carefully peel your perfectly soft-boiled egg and serve it immediately. A sprinkle of freshly ground sea salt and a generous grind of black pepper are all you need to enhance the natural flavors. Consider adding a dash of your favorite hot sauce for a touch of spice. For a richer experience, drizzle with a tablespoon of high-quality extra virgin olive oil. Approximately 1-2 teaspoons of olive oil per egg is ideal.
Elevate your toast: Soft-boiled eggs are a fantastic topping for toast or avocado toast. Slice the egg in half and gently spoon the yolk and white onto your toasted bread. For avocado toast, consider mashing half an avocado (approximately 1/2 medium avocado) onto whole-wheat toast and topping with your soft-boiled egg. A sprinkle of red pepper flakes adds a delightful kick. Ensure your toast is lightly buttered for optimal flavor and texture.
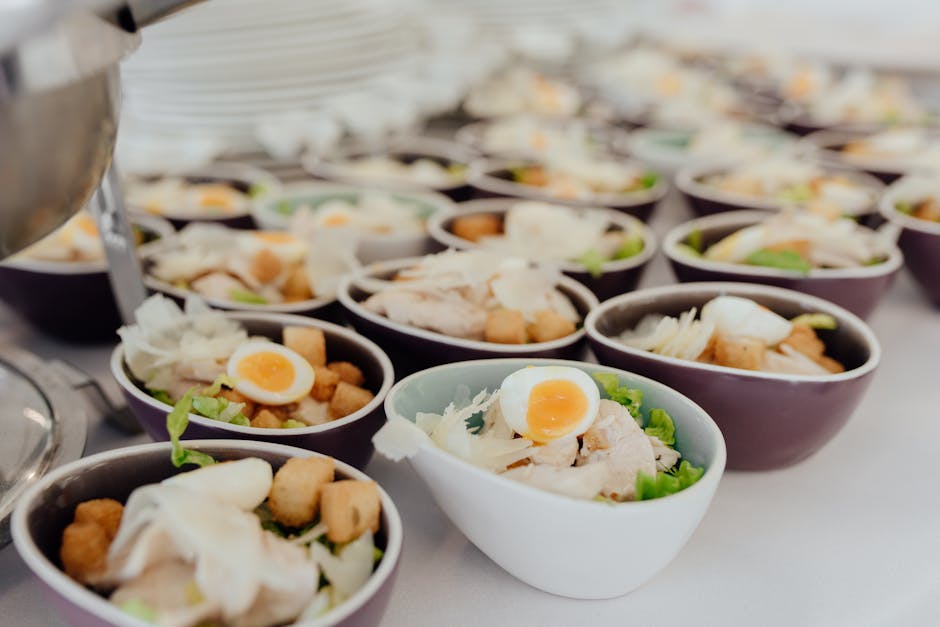
Incorporate into salads: Add a soft-boiled egg to your favorite salad for a boost of protein and richness. The creamy yolk will coat the salad greens, adding a creamy dressing-like element. A perfectly soft-boiled egg complements salads with lighter dressings, such as a vinaigrette. For a classic combination, try a simple green salad with a lemon vinaigrette, adding the sliced egg just before serving to prevent the yolk from becoming overcooked.
Create a luxurious soldiers experience: Cut a soft-boiled egg in half and serve it alongside warm, crusty bread, cut into thin strips (soldiers). Dip the soldiers into the runny yolk, enjoying the rich and satisfying combination of textures. For the best soldiers experience, use a sturdy bread like sourdough or a baguette. Consider serving with a small side of butter or aioli for extra richness.
Add to soups and stews: A soft-boiled egg adds a delightful creamy texture and a boost of protein to hearty soups and stews. Add the egg during the last few minutes of cooking to ensure the yolk remains runny. Avoid overcooking the egg in the soup. A simple vegetable or minestrone soup is an excellent candidate for this addition.
Make a delicious egg salad: While traditionally made with hard-boiled eggs, soft-boiled eggs offer a unique twist to egg salad. Finely chop the egg whites and yolk together, incorporating mayonnaise (approximately 2 tablespoons per egg), Dijon mustard (1/2 teaspoon per egg), salt, and pepper to taste. Use high-quality mayonnaise for the best flavor. Serve on bread, crackers, or lettuce cups.
No matter how you choose to serve your perfect soft-boiled eggs, remember that freshness and timing are key to achieving the desired creamy yolk and delicate white. Enjoy!
Perfect Soft Boiled Eggs: Recommendations
Achieving the perfect soft-boiled egg, with a runny yolk and a set white, is a culinary art. To ensure consistent results, follow these recommendations carefully. Start with fresh, high-quality eggs as they hold their shape better during cooking. Use a timer to ensure accurate cooking times, as even a few seconds can make a difference in the yolk’s consistency. Experiment slightly to find the perfect timing for your stove and preferred yolk consistency. For a truly perfect soft-boiled egg, aim for a cooking time between 6-7 minutes for a slightly runny yolk, or 5-6 minutes for a runnier yolk. Immediately after cooking, plunge the eggs into an ice bath to stop the cooking process and make peeling easier.
Peeling the eggs is crucial for a pleasant eating experience. To peel easily, gently tap the egg all over on a hard surface to create cracks in the shell. Then, start peeling under cold running water. The water helps to separate the shell from the egg white. If the egg is still difficult to peel, it may be because it’s too old or wasn’t cooked properly. Ensure your eggs are fresh for easier peeling.
Serving Suggestions: Soft-boiled eggs are incredibly versatile. Enjoy them on their own, sprinkled with salt and pepper, or elevate them with a variety of toppings. Consider a sprinkle of everything bagel seasoning, a drizzle of hot sauce, or a dollop of crème fraîche or sour cream. A sprinkle of finely chopped chives or fresh dill adds a lovely herbaceous note. For a more substantial meal, serve them alongside toasted whole-wheat bread soldiers for dipping into the runny yolk.
Complementary Dishes: Soft-boiled eggs pair beautifully with many dishes. They make a fantastic addition to salads, adding richness and protein. They are also a delightful component of breakfast bowls, alongside avocado, smoked salmon, or roasted vegetables. Consider adding them to a hearty brunch featuring bacon, sausage, or other breakfast meats. They also work well as a light lunch option served with a side salad and crusty bread.
Storage Conditions: Soft-boiled eggs are best enjoyed immediately after cooking. If you must store them, peel them first and refrigerate them in an airtight container for up to 24 hours. However, the texture and flavor may slightly degrade over time. Avoid storing them unpeeled as this can lead to bacterial growth.
Nutritional Information (per large egg): This information is approximate and can vary slightly depending on the size and type of egg. A large soft-boiled egg contains approximately 78 calories, 6 grams of protein, 5 grams of fat (including about 1.6 grams of saturated fat), and less than 1 gram of carbohydrates. They are a good source of choline, an essential nutrient for brain health. Note: Nutritional values may change slightly based on cooking method and any added ingredients.