The irresistible allure of cheesecake, a dessert transcending cultural boundaries, has captivated taste buds for centuries. While its precise origins remain shrouded in mystery, many culinary historians trace its roots back to ancient Greece, where a mixture of cheese and honey was likely the precursor to the creamy confections we know and love today. The evolution of cheesecake continued through the Roman Empire, where it gained popularity among the elite. However, the modern iteration of cheesecake, particularly the creamy, baked varieties, solidified its place in culinary history much later, gaining significant traction in the United States during the 20th century. This recipe, however, takes a delightful detour from the traditional baked cheesecake, offering a refreshing no-bake alternative that’s both convenient and incredibly delicious.
No-bake cheesecakes represent a significant evolution in cheesecake preparation, particularly appealing to home bakers seeking simpler, quicker methods. The rise in popularity of no-bake desserts can be attributed to several factors. Firstly, the ease of preparation significantly reduces time and effort, making it a perfect choice for busy individuals or those without extensive baking experience. Secondly, the elimination of oven time opens up creative possibilities, allowing for unique flavor combinations and textures. The availability of ready-made ingredients, like Oreo cookies in this particular recipe, further contributes to its convenience and widespread appeal. According to recent surveys, no-bake desserts account for a significant portion of the rapidly growing online recipe search queries, highlighting the increasing demand for convenient and delicious treats.
This No-Bake Oreo Cheesecake recipe embodies the spirit of modern dessert making: quick, easy, and undeniably delicious. It leverages the iconic Oreo cookie, a globally recognized symbol of American confectionery, to create a unique and satisfying twist on the classic cheesecake. The cultural significance of the Oreo cookie itself is undeniable; since its introduction in 1912, it has become a staple snack across the globe, representing a shared cultural touchstone for millions. Combining this iconic cookie with the creamy indulgence of cheesecake creates a dessert that is both familiar and exciting, appealing to a broad spectrum of palates and culinary backgrounds. The recipe’s simplicity ensures accessibility for everyone, regardless of culinary expertise, fostering a sense of accomplishment and enjoyment in the process of creating this delectable treat.
Beyond its ease and deliciousness, this recipe offers a level of customization. Feel free to experiment with different cookie varieties, add your favorite toppings, or even infuse the cheesecake filling with extracts like vanilla or peppermint for a unique flavor profile. The adaptability of the recipe makes it more than just a dessert; it is a platform for culinary creativity and personal expression. The possibilities are endless, allowing you to tailor the recipe to your preferences and impress your guests with a unique and delightful dessert experience. Ultimately, this No-Bake Oreo Cheesecake recipe is not just a dessert; it’s a testament to the evolution of baking, a celebration of convenience and creativity, and a delicious journey into the world of effortless culinary indulgence.
Ingredients and Measurements
This No-Bake Oreo Cheesecake recipe requires a careful balance of ingredients to achieve the perfect creamy texture and intense Oreo flavor. Precise measurements are crucial for success, so please use a kitchen scale for the most accurate results, especially for the cream cheese. While volume measurements are provided as a guide, weighing is always more reliable.
For the Oreo Crust:
- 200g (1 ½ cups) Oreo cookies, finely crushed: Use a food processor for the most consistent results. Avoid over-processing, as this can create crumbs that are too fine and may result in a less sturdy crust. If you don’t have a food processor, place the Oreos in a zip-top bag and crush them using a rolling pin. Ensure the cookies are crushed into a uniform consistency—a mixture of fine crumbs and some slightly larger pieces adds texture.
- 60g (¼ cup + 2 tbsp) unsalted butter, melted: Use unsalted butter to control the level of saltiness in your cheesecake. Ensure the butter is completely melted and slightly cooled before adding it to the cookie crumbs. This helps prevent the crumbs from becoming soggy.
For the Cheesecake Filling:
- 500g (2 x 8oz packages) cream cheese, softened to room temperature: This is absolutely essential. Room temperature cream cheese will blend smoothly and prevent lumps in your filling. If your cream cheese is too cold, it will be difficult to incorporate properly and may result in a grainy texture. Allow it to sit at room temperature for at least 30 minutes before starting.
- 100g (¾ cup) granulated sugar: Adjust the sugar amount to your preference. If you prefer a less sweet cheesecake, you can reduce the sugar by 1-2 tablespoons. Conversely, if you like your cheesecake sweeter, you can add a tablespoon or two more.
- 150ml (⅔ cup) heavy cream: Using heavy cream is crucial for achieving a rich and creamy texture. Do not substitute with light cream or milk as this will significantly alter the consistency of the cheesecake.
- 2 tsp pure vanilla extract: Use high-quality vanilla extract for the best flavor. A good quality vanilla extract will enhance the overall taste of the cheesecake.
- 2 large eggs: Bring the eggs to room temperature as well. This will help the filling blend together more smoothly and prevent it from curdling.
- 10 Oreo cookies, roughly chopped: These will be swirled into the cheesecake filling for added texture and visual appeal. You can adjust the amount of chopped Oreos to your liking.
Important Note: Before you begin, ensure all your ingredients are at the correct temperature. This will make the mixing process much easier and result in a smoother, more delicious cheesecake.
Optional Garnishes: Whipped cream, extra chopped Oreos, chocolate shavings, or even fresh berries make wonderful garnishes for your finished No-Bake Oreo Cheesecake. Feel free to get creative!
Crust Preparation
The crust is the foundation of a great no-bake Oreo cheesecake, providing a delightful contrast in texture and flavor to the creamy filling. A perfectly made crust is crucial for a successful dessert, so let’s ensure we get this right. We’ll be using classic Oreo cookies, but feel free to experiment with other chocolate sandwich cookies for a unique twist.
Ingredients:
- 1 ½ cups (150g) Oreo cookies, finely crushed (about 20-22 Oreos)
- ¼ cup (50g) unsalted butter, melted
Equipment: You’ll need a 9-inch springform pan, a food processor (highly recommended), or a zip-top bag and rolling pin for crushing the Oreos, and a measuring cup and spoons for precise measurements.
Instructions:
Begin by preparing your Oreo cookies. The key to a perfect crust is achieving a consistent, fine crumb. The easiest method is to use a food processor. Add the Oreos and pulse until they are finely ground, resembling coarse sand. Avoid over-processing, as this can create a paste-like consistency. If you don’t have a food processor, place the Oreos in a zip-top bag and crush them using a rolling pin. This method requires more effort and may result in a less uniform crumb, but it is entirely feasible.
Once your Oreos are crushed to your satisfaction, carefully melt the unsalted butter in a small saucepan over low heat. Avoid browning the butter, as this can impart an undesirable bitter flavor. Alternatively, you can melt the butter in the microwave in short bursts, stirring in between, to prevent overheating.
Combine the crushed Oreos and melted butter in a medium bowl. Use a fork or a spatula to thoroughly mix the two ingredients until the crumbs are evenly moistened. Ensure all the crumbs are coated with butter; this prevents the crust from crumbling apart once baked. The mixture should hold together when squeezed gently.
Prepare your springform pan. For easy removal later, lightly grease the bottom and sides of the pan with butter or cooking spray. This will prevent sticking and ensure a clean release of the cheesecake after chilling.
Press the Oreo mixture firmly into the bottom of the prepared springform pan. Use the bottom of a measuring cup or a glass to evenly distribute and compact the crust. Create an even layer; this will ensure uniform baking and prevent a soggy bottom. Press down firmly to create a solid base.
Chill the crust for at least 30 minutes in the refrigerator before adding the cheesecake filling. This will help the crust to firm up and prevent it from becoming soggy when the filling is added. Chilling also allows the flavors to meld together, creating a more harmonious taste experience.
Professional Tip: For a richer crust, use dark chocolate Oreos or add a tablespoon of cocoa powder to the mixture.
Cheesecake Filling Preparation
Creating the creamy and dreamy cheesecake filling is the heart of this No-Bake Oreo Cheesecake recipe. This section will guide you through each step, ensuring a perfectly smooth and delicious result. Get ready to whip up a batch of pure indulgence!
Begin by gathering your ingredients: 3 (8 ounce) packages of cream cheese, softened to room temperature; 1 ½ cups of granulated sugar; 1 teaspoon of pure vanilla extract; 2 cups of heavy cream, very cold; and ¼ teaspoon of salt. The success of your cheesecake filling hinges on the cream cheese being properly softened. Don’t rush this step; allow the cream cheese to sit at room temperature for at least 30 minutes to an hour, or until it’s easily spreadable with a spatula. This prevents lumps and ensures a smooth, homogenous texture. If you’re short on time, you can gently microwave the cream cheese in 15-second intervals, stirring in between, until softened. Be careful not to overheat; overheated cream cheese can become grainy.
In a large mixing bowl, beat the softened cream cheese with an electric mixer on medium speed until completely smooth and creamy. This will take about 2-3 minutes. Gradually add the granulated sugar, one cup at a time, beating well after each addition. Scrape down the sides of the bowl as needed to ensure everything is incorporated evenly. Once the sugar is fully incorporated, beat in the vanilla extract until combined.
Now, it’s time to incorporate the heavy cream. The heavy cream must be very cold; this is crucial for achieving stiff peaks and a stable, airy filling. If your heavy cream isn’t cold enough, it may not whip properly. In a separate bowl, whip the heavy cream with an electric mixer on high speed until stiff peaks form. This usually takes about 2-3 minutes. Avoid over-whipping, as this can result in a grainy texture.
Gently fold the whipped cream into the cream cheese mixture using a spatula. Use a folding motion to avoid deflating the whipped cream and maintain its airy texture. Begin by adding about one-third of the whipped cream and gently fold it in until just combined. Then, add another third, and repeat the folding process. Finally, add the remaining whipped cream and fold until the mixture is just combined. Be patient and gentle during this step; a little bit of cream cheese mixture showing through is fine. Over-mixing will result in a dense filling.
Once everything is gently incorporated, stir in the salt. The salt enhances the sweetness and balances the flavors of the cheesecake. Taste the mixture and adjust the sweetness if needed. Some may prefer a slightly sweeter cheesecake, while others prefer a more subtly sweet one. Now, your creamy, dreamy cheesecake filling is ready to be layered over your Oreo crust! Proceed to the next step with confidence, knowing you’ve created a perfect base for your no-bake Oreo cheesecake masterpiece.
Chilling and Setting
Once your No-Bake Oreo Cheesecake is assembled, the chilling process is crucial for achieving the perfect creamy texture and setting the cheesecake properly. This stage requires patience, but the result is well worth the wait. Improper chilling can lead to a runny or unstable cheesecake, so follow these instructions carefully.
Proper chilling is essential for the cheesecake to set correctly. The cream cheese filling needs sufficient time to firm up and meld with the Oreo crust. Insufficient chilling will result in a soft, unstable cheesecake that’s difficult to serve. Conversely, over-chilling can lead to a grainy texture.
Transfer the assembled cheesecake to the refrigerator immediately after preparation. Ensure the springform pan is tightly sealed with plastic wrap to prevent the cheesecake from absorbing any refrigerator odors. This prevents the formation of a skin on the surface and keeps the cheesecake moist.
Chill for a minimum of 4 hours, or preferably overnight (8-12 hours). This allows ample time for the filling to fully set and the flavors to meld. The longer it chills, the firmer and more stable the cheesecake will become. If you’re short on time, 4 hours is the absolute minimum, but overnight chilling is strongly recommended for optimal results.
Monitor the cheesecake’s consistency during chilling. After 4 hours, gently jiggle the springform pan. If the cheesecake shows only the slightest wobble in the center, it’s likely set enough. If it still has significant movement, chill for another 2-3 hours and check again. Remember, a slight wobble in the center is acceptable; you don’t want it to be completely rigid.
Avoid opening the refrigerator door frequently during chilling. Each time you open the door, the temperature fluctuates, potentially affecting the setting process. This can lead to an unevenly set cheesecake. Be patient and let the cheesecake chill undisturbed.
To serve, carefully run a thin, flexible knife or spatula around the edges of the cheesecake to loosen it from the springform pan. This will prevent cracking or crumbling when releasing the cheesecake. Gently release the sides of the springform pan. If the cheesecake is still sticking slightly, you can run the knife around the edges again or let it sit at room temperature for a few minutes to soften slightly.
Once released, carefully transfer the cheesecake to a serving platter. You can garnish it with additional Oreos, chocolate shavings, whipped cream, or fresh berries. Serve chilled and enjoy! Remember to always handle the cheesecake gently to avoid cracks or damage.
For best results, plan ahead and allow ample chilling time. This crucial step ensures a beautifully smooth, creamy, and perfectly set No-Bake Oreo Cheesecake.
Topping (Optional)
While this No-Bake Oreo Cheesecake is delicious on its own, a topping can elevate it to the next level, adding visual appeal and textural contrast. Here are a few suggestions, ranging from simple to more elaborate, to inspire your creativity.
Chocolate Ganache: A classic pairing with cheesecake, a rich chocolate ganache provides a decadent finish. For a simple ganache, combine 1/2 cup heavy cream and 4 ounces of semi-sweet chocolate (finely chopped) in a heatproof bowl set over a pan of simmering water (make sure the bottom of the bowl doesn’t touch the water). Stir gently until the chocolate is melted and smooth. Let it cool slightly before pouring it over the chilled cheesecake. For a more intense chocolate flavor, use dark chocolate instead. You can also add a teaspoon of vanilla extract for extra depth.
Whipped Cream: A light and airy whipped cream topping offers a beautiful contrast to the dense cheesecake. For best results, use heavy whipping cream (at least 35% fat). Chill the cream thoroughly before whipping. In a chilled bowl, beat 1 cup of heavy cream with 2 tablespoons of powdered sugar and 1 teaspoon of vanilla extract until stiff peaks form. Avoid over-whipping, as this can result in a grainy texture. Gently spread the whipped cream over the cheesecake using a spatula or piping bag for a more elegant presentation. You can also add a pinch of cocoa powder to the whipped cream for a mocha-flavored topping.
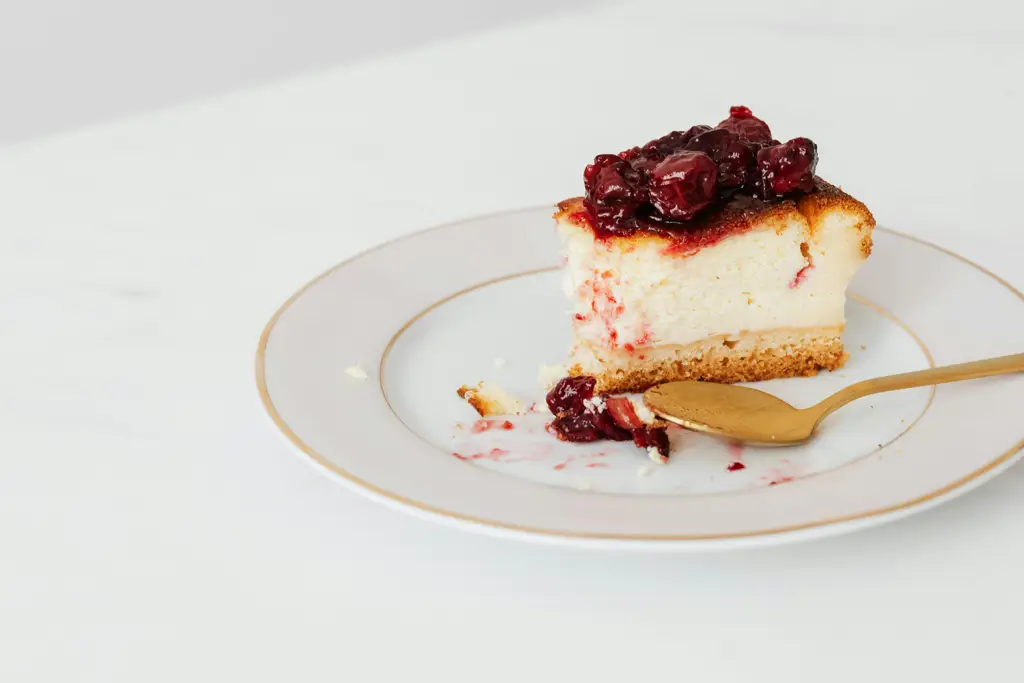
Fresh Berries: A vibrant and refreshing option, fresh berries provide a burst of sweetness and acidity that cuts through the richness of the cheesecake. Use a combination of your favorite berries, such as strawberries, raspberries, blueberries, and blackberries. Arrange them beautifully on top of the cheesecake, ensuring they are evenly distributed. Consider lightly macerating the berries (toss them with a tablespoon of sugar and a teaspoon of lemon juice) for 15-20 minutes before adding them to the cheesecake to intensify their flavor and release their juices.
Oreo Crumble: To further enhance the Oreo flavor, create a simple crumble topping. Pulse several Oreo cookies (about 6-8) in a food processor until finely crushed. You can add a tablespoon of melted butter to help bind the crumbs. Sprinkle the crumble evenly over the cheesecake. For a visually appealing contrast, use both the original Oreo cookies and the double-stuffed variety for a textural and visual difference.
Caramel Sauce: A drizzle of caramel sauce adds a touch of sweetness and a pleasingly sticky texture. You can use store-bought caramel sauce or make your own. Be mindful of the quantity; a little goes a long way. Drizzle it in a spiral pattern or in small, controlled lines for an attractive presentation. A sprinkle of sea salt on top of the caramel can enhance the flavor profile.
Remember to always chill the cheesecake completely before adding any topping to prevent it from melting or becoming soggy. Get creative and experiment with different combinations to find your perfect topping! Enjoy!
Serving Suggestions
This decadent No-Bake Oreo Cheesecake is incredibly versatile and can be served in a variety of ways, depending on the occasion and your personal preference. Whether you’re hosting a sophisticated gathering or enjoying a simple dessert at home, these suggestions will help you present this delicious treat beautifully and enhance its flavors.
Classic Presentation: For a straightforward yet elegant presentation, slice the cheesecake into 12 even portions using a sharp knife dipped in hot water (this prevents sticking and ensures clean cuts). Arrange the slices on a serving platter, garnished with a dusting of cocoa powder or finely grated chocolate. A few crushed Oreos scattered around the base of the platter add a nice textural and visual touch. Consider chilling the cheesecake for at least 30 minutes before slicing for optimal firmness.
Individual Portions: For a more casual setting, or if you’re preparing the cheesecake for individual servings, consider using small ramekins or dessert glasses. This allows guests to easily serve themselves and prevents the cheesecake from being overly handled. Fill each ramekin approximately ¾ full, leaving a little space at the top. Garnish each individual serving with a dollop of whipped cream, a fresh berry (like a raspberry or strawberry), or a chocolate shavings. Using clear glasses allows the beautiful layered effect of the cheesecake to be showcased.
Elevated Presentation: To elevate the presentation for a special occasion, consider using a decorative serving platter or cake stand. You can arrange the cheesecake slices artfully, incorporating fresh mint sprigs or edible flowers for a touch of sophistication. A drizzle of chocolate ganache (around 2 tablespoons of melted dark chocolate mixed with 1 tablespoon of heavy cream) adds a rich, decadent element. Ensure the ganache is cooled slightly before drizzling to avoid melting the cheesecake.
Accompaniments: The rich, creamy texture of this No-Bake Oreo Cheesecake pairs beautifully with a variety of accompaniments. A simple dollop of whipped cream (approximately 2 tablespoons per serving) adds a delightful lightness. Fresh berries, such as raspberries, strawberries, or blueberries (about 4-6 berries per serving), offer a refreshing contrast in flavor and texture. A scoop of vanilla ice cream (around ½ cup per serving) is a classic combination, creating a truly indulgent dessert. For a more sophisticated touch, consider serving with a coffee or espresso. Experiment with different accompaniments to find your favorite combination.
Storage and Serving Temperature: Store leftover cheesecake in an airtight container in the refrigerator for up to 3 days. Allow the cheesecake to come to room temperature for about 15-20 minutes before serving for the best texture and flavor. This allows the creamy filling to soften slightly, enhancing the overall eating experience. Avoid freezing this cheesecake, as it can alter the texture.
Important Note: Always ensure proper food safety practices when handling and serving the cheesecake. Wash your hands thoroughly before handling food and use clean utensils and serving dishes.
Recommendations for Your No-Bake Oreo Cheesecake
This no-bake Oreo cheesecake is a delightful treat, perfect for any occasion. To ensure you get the most out of this delicious dessert, follow these recommendations for serving, storage, and pairing with complementary dishes.
Serving Suggestions: For optimal enjoyment, allow the cheesecake to chill in the refrigerator for at least 4 hours, or preferably overnight, to allow the flavors to meld and the filling to set completely. Serve chilled in individual slices. Garnish each slice with a few crushed Oreos, a dollop of whipped cream, or a drizzle of chocolate sauce for an extra touch of elegance. Consider using a piping bag to create decorative swirls of whipped cream for a more sophisticated presentation. Individual serving dishes or small ramekins add a touch of class, while larger slices on a platter work well for casual gatherings.
Storage: Properly storing your cheesecake is crucial for maintaining its freshness and texture. Store the cheesecake in an airtight container in the refrigerator for up to 4 days. To prevent the cheesecake from absorbing odors from other foods in the refrigerator, cover it tightly. Freezing the cheesecake is not recommended, as it can alter the texture of the crust and filling. If you do need to store it longer, consider freezing the individual components and assembling it freshly closer to the serving time.
Complementary Dishes: This rich and decadent cheesecake pairs well with a variety of complementary dishes. Serve it alongside fresh berries, such as strawberries, raspberries, or blueberries, for a refreshing contrast in flavor and texture. A light and fruity salad, such as a mixed green salad with a light vinaigrette, can also cut through the richness of the cheesecake. For a more indulgent pairing, consider serving it with a scoop of vanilla ice cream or a warm, chocolate-covered espresso bean.
Calorie and Nutritional Information (Approximate per slice – this will vary based on the specific ingredients and portion size): Please note that these are estimates and should not be considered precise. Using a nutrition calculator with your specific ingredient quantities is recommended for accurate values.
Serving Size: Approximately 1/8 of the recipe
Calories: Approximately 350-400 calories
Fat: Approximately 20-25g
Saturated Fat: Approximately 12-15g
Cholesterol: Approximately 50-60mg
Sodium: Approximately 200-250mg
Carbohydrates: Approximately 40-45g
Sugar: Approximately 30-35g
Protein: Approximately 4-5g
Important Note: These nutritional values are estimates and can vary depending on the specific brands and types of ingredients used. For a more precise nutritional analysis, use an online nutrition calculator and input the exact ingredients and quantities used in your recipe.
Enjoy your delicious No-Bake Oreo Cheesecake! Remember to adjust the serving size and presentation to suit your preferences and the occasion.