Quesadillas, a seemingly simple dish of cheese melted between tortillas, boast a surprisingly rich history and cultural significance. While pinpointing their exact origin is difficult, their roots are firmly planted in Mexican cuisine, likely emerging sometime before the Spanish conquest. The name itself, quesadilla, translates directly to little cheesy thing, a testament to its core ingredient. Early versions likely consisted of just corn tortillas and cheese, reflecting the readily available ingredients of the time. The evolution of the quesadilla mirrors the broader evolution of Mexican cuisine, adapting to regional variations and incorporating diverse ingredients. Today, it transcends its humble beginnings, becoming a globally loved dish.
The popularity of quesadillas, both in their traditional and modern iterations, is undeniable. Globally, the demand for Mexican food is booming, with an estimated market size exceeding billions of dollars annually. Quesadillas, thanks to their versatility and ease of preparation, are a significant contributor to this success. They are incredibly adaptable, accommodating a wide array of fillings, from the classic cheese to more adventurous combinations like mushrooms, peppers, and, as we’ll be exploring today, a vibrant array of vegetables. This adaptability makes them a favorite for both casual weeknight meals and more elaborate gatherings. Recent studies show that vegetarian and vegan options are increasingly popular within the broader Mexican food market, reflecting a growing consumer demand for healthier and plant-based alternatives.
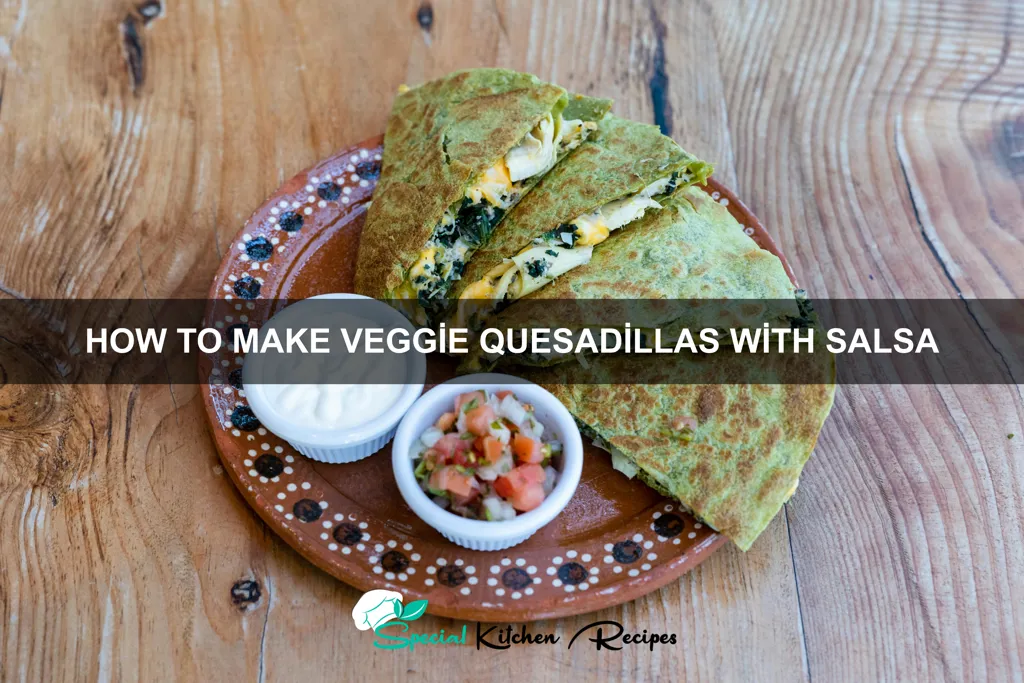
This recipe for Veggie Quesadillas with Salsa offers a delicious and healthy twist on a classic. It celebrates the freshness of seasonal vegetables and the vibrant flavors of homemade salsa, showcasing the versatility of this beloved dish. While traditional quesadillas often feature cheeses like Oaxaca or Chihuahua, this recipe allows for a dairy-free option, making it accessible to a wider range of dietary preferences. We will guide you through a simple yet flavorful process, resulting in a satisfying and nutritious meal that is both quick and easy to prepare. Get ready to experience a delightful fusion of textures and tastes, a testament to the enduring appeal of this iconic dish.
Ingredients and Measurements
This recipe yields two generously sized veggie quesadillas. Adjust ingredient quantities proportionally for more servings. The beauty of quesadillas lies in their adaptability; feel free to swap out vegetables based on your preferences and what’s in season.
Flour Tortillas (10-inch): You’ll need two 10-inch flour tortillas. Choose a high-quality tortilla for the best texture and flavor. Look for tortillas made with minimal ingredients, ideally just flour, water, and perhaps a touch of salt. Avoid overly processed tortillas with added preservatives.
Shredded Cheese (2 cups): Two cups of shredded cheese is the perfect amount for two quesadillas. A blend of Mexican cheeses is recommended, such as a combination of Monterey Jack, cheddar, and pepper jack. This creates a delicious flavor profile and a pleasing melt. If you prefer a spicier quesadilla, opt for a higher percentage of pepper jack. Pre-shredded cheese is convenient, but freshly shredded cheese often melts more evenly.
Bell Peppers (1 cup, chopped): One cup of chopped bell peppers provides a vibrant color and a slightly sweet flavor. Use a combination of colors – red, yellow, and orange – for an attractive visual appeal and a more complex taste. Dice the peppers into roughly ½-inch pieces for even cooking and distribution throughout the quesadilla.
Onions (½ cup, chopped): Half a cup of finely chopped onion adds a savory depth of flavor. Use white or yellow onions, depending on your preference. If you find raw onions too pungent, you can sauté them lightly before adding them to the quesadilla to soften their flavor.
Black Beans (½ cup, canned, rinsed and drained): Half a cup of canned black beans contributes a hearty texture and a slightly earthy flavor. Make sure to thoroughly rinse and drain the beans to remove excess sodium and prevent a watery quesadilla. If you prefer, you can substitute pinto beans or another type of bean.
Corn (½ cup, frozen or canned): Half a cup of frozen or canned corn adds a touch of sweetness and a pleasant textural contrast. Frozen corn works well straight from the freezer, as it will thaw and cook within the quesadilla. If using canned corn, drain it well before adding.
Salsa (½ cup): Half a cup of your favorite salsa adds a punch of flavor and heat. Adjust the amount of salsa based on your spice preference. Start with less and add more if needed. Homemade salsa is ideal, but store-bought salsa is a convenient alternative.
Olive Oil or Cooking Spray (optional): A light coating of olive oil or cooking spray on the pan prevents sticking and ensures even browning of the tortillas. Use a minimal amount to avoid excessive oil.
Equipment List
Creating delicious veggie quesadillas requires the right tools for efficient and safe preparation. This list details the essential equipment, along with recommendations for optimal results. Having everything ready beforehand will streamline the cooking process and prevent interruptions.
Cutting board: A large, sturdy cutting board (at least 12 x 15 ) is crucial for prepping your vegetables. Choose one made of plastic or wood – avoid glass, as it can dull knives quickly. A separate cutting board for raw meats is highly recommended to prevent cross-contamination if you plan to use leftover cooked meat in future recipes.
Chef’s knife: A sharp chef’s knife (approximately 8 inches) will make quick work of chopping your vegetables. A dull knife is dangerous and makes uneven cuts. Regular sharpening is essential for both safety and efficiency. Consider a honing steel to maintain the blade’s sharpness between sharpenings.
Measuring cups and spoons: Accurate measurements are important for consistent results. Having a set of both metric and imperial measuring cups and spoons allows for flexibility in following different recipes. Invest in high-quality measuring tools for precise quantities, especially for ingredients like spices.
Large skillet or griddle: A 10-12 inch non-stick skillet or griddle is ideal for cooking the quesadillas. Non-stick surfaces prevent sticking and make flipping easier. Ensure the skillet is properly seasoned if not non-stick to prevent food from sticking. A heavy-bottomed skillet will distribute heat evenly for consistent cooking.
Spatula: A wide, flat spatula is essential for flipping the quesadillas and ensuring even browning. A flexible spatula is preferred as it allows you to get underneath the quesadilla without breaking it.
Tongs: While not strictly necessary, tongs can be helpful for flipping larger quesadillas or transferring them from the skillet to a serving plate. They also prevent burning your fingers.
Plate or serving platter: A plate or serving platter large enough to hold the finished quesadillas is needed for serving. Consider using a heat-resistant plate if serving directly from the skillet.
Optional: A food processor or mandoline slicer can speed up the vegetable prep, especially if you’re working with a lot of vegetables. A microwave-safe plate can be used to quickly soften harder vegetables before adding them to the quesadilla filling.
Vegetable Preparation
The success of your veggie quesadillas hinges on properly preparing your vegetables. Here’s a step-by-step guide to ensure optimal texture and flavor.
Choosing Your Vegetables: Start with fresh, high-quality vegetables. The best choices are those that hold their shape well when cooked, like bell peppers, onions, and zucchini. Avoid overly watery vegetables like tomatoes or mushrooms, unless you specifically want a wetter quesadilla. For this recipe, we’ll use 1 medium red bell pepper, ½ medium yellow onion, and 1 medium zucchini.
Washing and Cleaning: Thoroughly wash all your vegetables under cold running water. Remove any stems, cores, or blemishes. For the bell pepper, cut it in half lengthwise, remove the seeds and membranes, and then chop it into ½-inch strips. The onion should be peeled and finely diced. The zucchini should be washed, trimmed of its ends, and then sliced into ¼-inch thick rounds.
Cutting Techniques for Optimal Cooking: Consistent cutting ensures even cooking. Aim for uniform sizes with all your vegetables. This prevents some pieces from becoming overcooked while others remain raw. If you prefer smaller pieces, feel free to adjust the sizes accordingly, but maintain consistency within each vegetable type.
Sautéing the Vegetables (Optional but Recommended): While you can add raw vegetables directly to your quesadillas, sautéing them beforehand enhances their flavor and softens their texture. Heat 1 tablespoon of olive oil in a medium skillet over medium heat. Add the diced onions and sauté for 3-4 minutes, until softened and translucent. Add the bell pepper strips and zucchini rounds, and continue to sauté for another 5-7 minutes, stirring occasionally, until the vegetables are tender-crisp. Do not overcook, as you want to retain some of their crunch. Season lightly with salt and pepper to taste.
Preparing for Assembly: Once the vegetables are cooked (or if skipping the sautéing step), set them aside to cool slightly before adding them to your quesadillas. This prevents the filling from being too hot and potentially burning the tortillas. Properly cooling the filling also improves the overall texture and prevents excess moisture from making the tortillas soggy.
Quantity Considerations: The amount of vegetables you use can be adjusted to your preference. This recipe provides a good balance of vegetables to cheese and tortilla, but you can easily increase or decrease the quantities based on your liking. Remember to maintain a good ratio to avoid a filling that is too bulky or sparse.
Cheese Preparation
The cheese you choose is crucial for a great veggie quesadilla. Sharp cheddar, Monterey Jack, and pepper jack are all excellent choices, offering varying levels of sharpness and melt. You can also experiment with blends! For this recipe, we’ll use a combination of cheddar and Monterey Jack for a balanced flavor and optimal melting properties.
Begin by shredding 1 ½ cups of your chosen cheese blend. Using a box grater is the most efficient method, ensuring even shreds that melt beautifully. Avoid pre-shredded cheese from bags, as they often contain cellulose which can prevent proper melting and create a gummy texture. If using pre-shredded cheese, be prepared for a less desirable result.
Properly shredding the cheese is key to achieving a gooey, flavorful filling. If you use large chunks, they won’t melt evenly and some parts of your quesadilla may be dry. Conversely, if the cheese is too finely grated, it can become pasty and clump together, obscuring the other flavors.
Once shredded, it’s important to keep the cheese cold until you are ready to assemble the quesadillas. This slows down the melting process, preventing the cheese from becoming oily or separating before it hits the hot pan. Store the shredded cheese in the refrigerator until you’re ready to use it. If you prefer a stronger cheese flavor, you can briefly let the cheese sit at room temperature for 10-15 minutes before adding it to your quesadilla.
Consider the moisture content of your cheese. Some cheeses are naturally drier than others. If using a drier cheese, you might need to slightly increase the amount to ensure sufficient melting and a satisfyingly cheesy filling. You can also add a tablespoon or two of milk or cream to the shredded cheese to help facilitate melting, but this will slightly alter the final texture.
Finally, remember that the amount of cheese is a matter of personal preference. Feel free to adjust the quantity to your liking, but keep in mind that too much cheese can lead to overflowing and messy quesadillas, while too little will leave you wanting more.
Quesadilla Assembly
Now that your fillings are prepped, it’s time to assemble your delicious veggie quesadillas! This stage is crucial for achieving that perfectly gooey, flavorful center and a crisply browned exterior. We’ll be making two generous quesadillas, but you can easily adjust the recipe to suit your needs.
Begin by laying out two large flour tortillas (about 10-12 inches in diameter) on a clean, flat surface. Ensure your tortillas are at room temperature; cold tortillas are more prone to tearing.
For each quesadilla, evenly distribute approximately 1/2 cup of your prepared vegetable mixture onto one half of each tortilla. Don’t overload the tortillas; too much filling will make them difficult to fold and cook evenly. Aim for a consistent layer about 1/4 inch thick. A good mix of textures and colors is visually appealing and contributes to a more interesting flavor profile.
Next, generously sprinkle 1-2 tablespoons of shredded cheddar cheese (or your preferred cheese blend) over the vegetable mixture on each tortilla. The cheese acts as a binding agent, holding the filling together and contributing to the quesadilla’s overall richness. Experiment with different cheeses – Monterey Jack, pepper jack, or a Mexican blend work well too.
Carefully fold the other half of the tortilla over the filling, covering the vegetables and cheese completely. Gently press down on the edges to seal them, ensuring no filling escapes during cooking. You can use a fork to crimp the edges further for a more professional look and to prevent leakage.
For a truly authentic touch, you can brush the outer surface of the quesadillas with a little melted butter or oil. This will promote browning and add a delightful crispness to the tortillas. However, this step is optional; you can achieve perfectly good quesadillas without it.
Pro Tip: If you’re working with particularly juicy vegetables, consider lightly sautéing them beforehand to remove excess moisture. This will prevent your quesadillas from becoming soggy.
With your quesadillas assembled and ready to cook, you’re one step closer to a delicious and satisfying meal! Proceed to the cooking instructions to finish your culinary masterpiece.
Cooking the Quesadillas
Now that your quesadilla fillings are prepped and ready, it’s time to assemble and cook them! We’ll be making two large quesadillas, perfect for sharing or enjoying a generous portion on your own. For this recipe, we’ll use a large non-stick skillet, approximately 12 inches in diameter. Using a non-stick skillet is crucial for preventing sticking and ensuring easy flipping.
Begin by placing one large flour tortilla (approximately 10-12 inches) flat on a clean, dry surface. Ensure your tortilla is at room temperature – this helps prevent it from tearing during cooking. Spread about 1/4 cup of your prepared veggie mixture evenly over one half of the tortilla, leaving a 1/2-inch border. Avoid overloading the tortilla; too much filling will make it difficult to fold and cook properly. Overfilling is a common mistake – less is more in this case.
Carefully fold the other half of the tortilla over the filling, pressing gently to seal the edges. You can use a fork to crimp the edges for a more professional look and to help prevent the filling from spilling out during cooking. Crimping the edges also helps to create a nice, even seal.
Heat your non-stick skillet over medium heat. Add a small amount of oil (about 1 teaspoon of olive oil or vegetable oil) to the skillet. Once the oil is shimmering, gently place the quesadilla in the hot skillet. Cook for approximately 3-4 minutes per side, or until the tortilla is golden brown and the cheese is melted and bubbly. Pay close attention to the heat; medium heat is ideal to prevent burning. Adjust the heat as needed to prevent burning or undercooking.
Once the first side is golden brown, carefully flip the quesadilla using a spatula. Use a wide spatula to ensure you get under the entire quesadilla for even cooking. Continue cooking for another 3-4 minutes, or until the second side is golden brown and crispy. If your skillet isn’t large enough to accommodate both quesadillas simultaneously, cook them one at a time.
Once both quesadillas are cooked, remove them from the skillet and let them rest for a minute or two before slicing and serving. Allowing them to rest helps the cheese to set slightly, making them easier to cut and eat. Serve immediately with your favorite salsa and enjoy!
Recommendations
For the best flavor and texture, use fresh, high-quality vegetables. Roasting your vegetables beforehand adds a delightful depth of flavor, especially for heartier options like bell peppers and onions. Experiment with different vegetable combinations to discover your favorites! Consider adding a sprinkle of cheese for extra richness, but remember that the vegetables themselves should be the star of the show.
Serving Suggestions: These veggie quesadillas are fantastic on their own, but they pair beautifully with a variety of sides. A dollop of sour cream or Greek yogurt adds a creamy contrast, while a side of guacamole or pico de gallo enhances the freshness. For a complete meal, serve them alongside a simple salad with a light vinaigrette or a small bowl of black beans and rice. Don’t forget a side of your favorite salsa for dipping!
Storage: Leftover quesadillas can be stored in an airtight container in the refrigerator for up to 3 days. To reheat, simply place them in a microwave-safe dish and heat for 1-2 minutes, or until heated through. You can also reheat them in a skillet over medium heat for a crispier texture. Avoid freezing quesadillas as the texture may suffer.
Complementary Dishes: These quesadillas are incredibly versatile and work well as part of a larger meal. They are a great addition to a casual taco night, a light lunch, or even a fun appetizer for a gathering. The vibrant colors and fresh flavors complement Mexican-inspired dishes perfectly. Consider serving them with a side of Mexican street corn or a refreshing agua fresca.
Nutritional Information (Approximate per quesadilla, based on average ingredients): Calorie count will vary depending on the specific vegetables and cheese used. A typical veggie quesadilla (without cheese) might contain around 200-250 calories. They are a good source of fiber, vitamins, and minerals, particularly Vitamins A and C. Nutritional information is highly dependent on the specific ingredients used, so this is just an estimate. For precise nutritional information, use a nutrition calculator with your exact ingredients and quantities.