Chili, a hearty and flavorful stew, boasts a rich and complex history deeply intertwined with American culture. Its origins are somewhat murky, with various claims to its birthplace, but most agree its development involved a confluence of indigenous American cooking techniques and European ingredients following colonization. While pinpointing a single inventor is impossible, the dish’s evolution spanned centuries, transforming from simple indigenous stews to the varied chili con carne we know today. Early versions likely featured ingredients like beans, squash, and peppers, reflecting the bounty of the American Southwest.
The addition of meat, primarily beef, solidified chili’s place in American cuisine, particularly in the Southwest. The 19th and early 20th centuries witnessed a boom in chili’s popularity, fueled by its affordability and satisfying nature. Texas, in particular, became a hotbed of chili innovation, with numerous regional variations emerging. Chili cook-offs became a popular pastime, further solidifying the dish’s cultural significance. Interestingly, the exact recipe and ingredients remain a subject of intense debate, with passionate arguments over the correct way to prepare it. This enduring debate is a testament to chili’s versatility and enduring appeal.
In recent years, there’s been a significant rise in vegan and vegetarian options for almost every traditional dish, and chili is no exception. The demand for plant-based alternatives has surged, with a recent study showing a 30% increase in vegan food consumption in the past five years. This shift is driven by various factors including health concerns, ethical considerations, and environmental awareness. Creating a delicious and satisfying vegan chili not only caters to this growing market but also provides a healthier and more sustainable alternative to traditional meat-based recipes. This recipe will explore how to achieve a rich, complex flavor profile without relying on any animal products, demonstrating that vegan chili can be just as hearty and flavorful as its meat-based counterpart.
Ingredients and Measurements
This recipe yields approximately 6-8 servings of hearty vegan chili. Accurate measurements are key to achieving the perfect balance of flavors and textures. We recommend using a kitchen scale for the most precise results, especially for spices. However, volume measurements are provided as an alternative.
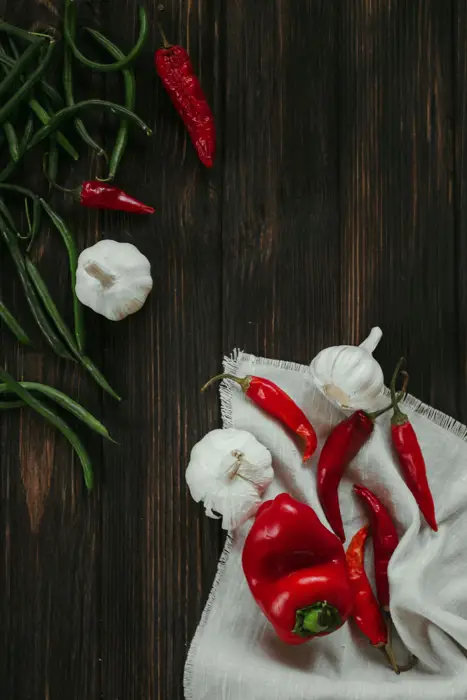
Vegetables:
- 1 large onion (approximately 1 cup chopped): A yellow or white onion works best. Feel free to substitute with a similar amount of shallots for a milder flavor.
- 2 cloves garlic (minced): Fresh garlic provides the most potent flavor. If using pre-minced garlic, reduce the amount slightly to avoid overpowering the chili.
- 1 red bell pepper (1 cup chopped): Adds sweetness and color. Orange or yellow bell peppers can be substituted.
- 1 green bell pepper (1 cup chopped): Contributes a slightly more vegetal note to the chili.
- 1 (28 ounce) can crushed tomatoes: San Marzano tomatoes are ideal for their rich flavor, but any good quality crushed tomatoes will work.
- 1 (15 ounce) can kidney beans, rinsed and drained: Choose low-sodium or no-salt-added beans whenever possible.
- 1 (15 ounce) can black beans, rinsed and drained: A mix of beans adds complexity to the chili.
- 1 (15 ounce) can pinto beans, rinsed and drained: These beans provide a creamy texture to the chili.
Other Ingredients:
- 1 tablespoon olive oil: Use a high-quality extra virgin olive oil for the best flavor.
- 1 tablespoon chili powder: Adjust this amount to your preferred level of spiciness. Start with less and add more later, as it’s easier to add spice than to remove it.
- 1 teaspoon cumin: Ground cumin adds warmth and depth to the chili.
- 1/2 teaspoon smoked paprika: Adds a smoky flavor that complements the beans and tomatoes.
- 1/4 teaspoon cayenne pepper (optional): Use this to increase the heat level of the chili. Start with a small amount and add more gradually, tasting as you go.
- 1 teaspoon dried oregano: Adds an earthy and herbaceous note.
- 1 teaspoon salt: Adjust to your taste preference. Remember that the beans and tomatoes may already contain some salt.
- 1/2 teaspoon black pepper: Freshly ground black pepper is always best.
- 1 cup vegetable broth (or water): Use low-sodium broth for better control over the salt content.
Optional additions: For extra flavor and texture consider adding 1 cup of chopped corn, diced carrots, or a tablespoon of brown sugar.
Preparation and Chopping
Before you even think about firing up the stove, proper preparation is key to a delicious and efficient chili-making experience. This stage focuses on prepping your vegetables and ensuring everything is ready to go for a smooth cooking process. We’ll be making a chili that serves 6-8 people.
Start by gathering your vegetables. For this recipe, we’ll need: one large onion (about 1 cup chopped), two cloves of garlic (minced), one large bell pepper (any color, about 1 cup chopped), one (14.5 ounce) can of diced tomatoes, undrained, and one (15 ounce) can of kidney beans, rinsed and drained. You can adjust these quantities to your liking, of course, but these measurements provide a good starting point.
Proper chopping techniques are crucial for even cooking and a better texture in your chili. Begin by peeling and chopping the onion. Aim for a consistent dice – about ½ inch pieces are ideal. Too large, and they won’t cook through properly; too small, and they might burn. A sharp chef’s knife is your best friend here; a dull knife will make the process more difficult and potentially dangerous.
Next, mince the garlic. Use a fine mince for even distribution of flavor throughout the chili. A garlic press can be helpful, but a sharp knife works just as well. Don’t over-mince; you want small pieces, not a garlic paste.
Chop the bell pepper similarly to the onion, aiming for approximately ½-inch pieces. Remove the stem, seeds, and membranes before chopping. Some prefer to leave the seeds in for added heat; it’s entirely up to your preference. Ensure all vegetables are roughly the same size for consistent cooking times.
Now, address your canned goods. Open the cans of diced tomatoes and kidney beans carefully. Rinse the kidney beans thoroughly under cold water to remove any excess sodium and starch. Drain them well, but don’t worry about getting every single drop of liquid out.
Once all your vegetables are chopped and your canned goods are prepared, you’re ready to move on to the next stage of chili making. Having everything prepped beforehand will significantly streamline the cooking process and help you avoid any last-minute scrambling.
Pro Tip: Consider using a food processor for faster chopping of onions and peppers if you are comfortable using one. Just be sure to pulse the ingredients rather than continuously processing to maintain a desirable texture.
Sautéing Aromatics
Sautéing the aromatics is the crucial first step in building a flavorful vegan chili. This process develops complex layers of taste that will permeate the entire dish. We’ll be using a classic combination of onion, garlic, and bell pepper, but feel free to experiment with others like shallots, leeks, or even a finely diced carrot.
Begin by prepping your aromatics. Finely chop one large yellow onion (approximately 1 cup chopped). Mince 4-6 cloves of garlic (about 2 tablespoons minced). For the bell pepper, choose your favorite color – red adds sweetness, green brings a bit more bite. Dice one medium bell pepper (about 1 cup diced). Ensure your ingredients are uniformly sized for even cooking; larger pieces will take longer to soften than smaller ones.
Heat a large, heavy-bottomed pot or Dutch oven over medium heat. Add 2 tablespoons of olive oil (or your preferred high-heat cooking oil). Avoid overcrowding the pot; if necessary, sauté the aromatics in batches to prevent steaming instead of sautéing. Once the oil shimmers, add the chopped onion. Cook, stirring occasionally, for about 5-7 minutes, until softened and translucent. Don’t brown the onions; we’re aiming for a gentle softening, releasing their natural sugars.
Next, add the minced garlic and diced bell pepper to the pot. Continue to cook for another 3-5 minutes, stirring frequently, until the garlic is fragrant and the bell pepper has slightly softened. Be careful not to burn the garlic; it will quickly become bitter if overcooked. At this stage, you should have a fragrant, softened mixture of onions, garlic, and bell pepper – the aromatic base of your delicious vegan chili.
Professional Tip: For an even deeper flavor, consider adding a teaspoon of smoked paprika or a pinch of cayenne pepper along with the garlic and bell pepper. This will enhance the overall spiciness and smokiness of your chili. Also, don’t be afraid to adjust the quantities of aromatics to your personal preference. Some people prefer a more pronounced onion flavor, while others might want more garlic or pepper.
Once your aromatics are sautéed to perfection, you’re ready to move on to the next step in creating your flavorful vegan chili!
Simmering the Chili
Once you’ve sautéed your vegetables and added your beans and spices, it’s time for the crucial simmering stage. This is where the flavors truly meld and deepen, creating a rich and complex chili. For this recipe, we’ll be simmering for at least 1.5 hours, but longer is generally better, up to 3 hours if you have the time.
Begin by transferring your sautéed mixture to a large, heavy-bottomed pot or Dutch oven. This type of pot distributes heat evenly, preventing scorching and ensuring even cooking. A 6-quart pot is ideal for this recipe, accommodating the volume of chili and allowing for a gentle simmer without overflowing.
Add 28 ounces (approximately 4 cups) of vegetable broth to the pot. You can use more or less depending on your desired chili consistency. For a thicker chili, use less broth. For a thinner, soupier chili, add more. Start with the recommended amount and adjust as needed towards the end of the simmering process.
Bring the chili to a gentle simmer over medium-low heat. This means you should see small bubbles consistently rising to the surface, not a vigorous boil. A vigorous boil can cause the chili to splatter and potentially burn, as well as potentially break down the beans too much. Reduce the heat if necessary to maintain a gentle simmer.
Partially cover the pot with a lid. This allows steam to escape while preventing excessive evaporation. Leaving it completely uncovered will result in a thicker chili and potentially make the spices more intense. Check the chili every 30 minutes or so, stirring gently to prevent sticking and ensure even cooking.
Taste and adjust seasoning as needed. After about an hour of simmering, taste the chili and adjust the seasoning accordingly. You might need to add more chili powder, cumin, salt, or other spices to your liking. Remember, tastes vary, so feel free to experiment!
Simmer for at least 1.5 hours, or up to 3 hours for a deeper, richer flavor. The longer you simmer, the more the flavors will develop. If you’re short on time, 1.5 hours is sufficient, but for the best results, let it simmer for longer. The chili will thicken as it simmers, so check the consistency periodically and adjust the broth accordingly.
Before serving, give the chili a final taste and adjust seasoning if needed. Consider adding a squeeze of lime juice or a dollop of vegan sour cream or cashew cream for an extra layer of flavor and texture.
Adding Beans and Liquid
This section details the crucial step of incorporating the beans and liquid into your vegan chili. The type of beans you choose significantly impacts the flavor and texture of the final dish. We recommend using a combination of beans for a richer, more complex flavor profile. For example, a blend of 1 (15-ounce) can of kidney beans, 1 (15-ounce) can of black beans, and 1 (15-ounce) can of pinto beans works wonderfully.
Before adding the beans, ensure they are drained and rinsed thoroughly. This removes excess sodium and starch, preventing a cloudy or overly salty chili. Take the time to rinse each can completely under cold running water; this seemingly small step makes a noticeable difference in the final product. Don’t be afraid to use your hands to gently break up any clumps of beans.
Now, let’s address the liquid. The amount of liquid you use will depend on your desired chili consistency. For a thicker chili, use less liquid; for a thinner, soupier chili, use more. We recommend starting with 2 cups of vegetable broth or water. You can always add more later if needed, but it’s difficult to remove excess liquid once it’s already in the pot.
The type of liquid also impacts the flavor. Vegetable broth adds a deeper savory depth, while water provides a more neutral base. Consider using a low-sodium broth to better control the saltiness of your chili. If you’re feeling adventurous, try adding a splash of beer or tomato juice for a unique twist. Remember to add the liquid gradually, stirring constantly to prevent scorching or sticking.
Once the beans and liquid are added, bring the chili back to a simmer. Reduce the heat to low, cover the pot, and let it simmer gently for at least 15-20 minutes. This allows the flavors to meld and the beans to fully absorb the liquid, resulting in a more cohesive and flavorful chili. Stir occasionally to prevent sticking and ensure even cooking. If you’re short on time, you can increase the heat slightly, but keep a close eye on it to prevent burning.
After simmering, taste the chili and adjust the seasoning as needed. You might want to add more salt, pepper, chili powder, or other spices to achieve your preferred level of spiciness and flavor. Remember that flavors deepen as the chili cools, so it’s best to err on the side of slightly under-seasoning during the cooking process.
Seasoning and Flavor Adjustments
Seasoning is crucial for a delicious vegan chili. Don’t be shy with the spices! Start with a base of 1 tablespoon of chili powder, 1 teaspoon of cumin, 1/2 teaspoon of smoked paprika, and 1/4 teaspoon of cayenne pepper (adjust to your spice preference). These provide a rich, complex flavor profile. Remember that the flavors will deepen as the chili simmers.
Salt and pepper are essential. Add 1 teaspoon of salt initially, tasting and adjusting as needed later. Freshly ground black pepper enhances the other spices; start with 1/2 teaspoon and add more to taste. Don’t be afraid to taste test throughout the cooking process; this allows you to fine-tune the seasoning as the flavors meld.
For added depth, consider incorporating other spices. A teaspoon of oregano or a half teaspoon of garlic powder can complement the chili’s base flavors beautifully. A pinch of cinnamon (1/4 teaspoon) adds a surprising warmth and complexity that many find delightful, particularly when paired with chocolate (see below!). Experiment with different spice combinations to discover your favorite profile.
Acidity is key to balancing the richness of the chili. A splash of apple cider vinegar (1-2 tablespoons) or lime juice (1 tablespoon) brightens the flavors and prevents the chili from becoming one-dimensional. Add the acid towards the end of cooking, allowing it to enhance the flavors without overpowering them.
Sweetness can also enhance the chili’s complexity. A tablespoon or two of maple syrup or brown sugar can add a subtle sweetness that balances the spices and acidity. Use sparingly, as too much sweetness can overpower the other flavors. For a truly unique twist, consider adding a small amount of unsweetened cocoa powder (1-2 tablespoons). This adds a deep, rich flavor that complements the spices beautifully.
Finally, remember that fresh herbs can make a significant difference. A handful of chopped cilantro or a tablespoon of chopped fresh oregano added at the end adds a vibrant freshness that elevates the overall taste. Consider adding a splash of your favorite hot sauce for an extra kick.
Professional Recommendation: Always taste and adjust your seasoning throughout the cooking process. The flavors will develop and change as the chili simmers, so don’t be afraid to make adjustments to achieve your desired flavor profile. Start with smaller amounts of spices and acids, and add more as needed.
Recommendations
This hearty vegan chili is best served hot, straight from the pot! For a truly satisfying meal, we recommend serving it with a dollop of vegan sour cream or cashew cream for extra richness and a touch of tang. A sprinkle of fresh cilantro or chopped green onions adds a vibrant pop of color and freshness. Consider serving your chili with crusty bread for dipping, or alongside fluffy cornbread for a classic southwestern pairing.
Leftovers are a delicious thing! Store your chili in an airtight container in the refrigerator for up to 4 days. The flavors will actually deepen and meld over time, making for an even tastier meal the next day. You can also freeze your chili for longer storage; freeze in individual portions for easy reheating and to avoid multiple freeze-thaw cycles. Reheat gently on the stovetop or in the microwave.
To complement your vegan chili, consider these delicious sides: A simple green salad with a light vinaigrette will cut through the richness of the chili, providing a refreshing contrast. A side of roasted sweet potatoes or corn on the cob adds sweetness and texture. For a more substantial side, try some creamy mashed potatoes or quinoa. Experiment with different combinations to find your perfect chili pairing!
Nutritional Information (per serving, approximate values will vary based on ingredients): Calories: Approximately 300-350, Protein: 15-20g, Fat: 10-15g, Carbohydrates: 40-50g, Fiber: 10-15g. Note: These values are estimates and can vary significantly depending on specific ingredients and portion sizes used. For precise nutritional information, use a nutrition calculator with your specific recipe details.
Important Note: Always ensure to thoroughly wash and prepare all your ingredients before cooking. Adjust seasoning to your preference. Feel free to experiment with different beans, vegetables, and spices to create your own unique chili masterpiece!