The humble cupcake, a miniature cake baked in a paper liner, holds a surprisingly rich and multifaceted history. While pinning down the exact origin is difficult, the name itself suggests a connection to individual portions: early recipes referred to cup cakes because they were baked in individual cups, or possibly teacups, rather than a larger pan. Early versions, dating back to the 18th century, were far simpler than today’s creations, often lacking the elaborate frostings and fillings we commonly associate with them. These early iterations were more of a practical solution for portion control and individual servings.
The rise of the cupcake to its current widespread popularity is intertwined with the evolution of baking technology and ingredients. The invention of the muffin tin in the late 19th century significantly contributed to the standardization and ease of cupcake production. The introduction of readily available baking powder and other leavening agents also allowed for lighter and fluffier textures, paving the way for the more sophisticated cupcakes we enjoy today. The 20th century saw a boom in cupcake culture, particularly in the United States, with the introduction of electric mixers and pre-made mixes further democratizing the process. Today, the cupcake industry is a multi-billion dollar market, with countless bakeries and home bakers creating innovative flavors and designs. Statistics show that the average American consumes around 23 cupcakes per year, demonstrating the enduring appeal of this beloved treat.
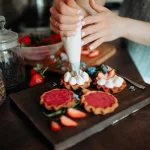
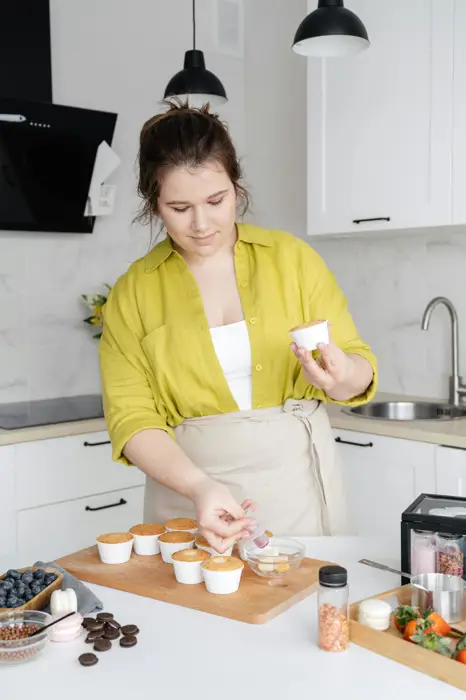
Beyond its commercial success, the cupcake holds significant cultural weight. From birthday celebrations to office parties, cupcakes are synonymous with joy, festivity, and personal indulgence. Their individual portions make them ideal for sharing and distribution, contributing to their popularity at gatherings of all sizes. Furthermore, cupcakes have become a canvas for creative expression, with bakers continually pushing boundaries through innovative flavor combinations, elaborate frosting techniques, and artistic decorations. This versatility, coupled with their inherent deliciousness, ensures the cupcake’s continued reign as a beloved dessert across various cultures and generations. In this guide, we will explore the techniques for creating the best vanilla cupcake, a classic that serves as the foundation for countless variations and a testament to the enduring appeal of this miniature masterpiece.
Ingredients and Measurements
Creating the perfect vanilla cupcake hinges on using high-quality ingredients measured precisely. Don’t skimp on the basics; the flavor of your cupcakes will directly reflect the quality of your ingredients. We’ll be using the weight method for measuring dry ingredients for the most accurate results. If you don’t have a kitchen scale, use a volume measuring cup, but be sure to spoon the flour into the cup and level it off with a straight edge – don’t pack it down.
For this recipe, you will need:
- All-Purpose Flour: 225g (1 ¾ cups): Use a good quality all-purpose flour. Cake flour can be substituted, but the texture will be slightly different, resulting in a more tender crumb. Avoid scooping flour directly from the bag, as this can incorporate air and lead to inaccurate measurements.
- Granulated Sugar: 225g (1 ¾ cups): Granulated sugar provides sweetness and structure. Do not substitute with powdered sugar, as it will alter the texture and moisture content of the batter.
- Baking Powder: 5g (2 tsp): Baking powder is the leavening agent, making your cupcakes light and fluffy. Ensure your baking powder is fresh; old baking powder will not rise properly. Check the expiration date.
- Baking Soda: 2.5g (½ tsp): Baking soda works in conjunction with baking powder to ensure a perfect rise. Don’t skip this ingredient, even if you’re using fresh baking powder.
- Salt: 2.5g (½ tsp): Salt enhances the flavors in the batter and balances the sweetness. Don’t underestimate the importance of salt in baking.
- Unsalted Butter: 115g (1 cup): Use unsalted butter to control the salt content in your cupcakes. Make sure your butter is softened to room temperature. This is crucial for proper creaming.
- Large Eggs: 2: Large eggs add richness and structure. Use eggs at room temperature for optimal emulsification with the other ingredients.
- Vanilla Extract: 2 tsp: Use pure vanilla extract for the best flavor. Avoid imitation vanilla, as it will significantly impact the taste.
- Milk: 120ml (½ cup): Milk adds moisture to the batter. Use whole milk for the richest flavor and texture, but you can substitute with other types of milk.
Precise measurements are key to baking success. Using a kitchen scale is recommended for the most accurate results, especially for dry ingredients. However, if you’re using volume measurements, always be careful to level off your ingredients properly.
Equipment List
Baking the perfect vanilla cupcake requires the right tools. This list details the essential equipment, along with recommendations for optimal results. Don’t skimp on quality – your cupcakes will thank you!
Mixing Bowls: You’ll need at least three mixing bowls of varying sizes. A large bowl (approximately 5-quart capacity) is crucial for creaming the butter and sugar. A medium bowl (3-quart) is ideal for whisking the dry ingredients, and a small bowl (1-quart) will be useful for separating eggs or holding your vanilla extract.
Measuring Cups and Spoons: Accurate measurements are paramount in baking. Invest in a good set of both dry and liquid measuring cups. Dry measuring cups should be used for dry ingredients like flour and sugar, while liquid measuring cups should be used for liquids like milk and oil. Similarly, a set of measuring spoons (1/4 teaspoon, 1/2 teaspoon, 1 teaspoon, 1 tablespoon) is essential for precise additions of baking powder, baking soda, and vanilla extract. Avoid using your everyday spoons for baking measurements.
Electric Mixer: A hand mixer or stand mixer is highly recommended. A stand mixer makes the creaming process easier, especially for larger batches. If using a hand mixer, be prepared for a bit more elbow grease. Ensure your mixer is clean and in good working order before you begin.
Rubber Spatula or Wooden Spoon: A rubber spatula is invaluable for scraping down the sides of the bowl and ensuring all ingredients are thoroughly combined. A wooden spoon can also be used, but a rubber spatula is more effective at incorporating all the ingredients without overmixing.
Muffin Tin: A standard 12-cup muffin tin is perfect for this recipe. Ensure your muffin tin is clean and free of any residue from previous baking. Consider using paper liners for easier removal and cleaner cupcakes. If using a non-stick muffin tin, lightly grease the cups with butter or cooking spray.
Baking Sheet: A baking sheet is useful to place underneath the muffin tin during baking to catch any spills.
Wire Rack: Once baked, transfer your cupcakes to a wire rack to allow them to cool completely. This prevents them from becoming soggy on the bottom.
Optional Equipment: A piping bag and various tips can be used for decorating, but are not essential for a delicious vanilla cupcake.
Preparation of Ingredients
Before you begin baking your vanilla cupcakes, meticulously preparing your ingredients is crucial for achieving a light, fluffy, and perfectly textured result. This step often gets overlooked, but it’s the foundation of a successful bake. We’ll start with the dry ingredients and then move to the wet ingredients.
Let’s begin with the flour. For this recipe, we’ll need 2 cups (250g) of all-purpose flour. Sifting the flour is highly recommended. This simple step removes clumps and aerates the flour, leading to a lighter cupcake. Use a fine-mesh sieve and sift the flour directly into a large mixing bowl. This prevents lumps from forming and ensures even distribution throughout the batter. Don’t skip this step; it truly makes a difference!
Next, we’ll measure out the 1 ½ teaspoons of baking powder and ½ teaspoon of baking soda. Ensure these leavening agents are fresh, as their effectiveness diminishes over time. If they’re old, your cupcakes might not rise properly. Add them to the sifted flour and gently whisk them together to distribute evenly. Avoid over-mixing at this stage.
Now, let’s move on to the wet ingredients. We need 2 large eggs at room temperature. This is extremely important. Room temperature eggs emulsify better with the other ingredients, resulting in a smoother batter and a more even rise. If your eggs are straight from the refrigerator, let them sit at room temperature for about 30 minutes before you begin. Cold eggs can lead to a dense and uneven texture.
We’ll also need 1 cup (2 sticks) of unsalted butter, softened to room temperature. Again, room temperature is key here. Soft butter will cream properly with the sugar, creating a light and airy batter. If your butter is too hard, it will be difficult to incorporate smoothly, potentially leading to a grainy texture. If it’s too soft, it may be difficult to achieve the proper volume when creaming. Aim for a consistency where the butter is easily spreadable with a knife.
Finally, we need 1 ¾ cups (350g) of granulated sugar and 1 teaspoon of pure vanilla extract. Measure the sugar accurately using a kitchen scale for the most precise results. The vanilla extract will provide the delightful flavor we’re aiming for. Make sure to use pure vanilla extract for the best flavor profile.
With all your ingredients properly measured and prepared, you’re ready to begin mixing your batter and create delicious vanilla cupcakes!
Making the Batter
Creating the perfect vanilla cupcake batter is key to achieving that light, fluffy texture and delicate vanilla flavor. Begin by ensuring all your ingredients are at room temperature. This is crucial for proper emulsification and a smooth batter. Cold ingredients can lead to a dense, lumpy result.
In a large bowl, cream together 1 cup (2 sticks) of unsalted butter and 1 ¾ cups of granulated sugar until the mixture is light and fluffy. This process incorporates air into the batter, contributing to a tender crumb. Use an electric mixer on medium-high speed for about 3-5 minutes; you should see a noticeable volume increase and a pale yellow color. Don’t rush this step!
Next, beat in 4 large eggs, one at a time, ensuring each egg is fully incorporated before adding the next. Scrape down the sides of the bowl as needed to prevent any unincorporated ingredients from settling at the bottom. Adding the eggs gradually prevents the batter from curdling.
In a separate bowl, whisk together 2 ½ cups of all-purpose flour, 2 teaspoons of baking powder, and ½ teaspoon of baking soda. Sifting the dry ingredients is highly recommended to remove any lumps and ensure even distribution throughout the batter. This prevents pockets of dense flour from forming in your cupcakes.
Gradually add the dry ingredients to the wet ingredients, alternating with 1 cup of milk. Begin and end with the dry ingredients. Mix on low speed until just combined. Overmixing develops gluten and can result in tough cupcakes. Mix only until no more dry flour is visible. A few small lumps are acceptable.
Finally, stir in 1 teaspoon of pure vanilla extract. Pure vanilla extract offers a superior flavor compared to imitation extracts. Gently fold the vanilla extract into the batter using a spatula to ensure even distribution. Avoid overmixing at this stage.
Before filling your cupcake liners, allow the batter to rest for about 10-15 minutes. This allows the gluten to relax, resulting in even more tender cupcakes. Now you’re ready to bake your delicious vanilla cupcakes!
Baking the Cupcakes
Preheat your oven to 350°F (175°C). This is crucial for even baking. Using an oven thermometer is highly recommended to ensure accuracy. Variations in oven temperature can significantly affect the outcome of your cupcakes.
Line a 12-cup muffin tin with paper liners. This prevents sticking and makes for easy removal. Don’t skip this step! Lightly greasing the liners is also a good idea for extra insurance.
Fill each cupcake liner about ⅔ full with batter. Overfilling will result in cupcakes that overflow and don’t bake properly. Aim for consistency in filling each liner for uniform rise and baking time.
Bake for 18-22 minutes, or until a toothpick inserted into the center comes out clean. Baking times can vary depending on your oven, so start checking at the 18-minute mark. Avoid overbaking, as this will result in dry cupcakes. If the toothpick comes out with a few moist crumbs, that’s perfectly fine.
Once baked, let the cupcakes cool in the muffin tin for 5-10 minutes before transferring them to a wire rack to cool completely. Cooling completely is essential before frosting, as warm cupcakes will melt the frosting.
Professional Tip: For perfectly even cupcakes, consider using a kitchen scale to measure your ingredients. This ensures accuracy and consistency in your baking. Also, rotating the muffin tin halfway through baking can help ensure even browning.
Troubleshooting: If your cupcakes are sinking in the center after baking, it’s likely due to overmixing the batter or using an oven temperature that is too low. If they have a peaked top, you may have overbaked them. Experiment with adjusting your baking time and oven temperature to achieve the perfect result.
Once completely cooled, your perfectly baked vanilla cupcakes are ready for frosting! Enjoy the fruits of your labour. Remember to store leftover cupcakes in an airtight container at room temperature for up to 3 days, or in the refrigerator for up to a week.
Cooling the Cupcakes
Cooling your cupcakes properly is just as crucial as baking them perfectly. Improper cooling can lead to soggy bottoms, uneven texture, and frosting that melts prematurely. This section details the best practices for cooling your vanilla cupcakes to ensure a consistently delicious result.
The first step is to let the cupcakes cool in the muffin tin for approximately 10-15 minutes. This allows the delicate structure to firm up slightly before handling. Resist the urge to remove them too early; impatience can result in broken cupcakes and a frustrating experience.
After the initial 10-15 minutes, carefully use a thin spatula or offset spatula to gently loosen the cupcakes from the sides of the muffin tin. Avoid forceful prying, as this can damage the delicate cakes. If any cupcakes stick stubbornly, you can run a thin knife around the edges to help them release.
Once loosened, carefully transfer the cupcakes to a wire rack. A wire rack is essential for proper cooling because it allows air to circulate freely around each cupcake. This prevents moisture from becoming trapped, which can lead to a soggy bottom. Place the wire rack on a flat, stable surface.
Allow the cupcakes to cool completely at room temperature for at least 30-45 minutes. This cooling period is vital for the cupcakes to reach a stable temperature before frosting. Attempting to frost warm cupcakes will result in melted frosting and a messy, unattractive result.
Check the cupcakes’ temperature before frosting. They should be completely cool to the touch. If you’re unsure, use a food thermometer; the internal temperature should be close to room temperature (around 70°F or 21°C).
Avoid placing the cupcakes in the refrigerator to speed up the cooling process. Refrigerating warm cupcakes can cause condensation to form, resulting in a soggy surface and making it difficult to frost evenly. Patience is key to achieving perfectly cooled and delicious vanilla cupcakes.
Once the cupcakes are completely cool, you can proceed to frost them and enjoy your perfectly baked, beautifully cooled, and deliciously frosted vanilla cupcakes!
Recommendations
For the best results, ensure your ingredients are at room temperature before beginning. This allows for proper emulsification and a lighter, fluffier cupcake. Overmixing the batter should be avoided as this can lead to tough cupcakes. Gentle folding is key to incorporating the dry ingredients. Fill the cupcake liners approximately two-thirds full to prevent overflow during baking.
Once baked, allow the cupcakes to cool completely in the pan for a few minutes before transferring them to a wire rack to cool completely. This prevents them from becoming soggy. Cooling completely is crucial before frosting to ensure the frosting adheres properly and doesn’t melt.
These vanilla cupcakes can be stored in an airtight container at room temperature for up to 3 days, or in the refrigerator for up to 5 days. For longer storage, freeze the unfrosted cupcakes in a freezer-safe container for up to 3 months. Thaw overnight in the refrigerator before frosting.
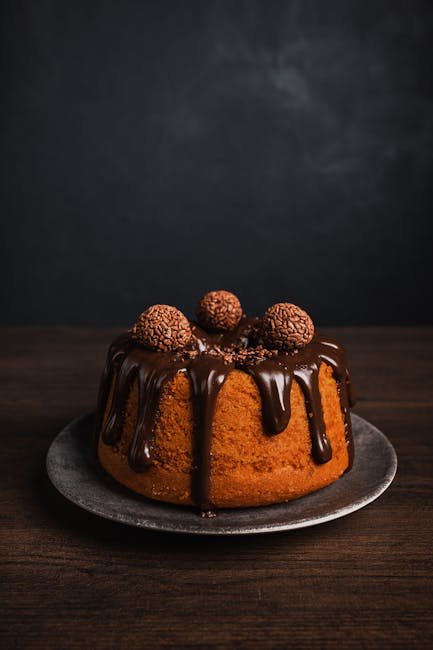
Serving suggestions abound! These cupcakes are delicious on their own, but can be elevated with fresh berries, a dusting of powdered sugar, or a sprinkle of chopped nuts. Consider serving them with a scoop of vanilla bean ice cream for a truly decadent dessert. They also pair beautifully with a cup of strong coffee or a glass of chilled milk.
Complementary dishes include a light and fruity salad, or a simple fruit crumble. The vanilla flavor is versatile and won’t clash with most desserts or side dishes. For a more sophisticated presentation, consider using different piping techniques to decorate the frosting.
Approximate Nutritional Information (per cupcake, may vary based on specific ingredients used): Calories: 250-300, Fat: 12-15g, Saturated Fat: 7-9g, Cholesterol: 30-40mg, Sodium: 100-150mg, Carbohydrates: 35-40g, Sugar: 20-25g, Protein: 3-4g. This is an estimate and should not be considered medical advice. For precise nutritional information, use a nutrition calculator with your specific ingredients and measurements.