The lobster roll, a seemingly simple sandwich, boasts a surprisingly rich and fascinating history. While pinpointing its exact origin is difficult, the consensus points to the early 20th century in New England, specifically along the coast of Maine. Its humble beginnings likely involved utilizing readily available, inexpensive lobster meat—a byproduct of the burgeoning lobster canning industry—to create a quick and satisfying meal for local fishermen and workers. Early versions were likely served cold, with simple mayonnaise dressing, showcasing the inherent sweetness and delicate texture of the lobster meat.
The lobster roll’s evolution was intrinsically tied to the fluctuating price of lobster. During periods when lobster was abundant and relatively cheap, it became a popular affordable food, fueling the sandwich’s rise in popularity. Conversely, times of scarcity would see lobster relegated to more upscale establishments. This economic ebb and flow significantly shaped the lobster roll’s culinary trajectory and its perception within different socioeconomic groups. Interestingly, the best lobster roll remains a highly debated topic, with fierce regional loyalties and passionate arguments over the ideal ingredients and preparation methods.
Today, the lobster roll enjoys a prominent position in American cuisine, transcending its New England origins. It’s estimated that the annual lobster roll market generates millions of dollars in revenue, a testament to its enduring appeal. While Maine remains a stronghold for traditionalists, variations have emerged across the country, showcasing regional twists and culinary innovations. Some opt for a warm, butter-toasted roll, while others champion the classic chilled version. The addition of celery, lemon juice, and even a touch of Old Bay seasoning further diversifies the culinary landscape of this iconic sandwich.
Beyond its economic impact, the lobster roll holds significant cultural weight. It’s a symbol of New England’s maritime heritage and its close relationship with the sea. Enjoying a lobster roll by the ocean, or at a quaint seaside shack, is a quintessential summer experience for many, representing a connection to nature and a simpler way of life. The sandwich’s enduring popularity also underscores our enduring fascination with fresh, high-quality ingredients and the ability of a simple dish to capture the essence of a region’s identity and culinary traditions.
This guide will explore the techniques and ingredients necessary to create the ultimate lobster roll, drawing upon the rich history and cultural significance of this beloved sandwich to craft a truly exceptional culinary experience. Get ready to embark on a delicious journey into the heart of New England’s culinary soul.
Ingredients and Measurements
Crafting the perfect lobster roll hinges on using high-quality ingredients and precise measurements. Don’t skimp on the lobster; it’s the star of the show! We’ll be focusing on a classic New England-style lobster roll, but feel free to adapt the seasonings to your preference.
Lobster Meat: You’ll need approximately 1 ½ pounds of cooked lobster meat, picked free from the shell and roughly chopped. Aim for a mix of claw and tail meat for optimal texture. Pre-cooked lobster meat is readily available in most seafood markets, saving you time and effort. However, for the most authentic flavor, consider cooking your own lobster. If you do, ensure it’s cooked properly to avoid tough, rubbery meat. Overcooked lobster will be dry and lack sweetness. The ideal lobster meat should be tender and slightly springy.
Mayonnaise: The mayonnaise is crucial for binding the lobster salad and adding richness. Use ½ cup of high-quality mayonnaise. Avoid using low-fat mayonnaise, as it will lack the necessary creaminess and body to hold the lobster salad together. A good quality mayonnaise, preferably one with a slightly tangy flavor profile, will significantly elevate the overall taste. Consider adding a squeeze of fresh lemon juice to enhance the flavor further.
Celery: Finely diced celery adds a pleasant crunch and subtle freshness to the lobster salad. Use about 2 stalks of celery, finely diced. Overly large pieces of celery will detract from the lobster’s texture, so ensure they are finely minced. The celery should be crisp and vibrant green.
Red Onion: A small amount of finely diced red onion provides a touch of sharpness and color. Use approximately ¼ cup of finely diced red onion. Don’t overdo the red onion, as it can overpower the delicate flavor of the lobster. If you prefer a milder flavor, you can briefly soak the diced onion in cold water for a few minutes to reduce its pungency before adding it to the salad.
Lemon Juice: A touch of lemon juice brightens the flavors and balances the richness of the mayonnaise. Use about 1 tablespoon of fresh lemon juice. Freshly squeezed lemon juice is highly recommended over bottled juice, as it offers a superior taste and aroma.
Seasoning: Keep the seasoning simple yet effective. Use salt and freshly ground black pepper to taste. Start with a small amount and adjust according to your preference. You may also consider a pinch of Old Bay seasoning for a classic seafood touch, but use it sparingly to avoid overpowering the lobster.
Lobster Roll Buns: The buns are just as important as the lobster salad itself. Choose 4-6 toasted New England-style hot dog buns or split-top rolls. Ensure the buns are of high quality, soft, and slightly sweet. Lightly toasting the buns before adding the lobster salad enhances their flavor and prevents them from becoming soggy.
Optional additions: Some chefs like to add a touch of finely chopped chives or parsley for added freshness and visual appeal. A tiny pinch of cayenne pepper can add a subtle kick for those who enjoy a little heat. Remember, less is more when it comes to additional ingredients; let the lobster shine!
Equipment Checklist: Mastering the Lobster Roll
Crafting the perfect lobster roll requires the right tools. Don’t underestimate the impact of proper equipment on the final product; a smooth workflow translates to a superior culinary experience. This checklist details essential items, from prep to presentation, ensuring you’re fully equipped for lobster roll mastery.
Lobster Cracking and Meat Extraction: You’ll need a sturdy lobster cracker (a nutcracker won’t suffice for larger lobsters) and a lobster pick. These specialized tools allow efficient and safe removal of lobster meat without excessive damage or waste. Consider investing in a high-quality set; it’s a worthwhile investment for frequent lobster preparation.
Knife Skills: A sharp chef’s knife (8-10 inches) is crucial for dicing celery, finely chopping onions, and neatly trimming the lobster meat. A dull knife will crush the ingredients, affecting texture and appearance. A paring knife (3-4 inches) will be handy for smaller tasks like removing any residual cartilage from the lobster meat. Remember to sharpen your knives regularly for optimal performance and safety.
Mixing and Preparation: A medium-sized mixing bowl (approximately 3-quart capacity) is ideal for combining the lobster meat with mayonnaise, celery, onion, and seasonings. A smaller 2-cup measuring cup and 1-tablespoon measuring spoon are essential for precise ingredient measurements to ensure consistent flavor profiles. For a smooth mayonnaise mixture, consider using a whisk to gently incorporate all ingredients.
Bread and Roll Preparation: You’ll need a baking sheet if you’re toasting the rolls. A toasting rack placed on the baking sheet facilitates even toasting. A pair of tongs will help safely handle the hot rolls. Choose the right bread – hot dog rolls, split-top rolls or brioche – depending on your preference. Have a butter knife on hand to spread softened butter on the rolls for toasting or after assembling the roll.
Serving and Presentation: Serving plates or trays, appropriate for the number of lobster rolls being prepared, are essential for an attractive presentation. Paper towels are vital for cleaning up any spills or excess mayonnaise. Optional: Consider using small bowls or ramekins for individual servings of lemon wedges or additional mayonnaise for those who prefer a richer flavor.
Cleaning Up: Finally, remember the importance of proper cleaning. Have a dish rack and dish soap ready for washing the mixing bowl, utensils, and any other equipment used in the preparation process. Garbage bags are a must for efficient waste disposal during and after lobster roll preparation.
Professional Recommendation: Invest in quality tools. While you might find cheaper alternatives, durable, well-made equipment will last longer and enhance your overall cooking experience. A sharp knife, for example, is not just about efficiency; it’s also about safety.
Lobster Preparation (Cooking & Meat Extraction)
Preparing the lobster is crucial for a delicious lobster roll. The goal is to cook the lobster perfectly – achieving tender, succulent meat without overcooking it to rubbery texture. We’ll cover two common methods: steaming and boiling, followed by detailed meat extraction.
Steaming Lobster: This method is generally preferred by chefs as it retains more moisture and flavor. For a 1-1.5 lb lobster, bring about 2 inches of water to a rolling boil in a large pot with a steamer basket. Add a few bay leaves and a couple of peppercorns for extra flavor (optional). Place the lobster, still alive (or already stunned and immediately placed into the boiling water to avoid unnecessary suffering), in the steamer basket, ensuring it’s not overcrowded. Cover the pot tightly and steam for 8-12 minutes, depending on the size. A 1-1.5 lb lobster will typically take around 10 minutes. The lobster is done when the shell turns bright red and the meat is opaque. Immediately remove it from the steamer and let it cool slightly before handling.
Boiling Lobster: While not as preferred as steaming, boiling is a quicker method. Bring a large pot of salted water (about 2 tablespoons of salt per gallon) to a rolling boil. Carefully submerge the live lobster (or the stunned lobster) in the boiling water and cook for 8-12 minutes, again depending on size. Ensure the lobster is fully submerged. Once done, remove it from the pot and let it cool. Overcooking will result in tough, rubbery meat.
Meat Extraction: Once the lobster has cooled sufficiently to handle, begin extracting the meat. This process requires some care to avoid tearing the delicate meat. First, twist off the claws and tail from the body. Crack the claws using a nutcracker or heavy mallet. Avoid crushing the claws excessively, as this can make removing the meat more difficult. Using a lobster cracker and a small fork, carefully extract the meat from the claws, discarding any hard cartilage.
Next, remove the tail meat. Using a small sharp knife or a lobster pick, carefully cut along the underside of the tail to separate the shell from the meat. Gently pry the meat out of the shell, working from the bottom to the top. Be careful not to tear the meat. Some people like to use a butter knife to loosen the meat from the shell. The tail meat should come out in one long piece. Set aside.
Finally, extract meat from the body. Cut the body in half lengthwise. Remove the dark, intestinal vein running along the top of the body, discarding it. Using a fork, scrape the meat from the body cavity. This meat is often more tender and less firm than the tail and claw meat. Combine all the extracted lobster meat in a bowl. You should have approximately 1-1.5 cups of meat from a 1-1.5 lb lobster. Discard any remaining inedible parts.
Professional Recommendation: For the best results, purchase live lobsters and cook them immediately. If this isn’t possible, ensure that the pre-cooked lobster you purchase is fresh and high quality. Properly cooked lobster meat should be firm, moist, and sweet. Overcooked lobster will be tough and rubbery, while undercooked lobster will be slimy and translucent.
Sauce Preparation (Mayonnaise-based or other)
The sauce is arguably just as crucial as the lobster itself in crafting the perfect lobster roll. A well-made sauce elevates the dish, complementing the delicate sweetness of the lobster without overpowering it. While a classic mayonnaise-based sauce reigns supreme, there’s room for creative variations to suit individual preferences.
The Classic Mayonnaise-Based Sauce: This recipe provides a creamy, tangy base that perfectly balances the lobster. Begin with 1 cup of high-quality mayonnaise. Using a good mayonnaise is paramount; its flavor will significantly impact the overall taste of the roll. Look for brands with a rich, slightly tangy flavor profile. Next, add 2 tablespoons of finely chopped celery. The celery adds a pleasant crunch and a hint of freshness. Then, incorporate 1 tablespoon of finely chopped red onion for a slight bite and visual appeal. Remember to finely mince both the celery and onion to avoid large, unpleasant chunks in the finished sauce.
Seasoning is key: Add 1 tablespoon of freshly squeezed lemon juice for brightness and acidity. This cuts through the richness of the mayonnaise. Season generously with freshly ground black pepper – approximately ½ teaspoon to ¾ teaspoon, depending on your preference. A pinch of cayenne pepper (or a few dashes of your favorite hot sauce) can add a subtle kick, but use sparingly to avoid overpowering the lobster. Finally, add a teaspoon of Old Bay seasoning for that classic seafood taste. Taste and adjust seasoning as needed. You might want more lemon juice for extra tang, or more pepper for a spicier bite. The goal is to create a balanced, flavorful sauce that complements, not competes with, the lobster.
Variations on the Classic: For a richer, more decadent sauce, consider adding a tablespoon or two of melted butter. This adds a luxurious mouthfeel and a subtle buttery note. For those who prefer a lighter sauce, reduce the amount of mayonnaise slightly, and increase the lemon juice for a brighter, tangier flavor. Experiment with different herbs, such as chives or dill, for added complexity and freshness. A teaspoon of finely chopped fresh parsley can also add a vibrant green color and a slightly peppery flavor.
Beyond Mayonnaise: While mayonnaise forms the foundation of most lobster roll sauces, adventurous cooks might explore alternatives. Aioli, a garlic-infused mayonnaise, offers a more pungent and flavorful base. A simple vinaigrette, made with olive oil, lemon juice, and Dijon mustard, could provide a lighter, less creamy alternative, particularly suited for those who prefer a less heavy sauce. Remember to adjust seasoning accordingly when using alternative bases. The goal remains the same: to complement the delicate flavor of the lobster without overpowering it.
Preparation and Storage: Once the sauce is prepared, taste it again and make any final adjustments. It’s best to prepare the sauce at least 30 minutes before serving to allow the flavors to meld. The sauce can be stored in an airtight container in the refrigerator for up to 2 days. Bring the sauce to room temperature before serving for optimal flavor and texture.
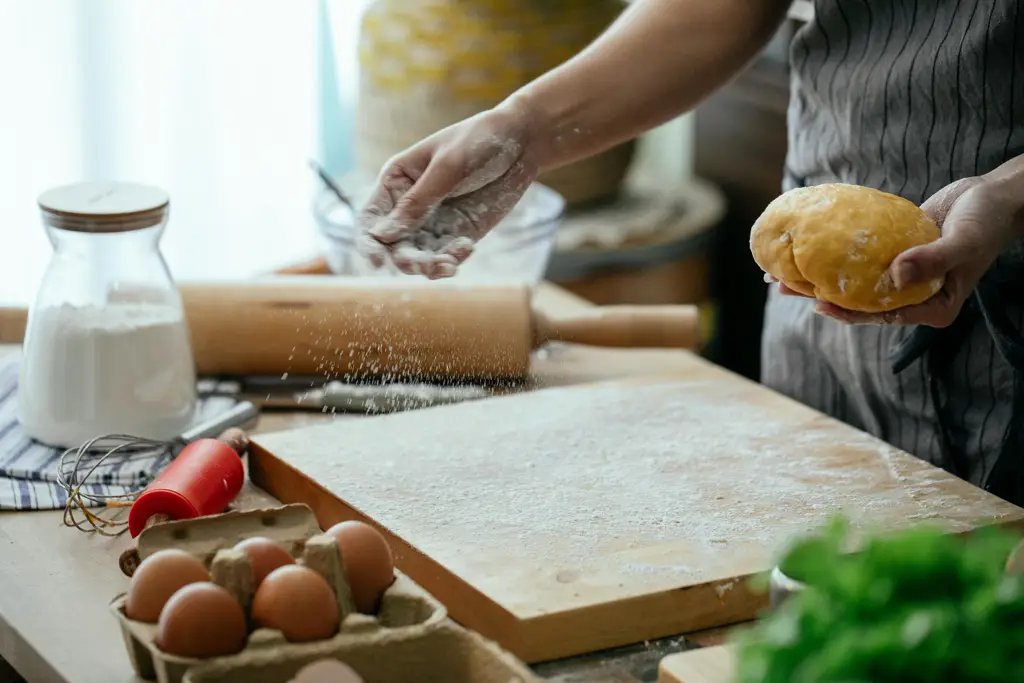
Roll Preparation (Toasting, Buttering)
The perfect lobster roll hinges not just on the succulent lobster meat, but also on the supporting cast: the roll. Choosing the right roll is crucial, but equally important is the preparation—toasting and buttering—which elevates the experience from good to unforgettable.
Roll Selection: Start with a sturdy, slightly sweet, New England-style split-top hot dog bun. These rolls offer the perfect balance of softness and structural integrity to hold the generous lobster filling without falling apart. Avoid overly soft rolls that will become soggy under the weight of the lobster salad and butter. Look for rolls that are approximately 6 inches long and 2 inches wide. About 6-8 rolls should suffice for a typical recipe yielding 4-6 lobster roll servings, depending on the size of your lobster.
Toasting the Rolls: Toasting the rolls is essential for preventing sogginess and adding a delightful textural contrast to the creamy lobster filling. There are several ways to achieve the perfect toast:
Method 1: Pan-Toasting: This method provides excellent control and even toasting. Cut the rolls in half lengthwise. Heat a large skillet or griddle over medium heat. Lightly brush the cut sides of the rolls with unsalted butter (approximately 1 tablespoon total for 6-8 rolls). Place the cut-side down in the hot skillet and toast for 2-3 minutes, until lightly golden brown and crisp. Flip and toast the other side for 1-2 minutes, just to warm it through. Avoid burning; a light golden color is the goal.
Method 2: Broiler Toasting: For a quicker method, preheat your broiler. Arrange the split rolls cut-side up on a baking sheet. Brush the cut sides lightly with unsalted butter (approximately 1 tablespoon total for 6-8 rolls). Broil for 1-2 minutes, watching carefully to prevent burning. The rolls should be golden brown and slightly crisp. Keep a close eye on them as broilers can cook unevenly.
Method 3: Toaster Oven Toasting: A toaster oven provides a good balance of speed and even toasting, particularly for smaller batches. Arrange the rolls cut-side up in the toaster oven and toast according to the manufacturer’s instructions, checking frequently to prevent burning. Use a low setting and toast for 2-3 minutes. Lightly brush the cut sides with unsalted butter (approximately 1 tablespoon total for 6-8 rolls) before toasting.
Buttering the Rolls: Once the rolls are toasted, it’s time to add the butter. Use high-quality unsalted butter, preferably European-style butter with a richer flavor. Let the toasted rolls cool slightly before buttering to prevent the butter from melting too quickly. Generously butter the inside of both halves of the roll. You can use a butter knife or a pastry brush to spread the butter evenly. Aim for a thin but even layer which will enhance the flavor and prevent dryness. Approximately 1-2 tablespoons of butter total (depending on the size of your rolls) should be sufficient for this step.
Important Note: The amount of butter used is a matter of personal preference, but don’t skimp! The butter adds flavor and richness to the roll and helps to prevent the bread from becoming soggy from the lobster salad.
Assembly of the Lobster Roll
With your perfectly cooked and dressed lobster meat prepared, it’s time to assemble the star of the show: the lobster roll. The assembly process is crucial for achieving that perfect balance of texture and flavor. We’ll be focusing on the classic New England style, but feel free to adapt based on your preference.
Choosing your rolls: The bread is arguably as important as the lobster itself. Opt for perfectly toasted, split-top hot dog buns or New England-style rolls. These offer a sturdy base to hold the generous lobster salad without becoming soggy. Approximately 6-inch rolls are ideal for a satisfying portion. Toasting the rolls lightly on a griddle or under the broiler adds a delightful crispness and helps prevent them from absorbing excess moisture from the lobster salad.
Layering for maximum flavor and texture: Begin by gently spreading 1-2 tablespoons of mayonnaise (depending on the richness of your lobster salad) inside each roll. This creates a flavorful base and prevents the bread from becoming too dry. Don’t overload; a thin coating is sufficient. Next, add approximately 4-5 ounces of your prepared lobster salad to each roll. Avoid overfilling; a generously packed roll is ideal, but overflowing lobster can lead to a messy experience.
The art of the presentation: Evenly distribute the lobster salad within the roll, ensuring it reaches the edges for maximum flavor in every bite. A slightly mounded top is aesthetically pleasing. Avoid compacting the lobster salad; you want to maintain its fluffy texture. If using celery or other vegetables in your lobster salad, ensure they are evenly distributed throughout the roll.
Adding finishing touches: Once the lobster salad is neatly nestled in the roll, consider adding some finishing touches. A small sprinkle of freshly chopped chives or parsley adds a pop of color and fresh herb flavor. A squeeze of fresh lemon juice brightens the overall taste and adds a touch of acidity to cut through the richness of the lobster and mayonnaise. Avoid adding too much lemon juice, as it can overpower the delicate flavor of the lobster.
Serving suggestions: Serve the lobster rolls immediately for optimal enjoyment. The toasted bun provides a delightful contrast to the cool, succulent lobster salad. Offer accompaniments such as lemon wedges, potato chips, or a simple side salad to complete the meal. Consider individual serving sizes — presentation is key to a truly memorable lobster roll experience. Remember to store any leftover lobster rolls appropriately in the refrigerator. Consume within 24 hours for the best quality.
Professional Tip: For an extra touch of elegance, consider lightly buttering the cut sides of the rolls before toasting. This adds a subtle richness and enhances the overall flavor profile. Additionally, if you find your lobster salad a bit dry, adding a touch more mayonnaise or even a spoonful of lobster bisque can improve consistency and moisture.
Recommendations for the Best Lobster Roll
To achieve the ultimate lobster roll experience, meticulous attention to detail is key. Start with the freshest lobster meat possible. Look for locally sourced lobster when available, and ensure the meat is firm, bright, and free of any off-putting odors. Don’t be afraid to ask your fishmonger for recommendations. The quality of your lobster directly impacts the final flavor and texture of your roll.
Properly prepping the lobster meat is crucial. Avoid over-mixing or over-handling the lobster, as this can make it tough. Gently toss it with mayonnaise (preferably a high-quality, slightly tangy brand), celery, a touch of lemon juice, and a sprinkle of salt and freshly cracked black pepper. Avoid excessive mayonnaise, as it can overpower the delicate flavor of the lobster. Experiment with adding finely chopped chives or dill for an extra layer of freshness.
The choice of bread is paramount. A classic New England-style lobster roll uses a toasted, slightly split-top hot dog bun or a New England style roll. The bread should be sturdy enough to hold the generous lobster filling without falling apart, yet soft enough to complement the tender lobster meat. Toasting the bread lightly before adding the filling enhances its texture and prevents it from becoming soggy.
Serving suggestions are numerous. A simple yet elegant presentation includes serving the lobster roll on a bed of crisp lettuce with a side of lemon wedges. For a more substantial meal, consider serving it with classic sides such as french fries, potato salad, or a fresh green salad. A side of coleslaw adds a nice creamy counterpoint to the richness of the lobster.
For those seeking a complete culinary experience, consider pairing your lobster roll with a crisp white wine, such as Sauvignon Blanc or Pinot Grigio. These wines cut through the richness of the lobster and mayonnaise, enhancing the overall flavor profile. A light-bodied beer, like a pilsner, can also be a refreshing accompaniment.
Storage: Leftover lobster rolls should be refrigerated immediately in an airtight container. They are best enjoyed fresh, but can be stored for up to 24 hours. Do not freeze lobster rolls, as the texture of the lobster meat will significantly deteriorate upon thawing.
Nutritional Information (per serving, approximate, based on 6oz lobster meat and standard bun): Calories: 500-600, Protein: 30-40g, Fat: 25-35g, Carbohydrates: 40-50g. Note: Nutritional information varies significantly depending on the ingredients used and portion sizes. This is an estimate only.
Important Note: Always ensure your lobster is sourced from reputable suppliers to guarantee freshness and quality. Proper food handling and hygiene practices should be followed throughout the preparation and serving process.