Chocolate mousse, a decadent dessert beloved worldwide, boasts a surprisingly rich history intertwined with culinary innovation and cultural shifts. While pinpointing its exact origin is difficult, its evolution can be traced back to the 18th-century French culinary scene, a period marked by a growing fascination with refined desserts and airy textures. Early versions likely involved incorporating whipped egg whites into a chocolate base, a technique already prevalent in other French sweets. It wasn’t until the 19th and 20th centuries that chocolate mousse, as we largely recognize it today, truly took shape, benefiting from improvements in chocolate production and a broader availability of high-quality ingredients. The rise of the modern culinary arts also played a significant role, with chefs experimenting with different techniques and flavors to create ever more sophisticated versions.
The cultural significance of chocolate mousse is undeniable. It transcends geographical boundaries and appears on menus in countless restaurants and homes across the globe. Its popularity is a testament to its versatility; it can be a simple yet elegant end to a meal, a sophisticated addition to a high-end restaurant’s offerings, or a celebratory treat for special occasions. The global chocolate market itself is a colossal industry, estimated to be worth hundreds of billions of dollars annually, with a significant portion of that attributed to chocolate-based desserts like mousse. This widespread consumption reflects not only a love for the taste and texture but also the emotional connection associated with indulgence and pleasure.
Interestingly, the very name mousse – meaning foam in French – perfectly encapsulates the dessert’s airy, light texture. This lightness is a key element that distinguishes it from other chocolate-based desserts. Achieving this perfect texture requires a delicate balance of ingredients and techniques. Many recipes rely on the careful whipping of egg whites to incorporate air into the mixture, creating a cloud-like consistency. The type of chocolate used also plays a crucial role, with dark, milk, and even white chocolate variations all offering unique flavor profiles and textural nuances. Variations abound – from simple, classic recipes to those incorporating liqueurs, fruits, or spices – showcasing the enduring appeal and adaptability of this culinary masterpiece.
This guide will explore the intricacies of creating the best chocolate mousse, focusing on techniques that ensure a perfectly light and airy texture, a rich and intense chocolate flavor, and a flawlessly smooth finish. We will delve into the importance of ingredient selection, the nuances of whipping techniques, and the secrets to achieving that signature, melt-in-your-mouth experience. Prepare to embark on a culinary journey that will elevate your chocolate mousse game to new heights!
Ingredients and Measurements
Creating the perfect chocolate mousse hinges on precise measurements and high-quality ingredients. Don’t skimp on the chocolate – it’s the star of the show! We’ll be using bittersweet chocolate, but feel free to experiment with dark chocolate or even semi-sweet, adjusting the sugar accordingly. The key is to choose a chocolate with a high percentage of cacao for a rich, intense flavor.
For this recipe, we’ll need 6 ounces (170 grams) of high-quality bittersweet chocolate, chopped into small, roughly equal pieces. Smaller pieces will melt more evenly and quickly. Using a good quality chocolate grater can speed up this process, ensuring consistent sized pieces and quicker melting. Avoid using chocolate chips as they often contain additives that can affect the texture of the mousse.
Next, we need 4 large eggs, separated carefully. Proper separation is crucial for achieving a light and airy texture. Ensure no yolk gets into the whites, as even a tiny speck of yolk can inhibit whipping. Use a separate bowl for the egg whites to prevent cross-contamination. Room temperature eggs whip up more easily and create a more stable meringue.
We’ll also need 1/4 cup (50 grams) of granulated sugar. Do not substitute with powdered sugar as it will affect the texture. Granulated sugar dissolves more evenly and contributes to the desired sweetness and structure. You can adjust the sugar quantity to your preference, bearing in mind the sweetness of your chosen chocolate.
For a touch of richness and stability, we’ll add 1/4 cup (60ml) of heavy cream. Heavy cream (whipping cream) is essential; using light cream or milk will result in a thinner, less stable mousse. Make sure your cream is very cold for optimal whipping results. Cold cream whips up to a stiffer peak, crucial for a well-structured mousse.
Finally, a pinch of salt (about 1/8 teaspoon) enhances the chocolate flavor and balances the sweetness. Don’t be afraid of the salt; it’s a subtle but important element in bringing out the best in the chocolate. Use fine sea salt for the best results – coarser salt can be grainy and more noticeable.
Optional additions: For an extra layer of flavor, consider adding a teaspoon of vanilla extract or a tablespoon of coffee liqueur (like Kahlúa) to the melted chocolate mixture. A dash of espresso powder can also complement the chocolate beautifully. Remember to adjust the sugar content if adding other sweeteners.
Measurement precision: Using a kitchen scale is highly recommended for accurate measurements, especially for the chocolate and sugar. Volume measurements can be less precise, potentially affecting the final texture and taste of the mousse. Accuracy is key to creating a perfect chocolate mousse.
Equipment List
Creating a flawlessly smooth and decadent chocolate mousse requires not only the finest ingredients but also the right tools. The equipment listed below is essential for achieving professional-quality results at home. While some items might seem optional, they significantly contribute to the ease and success of the recipe. Investing in quality equipment is an investment in the quality of your mousse.
Mixing Bowls: You’ll need at least two mixing bowls, preferably stainless steel or glass. One large bowl (at least 4-quart capacity) is crucial for whipping the cream and folding in the chocolate mixture. This size provides ample space to incorporate air without over-mixing. A smaller bowl (approximately 2-quart capacity) is ideal for melting the chocolate and preparing the egg mixture. Avoid using plastic bowls, especially for the egg whites, as plastic can sometimes retain odors and affect the whipping process.
Whisk: A sturdy balloon whisk is indispensable. Its flexible wires effectively incorporate air into the egg whites and cream, creating volume and lightness. A hand whisk is perfectly adequate, but a stand mixer with a whisk attachment can also be used, especially if making a larger batch. Ensure your whisk is clean and dry to prevent the egg whites from collapsing during the whipping process.
Double Boiler or Heatproof Bowl and Saucepan: Gentle melting of chocolate is key to preventing scorching and seizing. A double boiler is the ideal method, providing even heat distribution. Alternatively, you can use a heatproof bowl set over a saucepan of simmering water (ensure the bowl’s bottom doesn’t touch the water). The water should be gently simmering, not boiling vigorously. A thermometer is highly recommended to monitor the water temperature.
Spatula or Rubber Scraper: A flexible spatula or rubber scraper is necessary for folding the whipped cream and egg whites into the melted chocolate mixture. Gentle folding is essential to maintain the air incorporated in the whipped components. Aggressive stirring will deflate the mousse and result in a dense texture. Choose a spatula with a flexible edge for efficient scraping of the bowl.
Measuring Cups and Spoons: Accurate measuring is crucial for achieving the perfect balance of ingredients. Use measuring cups and spoons designed for accurate volume and weight measurements. For instance, a kitchen scale can prove invaluable for measuring ingredients like sugar and chocolate precisely.
Serving Dishes or Glasses: Individual serving dishes or glasses are recommended for presenting your chocolate mousse beautifully. Choose elegant glasses or ramekins to enhance the overall dining experience. Chill the serving dishes briefly before filling them with the mousse for a more visually appealing presentation.
Optional Equipment: While not strictly essential, a stand mixer with a whisk attachment can significantly simplify the whipping process, saving time and effort. A pastry bag with a large round tip is helpful for creating a professional finish when transferring the mousse into serving dishes. A food processor can be used to finely chop the chocolate, though this is not necessary if using pre-chopped chocolate.
Preparation of Ingredients
Before you begin assembling your exquisite chocolate mousse, meticulous preparation of your ingredients is paramount. This stage ensures a smooth, luxurious texture and a rich, decadent flavor. We’ll focus on two key components: melting chocolate and whipping cream.
Melting the Chocolate: The Gentle Approach
For the best results, use high-quality dark chocolate (at least 70% cacao) with a high cocoa butter content. This contributes significantly to the mousse’s velvety texture. We’ll be using 6 ounces (170g) of finely chopped dark chocolate for this recipe. Avoid using chocolate chips, as they often contain stabilizers that can interfere with the melting process. There are two reliable methods for melting chocolate:
Method 1: Double Boiler Method (Recommended): This gentle method prevents scorching and ensures even melting. Fill a saucepan with about an inch of water and bring it to a simmer. Place a heatproof bowl on top of the saucepan, making sure the bottom of the bowl doesn’t touch the water. Add your chopped chocolate to the bowl. Stir gently and consistently until the chocolate is completely melted and smooth. Avoid getting any water into the chocolate, as this will seize it and create a grainy texture.
Method 2: Microwave Method (Use with Caution): Place your chopped chocolate in a microwave-safe bowl. Microwave in 30-second intervals, stirring thoroughly after each interval. This method requires close monitoring to prevent overheating and seizing. Overheating can lead to a grainy, lumpy texture, ruining your mousse. If the chocolate is seizing, try adding a teaspoon of vegetable oil to restore its smoothness.
Whipping the Cream: Achieving Perfect Peaks
The success of your chocolate mousse heavily relies on properly whipped cream. We’ll use 1 cup (240ml) of heavy whipping cream, which has a higher fat content than light cream, resulting in a sturdier, more voluminous mousse. Ensure your cream is very cold; ideally, chill it in the refrigerator for at least 30 minutes before whipping. Using a cold bowl and whisk also helps.
Using an electric mixer, beat the cream on medium speed until soft peaks form. Don’t overwhip; overwhipped cream will become grainy and buttery. Soft peaks should hold their shape when you lift the whisk but still have a slight curve at the top. Gradually increase the speed to high and continue beating until stiff peaks form. The cream should hold its shape firmly when you lift the whisk. Be careful not to overwhip, as this will result in a butter-like consistency.
Important Note: Both melted chocolate and whipped cream should be at room temperature before combining them. This will prevent the cream from curdling. Allow the melted chocolate to cool slightly before proceeding to the next step. This ensures that the temperature difference between the chocolate and the cream is minimal, improving the final texture of the mousse.
Mixing and Folding Techniques
Creating a light and airy chocolate mousse hinges on mastering the delicate art of mixing and folding. Improper technique can lead to a dense, heavy mousse, ruining the desired texture. This section will guide you through the crucial steps, ensuring your mousse achieves its cloud-like perfection.
We’ll begin with the initial mixing of the egg yolks and sugar. Use a medium-sized bowl and a whisk. The goal is to create a pale, thick ribbon-like consistency. This process is crucial for incorporating air and creating a stable base for your mousse. Whisk vigorously for at least 5-7 minutes, until the mixture is light, fluffy, and noticeably increased in volume. You should be able to trace a trail of the mixture on the surface that holds its shape for a few seconds before settling back.
Next, we’ll address melting the chocolate. Use a double boiler or a heatproof bowl set over a pan of simmering water. Avoid direct heat, as this can scorch the chocolate and impart a bitter taste. Ensure the water doesn’t touch the bottom of the bowl. Chop your chocolate (approximately 6 ounces of high-quality dark chocolate) into small pieces for even melting. Stir gently until the chocolate is completely smooth and glossy. Remove from heat and let cool slightly.
The most critical stage is the folding of the chocolate into the egg yolk mixture. Folding, not stirring, is paramount. Stirring will deflate the air whipped into the yolks, resulting in a dense mousse. To fold, gently pour about one-third of the melted chocolate into the egg yolk mixture. Using a spatula, gently cut down through the mixture, across the bottom of the bowl, and up and over, turning the bowl as you go. Repeat this process in three additions, ensuring each addition of chocolate is fully incorporated before adding more.
Gentle and deliberate movements are key. Imagine you’re scooping the mixture from the bottom and gently folding it over the top. Avoid over-folding, which can also deflate the mixture. The goal is to combine the ingredients without losing the air incorporated into the egg yolks. Once all the chocolate is incorporated, the mixture should be smooth and glossy, with a light and airy texture.
Finally, if using, gently fold in the whipped cream. Whip 1 cup of heavy cream to soft peaks before incorporating it into the chocolate mixture. Follow the same folding technique as before, ensuring that you maintain the delicate airiness of both components. Over-mixing will result in a dense and less appealing mousse. Once everything is incorporated, carefully spoon the mousse into individual serving glasses or a larger bowl and refrigerate for at least 2 hours, or preferably overnight, to allow the flavors to meld and the mousse to set.
Remember: Patience and precision are key to achieving the perfect chocolate mousse. Take your time, and enjoy the process of creating this delicious dessert.
Chilling and Setting Time
Chilling your chocolate mousse is crucial for achieving its signature smooth, creamy texture and preventing it from becoming runny. The chilling process allows the mousse to properly set, solidifying the mixture and creating that delightful, melt-in-your-mouth experience. Insufficient chilling will result in a loose, soupy mousse, while over-chilling can lead to a grainy or excessively firm texture.
The ideal chilling time is typically 2-4 hours in the refrigerator. However, this can vary slightly depending on factors like the ambient temperature of your refrigerator, the size and type of serving dishes you’re using, and the specific recipe followed. A smaller ramekin will chill faster than a large bowl.
Properly prepare your serving dishes before chilling. Individual ramekins or small glasses are ideal for serving chocolate mousse as they allow for even chilling. Rinse your chosen serving dishes with cold water before adding the mousse. This pre-chilling helps to speed up the overall setting process. Avoid using metallic containers as they can sometimes affect the taste of the mousse. Glass or ceramic are preferred.
Ensure your mousse is completely cooled before chilling. If you add warm or even lukewarm mousse to the refrigerator, it will significantly prolong the chilling time and potentially lead to uneven setting. Allow the mixture to cool to room temperature (approximately 20-25°C or 68-77°F) for at least 30 minutes before transferring it to your prepared serving dishes.
For a quicker chilling process, consider using a shallow dish. A wider, shallower container will offer a larger surface area for heat dissipation, leading to faster chilling. However, be mindful that a very shallow container may increase the risk of the mousse drying out on the surface. A depth of approximately 2-3 inches is generally recommended.
Monitor the mousse during chilling. After 2 hours, gently check the consistency. It should be set around the edges but still slightly soft in the center. If it’s still too soft, continue chilling for another hour. Conversely, if it’s firm all the way through after 2 hours, it’s perfectly set and ready to serve. Over-chilled mousse can be slightly difficult to scoop and serve.
Avoid significant temperature fluctuations. Do not place the chilled mousse in a warm environment immediately after chilling. Let it sit at room temperature for about 10-15 minutes before serving to allow it to soften slightly and become easier to serve. This will enhance the overall enjoyment of the luscious chocolate mousse.
Remember, patience is key. Proper chilling is essential for achieving the perfect chocolate mousse. Don’t rush the process! Allow ample time for the mousse to set properly and fully develop its rich, decadent texture. The results will be worth the wait.
Serving Suggestions (including garnishes)
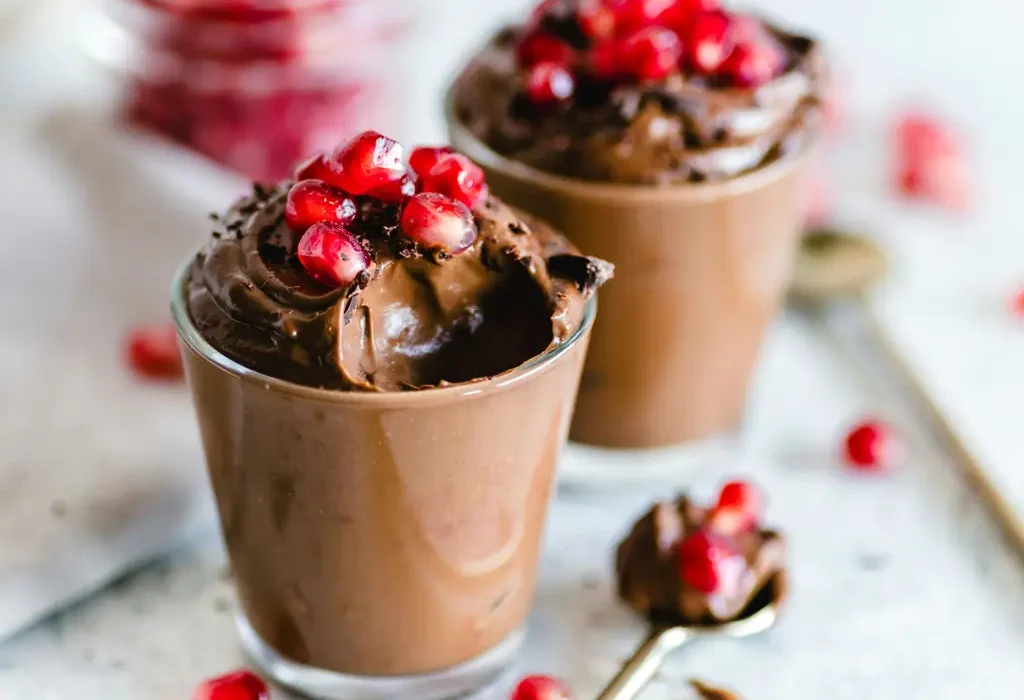
Your exquisitely crafted chocolate mousse deserves a presentation as elegant as its taste. Here are some serving suggestions to elevate your dessert from delicious to divine, focusing on both visual appeal and complementary flavors.
Classic Elegance: For a timeless presentation, serve your mousse in individual stemmed glasses or dessert bowls. A simple approach is often best – fill each glass about ¾ full to allow for a garnish and to avoid spillage. Chill the glasses beforehand for an extra touch of sophistication and to keep the mousse perfectly cool.
Garnish Ideas: A few well-chosen garnishes can transform your mousse from good to unforgettable. Consider these options:
- Fresh Berries: A handful of raspberries, strawberries, or blueberries scattered atop the mousse adds a vibrant pop of color and a delightful tartness that contrasts beautifully with the richness of the chocolate. Use approximately 4-6 berries per serving, depending on size.
- Chocolate Shavings: Using a vegetable peeler or a microplane, create delicate chocolate shavings from high-quality dark chocolate (70% cacao or higher). Gently sprinkle 1-2 teaspoons over each serving for an elegant touch of extra chocolate intensity.
- Whipped Cream: A dollop of lightly sweetened whipped cream provides a lovely textural contrast. Use 1-2 tablespoons of whipped cream per serving; too much can overpower the mousse.
- Mint Sprig: A small, fresh mint sprig adds a refreshing aroma and a pop of green. Use only one small sprig per serving; avoid overpowering the chocolate flavor.
- Candied Orange Peel: Thinly sliced candied orange peel offers a subtle citrusy note that complements dark chocolate beautifully. Use 1-2 small pieces per serving.
- Cocoa Powder Dusting: A light dusting of unsweetened cocoa powder provides a rustic, elegant finish. Use a fine-mesh sieve to ensure an even distribution. A light dusting is sufficient; avoid a heavy coat.
Creative Plating: Experiment with different plating techniques. You can create a visually stunning dessert by layering the mousse with other components. For example, a layer of crushed biscotti or crumbled brownie pieces at the bottom of the glass, followed by the mousse, and then your chosen garnish, adds texture and visual interest. Ensure proportions are balanced to avoid one element overpowering the others.
Temperature Considerations: Serve your chocolate mousse chilled, but not frozen. Allow it to sit at room temperature for approximately 10-15 minutes before serving to allow the flavors to fully develop and the texture to soften slightly. This makes it easier to scoop and enjoy.
Presentation Matters: Take the time to plate your mousse beautifully. Even a simple garnish, artfully arranged, can make a significant difference. Consider using small spoons or forks specifically designed for desserts. A clean plate or glass is essential for a professional-looking presentation. Remember, the presentation is just as important as the taste!
Recommendations for the Best Chocolate Mousse
To achieve the perfect chocolate mousse, several key recommendations should be followed. First and foremost, use high-quality chocolate. The flavor of your mousse will directly reflect the quality of the chocolate you choose. Dark chocolate with a high percentage of cacao (70% or higher) will yield a richer, more intense flavor, but milk chocolate or even white chocolate can be used depending on your preference. Ensure the chocolate is finely chopped or even better, melted gently in a double boiler or microwave in short bursts, stirring frequently to prevent scorching. This ensures a smooth, lump-free texture in the final product. The eggs should be at room temperature for optimal emulsification – this helps create a lighter, airier mousse.
Whipping the cream to stiff peaks is crucial. Under-whipped cream will result in a mousse that is too liquid, while over-whipped cream can become grainy. The key is to achieve a texture where the cream holds its shape but is still light and airy. Gentle folding of the whipped cream into the chocolate mixture is essential to maintain the airiness. Avoid over-mixing, which can deflate the mousse. Use a spatula and gently fold the mixture until just combined. A few streaks of unmixed chocolate are better than a deflated mousse.
For serving suggestions, consider individual serving glasses or ramekins. This allows for elegant presentation and portion control. Garnish with fresh berries (raspberries, strawberries, blueberries), a dusting of cocoa powder, chocolate shavings, or a sprig of mint for a visually appealing touch. Chill the mousse for at least 2 hours before serving to allow the flavors to meld and the texture to set properly. The mousse will be even better if chilled overnight.
Storage is important to maintain the quality of your mousse. Store leftover mousse in an airtight container in the refrigerator for up to 3 days. However, the texture may slightly change after the first day. Avoid freezing chocolate mousse, as this can significantly alter its texture and flavor. Freezing may cause the mousse to become icy and grainy upon thawing.
Complementary dishes to accompany your chocolate mousse include a light and fruity dessert wine such as a Moscato d’Asti or a Sauternes. A simple biscotti or shortbread cookie also pairs well, offering a delightful textural contrast. For a more substantial pairing, consider a light sponge cake or angel food cake.
Nutritional Information (per serving, approximate, variations will occur based on ingredients and portion size): Calorie count will vary greatly depending on the type and amount of chocolate used, as well as the amount of cream. A typical serving might contain around 300-400 calories. Fat content will be relatively high due to the chocolate and cream. Protein content will be moderate due to the egg yolks. Sugar content will be significant, depending on the chocolate and any added sugar. Specific nutritional values should be calculated based on your exact recipe and ingredient quantities using a nutrition calculator.
Remember to always practice safe food handling techniques. Ensure eggs are fresh and thoroughly cooked (in the case of using a recipe which includes cooking the eggs) to prevent the risk of foodborne illness. Enjoy your decadent and delicious chocolate mousse!