The humble cupcake, a miniature cake baked in a paper liner, holds a surprisingly rich and complex history. While pinpointing its exact origin is difficult, the term cupcake first appeared in print in American cookbooks in the late 18th and early 19th centuries. These early recipes weren’t the fluffy, frosted delights we know today; they were simpler, often denser cakes, baked in individual cups or ramekins – hence the name. The rise of the cupcake to its current iconic status is largely a 20th-century phenomenon, fueled by the increased availability of convenient ingredients, improved baking techniques, and the burgeoning popularity of commercial baking mixes.
Chocolate, the star ingredient in our recipe for the best chocolate cupcakes, boasts an even more storied past. Originating in Mesoamerica centuries ago, cacao beans were revered by the Olmec, Maya, and Aztec civilizations, not as a sweet treat, but as a sacred beverage consumed during ceremonies and rituals. The Spanish conquistadors introduced chocolate to Europe in the 16th century, where it gradually evolved from a bitter drink to the indulgent confection we know and love. Today, the global chocolate market is a multi-billion dollar industry, with annual consumption exceeding 7 million metric tons, a testament to its widespread appeal and enduring popularity.
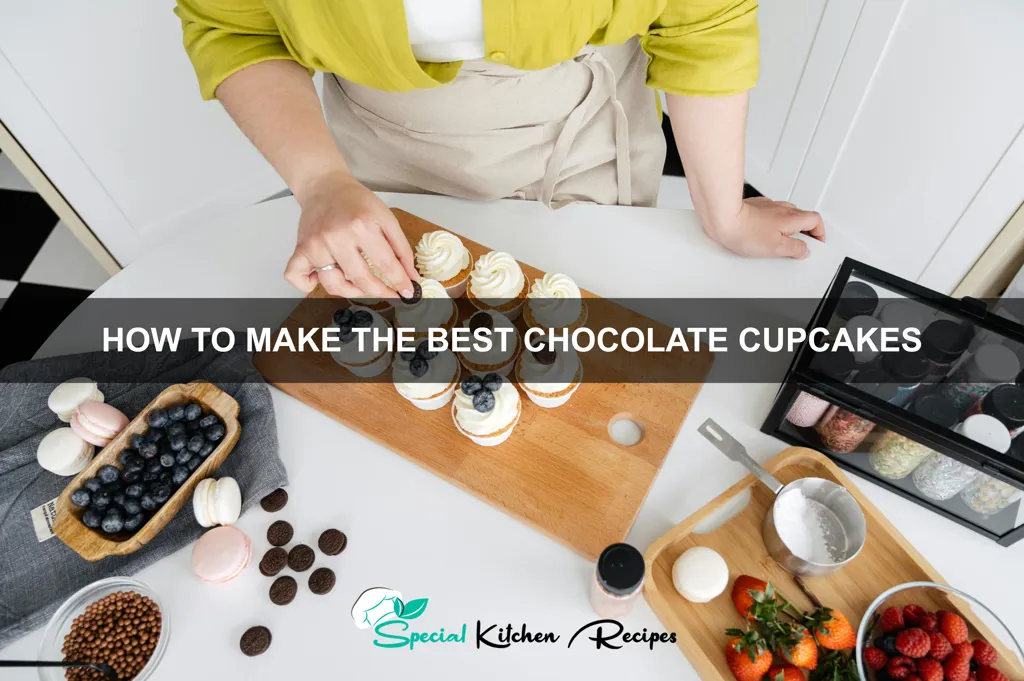
The combination of cupcake and chocolate is a match made in culinary heaven. Chocolate cupcakes have become a staple at birthdays, celebrations, and everyday indulgences. Their versatility is undeniable; from simple vanilla frosting to elaborate buttercream designs, the possibilities are endless. This recipe aims to create the perfect balance of moist, decadent chocolate cake and a rich, creamy frosting. We’ll explore techniques that ensure a perfectly textured cupcake, every time. Prepare to embark on a delicious journey, learning the secrets to crafting the best chocolate cupcakes that will leave you and your loved ones craving more. Statistics show that chocolate is the most popular cupcake flavor worldwide, further highlighting the enduring allure of this classic combination.
Ingredients and Measurements
Creating the perfect chocolate cupcake hinges on using high-quality ingredients and precise measurements. Don’t skimp on the cocoa powder – it’s the star of the show! We’ll be using unsweetened cocoa powder for the richest chocolate flavor. Avoid using Dutch-processed cocoa, as it can result in a flatter, less vibrant chocolate taste in this recipe.
For the dry ingredients, you’ll need: 2 cups (250g) all-purpose flour. This provides the structure for your cupcakes. Make sure to sift your flour before measuring to avoid lumps and ensure even baking. Next, we need ¾ cup (60g) unsweetened cocoa powder. This is where the chocolate magic happens! Using a good quality cocoa powder will make a noticeable difference in the final product. We also require 1 ½ teaspoons baking powder for leavening. Don’t substitute baking soda, as it will affect the texture and taste. Finally, add ¾ teaspoon baking soda and ¾ teaspoon salt for balance.
The wet ingredients are equally crucial. Start with 1 cup (2 sticks) unsalted butter, softened to room temperature. This is essential for achieving a light and fluffy batter. Cold butter will result in a crumbly texture. Next, add 1 ¾ cups (350g) granulated sugar. This provides sweetness and helps create a tender crumb. Then, incorporate 2 large eggs at room temperature. Room temperature eggs emulsify better with the other wet ingredients, creating a smoother batter. Finally, you’ll need 1 cup (240ml) buttermilk. Buttermilk adds moisture and tanginess, counteracting the sweetness of the sugar. If you don’t have buttermilk, you can substitute by adding 1 tablespoon of white vinegar or lemon juice to 1 cup of milk and letting it sit for 5 minutes.
Lastly, for the rich chocolate frosting (recipe not included here, but essential!), you’ll need high-quality ingredients such as unsalted butter, powdered sugar, cocoa powder, milk, and vanilla extract. The quantities will depend on your chosen frosting recipe. Remember to measure all ingredients accurately using kitchen scales for the best results. Volume measurements can be less precise, leading to variations in your final product.
Pro Tip: Weighing your ingredients is the most accurate method, especially for the flour and cocoa powder. Using a kitchen scale will ensure consistent results every time you bake these delicious chocolate cupcakes.
Equipment List
Making the perfect chocolate cupcakes requires the right tools. While you might have some of these items already, ensuring you have the correct equipment will make the baking process smoother and yield better results. This list details everything you’ll need, from essential mixing bowls to specialized tools for achieving professional-looking cupcakes.
Mixing Bowls: You’ll need at least three mixing bowls of varying sizes. A large bowl (approximately 5-quart capacity) is crucial for creaming together the butter and sugar. A medium bowl (approximately 3-quart capacity) will be perfect for whisking together the dry ingredients. Finally, a small bowl (approximately 2-quart capacity) is handy for melting the chocolate and for holding any other ingredients you might need to prepare separately.
Measuring Cups and Spoons: Accurate measurements are paramount in baking. Invest in a set of both dry and liquid measuring cups. Dry measuring cups should be used for dry ingredients like flour and cocoa powder, while liquid measuring cups are essential for liquids like milk and oil. A set of measuring spoons is equally important for measuring smaller quantities of baking powder, baking soda, and salt. Using the correct measuring tools will significantly impact the final outcome of your cupcakes.
Electric Mixer: A hand mixer or stand mixer is highly recommended. Creaming butter and sugar together requires significant effort, and an electric mixer will make this process much easier and more efficient. A stand mixer, while more expensive, offers superior mixing capabilities and can handle larger batches. If using a hand mixer, be prepared to mix for a longer duration.
Rubber Spatula or Scraper: A rubber spatula is invaluable for scraping down the sides of the bowl to ensure all ingredients are fully incorporated. This is especially important when combining wet and dry ingredients to prevent lumps and ensure a smooth batter.
Muffin Tin: A standard 12-cup muffin tin is ideal for this recipe. Ensure your muffin tin is clean and non-stick to prevent sticking and ensure easy removal of the cupcakes. Consider using paper liners for easier removal and to prevent sticking, especially if your muffin tin isn’t non-stick.
Baking Sheet: A baking sheet is recommended to place underneath the muffin tin during baking. This will catch any spills and provide stability to the tin.
Wire Rack: Once the cupcakes are baked, a wire rack allows them to cool completely and prevents them from becoming soggy. Allowing them to cool completely before frosting is crucial for preventing the frosting from melting.
Frosting Tools: You will need a spatula or piping bag for frosting your cupcakes. Piping bags allow for more decorative frosting applications.
Optional Equipment: A kitchen scale, for precise measurements, and a thermometer, to ensure your chocolate is melted to the correct temperature, can help you achieve even better results.
Preparation of Ingredients
Before you even think about whipping up the batter, meticulous preparation of your ingredients is key to achieving perfectly moist and delicious chocolate cupcakes. This seemingly small step significantly impacts the final product’s texture and consistency. Let’s start with the dry ingredients.
Sifting the Flour: For this recipe, we’ll need 2 cups of all-purpose flour. Sifting is crucial, as it aerates the flour, removing any lumps and ensuring a smooth, light batter. Use a fine-mesh sieve and gently sift the flour directly into a large mixing bowl. This prevents the formation of pockets of dense flour in your batter, leading to unevenly cooked cupcakes. Don’t rush this process; a few passes through the sieve will ensure optimal results.
Measuring the Sugar: We’ll use 1 ¾ cups of granulated sugar. Accuracy in measuring is paramount when baking. Avoid scooping sugar directly from the bag with a measuring cup, as this often leads to compaction and inaccurate measurements. Instead, lightly spoon the sugar into the measuring cup and level it off with a straight edge, such as a butter knife. This ensures you’re using the correct amount and prevents overly sweet or overly dry cupcakes.
Measuring the Cocoa Powder: For rich chocolate flavor, we’ll be using ½ cup of unsweetened cocoa powder. Similar to the sugar, use the spoon and level method for accurate measurement. Ensure your cocoa powder is fresh for the best chocolate flavor. Stale cocoa powder can result in a dull, muted chocolate taste.
Measuring the Liquids: Precise liquid measurements are just as crucial as dry ingredient measurements. For this recipe, we require 1 cup of milk, 2 large eggs, and ½ cup of vegetable oil. Use a liquid measuring cup placed on a flat surface, and fill it to the designated measurement line while looking directly at eye level. Avoid filling the cup above the line. For the eggs, crack them individually into a small bowl before adding them to the batter to avoid accidentally cracking a spoiled egg into your mixture.
Preparing the Baking Soda and Baking Powder: We require 1 teaspoon of baking soda and 1 ½ teaspoons of baking powder. These leavening agents are essential for the rise of your cupcakes. Ensure they are fresh; old baking soda and baking powder will be less effective, resulting in flat cupcakes. Use a level teaspoon measuring spoon for accurate measurements.
Once all your ingredients are accurately measured and prepared, you’re ready to move on to the next step in creating the perfect chocolate cupcakes. Remember, proper preparation is the foundation for baking success!
Mixing the Batter (including techniques for proper incorporation)
The success of your chocolate cupcakes hinges significantly on properly mixing the batter. Overmixing leads to tough cupcakes, while undermixing results in uneven texture and possibly unbaked pockets. We’ll guide you through achieving that perfect, light and fluffy batter.
Begin by creaming together 1 cup (2 sticks) of unsalted butter, softened to room temperature, and 1 ¾ cups of granulated sugar. Use an electric mixer on medium speed. Creaming means beating the butter and sugar until the mixture is light, fluffy, and pale yellow – this typically takes about 3-5 minutes. Scrape down the sides of the bowl frequently to ensure everything is incorporated evenly.
Next, add 2 large eggs one at a time, beating well after each addition. Don’t rush this step; allow each egg to fully incorporate before adding the next. This ensures proper emulsification, creating a stable batter that won’t separate.
In a separate bowl, whisk together the dry ingredients: 2 cups of all-purpose flour, ¾ cup unsweetened cocoa powder (Dutch-processed is recommended for a richer flavor), 1 ½ teaspoons of baking powder, 1 teaspoon of baking soda, and ½ teaspoon of salt. Whisk thoroughly to eliminate any lumps.
Gradually add the dry ingredients to the wet ingredients, alternating with 1 cup of buttermilk. Begin and end with the dry ingredients. Add about one-third of the dry ingredients, then half of the buttermilk, followed by another third of the dry ingredients, the remaining buttermilk, and finally the last third of the dry ingredients. Mix on low speed until just combined. Avoid overmixing; mix only until no streaks of dry ingredients remain. Overmixing develops the gluten in the flour, resulting in tough cupcakes.
Finally, stir in 1 teaspoon of vanilla extract. This enhances the chocolate flavor and adds a delightful aroma. Gentle folding is recommended at this stage to ensure the vanilla is evenly distributed without deflating the batter.
Professional Tip: If using a stand mixer, use the paddle attachment for creaming the butter and sugar and for combining the wet and dry ingredients. For hand mixing, a sturdy whisk and a good amount of elbow grease are necessary. Remember, patience and attention to detail are key to achieving perfect chocolate cupcakes.
Baking the Cupcakes
Preheat your oven to 350°F (175°C). This is crucial for even baking. Using a thermometer to verify the oven temperature is highly recommended, as ovens can vary significantly in their accuracy. A properly preheated oven ensures that your cupcakes rise beautifully and bake evenly throughout.
Fill each cupcake liner about ⅔ full with batter. Overfilling will cause the cupcakes to overflow and create uneven baking. Don’t pack the batter tightly; a gentle spoon into each liner is sufficient. Aim for approximately 1.5 – 2 tablespoons of batter per liner, depending on the size of your liners.
Bake for 18-22 minutes, or until a toothpick inserted into the center comes out clean. Baking time may vary depending on your oven and the size of your cupcake liners. Start checking for doneness around the 18-minute mark. If the toothpick comes out with a few moist crumbs attached, it’s likely still baking. Give it another 2-3 minutes and check again. Overbaking will result in dry, crumbly cupcakes.
The toothpick test is your best friend! It’s a reliable indicator of doneness. However, don’t rely solely on time. If your cupcakes are browning too quickly on top but the center is still underbaked, you may need to reduce the oven temperature slightly and tent the cupcakes loosely with aluminum foil to prevent further browning.
Once baked, let the cupcakes cool in the muffin tin for 5-10 minutes before transferring them to a wire rack to cool completely. Cooling the cupcakes in the tin for a short time prevents them from crumbling when you remove them. Allowing them to cool completely on a wire rack ensures that the frosting will adhere properly and prevents it from melting.
Patience is key! Rushing the cooling process can lead to unevenly frosted cupcakes and a less-than-perfect final product. Allow ample time for the cupcakes to cool completely before proceeding to the frosting stage.
If you notice that the edges of your cupcakes are browning too quickly while the center is still underbaked, try placing a baking sheet on the rack below your cupcakes. This will help to distribute the heat more evenly and prevent excessive browning.
Cooling the Cupcakes (Preventing Cracking)
Cooling your chocolate cupcakes correctly is crucial for preventing unsightly cracks and ensuring a moist, delicious interior. Improper cooling can lead to the cupcake tops sinking or developing deep fissures, ruining their appearance and potentially affecting texture. This section details the best practices for achieving perfectly cooled, crack-free cupcakes.
The first step is to let the cupcakes cool in the muffin tin for approximately 10-15 minutes. This allows the delicate structure to firm up slightly before handling. Resist the urge to remove them immediately, as they’ll be very fragile and prone to crumbling.
After the initial 10-15 minutes, carefully run a thin knife or offset spatula around the edges of each cupcake to loosen them from the muffin tin. This prevents sticking and makes removal easier. Avoid forcing them out; gently coax them free. If a cupcake is stubbornly stuck, carefully tap the bottom of the tin on a countertop.
Transfer the cupcakes to a wire rack. Using a wire rack is essential for even cooling. It allows air to circulate freely around each cupcake, preventing moisture build-up which can lead to cracking. Never stack the cupcakes on top of each other while cooling; this will trap heat and steam, increasing the likelihood of cracks.
Allow the cupcakes to cool completely at room temperature for at least 30-45 minutes before frosting. This is a critical step. Frosting warm cupcakes can cause the frosting to melt and slide off, and the heat from the cupcake can cause the frosting to crack. Patience is key here; rushing the cooling process almost guarantees cracking.
For particularly delicate or prone-to-cracking recipes, consider using a slightly smaller cupcake liner. Overfilling the liners can cause the batter to rise excessively, leading to cracks as the cupcakes cool and shrink. Fill each liner about ¾ full to allow for expansion.
Avoid placing the cooling rack near any sources of heat or drafts. Sudden temperature changes can shock the cupcakes and contribute to cracking. A cool, stable environment is ideal for even cooling.
Following these steps will dramatically reduce the chances of your beautifully baked chocolate cupcakes cracking, ensuring a perfect finish for your delicious treats.
Recommendations
For the best results when making these decadent chocolate cupcakes, ensure your ingredients are at room temperature. This allows for optimal mixing and a smoother batter. Don’t overmix the batter, as this can lead to tough cupcakes. Gentle folding is key to incorporating the dry ingredients without developing excessive gluten.
Once baked, allow the cupcakes to cool completely in the pan before frosting. This prevents the frosting from melting and creating a messy presentation. Proper cooling is crucial for maintaining the cupcake’s structure and preventing sogginess.
Storage is important for preserving freshness. Store frosted cupcakes in an airtight container in the refrigerator for up to 3 days. Unfrosted cupcakes can be stored at room temperature in an airtight container for up to 2 days or frozen for up to 3 months. To prevent freezer burn, wrap individual cupcakes tightly in plastic wrap before placing them in a freezer bag.
These rich chocolate cupcakes pair beautifully with a variety of beverages and desserts. Serve them with a tall glass of cold milk, a strong cup of coffee, or a refreshing glass of iced tea. For a truly indulgent experience, consider pairing them with a scoop of vanilla bean ice cream or a dollop of whipped cream. They also complement a light fruit salad for a balanced dessert offering.
Serving Suggestions: Dust with powdered sugar, drizzle with melted chocolate, or garnish with fresh berries for an elegant touch. For a fun twist, add chocolate shavings or sprinkles.
Nutritional Information (per cupcake, approximate): Calories: 350-400, Fat: 20-25g, Saturated Fat: 12-15g, Cholesterol: 50-60mg, Sodium: 150-200mg, Carbohydrates: 40-50g, Sugar: 25-30g, Protein: 4-6g. Note: Nutritional information will vary depending on specific ingredients and portion sizes used.
Enjoy your delicious homemade chocolate cupcakes!