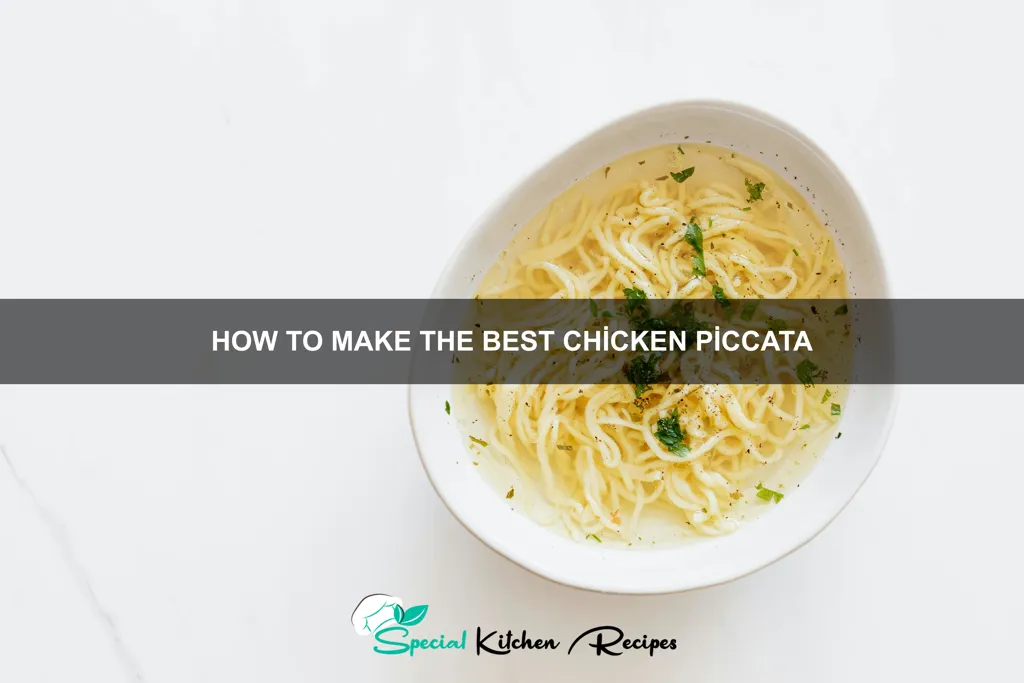
Chicken Piccata, a beloved dish known for its bright, lemony sauce and tender chicken cutlets, boasts a surprisingly rich history, though its exact origins remain somewhat shrouded in mystery. While pinpointing a single inventor is impossible, the dish’s roots are widely believed to be in Italy, specifically within the culinary traditions of the regions of Tuscany and Rome. The name itself, Piccata, points to this Italian heritage, deriving from the Italian word piccare, meaning to prick or to pierce, referring to the traditional method of lightly scoring the meat before cooking. This technique, still employed today, helps tenderize the chicken and allows for better absorption of the flavorful sauce.
Although precise historical documentation is lacking, culinary historians suggest that Chicken Piccata emerged sometime during the 19th or early 20th century, likely evolving from simpler preparations of breaded and pan-fried chicken. Its popularity grew steadily throughout the 20th century, particularly in the United States where it became a staple in Italian-American restaurants and home kitchens. Today, Chicken Piccata remains incredibly popular, consistently ranking among the top-searched chicken recipes online, a testament to its enduring appeal. While exact statistics are difficult to obtain, anecdotal evidence from recipe websites and food blogs suggests millions of searches each year for variations of this classic dish.
The cultural significance of Chicken Piccata lies in its accessibility and adaptability. It’s a relatively quick and easy dish to prepare, making it perfect for busy weeknights. The vibrant, acidic sauce provides a refreshing counterpoint to the richness of the chicken, making it a versatile option suitable for a variety of occasions, from casual weeknight dinners to more formal gatherings. Furthermore, its inherent flexibility allows for easy customization. Many variations exist, incorporating different herbs, vegetables, or even types of wine into the sauce, reflecting regional and personal preferences. This adaptability underscores the dish’s enduring appeal and its capacity to transcend simple culinary boundaries, becoming a true reflection of culinary creativity and cultural fusion.
Ingredients and Measurements
This recipe for Chicken Piccata serves 4 and relies on fresh, high-quality ingredients for optimal flavor. Precise measurements are crucial for achieving the perfect balance of tangy lemon, savory butter, and tender chicken.
Chicken: You’ll need 4 boneless, skinless chicken breasts (about 1.5 lbs total). Choose chicken breasts that are evenly sized for consistent cooking. If they vary significantly in size, pound the thicker ones to an even thickness of about ½ inch. This ensures even cooking and prevents some pieces from being overcooked while others remain undercooked.
Flour for Dredging: Use ½ cup all-purpose flour. Ensure the flour is lightly seasoned. I recommend adding ½ teaspoon of salt and ¼ teaspoon of freshly ground black pepper to the flour before dredging the chicken. This seasons the chicken evenly and creates a crispier crust.
Butter: You will need 6 tablespoons (3 ounces) of unsalted butter. Use unsalted butter to control the salt content of the dish. High-quality butter will significantly enhance the flavor of the sauce.
Capers: 2 tablespoons of capers, drained. Rinse the capers briefly under cold water to remove excess salt before adding them to the sauce. This prevents the sauce from becoming overly salty.
Lemon Juice: Use the juice of 2 large lemons (approximately ¼ cup). Freshly squeezed lemon juice is essential for the bright, vibrant flavor of the Piccata. Bottled lemon juice lacks the fresh citrus notes that make this dish special.
Chicken Broth: You’ll need ½ cup of low-sodium chicken broth. Low-sodium broth allows you to control the saltiness of the dish and prevents it from becoming overly salty, especially if you’ve used salted capers.
Garlic: 2 cloves of garlic, minced. Freshly minced garlic provides the best flavor. If using pre-minced garlic from a jar, use less to avoid overpowering the other flavors.
Parsley: 2 tablespoons of freshly chopped flat-leaf parsley, for garnish. Fresh parsley adds a beautiful pop of color and fresh herbaceous notes to the finished dish. Use it generously.
Salt and Pepper: Salt and freshly ground black pepper to taste. Seasoning is key. Taste the sauce before serving and adjust the salt and pepper accordingly.
Optional: For added richness, consider adding a tablespoon of dry white wine to the sauce along with the chicken broth.
Equipment and Utensils
Making a truly exceptional Chicken Piccata requires the right tools. While you might be able to improvise with some items, having the proper equipment will significantly enhance your cooking experience and the final result. Let’s break down the essential pieces.
For prepping the chicken: You’ll need a cutting board (at least 12 x 16 ), a sharp chef’s knife (8-10 inches is ideal) for even slicing, and meat mallet (or a heavy-bottomed pan) for tenderizing. Accurate measurements are key, so a kitchen scale is highly recommended for weighing the chicken breasts (aim for approximately 6 ounces each, for 4 servings). Paper towels are also essential for patting the chicken dry before cooking.
For cooking the chicken: A large, non-stick skillet (12 inches or larger) is perfect for browning the chicken. Non-stick is crucial to prevent sticking and ensure easy flipping. A good quality skillet will distribute heat evenly, leading to perfectly cooked chicken breasts. You’ll also need tongs for safely handling the chicken during cooking, and a thermometer to ensure the chicken reaches a safe internal temperature of 165°F (74°C).
For the sauce: While not strictly necessary, a whisk will help you create a smooth, lump-free sauce. A small saucepan (around 1-quart capacity) is ideal for making the sauce. Use a saucepan with a heavy bottom to prevent scorching the butter and flour while making the roux. Measuring cups and spoons are crucial for precise ingredient measurements, ensuring the sauce achieves the right balance of flavors.
Other helpful utensils: A fine-mesh sieve can be used to strain the sauce if desired, removing any lumps or excess solids. A slotted spoon is useful for removing the chicken from the pan without losing the precious sauce. Finally, serving dishes and plates are needed to present your delicious Chicken Piccata. Consider using a shallow dish to allow the sauce to pool beautifully around the chicken for an elegant presentation.
By gathering these essential equipment and utensils, you’ll be well-equipped to create a restaurant-quality Chicken Piccata in your own kitchen. Investing in quality tools will significantly improve your cooking process and the overall taste and presentation of your dish.
Chicken Preparation (including tenderizing)
Choosing the right chicken is crucial for a successful Chicken Piccata. Opt for boneless, skinless chicken breasts, about 1.5 to 2 pounds total. This amount will typically yield about 4 servings. Avoid overly large breasts; they may cook unevenly. If you have larger breasts, consider butterflying them (slicing them horizontally almost all the way through to create thinner pieces) for more even cooking.
Once you’ve selected your chicken, it’s time for tenderizing. While not strictly required, tenderizing ensures a more delicate and evenly cooked final product, especially if using slightly tougher breasts. There are several methods you can choose from:
Method 1: Pounding: This classic method involves placing each chicken breast between two sheets of plastic wrap (to prevent splattering and keep your work surface clean). Using a meat mallet, gently pound the chicken to an even 1/4-inch thickness. Avoid pounding too hard, as this can result in tough, shredded chicken. Aim for an even thickness to ensure consistent cooking time.
Method 2: Marinating: A simple marinade can help tenderize the chicken. Combine 1/4 cup of buttermilk or plain yogurt with 1 tablespoon of lemon juice and a pinch of salt and pepper. Place the chicken breasts in a resealable bag with the marinade and refrigerate for at least 30 minutes, or up to 2 hours. The acid in the lemon juice and the lactic acid in the buttermilk will help break down the proteins, resulting in tender chicken.
Method 3: Using a Meat Tenderizer (optional): For a quicker tenderizing option, you can use a commercial meat tenderizer. Follow the instructions on the packaging carefully. Remember that over-tenderizing can lead to mushy chicken, so use it sparingly.
Regardless of your chosen method, after tenderizing, trim any excess fat from the chicken breasts. This will help prevent excessive greasiness in your final dish. Once tenderized and trimmed, your chicken is ready for the next step: breading and cooking. Ensure your chicken is completely dry before breading to help the flour adhere properly. Pat it dry with paper towels if necessary.
Proper chicken preparation is essential for a perfect Chicken Piccata. Taking the time to tenderize and prepare the chicken properly will pay off in a delicious, tender, and flavorful final dish.
Sauce Preparation (including making the sauce)
The sauce is the star of Chicken Piccata, so let’s make it exceptional! We’ll be creating a bright, lemony, buttery sauce that perfectly complements the delicate chicken. Begin by gathering your ingredients: 1/2 cup all-purpose flour, 1/2 teaspoon salt, 1/4 teaspoon black pepper, 1/4 teaspoon garlic powder (optional, but adds a nice depth), 6 tablespoons (3 ounces) unsalted butter, 1/2 cup dry white wine (like Sauvignon Blanc or Pinot Grigio), and 1/2 cup fresh lemon juice (about 2-3 lemons). You’ll also need 2 tablespoons of capers, drained, and 2 tablespoons of chopped fresh parsley for garnish.
First, prepare your chicken for dredging. Ensure it’s patted completely dry with paper towels; this is crucial for a good sear and crispy crust. In a shallow dish, whisk together the flour, salt, pepper, and garlic powder (if using). Thoroughly coat each chicken breast in the flour mixture, ensuring it’s evenly covered. Shake off any excess flour.
Now, let’s make the sauce. In a large skillet, melt 4 tablespoons of the butter over medium-high heat. Once the butter is melted and foaming, carefully add the floured chicken breasts. Avoid overcrowding the pan; you may need to cook in batches. Sear the chicken for about 3-4 minutes per side, until golden brown and cooked through. Remove the chicken from the pan and set aside, keeping it warm.
Reduce the heat to medium. Add the remaining 2 tablespoons of butter to the pan and swirl to melt. Immediately add the white wine, scraping up any browned bits from the bottom of the pan – these bits contain incredible flavor! Allow the wine to reduce slightly, for about 1-2 minutes, until it’s slightly syrupy.
Stir in the lemon juice and bring the sauce to a gentle simmer. Reduce the heat to low and simmer for another 2-3 minutes, allowing the sauce to thicken slightly. Do not boil the sauce vigorously, as this can make it bitter. Stir in the capers and season to taste with additional salt and pepper if needed.
Return the cooked chicken to the pan, coating it evenly in the sauce. Garnish with the fresh parsley and serve immediately over pasta, rice, or mashed potatoes. For an extra touch of richness, consider adding a tablespoon of cold butter at the very end and swirling it in off the heat. This will create a beautiful sheen and add a subtle richness to the sauce.
Cooking the Chicken
Once your chicken breasts are prepared (pounded to an even thickness and seasoned), it’s time to cook them to perfection. For this recipe, we’ll be pan-frying, which delivers a beautiful sear and ensures juicy, tender chicken. You’ll need about 2 tablespoons of high-heat oil, such as canola or vegetable oil, in a large skillet over medium-high heat.
Ensure your skillet is hot before adding the chicken. This is crucial for achieving a nice, crispy crust. You should see the oil shimmer slightly. Carefully place the chicken breasts in the hot skillet, making sure not to overcrowd the pan. Working in batches is recommended if necessary. Overcrowding will lower the temperature of the pan and result in steaming rather than searing, leading to soggy chicken.
Cook the chicken for about 4-5 minutes per side, or until a deep golden brown crust has formed and the internal temperature reaches 165°F (74°C). Use a meat thermometer to check the internal temperature; this is the most accurate way to ensure the chicken is cooked through and safe to eat. Don’t be tempted to move the chicken around too much during cooking; let it develop a good sear before flipping.
Resist the urge to constantly check the chicken while it’s searing. This will interrupt the cooking process and prevent the formation of a nice crust. Once you flip the chicken, reduce the heat slightly to medium to ensure it cooks through evenly without burning. If you notice the chicken browning too quickly on one side, you can slightly reduce the heat or briefly remove the chicken from the pan until the other side is ready.
Once the chicken is cooked through, remove it from the skillet and set it aside on a plate. Do not discard the rendered chicken fat in the pan; this will add depth of flavor to your sauce. Keep the cooked chicken warm while you prepare the sauce. You can loosely tent it with foil to retain its heat and moisture. Remember, perfectly cooked chicken is the foundation of a delicious Chicken Piccata, so take your time and follow these steps carefully.
Pro Tip: For extra flavorful chicken, you can marinate the chicken in a mixture of lemon juice, garlic, and herbs for at least 30 minutes before cooking. This will infuse the chicken with additional flavor and tenderize it further.
Plating and Garnishing Your Chicken Piccata
Plating is as crucial as the cooking process itself when it comes to presenting a restaurant-quality Chicken Piccata. A beautifully plated dish elevates the dining experience and showcases your culinary skills. For this recipe, we’ll aim for a sophisticated yet simple presentation.
Begin by choosing the right plates. White or off-white plates are classic choices that allow the vibrant colors of the chicken and sauce to stand out. A plate diameter of approximately 10-12 inches is ideal for a single serving of Chicken Piccata.
Arrange the chicken breast strategically. Instead of simply piling the chicken in the center, consider a slightly off-center placement. This creates visual interest and balance. Two to three slices of chicken are usually sufficient for a single serving. If using smaller cutlets, you might use four. Ensure the chicken is arranged neatly, avoiding overlapping.
Next, consider the sauce. Don’t drown the chicken! A generous but not excessive amount of sauce is key. About ¼ cup to ⅓ cup of sauce per serving is sufficient to coat the chicken without making the plate look soggy. Spoon the sauce artfully around the chicken, allowing some to pool slightly beneath it.
Garnishing adds the final touch of elegance. Fresh herbs are essential. A sprinkle of finely chopped fresh parsley (approximately 1 tablespoon) adds a pop of color and a fresh, herbaceous aroma. You can also add a few sprigs of parsley for a more visually appealing garnish. Place them strategically, perhaps tucked under a chicken slice or delicately scattered around the plate.
Lemon wedges are a classic accompaniment to Chicken Piccata. A single, thinly sliced lemon wedge, placed near the chicken, adds a bright visual element and provides the diner with the option to add extra lemon juice. Ensure the lemon is cut neatly and looks fresh.
Finally, consider the presentation of the capers. If you have some whole capers left over, you can artfully arrange a few on the plate near the chicken, adding a subtle textural contrast. Avoid overcrowding the plate with too many garnishes – less is often more.
Professional Tip: Before plating, ensure your chicken is completely dry to prevent the sauce from becoming watery. Also, consider the temperature of the plate; a warm plate will keep the chicken warmer for longer.
Recommendations for the Best Chicken Piccata
For the most flavorful Chicken Piccata, ensure your chicken breasts are pounded evenly to an even thickness. This guarantees even cooking and prevents some parts from being dry while others are still raw. Don’t be shy with the salt and pepper; properly seasoning the chicken is key to a delicious dish. Also, using fresh lemon juice makes a significant difference in the brightness and overall taste compared to bottled juice.
To elevate the dish further, consider adding a touch of capers or sun-dried tomatoes to the sauce. These additions provide a delightful burst of briny or savory flavor that complements the lemon perfectly. Experiment with different types of flour for dredging the chicken; all-purpose works well, but you can try using a blend of all-purpose and almond flour for a slightly nutty flavor. Finally, don’t overcook the chicken; aim for a juicy, tender interior.
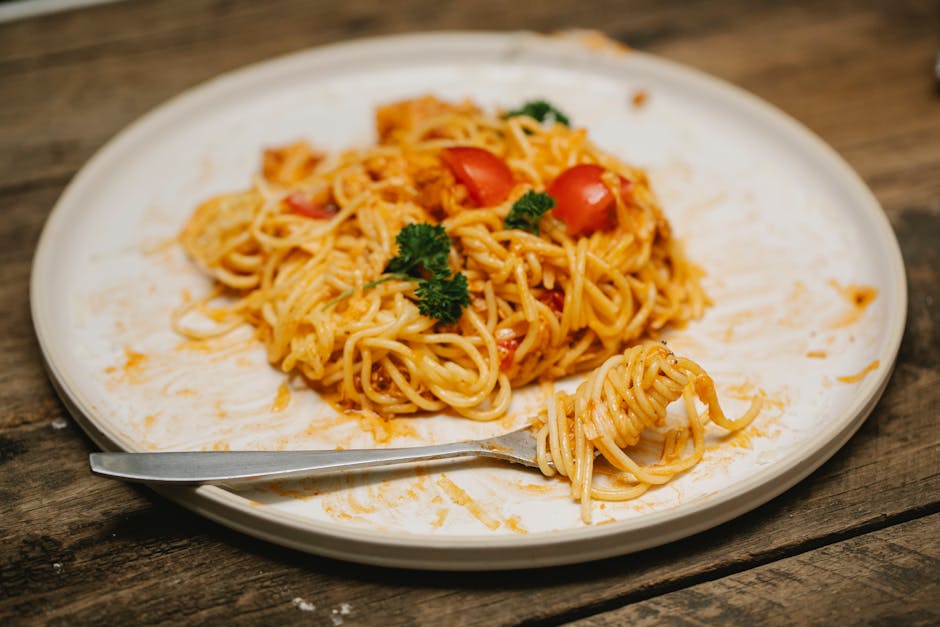
Serving suggestions abound! Chicken Piccata pairs beautifully with a variety of sides. Consider serving it with a simple side salad, roasted asparagus, or creamy mashed potatoes. Pasta, especially linguine or fettuccine, is a classic accompaniment that soaks up the delicious lemon-caper sauce beautifully. For a complete meal, serve with crusty bread to mop up every last drop of sauce.
Storage: Leftovers can be stored in an airtight container in the refrigerator for up to 3 days. Reheat gently in a pan over low heat or in the microwave. Avoid overcooking when reheating, as this can dry out the chicken. Freezing is not recommended as it can affect the texture of the chicken.
Nutritional Information (per serving, approximate): Calorie count will vary depending on the size of chicken breasts and the amount of butter/oil used. A typical serving might contain approximately 350-450 calories. Nutritional information will also vary but generally includes a good source of protein and some healthy fats. For precise nutritional information, use a nutrition calculator and input your specific ingredients and quantities. Please note: this is an estimate and may vary based on specific ingredients and portion sizes.
Complementary Dishes: To round out your meal, consider a light and refreshing side salad with a vinaigrette dressing, or a simple green bean almondine. A glass of crisp white wine, such as Pinot Grigio or Sauvignon Blanc, would also complement the flavors of the dish perfectly.