Prepare yourself for a culinary journey into the heart of American barbecue, where succulent, fall-off-the-bone ribs reign supreme. We’re diving deep into the art of making sweet and spicy BBQ ribs, a dish steeped in history and cultural significance. While pinpointing the exact origin is tricky, the story of BBQ ribs is intrinsically linked to the evolution of barbecue itself, a cooking technique dating back centuries. Indigenous populations of the Americas were early pioneers, utilizing low and slow cooking methods over open fires, a practice later adopted and adapted by European settlers. The specific combination of sweet and spicy flavors, however, likely emerged in the American South, a testament to the region’s rich culinary heritage influenced by African, European, and Indigenous traditions.
The popularity of ribs, particularly in the barbecue context, exploded in the 20th century. The rise of roadside barbecue joints and the post-war economic boom fueled a national obsession with this comforting and flavorful food. Today, the barbecue industry is a multi-billion dollar enterprise in the United States alone, with ribs consistently ranking among the most popular items. According to the National Restaurant Association, over 50% of Americans report consuming barbecue at least once a month, highlighting its enduring appeal. This widespread popularity is largely due to the versatility of the dish; the sweet and spicy profile can be easily adjusted to cater to individual preferences, ranging from subtly sweet to intensely fiery.
Beyond the sheer deliciousness, sweet and spicy BBQ ribs hold a special place in American culture. They are frequently associated with celebrations, family gatherings, and sporting events. Rib cook-offs and competitions are common across the country, drawing large crowds and showcasing the diverse regional styles and techniques. From Memphis-style dry rubs to Carolina-style vinegar sauces, the variations are endless, each telling a unique story about its origin and community. This recipe will guide you through creating your own version of this iconic dish, allowing you to experience the rich flavors and cultural heritage firsthand. Get ready to savor the sweet, smoky, and spicy perfection of homemade BBQ ribs!
Ingredients and Measurements
This recipe yields approximately 6 servings of tender, sweet and spicy BBQ ribs. Accurate measurements are crucial for achieving the perfect balance of flavors. Use a kitchen scale for the most precise results, especially when measuring spices.
For the Ribs:
- 3 lbs (1.4 kg) St. Louis style pork ribs, or your preferred cut. Ensure the membrane on the back of the ribs is removed for optimal tenderness and flavor penetration. Use a butter knife to loosen it, then peel it off completely.
- 1 tbsp (15ml) kosher salt
- 1 tsp (5ml) freshly ground black pepper
- 1 tsp (5ml) smoked paprika
- 1/2 tsp (2.5ml) garlic powder
- 1/2 tsp (2.5ml) onion powder
For the Sweet and Spicy BBQ Sauce:
- 1 cup (240ml) ketchup
- 1/2 cup (120ml) apple cider vinegar
- 1/4 cup (60ml) packed brown sugar
- 2 tbsp (30ml) Worcestershire sauce
- 2 tbsp (30ml) honey
- 1 tbsp (15ml) Dijon mustard
- 1 tbsp (15ml) smoked paprika
- 1 tbsp (15ml) chili powder
- 1 tsp (5ml) cayenne pepper (or more, to taste) Adjust the cayenne pepper according to your spice preference. Start with less and add more gradually.
- 1 tsp (5ml) garlic powder
- 1/2 tsp (2.5ml) ground cumin
- 1/4 tsp (1.25ml) black pepper
Optional additions: Consider adding a splash of your favorite bourbon or whiskey to the BBQ sauce for a deeper, more complex flavor. You can also substitute maple syrup for honey for a slightly different sweetness.
Important Note: These measurements are guidelines. Feel free to adjust the spices to your liking. For a sweeter sauce, increase the brown sugar or honey. For a spicier sauce, increase the cayenne pepper. Taste and adjust the sauce as you go to achieve your desired flavor profile. Properly measuring your ingredients will contribute significantly to the overall success of your recipe.
Equipment List
Making delicious sweet and spicy BBQ ribs requires the right tools. This list details the essential equipment, along with recommendations for optimal results. While some items might seem interchangeable, using the specified tools will significantly improve your cooking experience and the final product.
Rib Rack: A rib rack is crucial for even cooking. It elevates the ribs above the dripping pan, ensuring airflow around all sides. Choose a rack that can comfortably hold a full rack of ribs without overcrowding. A standard size rack that accommodates around 3-4 lbs of ribs is ideal.
Large Baking Sheet or Roasting Pan: This will serve as the base for your rib rack and catch any rendered fat and juices during cooking. Select a pan with high sides (at least 2 inches) to prevent spills and ensure easy cleanup. A 18×13 inch baking sheet is a good starting point for a standard rack of ribs.
Meat Thermometer: A reliable instant-read meat thermometer is absolutely essential for achieving perfectly cooked ribs. Avoid relying solely on visual cues; a thermometer guarantees that the ribs reach the safe internal temperature of 190-200°F (88-93°C) for tender, juicy results. A digital thermometer with a probe is highly recommended for ease of use and accurate readings.
Small Bowls (at least 3): You’ll need several small bowls for mixing the dry rub, preparing the BBQ sauce, and potentially for separating ingredients. Choose bowls that are easy to clean and microwave-safe if you plan on using them for sauce preparation.
Whisk or Spatula: A whisk is ideal for creating a smooth and even dry rub, while a spatula is necessary for applying the BBQ sauce and basting the ribs throughout the cooking process. A silicone spatula is recommended as it is heat-resistant and won’t scratch your pans.
Basting Brush: A basting brush is essential for evenly coating your ribs with the BBQ sauce. Choose a brush with sturdy bristles that won’t shed and is heat resistant to withstand the high temperatures of the oven or smoker.
Aluminum Foil (Optional): While not strictly required, aluminum foil can be useful for wrapping the ribs during the cooking process to help retain moisture and speed up cooking time, especially in lower-temperature cooking methods. Use heavy-duty foil to avoid tearing.
Gloves (Optional but Recommended): Handling raw ribs can be messy. Wearing disposable gloves will keep your hands clean and prevent cross-contamination.
Oven or Smoker: Finally, you’ll need an oven or smoker to cook the ribs. Oven temperatures will vary depending on the recipe, but a smoker offers a truly authentic BBQ experience.
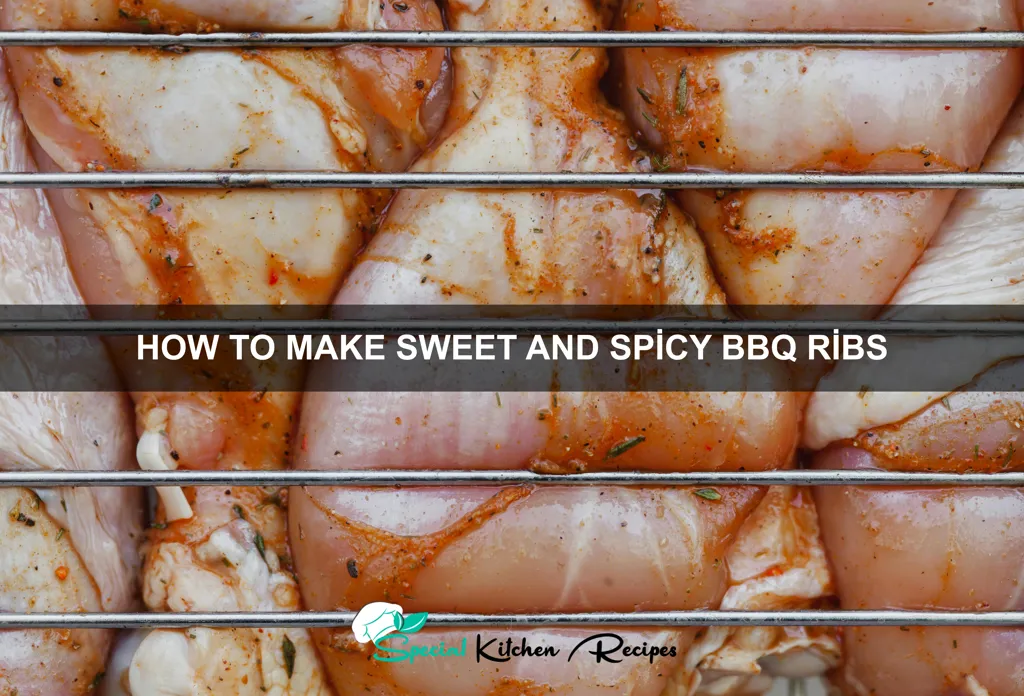
Preparation of the Ribs (Trimming, etc.)
Before you even think about firing up the grill, proper rib preparation is key to achieving tender, flavorful BBQ. This crucial step ensures even cooking and maximizes the deliciousness of your final product. We’ll be working with a full rack of St. Louis-style ribs (approximately 3-4 pounds), but the principles apply to other cuts as well.
Begin by inspecting your rack of ribs. Remove any loose, ragged pieces of membrane or fat. These can hinder the penetration of smoke and flavor, resulting in dry, tough ribs. A sharp paring knife is ideal for this task.
Next, focus on the membrane on the back of the ribs (the bone side). This tough, silvery membrane is extremely difficult to chew and needs to be removed. Using a butter knife or a specialized rib membrane remover, carefully loosen and peel away this membrane. It’s easier to do this when the ribs are cold. If you struggle, try to get under a corner and pull aggressively – it will usually come off in a single piece. Don’t worry if you tear it slightly; it’s not a major issue.
Now, let’s address any excess fat. While some fat is desirable for flavor and moisture, excessive fat can lead to flare-ups on the grill and uneven cooking. Using kitchen shears, trim away any large clumps of fat. Aim for a consistent layer of fat, about ⅛ to ¼ inch thick. You don’t need to be overly precise here; a little fat is your friend. Just remove the excess.
Once you’ve trimmed the fat, consider whether you want to cut the rack in half. For easier handling and more even cooking, particularly on smaller grills, cutting the rack into two halves is recommended. Use a sharp chef’s knife to cut cleanly through the cartilage connecting the two halves of the rack.
Finally, give your ribs a good rinse under cold water and pat them thoroughly dry with paper towels. This ensures a good sear and prevents excess moisture from steaming the ribs instead of allowing them to properly smoke.
With your ribs properly trimmed and prepared, you’re ready to move on to the next stage of creating your mouthwatering sweet and spicy BBQ ribs!
Making the Sweet and Spicy BBQ Sauce
This recipe creates a vibrant, flavourful sweet and spicy BBQ sauce that perfectly complements the richness of the ribs. We’ll be building layers of flavour to achieve a complex and delicious sauce. Accurate measurements are key to achieving the desired balance of sweet and spicy.
Begin by gathering your ingredients: 1 cup ketchup, ½ cup apple cider vinegar, ¼ cup brown sugar (packed), 2 tablespoons Worcestershire sauce, 1 tablespoon Dijon mustard, 1 tablespoon honey, 1 teaspoon smoked paprika, 1 teaspoon chili powder, ½ teaspoon cayenne pepper (or more, to taste), ½ teaspoon garlic powder, ¼ teaspoon onion powder, and a pinch of salt and black pepper. Adjust the cayenne pepper according to your preferred spice level. Start with half a teaspoon and add more gradually until you reach your desired heat.
In a medium saucepan over medium heat, combine the ketchup, apple cider vinegar, brown sugar, Worcestershire sauce, Dijon mustard, and honey. Stir well to ensure all ingredients are thoroughly incorporated. Ensure the brown sugar is completely dissolved before proceeding; this prevents crystallization and ensures a smooth sauce consistency.
Next, add the smoked paprika, chili powder, cayenne pepper, garlic powder, onion powder, salt, and black pepper. Stir again to combine all the spices evenly throughout the sauce. Don’t rush this step; ensure the spices are fully incorporated to prevent clumping.
Bring the mixture to a simmer, then reduce the heat to low and let it gently simmer for approximately 15-20 minutes, stirring occasionally. This allows the flavours to meld and deepen. The sauce will thicken as it simmers. If it becomes too thick, you can add a tablespoon or two of water to adjust the consistency.
Once the sauce has reached your desired thickness and flavour intensity, remove it from the heat and let it cool slightly before using. Taste the sauce and adjust the seasoning as needed. You might want to add more brown sugar for sweetness, vinegar for tang, or cayenne pepper for heat. The sauce can be stored in an airtight container in the refrigerator for up to a week.
Pro Tip: For a smoother sauce, you can blend the sauce with an immersion blender after simmering. This will remove any remaining spice clumps and create a more velvety texture. Enjoy your homemade sweet and spicy BBQ sauce!
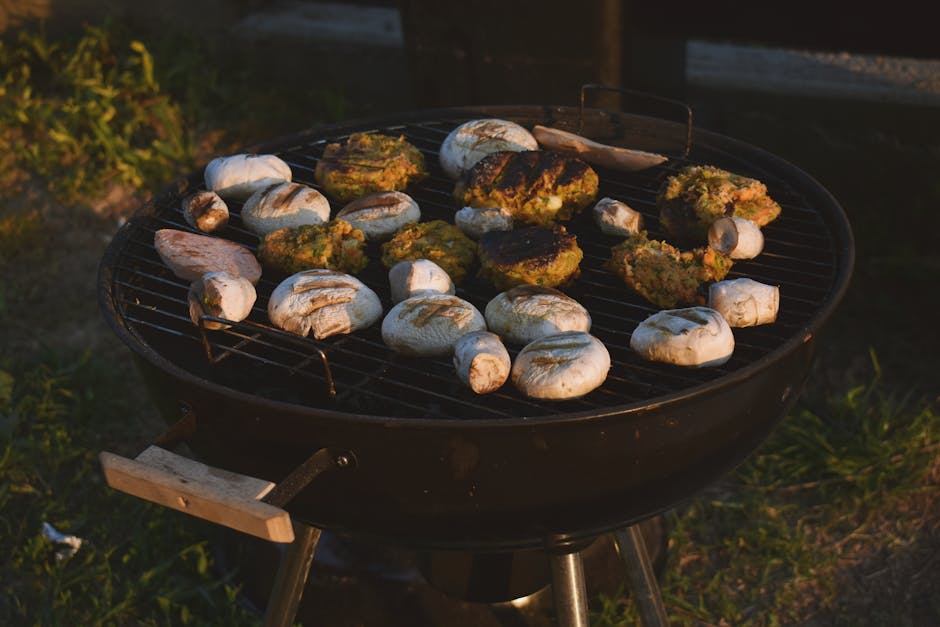
Cooking the Ribs (Smoking Method)
For the most tender and flavorful ribs, smoking is the preferred method. We’ll be using the 3-2-1 method, a popular technique that combines smoking, wrapping, and finishing for perfect results. You’ll need a smoker capable of maintaining a consistent temperature around 225°F (107°C).
Step 1: The Smoke (3 hours): Place your rack of baby back ribs (approximately 3-4 lbs) meat-side up directly on the smoker grates. Maintain a consistent temperature of 225°F (107°C) throughout. Use your favorite wood chips – hickory, pecan, or applewood are excellent choices. Apply a thin layer of your favorite dry rub to both sides of the ribs before placing them in the smoker. Don’t overdo the rub; a thin coating is sufficient.
Step 2: The Wrap (2 hours): After 3 hours of smoking, the ribs should be slightly tender. Remove them from the smoker and wrap them tightly in heavy-duty aluminum foil. Add about 1/4 cup of apple cider vinegar and 2 tablespoons of your BBQ sauce to the foil before sealing. This creates steam, further tenderizing the meat. Return the wrapped ribs to the smoker and continue cooking at 225°F (107°C) for another 2 hours.
Step 3: The Glaze (1 hour): After 2 hours of wrapping, carefully unwrap the ribs. The meat should be very tender and easily pulling away from the bone. Apply a generous coating of your sweet and spicy BBQ sauce to both sides. Return the ribs to the smoker (unwrapped) for the final hour, basting with additional sauce every 20 minutes. This allows the sauce to caramelize and develop a beautiful glossy finish.
Important Note: Cooking times may vary depending on the size and thickness of your ribs and your smoker’s consistency. Use a meat thermometer to check for doneness. The internal temperature should reach at least 190°F (88°C) for tender ribs. Always prioritize meat temperature over time.
Alternative Methods (Grilling & Baking): While smoking delivers the best results, you can also grill or bake your ribs. Grilling requires higher heat and careful attention to prevent burning, while baking offers a more hands-off approach but may result in less smoky flavor. Adjust cooking times accordingly, and consider using a foil wrap during the baking process for added moisture.
Basting and Monitoring the Ribs
Once your ribs are nestled snugly in the smoker or on the grill, the real magic begins: basting and monitoring. This crucial step ensures tender, juicy, and perfectly flavored ribs. We’ll be using a simple yet effective basting sauce, but feel free to experiment with your own favorite recipe.
Prepare your basting sauce: For this recipe, we’ll use a 1 cup mixture of your favorite BBQ sauce (preferably a slightly thicker variety) combined with 2 tablespoons of melted butter or apple cider vinegar for extra moisture and shine. Ensure your sauce is warm before basting; this helps it adhere better to the ribs.
The first basting should occur approximately 1 hour into the cooking process. Use a basting brush to generously coat the top and bottom surfaces of the ribs. Don’t be shy – a good coating is key to developing that delicious, sticky glaze. After basting, close the smoker lid or cover the grill to maintain consistent heat and prevent the ribs from drying out.
Monitoring the internal temperature is critical. Use a reliable meat thermometer to check the internal temperature of the ribs every 30-45 minutes, beginning after the first hour. The ribs are done when the internal temperature reaches 200-205°F (93-96°C). This ensures the meat is tender and pulls away easily from the bone.
Between basting sessions, observe the ribs for signs of dryness. If they appear to be drying out too quickly, you can increase the frequency of basting or lightly spritz them with apple cider vinegar or water using a spray bottle. Avoid over-basting, however, as this can dilute the flavors and create a gummy texture. Aim for a balance: enough basting to keep them moist and flavorful, without drowning them in sauce.
During the last 30 minutes of cooking, increase the basting frequency. This helps develop a deep, rich, and glossy glaze. You can also add a little extra BBQ sauce during this final phase for an even more intense flavor. Keep a close eye on the ribs during the last stage, as they can burn quickly.
Once the ribs reach the desired internal temperature, remove them from the heat and let them rest for at least 15 minutes before serving. This allows the juices to redistribute, resulting in incredibly tender and flavorful ribs. Enjoy!
Recommendations
For the best results when making Sweet and Spicy BBQ Ribs, ensure your ribs are cooked to a tender, fall-off-the-bone consistency. This may require adjusting cooking times based on your oven or smoker. Using a meat thermometer is crucial to ensure the internal temperature reaches at least 190°F (88°C) for optimal tenderness. Don’t be afraid to experiment with the spice rub; feel free to adjust the quantities of chili powder, paprika, or brown sugar to suit your taste preferences. For a spicier kick, add a pinch of cayenne pepper or a dash of your favorite hot sauce.
Serving Suggestions: These sweet and spicy ribs are delicious served on their own, but they’re even better with some accompaniments. Consider serving them with classic sides like coleslaw, creamy potato salad, or baked beans. A simple green salad with a vinaigrette dressing provides a refreshing counterpoint to the richness of the ribs. Cornbread is another excellent choice, soaking up the delicious BBQ sauce.
Storage: Leftover ribs should be stored in an airtight container in the refrigerator for up to 3 days. To reheat, you can bake them in a low oven (around 250°F or 121°C) until heated through, or use a microwave in short bursts. Freezing is also an option; store the ribs in a freezer-safe container or bag for up to 3 months. Thaw overnight in the refrigerator before reheating.
Complementary Dishes: To balance the sweetness and spice of the ribs, consider serving them with dishes that offer contrasting flavors and textures. A tangy vinegar-based slaw or a side of grilled pineapple will cut through the richness. For a heartier meal, serve the ribs with mac and cheese or mashed sweet potatoes. The possibilities are endless!
Nutritional Information (Approximate per serving, based on a 3-rib serving): This information is an estimate and will vary depending on specific ingredients and portion sizes. Calories: Approximately 450-550; Protein: 30-40g; Fat: 25-35g; Carbohydrates: 20-30g. This is a high-calorie dish, so enjoy in moderation. Sodium content will be high due to the BBQ sauce, so consider adjusting the sauce recipe or using a low-sodium option if needed.