Sweet and sour chicken, a culinary chameleon that effortlessly bridges continents and cultures, is a dish whose history is as intriguing as its flavor profile. While pinpointing its exact origin is difficult, the most widely accepted theory traces it back to Cantonese cuisine in southern China. Centuries ago, Cantonese chefs, renowned for their innovative approach to blending sweet and savory elements, began experimenting with marinades and sauces that incorporated the contrasting flavors of sugar, vinegar, and spices. This innovative approach laid the groundwork for what would eventually become a global favorite.
The dish’s journey westward is a fascinating testament to the power of culinary exchange. It’s believed that sweet and sour chicken gained significant popularity in the West during the late 19th and early 20th centuries, coinciding with the rise of Chinese diaspora communities and the increasing accessibility of Chinese ingredients. Early versions were likely found in Chinese restaurants catering to Western palates, gradually adapting to local tastes and preferences over time. The use of readily available ingredients like ketchup and pineapple further cemented its place in Western kitchens and menus.
Today, sweet and sour chicken is a ubiquitous dish, a staple on countless menus worldwide. Its popularity is undeniable; statistics on online recipe searches and restaurant orders consistently rank it among the top-searched and ordered Chinese-inspired dishes globally. This widespread appeal stems from its versatility and accessibility. It’s a relatively easy dish to prepare, requiring readily available ingredients and straightforward techniques. Furthermore, its balance of sweet, sour, and savory flavors appeals to a broad range of palates, transcending cultural boundaries and making it a universally enjoyed culinary experience. The dish even boasts several variations, including variations that utilize different meats, vegetables and sauces. This adaptability ensures its enduring popularity and guarantees its place on dinner tables for years to come.
Beyond its widespread popularity, sweet and sour chicken embodies a significant aspect of globalization and cultural exchange. It represents the successful adaptation and evolution of a dish, showcasing how culinary traditions can travel, transform, and thrive in new environments. Its journey from the kitchens of Cantonese chefs to global kitchens is a testament to the power of culinary fusion and the enduring appeal of well-balanced flavors. The story of sweet and sour chicken is not just a recipe; it’s a fascinating narrative of cultural exchange and culinary innovation.
Ingredients and Measurements
This recipe yields approximately 4 servings of delicious sweet and sour chicken. Accurate measurements are crucial for achieving the perfect balance of sweet, sour, and savory flavors. Using a kitchen scale for weighing ingredients, especially the chicken and sugar, will ensure consistent results.
Chicken: We’ll be using 1.5 lbs (680g) of boneless, skinless chicken breasts. You can substitute with thighs, but breasts offer a leaner, more tender result for this dish. Cut the chicken into 1-inch cubes. This ensures even cooking and a pleasing bite-sized texture. Larger pieces may remain undercooked in the center, while smaller pieces might overcook and become dry.
Marinade: A simple marinade will enhance the chicken’s flavor and tenderness. We’ll use 2 tablespoons of soy sauce (low sodium preferred for better control over saltiness), 1 tablespoon of cornstarch, and 1 teaspoon of ground ginger. The cornstarch acts as a tenderizer and helps the sauce cling to the chicken. Mixing the marinade thoroughly and allowing the chicken to marinate for at least 30 minutes, or even better, up to 2 hours in the refrigerator, will significantly improve the final product.
Sauce Ingredients: The sweet and sour sauce is the star of the show! We need 1/2 cup (120ml) of white vinegar, which provides the necessary sourness. Avoid using apple cider vinegar or other flavored vinegars, as they can overpower the delicate balance of flavors. Next, we’ll use 1 cup (200g) of granulated sugar. Use a kitchen scale to measure the sugar accurately for consistent sweetness. Then, add 1/2 cup (120ml) of chicken broth (low sodium is recommended). This adds depth and helps to thin the sauce to the perfect consistency.
Vegetables: For a vibrant and colorful dish, we’ll use 1 red bell pepper, 1 green bell pepper, and 1/2 cup (70g) of pineapple chunks (fresh or canned, packed in juice). Cut the bell peppers into 1-inch pieces, similar in size to the chicken. This ensures even cooking and a pleasant textural contrast. If using canned pineapple, drain well to avoid excess liquid from thinning the sauce.
Garnish & Other Ingredients: We’ll need 2 tablespoons of vegetable oil for stir-frying, 1 tablespoon of sesame oil (for added aroma), and 2 green onions, thinly sliced, for garnish. The sesame oil adds a lovely nutty fragrance that complements the sweet and sour flavors. Don’t skip the garnish; the green onions add a fresh, appealing touch to the finished dish.
Cornstarch Slurry (for thickening): To ensure a luscious, thick sauce, we’ll make a slurry by mixing 2 tablespoons of cornstarch with 2 tablespoons of cold water. Make sure the cornstarch is completely dissolved in the water to prevent lumps in the sauce. This slurry will be added towards the end of the cooking process to thicken the sweet and sour sauce to the desired consistency.
Optional additions: Feel free to experiment! Consider adding other vegetables like carrots, onions, or mushrooms. A pinch of red pepper flakes can add a touch of heat for those who prefer a spicier dish. Remember to adjust cooking times accordingly when adding extra ingredients.
Preparation of Chicken and Vegetables
The success of your sweet and sour chicken hinges significantly on the proper preparation of both the chicken and vegetables. This stage ensures even cooking and optimal texture in the final dish. We’ll be using 1 lb boneless, skinless chicken breasts and a vibrant mix of vegetables.
Begin by preparing the chicken. Cut the 1 lb boneless, skinless chicken breasts into bite-sized, roughly 1-inch cubes. Consistency in size is key; this ensures even cooking and prevents some pieces from being overcooked while others remain underdone. Avoid making the pieces too small, as they may become dry during cooking. Too large, and they won’t cook through properly.
Once cubed, place the chicken in a medium bowl. In a separate small bowl, whisk together 1/4 cup cornstarch, 1 tablespoon soy sauce, and 1 teaspoon of ground ginger. Pour this mixture over the chicken, ensuring each piece is thoroughly coated. Gently toss the chicken to distribute the marinade evenly. This cornstarch slurry not only seasons the chicken but also helps to create a wonderfully crispy texture when stir-fried.
Now, let’s tackle the vegetables. This recipe calls for a classic combination, but feel free to adjust based on your preferences. We’ll use 1 red bell pepper, 1 green bell pepper, 1 small onion, and 1 cup of broccoli florets. Wash all vegetables thoroughly and remove any blemishes or stems.
Cut the red and green bell peppers into roughly 1-inch pieces, mirroring the size of your chicken cubes. Similarly, dice the small onion into roughly the same size. For the broccoli, break it into bite-sized florets. Ensure that all the vegetables are relatively uniform in size to ensure even cooking. Overly large pieces will be undercooked, while small pieces might overcook and become mushy.
Once all the vegetables are prepped, set them aside in separate bowls. This prevents them from becoming soggy before cooking. Do not mix the vegetables with the chicken until just before stir-frying. This prevents the vegetables from releasing excess moisture and making the chicken soggy.
Finally, before you begin the stir-frying process, prepare your wok or large skillet. Ensure it’s adequately heated with a sufficient amount of oil (about 2 tablespoons of vegetable oil) before adding the chicken. Proper preparation of both the chicken and vegetables is crucial for the overall success of your sweet and sour chicken. Taking the time to follow these steps will result in a delicious and beautifully presented dish.
Sauce Preparation
The sweet and sour sauce is the star of this dish, so taking your time to create a balanced and flavorful sauce is crucial. This recipe yields approximately 1 ½ cups of sauce, enough for generous coating of your chicken and rice.
Begin by whisking together the following ingredients in a medium saucepan: ½ cup of white granulated sugar, ¼ cup of white rice vinegar, and ¼ cup of ketchup. The sugar provides the sweetness, the vinegar offers a tangy counterpoint, and the ketchup adds a rich umami depth. Make sure the sugar is fully dissolved before proceeding; a gentle heat on the stovetop will help with this.
Next, incorporate the savory elements: 2 tablespoons of soy sauce (use low sodium if you prefer less salt), 1 tablespoon of cornstarch, and 1 tablespoon of tomato paste. The soy sauce adds saltiness and a subtle depth of flavour, while the cornstarch acts as a thickener, giving your sauce the signature glossy consistency. The tomato paste deepens the color and adds a richer, more complex flavour profile. Whisk vigorously to ensure no lumps form from the cornstarch.
Now, add the aromatic components: 1 tablespoon of grated fresh ginger, 1 clove of minced garlic, and ½ teaspoon of ground black pepper. Fresh ginger and garlic are essential for a truly authentic sweet and sour chicken flavour. Don’t be shy with the ginger; its pungent aroma and slight heat perfectly complement the sweet and sour elements. The black pepper adds a touch of warmth and balances the sweetness.
Important: Slowly whisk in ½ cup of water. This gradually incorporates the liquid preventing lumps and ensuring a smooth, even texture. Bring the mixture to a simmer over medium heat, stirring constantly to prevent sticking or burning. The sauce will begin to thicken as it simmers. This process should take about 3-5 minutes.
Continue to cook and stir until the sauce has reached your desired consistency. It should be thick enough to coat the back of a spoon but still pourable. If it becomes too thick, add a splash more water, a teaspoon at a time, until you achieve the right consistency. If it’s too thin, continue to simmer gently for a few more minutes, stirring frequently.
Once the sauce has thickened to your liking, remove it from the heat. Taste and adjust seasonings as needed. You might want to add a pinch more sugar for extra sweetness, a dash more vinegar for extra tang, or a little more soy sauce for added saltiness. Remember to taste test throughout the process to perfect your sauce’s balance of sweet, sour, and savory flavors.
Finally, set aside the sauce and allow it to cool slightly before adding it to your cooked chicken. This prevents the chicken from overcooking when you add the sauce.
Cooking the Chicken
This section details the crucial step of cooking the chicken for your sweet and sour delight. Properly cooked chicken is essential for a successful dish; it needs to be cooked through to a safe internal temperature while remaining tender and juicy. We’ll be using 1.5 lbs (approximately 680g) of boneless, skinless chicken breasts, cut into bite-sized pieces (approximately 1-inch cubes).
Preparation is key. Before you even think about the pan, pat the chicken pieces dry with paper towels. This helps to achieve a nice sear and prevents excess moisture from steaming the chicken instead of browning it. Excess moisture can also lead to a less flavorful final product.
We’ll start by marinating the chicken. In a medium bowl, whisk together 2 tablespoons of cornstarch, 1 tablespoon of soy sauce, 1 teaspoon of ground ginger, and ½ teaspoon of garlic powder. Add the chicken pieces and toss gently to ensure they are evenly coated. Let this marinate for at least 15 minutes, or even longer for a more intense flavor. The longer the marinade, the better the flavor!
Heat 2 tablespoons of vegetable oil in a large wok or skillet over medium-high heat. Ensure the oil is hot enough before adding the chicken; otherwise, it will steam instead of sear. You should see a slight shimmer in the oil. Add the marinated chicken to the hot wok in a single layer, avoiding overcrowding. Overcrowding will lower the temperature of the oil and result in steamed, rather than seared, chicken.
Cook the chicken for 3-4 minutes per side, or until it’s golden brown and cooked through. Avoid constantly moving the chicken during the initial searing process. Let it develop a nice crust before turning. If you have a large amount of chicken, you may need to cook it in batches to ensure proper browning.
Once browned, remove the chicken from the wok and set it aside. Do not wash the wok; the fond (brown bits) left in the wok will add depth of flavor to the sauce. You can use a spatula to scrape up any browned bits from the bottom of the wok before proceeding to the sauce making stage. Using a meat thermometer is highly recommended. The internal temperature of the chicken should reach 165°F (74°C) to ensure it’s safely cooked.
Important Note: If you find that your chicken is releasing a lot of moisture while cooking, it’s a sign that you didn’t pat it dry enough before marinating. This excess moisture can prevent proper browning. For future reference, make sure to thoroughly dry your chicken before proceeding.
Once the chicken is cooked and set aside, you’re ready to move on to making the delicious sweet and sour sauce! Remember to keep the cooked chicken warm while you prepare the sauce to ensure it stays juicy and delicious.
Combining Chicken and Sauce
After you’ve expertly prepared both the crispy, golden chicken and the vibrant sweet and sour sauce, it’s time for the crucial final step: combining them. This seemingly simple act requires attention to detail to ensure the chicken stays crispy and the sauce evenly coats every piece. The goal is a perfect balance of sweet, sour, and savory flavors with a satisfying textural contrast.
First, ensure your chicken is completely drained of excess oil. This is crucial for preventing a greasy final product. You can achieve this by gently placing the fried chicken pieces on a wire rack set over a baking sheet lined with paper towels. Allow the chicken to rest for at least 2-3 minutes, allowing any excess oil to drip away. Do not overcrowd the rack; work in batches if necessary to maintain air circulation.
While the chicken rests, gently reheat your sweet and sour sauce. If it has thickened significantly during its preparation, you may need to add a tablespoon or two of water or chicken broth to adjust the consistency. You want a sauce that is thick enough to cling to the chicken, but not so thick that it becomes gummy. Heat the sauce over medium-low heat, stirring frequently to prevent sticking or burning. Avoid high heat, which can cause the sauce to become too thick or separate.
Now, add the drained chicken to the reheated sauce. Work in batches to ensure each piece is thoroughly coated. Using tongs, gently toss the chicken in the sauce, making sure to coat every surface evenly. Avoid aggressively tossing, as this can break the delicate fried coating. If you have a large amount of chicken, you may need to do this in two or three batches to prevent overcrowding the pan and ensuring even coating.
Once all the chicken is coated, simmer for 1-2 minutes, allowing the sauce to thicken slightly and adhere to the chicken. This short simmering period helps meld the flavors and ensures the sauce clings to the chicken, creating a more flavorful and visually appealing dish. Continuously stir gently during this time to prevent burning or sticking. If the sauce becomes too thick, add a teaspoon of water at a time to adjust the consistency.
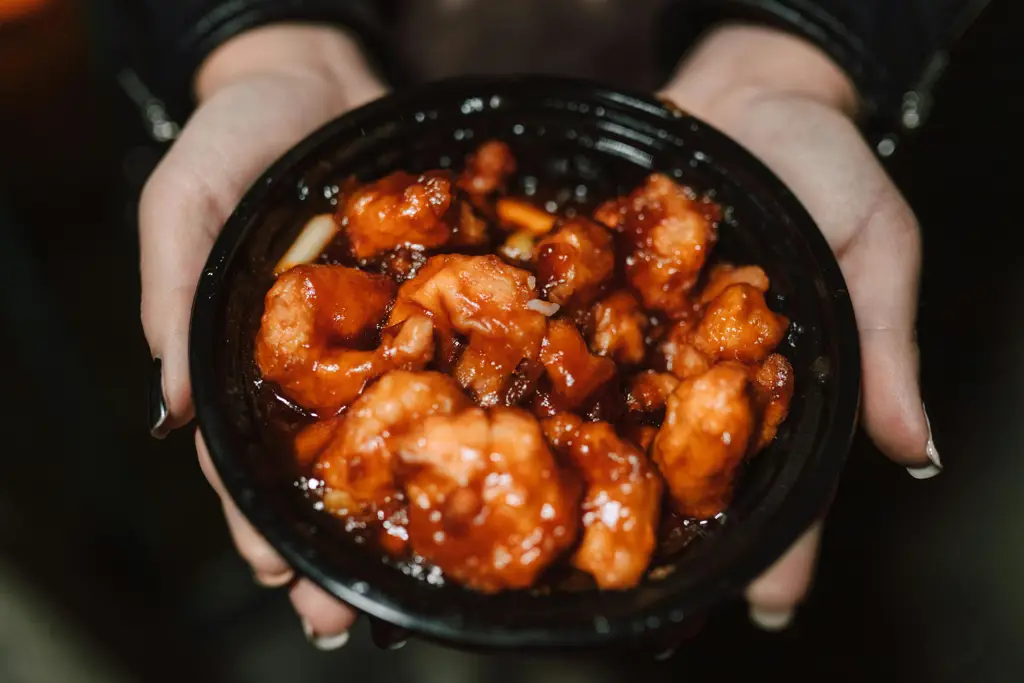
Finally, remove the chicken from the sauce and serve immediately. Garnish with chopped spring onions or sesame seeds for an extra touch of visual appeal and flavor. Serve hot with steamed rice for a complete and satisfying meal. Remember, the key is gentle handling to preserve the chicken’s crispiness while achieving a delicious, even coating of the sweet and sour sauce. Enjoy your perfectly made Sweet and Sour Chicken!
Serving Suggestions
Your perfectly cooked Sweet and Sour Chicken deserves a presentation as delicious as its taste! Here are some serving suggestions to elevate your culinary creation and impress your guests.
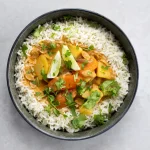
Classic Pairing: Steamed Rice. A staple for a reason! Serve 1.5 to 2 cups of fluffy steamed white rice per person. The rice provides a neutral base that perfectly complements the sweet and sour flavors of the chicken. For a more sophisticated touch, consider using jasmine rice or even a short-grain sushi rice for a slightly stickier, more textural experience. Don’t overcook the rice; it should be light and fluffy, not mushy.
Elevated Sides: Noodles & Vegetables. For a heartier meal, consider serving your Sweet and Sour Chicken with a side of noodles. 150-200g of egg noodles or thin rice noodles per person, stir-fried lightly with a touch of soy sauce and sesame oil, would be a fantastic complement. Alternatively, a vibrant side salad with crisp vegetables like shredded carrots, bell peppers (1/2 cup per person), and cucumber, tossed in a light vinaigrette, adds freshness and a contrasting texture. Consider the colors – a bright green salad with orange carrots enhances the visual appeal of the dish.
Garnishes for that Extra Touch. Even small details make a big difference. Garnish each serving with a sprinkle of chopped green onions (1 tablespoon per serving) for a pop of fresh flavor and color. A scattering of toasted sesame seeds (1 teaspoon per serving) adds a nutty aroma and texture. A small wedge of lime (1/8 per serving) offers a refreshing acidity that cuts through the sweetness of the sauce. Be mindful of not overpowering the dish; keep garnishes subtle yet effective.
Family-Style Serving: A Feast for the Eyes. For a casual family-style meal, serve the Sweet and Sour Chicken in a large, shallow bowl, allowing guests to help themselves. Arrange the rice or noodles artfully around the chicken, and place the garnishes in small bowls on the side for guests to add as they prefer. This creates a visually appealing and interactive dining experience. Consider using a decorative serving platter to enhance the presentation.
Buffet Style: Easy and Convenient. If you’re hosting a buffet, serve the Sweet and Sour Chicken in chafing dishes to keep it warm. Offer separate bowls of rice, noodles, and various garnishes, allowing guests to customize their portions. Clearly label each dish. Maintain appropriate food safety temperatures, especially when serving buffet-style.
Leftovers? Even Better! Sweet and Sour Chicken tastes even better the next day! Store leftovers in an airtight container in the refrigerator for up to 3 days. Reheat gently in the microwave or on the stovetop, adding a splash of water or sauce if needed to prevent dryness. Avoid over-reheating, as this can affect the texture and flavor.
Presentation Matters. No matter how you choose to serve your Sweet and Sour Chicken, remember that presentation is key. Use attractive serving dishes, and pay attention to the arrangement of food on the plate. A well-presented meal is more appealing and enjoyable.
Recommendations for Sweet and Sour Chicken
Serving Suggestions
For a truly authentic experience, serve your Sweet and Sour Chicken with steamed white rice. The fluffy rice perfectly soaks up the delicious sweet and sour sauce, creating a harmonious balance of flavors and textures. Alternatively, you can serve it with egg fried rice for a richer, more savory accompaniment. For a healthier option, consider serving it over a bed of quinoa or brown rice.
Consider adding some fresh, vibrant garnishes to elevate the presentation and taste. Chopped green onions, sesame seeds, and a wedge of lime offer a beautiful visual appeal and add subtle contrasting flavors. A sprinkle of chopped cilantro or fresh chili flakes can also add a nice kick.
Serving temperature is crucial. Serve the Sweet and Sour Chicken hot, straight from the pan, to ensure the sauce remains glossy and the chicken is tender and juicy.
Storage and Leftovers
Proper storage is key to maintaining the quality of your Sweet and Sour Chicken. Allow the dish to cool completely before storing it in an airtight container in the refrigerator. It will keep for up to 3-4 days. To reheat, gently warm it in a pan on the stovetop or in the microwave, avoiding overcooking which can make the chicken dry.
Avoid freezing this dish. The sauce tends to separate upon thawing, impacting the overall texture and taste. Enjoy your Sweet and Sour Chicken within a few days for the best results.
Complementary Dishes
Sweet and Sour Chicken pairs beautifully with a variety of side dishes. A simple green salad with a light vinaigrette provides a refreshing contrast to the richness of the main course. Stir-fried vegetables like broccoli, carrots, and snap peas offer a healthy and flavorful accompaniment.
For a more substantial meal, consider serving it with spring rolls or pot stickers. These appetizers provide a textural contrast and add an extra layer of flavor to your dining experience. A side of egg drop soup or wonton soup can also complement the dish nicely.
Nutritional Information (Approximate per serving)
Please note: This nutritional information is an estimate and can vary depending on the specific ingredients used and portion sizes. It’s always recommended to use a nutritional calculator with your exact ingredients for precise values.
Calories: Approximately 400-500 calories per serving.
Protein: Around 30-40 grams.
Fat: Approximately 20-25 grams (depending on the amount of oil used).
Carbohydrates: Approximately 40-50 grams.
Sodium: Can be high due to soy sauce; consider reducing sodium by using low-sodium soy sauce or adjusting the recipe accordingly.
Important: This dish may contain allergens such as soy, gluten, and eggs. Always check the ingredients of your specific products to ensure they meet your dietary needs.