Roasted chicken thighs, a seemingly simple dish, boast a surprisingly rich history and global presence. While pinpointing an exact origin is difficult, the practice of roasting poultry dates back millennia. Archaeological evidence suggests that humans have been cooking birds over open fires since the Neolithic period. The domestication of chickens, primarily in Southeast Asia, around 4,000 years ago, laid the foundation for the widespread culinary traditions we see today. Different cultures, from ancient Egyptians to medieval Europeans, have embraced chicken in various forms, with roasting becoming a particularly popular method due to its simplicity and the delicious results.
The popularity of chicken thighs, specifically, stems from their inherently higher fat content compared to breasts, resulting in a more succulent and flavorful final product. This is a key reason why they are a favorite amongst home cooks and chefs alike. Many consider the dark meat more tender and forgiving in the oven, less prone to drying out than the leaner breast. In the United States alone, chicken is the most consumed meat, with an estimated annual per capita consumption exceeding 90 pounds, a testament to its versatility and affordability. This high consumption rate reflects the prevalence of dishes like roasted chicken thighs in everyday diets.
Culturally, roasted chicken thighs hold significance in countless traditions. In many Western cultures, it’s a comforting staple, often associated with home-cooked meals and family gatherings. From Sunday roasts in Britain to celebratory feasts in numerous other countries, roasted chicken, including thighs, serves as a symbol of nourishment and togetherness. The dish’s adaptability also contributes to its enduring appeal; it effortlessly integrates into diverse cuisines, from Mediterranean herb-roasted thighs to Asian-inspired variations with soy sauce and ginger. This recipe will guide you through a classic preparation, providing a foundation upon which you can build your own culinary adventures.
Ingredients and Measurements
This recipe yields approximately 4 servings of succulent roasted chicken thighs. The quantities can be easily adjusted to accommodate more or fewer guests. Accuracy in measurements is crucial for achieving the perfect balance of flavors and ensuring even cooking. Use a kitchen scale for the most precise results, especially when measuring the chicken thighs and seasonings.
Chicken Thighs: 2 lbs (approximately 8 large bone-in, skin-on chicken thighs). You can substitute with boneless, skinless thighs, but the cooking time will need adjustment. Bone-in, skin-on thighs render the most flavorful results as the bone contributes to the richness and the skin crisps beautifully. Ensure the thighs are relatively uniform in size for even cooking. If some are significantly larger, you may need to adjust their cooking time to prevent overcooking smaller pieces.
Olive Oil: 2 tablespoons. Extra virgin olive oil is recommended for its superior flavor. You can substitute with another high-heat oil like avocado or grapeseed oil. Avoid using oils with low smoke points as they can impart an unpleasant taste.
Salt: 1.5 teaspoons. Kosher salt is preferred for its larger crystals and consistent flavor. If using table salt, reduce the quantity by about half, as it’s more concentrated. Don’t be shy with the salt! It’s crucial for seasoning the chicken and enhancing its natural flavors.
Black Pepper: 1 teaspoon. Freshly ground black pepper offers a more vibrant flavor than pre-ground. Grind the pepper just before using to maximize its aroma and pungency.
Garlic: 4 cloves, minced. Fresh garlic provides the best flavor. You can adjust the quantity to your preference. Mincing the garlic finely ensures even distribution throughout the chicken.
Paprika: 1 teaspoon. Smoked paprika adds a delightful smoky depth of flavor. Sweet paprika can be used as a substitute, but the smoky variation is highly recommended.
Optional Herbs: 1 teaspoon dried rosemary or thyme, or 2 tablespoons fresh, chopped. These herbs complement the chicken beautifully. Feel free to experiment with other herbs such as oregano or sage, adjusting the quantity accordingly.
Optional Lemon: ½ lemon, thinly sliced. Adding lemon slices contributes a bright, citrusy note. Place the lemon slices directly on top of the chicken during roasting for maximum flavor infusion.
Note: All measurements are approximate. Feel free to adjust them slightly to suit your personal taste preferences. Always ensure your chicken is thoroughly cooked to an internal temperature of 165°F (74°C) before serving.
Equipment and Utensils
Roasting chicken thighs is a straightforward process, but having the right equipment and utensils will ensure even cooking and a delicious result. You’ll need a few key items to get started. First and foremost, you’ll need a suitable roasting pan. A standard 9×13 inch baking dish works well for a small batch (around 4-6 thighs), while a larger roasting pan (12×18 inches or even a larger rectangular pan) is ideal for larger quantities. Avoid using non-stick pans for roasting as they can be damaged by high heat.
Next, you’ll need a meat thermometer. This is absolutely crucial for ensuring your chicken thighs are cooked to a safe internal temperature of 165°F (74°C). Don’t rely solely on visual cues; a thermometer guarantees food safety. A digital instant-read thermometer is the most convenient and provides quick, accurate readings.
Beyond the roasting pan and thermometer, you’ll need some basic kitchen tools. A large bowl is essential for tossing the chicken thighs in the marinade or seasoning. A set of tongs will be helpful for turning the chicken and transferring it to and from the pan. Measuring spoons and cups are necessary for accurately measuring your spices and other ingredients. Paper towels are useful for patting the chicken thighs dry before seasoning.
For more advanced roasting techniques, consider investing in a roasting rack. A roasting rack elevates the chicken thighs above the bottom of the pan, allowing for better air circulation and resulting in crispier skin. If you don’t have a rack, you can achieve similar results by placing the chicken thighs on a bed of roughly chopped vegetables like onions or carrots. This will also add flavor to your dish.
Finally, don’t forget a basting brush (optional but recommended). Basting the chicken thighs with pan juices during the roasting process helps to keep them moist and adds flavor. A good quality basting brush with durable bristles is a worthwhile investment for any home cook. If you don’t have a basting brush, you can use a spoon.
In summary: The essential equipment includes a roasting pan, meat thermometer, large bowl, tongs, measuring tools, and paper towels. A roasting rack and basting brush are highly recommended for optimal results but not strictly necessary.
Preparation of Chicken Thighs
Before you begin roasting, proper preparation of your chicken thighs is crucial for achieving juicy, flavorful results. Start with 4 bone-in, skin-on chicken thighs, weighing approximately 2 pounds total. This recipe can be easily scaled up or down depending on your needs.
Pat the chicken thighs dry: This is a critically important step often overlooked. Using paper towels, thoroughly pat the skin of each thigh dry. Excess moisture will steam the chicken instead of browning it, resulting in a less crispy and flavorful final product. Take your time and ensure all surfaces are dry.
Season generously: Don’t be shy with the seasoning! For these 4 thighs, use about 1 ½ teaspoons of kosher salt and ¾ teaspoon of freshly ground black pepper. Evenly distribute the salt and pepper across all surfaces of the chicken, including under the skin. You can gently loosen the skin with your fingers to help the seasoning reach the meat underneath. This will ensure even cooking and maximum flavor penetration.
Optional additions for extra flavor: Consider adding other seasonings to enhance the flavor profile. Popular choices include garlic powder (1 teaspoon), paprika (½ teaspoon), onion powder (½ teaspoon), or your favorite herbs like rosemary, thyme, or oregano (1-2 teaspoons total). Again, ensure even distribution of these seasonings across the chicken thighs.
Consider brining (optional but recommended): For incredibly juicy and flavorful chicken, consider brining the thighs for at least 30 minutes, or up to 4 hours, in a simple brine solution. A basic brine consists of 1 cup of water, 2 tablespoons of salt, and 1 tablespoon of sugar. Submerge the chicken in the brine, ensuring it’s fully covered. This step is particularly beneficial for leaner chicken thighs.
Remove excess seasoning (optional): If you’ve used a generous amount of herbs or spices, you may want to gently shake off any excess seasoning before roasting. This prevents burning and ensures an even browning of the skin. This step is optional and depends on your preference and the amount of seasoning used.
Once your chicken thighs are prepared, you’re ready to move on to the roasting process. Remember, proper preparation is key to achieving perfectly roasted chicken thighs every time!
Preparation of Vegetables (if applicable)
Roasting chicken thighs alongside vegetables creates a complete and flavorful meal. The preparation of your chosen vegetables is crucial for achieving tender, evenly cooked results that complement the chicken perfectly. This section outlines preparation techniques for popular roasting companions.
Root Vegetables (carrots, potatoes, parsnips): For sturdier vegetables like carrots, potatoes, and parsnips, begin by peeling them if desired. Scrubbing them thoroughly under cold water is sufficient for many recipes. Then, cut them into roughly 1-inch pieces. Consistency in size is key to ensure even cooking. Smaller pieces will cook faster than larger ones, leading to uneven browning and potential burning. Aim for uniformity to prevent some vegetables from being overcooked while others remain underdone.
Onions and Garlic: Halve or quarter larger onions, depending on their size, to allow for even roasting and browning. For garlic, you can leave the cloves whole with their papery skins on for a milder, subtly sweet flavor, or you can peel and roughly chop them for a more pronounced garlic taste. Leaving the garlic cloves whole in their skins is recommended if you prefer a less intense garlic flavor.
Broccoli and Brussels Sprouts: For broccoli, cut the florets into similarly sized pieces, approximately 1-1.5 inches. For Brussels sprouts, trim the ends and halve or quarter larger sprouts, depending on their size. Avoid overcrowding the pan; this will steam the vegetables instead of roasting them, resulting in a soggy texture. If necessary, roast the vegetables in batches for optimal results.
Other Vegetables: Many other vegetables are suitable for roasting alongside chicken thighs, such as bell peppers (cut into 1-inch strips), zucchini and squash (cut into half-moons or 1-inch chunks), and sweet potatoes (cut into 1-inch cubes). Remember to always consider the cooking time of each vegetable and adjust the preparation accordingly to ensure everything is perfectly cooked at the same time. Always preheat your oven to the correct temperature before adding the vegetables and chicken to the roasting pan.
Seasoning Vegetables: Once your vegetables are prepped, toss them with 1-2 tablespoons of olive oil, salt, and pepper. You can also add other herbs and spices to enhance their flavor, such as rosemary, thyme, paprika, or garlic powder. Don’t be afraid to experiment with different flavor combinations! The key is to evenly distribute the oil and seasonings to ensure every piece of vegetable is seasoned properly.
Important Note: Adjust the quantity of vegetables based on your recipe and the number of chicken thighs you are roasting. A good rule of thumb is to have a roughly equal volume of vegetables to chicken.
Seasoning and Marinating (if applicable)
While perfectly acceptable to roast chicken thighs with minimal seasoning, a well-crafted marinade or rub elevates the flavor profile significantly. The choice depends on your preferred taste and available time. For a simple approach, dry seasoning offers quick preparation, while marinating allows for deeper flavor penetration.
Dry Brining: For a flavorful, juicy result without the need for a wet marinade, consider dry brining. This involves generously seasoning the chicken thighs at least 4 hours, or preferably overnight, before roasting. Pat the chicken thighs dry with paper towels to remove excess moisture. Then, rub 1 tablespoon of kosher salt and 1 teaspoon of freshly ground black pepper all over the skin and flesh of each thigh. You can also add other spices like 1 teaspoon of paprika, ½ teaspoon of garlic powder, and ½ teaspoon of onion powder for a richer flavor profile. Ensure the salt is evenly distributed to promote even cooking and moisture retention.
Wet Marinades: Marinades add moisture and impart intense flavor. A simple marinade can be made with ½ cup of olive oil, ¼ cup of lemon juice, 2 cloves of minced garlic, 1 teaspoon of dried oregano, and ½ teaspoon of salt. Combine all ingredients in a bowl or zip-top bag. Add the chicken thighs, ensuring they are fully coated. Marinate for at least 2 hours, or preferably overnight in the refrigerator. Longer marinating times result in more tender and flavorful chicken, but beyond 24 hours, the acid in the marinade can begin to break down the chicken proteins, potentially making it mushy.
Advanced Marinades: For a more complex flavor, experiment with different ingredients! Consider adding herbs like rosemary, thyme, or sage. A touch of honey or maple syrup adds sweetness, while a splash of soy sauce or Worcestershire sauce introduces savory depth. Remember to always prioritize food safety: ensure the marinade is refrigerated at all times, and discard any leftover marinade that has come into contact with raw chicken.
Important Note: Regardless of whether you dry brine or marinate, always ensure the chicken thighs are patted dry before roasting. Excess moisture can lead to steaming rather than browning, resulting in less crispy skin. Properly seasoned and marinated chicken thighs will yield a more flavorful and juicy final product, enhancing your roasting experience.
Roasting Process
Once your chicken thighs are prepped (patted dry and seasoned – see previous section!), it’s time for the roasting process. This is where you’ll transform simple chicken thighs into a juicy, flavorful masterpiece. Preheat your oven to 400°F (200°C). This temperature ensures even cooking and crispy skin.
Choosing your roasting pan is crucial. A roasting pan with a rack is ideal. This allows air to circulate around the chicken thighs, promoting even browning and preventing them from steaming. If you don’t have a rack, you can create a makeshift one using sturdy vegetables like carrots or onions placed at the bottom of the pan.
Arrange the chicken thighs in a single layer in your roasting pan, ensuring they’re not overcrowded. Overcrowding will lead to steaming instead of roasting, resulting in soggy chicken. If you have more than four thighs, use two pans to ensure even cooking.
Roast the chicken thighs for approximately 40-45 minutes, or until they reach an internal temperature of 165°F (74°C) in the thickest part of the thigh. Use a meat thermometer to check for doneness; this is the most accurate way to ensure the chicken is cooked through and safe to eat. Don’t rely solely on visual cues, as browning doesn’t always indicate full cooking.
Basting is optional but recommended. About halfway through the roasting time (around 20-25 minutes), you can baste the chicken thighs with the pan juices. This adds extra flavor and helps keep the chicken moist. Use a spoon or baster to carefully lift the chicken and spoon the juices over the top.
For extra crispy skin, you can increase the oven temperature to 425°F (220°C) for the last 10 minutes of cooking. Keep a close eye on the chicken to prevent burning. This high-heat finish will crisp up the skin beautifully.
Resting is key. Once the chicken thighs reach the correct internal temperature, remove them from the oven and let them rest for 5-10 minutes before serving. This resting period allows the juices to redistribute, resulting in more tender and flavorful chicken. Never skip this step!
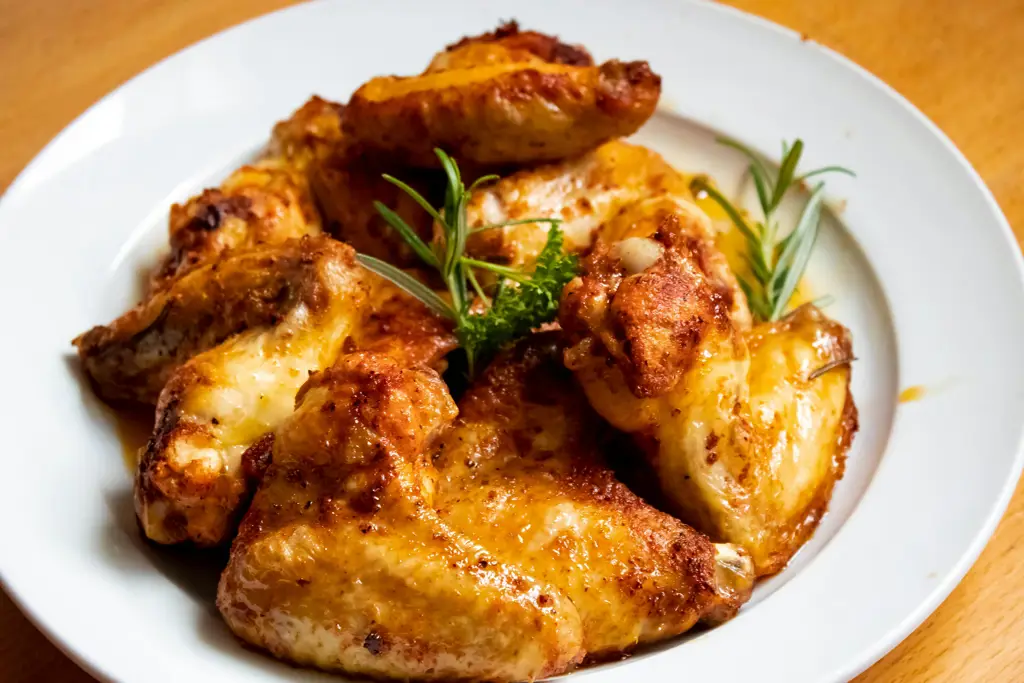
Enjoy! Your perfectly roasted chicken thighs are now ready to be served. They can be enjoyed on their own, with your favorite sides, or as part of a larger meal. Remember to always prioritize food safety and use a meat thermometer to ensure your chicken is cooked to a safe internal temperature.
Recommendations
For optimal flavor and texture, ensure your chicken thighs reach an internal temperature of 165°F (74°C) before serving. Use a meat thermometer to check for doneness, inserting it into the thickest part of the thigh. Overcooked thighs will be dry, while undercooked ones pose a food safety risk.
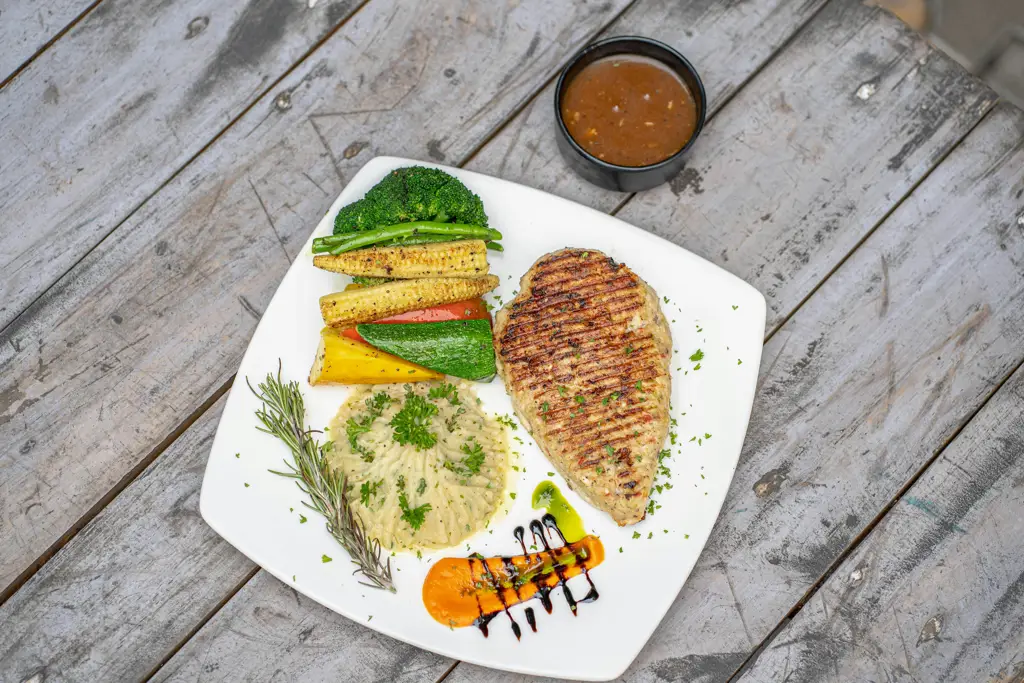
These roasted chicken thighs are incredibly versatile and can be served in a variety of ways. They’re delicious on their own, alongside a simple salad. Consider serving them with roasted root vegetables like potatoes and carrots for a hearty and complete meal. A vibrant green salad with a lemon vinaigrette would also complement the richness of the chicken beautifully.
Leftover roasted chicken thighs can be stored in an airtight container in the refrigerator for up to 3-4 days. They can also be frozen for up to 3 months. Reheat gently in the oven or microwave until heated through. Avoid reheating multiple times.
To enhance your roasted chicken thighs experience, consider experimenting with different herbs and spices. Rosemary, thyme, garlic powder, and paprika all pair exceptionally well with chicken. A simple marinade made with olive oil, lemon juice, and your favorite herbs can elevate the flavor significantly.
Approximate Nutritional Information (per serving, based on 1 large chicken thigh): Calories: Approximately 250-300, depending on cooking method and added ingredients. Protein: 25-30g, Fat: 15-20g, Carbohydrates: 0-5g. Note: This is an estimate and can vary based on the specific ingredients and portion size. For precise nutritional information, use a nutrition calculator with your specific recipe details.
Complementary dishes that pair well with roasted chicken thighs include: creamy mashed potatoes, rice pilaf, couscous, quinoa, roasted asparagus, green beans, or a simple pasta salad. The possibilities are endless, allowing you to create a balanced and flavorful meal to suit your preferences.