Salsa, a vibrant and flavorful condiment, is far more than just a simple dip; it’s a culinary journey through time and culture. Its origins are deeply rooted in the indigenous cooking traditions of Mexico, specifically the Aztec civilization, who utilized ingredients like tomatoes, chili peppers, and herbs in various forms long before the arrival of Europeans. While the exact recipe for salsa as we know it today didn’t exist then, the fundamental components and preparation techniques were established centuries ago. The arrival of Europeans introduced new ingredients and techniques, leading to the evolution of the diverse salsa styles we enjoy today.
The word salsa itself, meaning sauce in Spanish, reflects its widespread adoption across Latin American cultures. While its precise origins are debated, the modern form of salsa emerged in the United States during the 20th century, particularly in the Southwest, becoming a staple of Mexican-American cuisine. The popularity of salsa exploded in the latter half of the 20th century, with sales skyrocketing to become a multi-billion dollar industry. In fact, according to recent market research, Americans alone consume billions of pounds of salsa annually, showcasing its ubiquitous presence in kitchens and restaurants nationwide. This incredible growth reflects not only its delicious taste but also its versatility as a topping, dip, and even a key ingredient in many dishes.
Beyond its commercial success, salsa holds profound cultural significance. It’s a symbol of vibrant Mexican-American culture, often passed down through generations, with each family possessing its own unique recipe and preparation method. The preparation of salsa itself can be a communal activity, bringing families and friends together around a table, chopping, blending, and tasting. This shared experience transcends mere cooking; it’s a celebration of heritage, identity, and the joy of sharing food. The countless variations – from fiery habanero salsas to mild tomato salsas, each with its own distinct flavor profile and regional character – further demonstrate the rich tapestry of cultural influences that have shaped this beloved condiment. Understanding the history and cultural context of salsa enriches the experience of making and enjoying it, transforming a simple recipe into a flavorful journey through time and tradition.
Ingredients and Measurements
Creating the perfect salsa hinges on using fresh, high-quality ingredients and precise measurements. While you can certainly adjust to your personal taste preferences, starting with these guidelines will ensure a balanced and delicious salsa every time. We’ll be making a classic medium salsa, but feel free to experiment!
Tomatoes: The foundation of any good salsa is the tomato. We recommend using about 2 pounds (900g) of ripe Roma tomatoes. Roma tomatoes have a lower water content than other varieties, resulting in a thicker, less watery salsa. Avoid using overly soft or bruised tomatoes, as they will negatively impact the texture and flavor. If you prefer a smoother salsa, you can blanch the tomatoes briefly before chopping to remove the skins.
Onion: A medium-sized white onion (about ½ cup chopped, approximately 100g) will provide a sharp, clean bite. You can substitute with yellow onion for a milder flavor, or red onion for a more pungent taste. Finely chop the onion to ensure even distribution throughout the salsa. Too much onion can overpower the other flavors, so start with the specified amount and add more to taste only if necessary.
Jalapeno Peppers: The level of heat is entirely up to you! For a medium heat, we recommend using 1-2 jalapeños, seeded and minced. Remember to wear gloves when handling jalapeños to avoid irritating your skin. If you prefer a milder salsa, use only one jalapeño, or remove the seeds and membranes for a significantly reduced heat. For a spicier salsa, add more jalapeños or include a serrano pepper.
Cilantro: Fresh cilantro adds a vibrant, herbaceous flavor that is essential to a good salsa. Use about ½ cup (approximately 15g) of chopped fresh cilantro. Don’t over-chop the cilantro; larger pieces retain more of their flavor and texture. If you are not a fan of cilantro, you can substitute with parsley, but be aware that the flavor profile will change.
Lime Juice: Lime juice provides acidity that balances the sweetness of the tomatoes and enhances the overall flavor. Use the juice of 2-3 limes (approximately 2 tablespoons or 30ml). Freshly squeezed lime juice is always best; bottled lime juice often lacks the vibrant flavor of fresh juice. Taste and adjust as needed, adding more lime juice for extra tanginess.
Other Ingredients (Optional): Feel free to add other ingredients to customize your salsa. Common additions include: 1-2 cloves of minced garlic for a more pungent flavor, a small diced red bell pepper for added sweetness and color, or a pinch of cumin or oregano for a more complex flavor profile. Remember to adjust the quantities of other ingredients according to your taste preferences.
Salt: Salt is crucial for bringing out the flavors in your salsa. Start with 1 teaspoon (5g) of kosher salt, and taste before adding more. Always add salt gradually, as it’s easier to add more than to take it away.
Important Note: These are guidelines; feel free to adjust the quantities to your liking. The beauty of salsa is its versatility! Experiment with different combinations of ingredients and spice levels to discover your perfect recipe.
Equipment and Utensils
Making perfect salsa requires the right tools to ensure consistent chopping, efficient blending (if applicable), and easy serving. While you might not need every item listed, having these will significantly enhance your salsa-making experience and the final product’s quality.
For chopping: A sharp chef’s knife (8-10 inches) is essential for achieving consistently sized pieces of your ingredients, particularly the onions, tomatoes, and peppers. A dull knife will bruise the ingredients, releasing more liquid and compromising texture. Consider investing in a good quality knife and keeping it sharp; a honing steel used before each use will help maintain its edge. Alternatively, a high-quality mandoline slicer can be used for very precise and uniform chopping, especially if you’re working with larger quantities of salsa. For smaller ingredients like cilantro and garlic, a smaller paring knife is handy.
For measuring: Accurate measurements are key to achieving the perfect balance of flavors. A set of measuring cups (dry and liquid) and measuring spoons will help you replicate your recipe successfully every time. Specifically, you’ll need cups for measuring larger ingredients like tomatoes and peppers, and spoons for smaller ingredients such as spices, cumin, and salt. Don’t rely on eyeballing – use measuring tools to ensure consistency.
For blending (optional): If you’re making a chunky salsa, a food processor is extremely helpful for creating a smooth base of blended ingredients before adding the larger chunks. A standard food processor with a pulse function allows you to control the texture, preventing over-processing. If you prefer a completely smooth salsa, a high-speed blender can achieve a perfectly fine consistency. However, remember that blending will remove some of the textural elements, so consider your preferred style of salsa.
For preparation: A large cutting board (at least 12×15 inches) provides ample space for chopping all your ingredients without overcrowding. Choose a cutting board made of durable material, such as wood or high-quality plastic, that is easy to clean. Multiple smaller cutting boards can also be used to keep ingredients separated and avoid cross-contamination of flavors. A few medium-sized bowls are necessary for holding chopped ingredients before combining them. These should be made of a material that won’t react with the acidity of the tomatoes, such as glass or stainless steel.
Serving and Storage: Once your salsa is ready, you’ll need a serving bowl. A shallow bowl that showcases the vibrant colors of your salsa is ideal. For storing leftovers, airtight containers are recommended to preserve freshness and prevent oxidation. Glass or BPA-free plastic containers are suitable options. Always store your salsa in the refrigerator and consume within 3-5 days for optimal quality.
Other helpful utensils: A sturdy spatula or spoon is useful for mixing the ingredients together. A citrus juicer will help you extract the maximum amount of juice from your limes or lemons. Finally, clean kitchen towels are essential for wiping down your cutting board and knife throughout the process.
Preparation of Ingredients (Washing, Chopping, etc.)
Making perfect salsa starts with meticulously preparing your ingredients. The freshness and quality of your produce directly impact the final flavor profile. We’ll be making a classic salsa using the following quantities: 4 large ripe tomatoes, 1 medium red onion, 1 jalapeño pepper, 1/2 cup chopped cilantro, and the juice of 1 lime. Adjust these quantities to suit your taste and the number of servings you require.
Washing the Produce: Begin by thoroughly washing all your ingredients under cold running water. Don’t skip this crucial step! Thoroughly scrub the tomatoes, red onion, and jalapeño pepper to remove any dirt, pesticides, or debris. Use a produce brush if necessary, paying special attention to crevices and stems. A clean vegetable is a crucial component of a safe and delicious salsa.
Preparing the Tomatoes: For optimal texture and flavor, use ripe, but firm tomatoes. Avoid overly soft or bruised tomatoes, as these can lead to a watery salsa. Core the tomatoes by using a small paring knife to carefully remove the stem end and any green parts around it. Then, roughly chop the tomatoes into approximately 1/2-inch dice. Consistency is key here; aim for even-sized pieces to ensure a uniform texture in your finished salsa.
Preparing the Red Onion: Red onions add a sharp, vibrant flavor to salsa. However, their pungency can be overpowering if not handled correctly. To mitigate this, soak the chopped onion in cold water for about 10-15 minutes after chopping. This helps to remove some of the harshness. Chop the red onion into small, roughly 1/4-inch dice, similar in size to your diced tomatoes. Again, consistency is crucial for a balanced salsa.
Preparing the Jalapeño Pepper: The jalapeño pepper provides the heat in your salsa. Handle jalapeños with care, as the capsaicin in them can irritate your skin and eyes. Wear gloves if desired. Remove the stem and, if desired, remove the seeds and membranes – this will significantly reduce the heat. Finely mince the jalapeño, or chop it into small pieces, depending on your preferred level of spiciness. Remember that the heat will intensify as the salsa sits.
Preparing the Cilantro: Fresh cilantro adds a bright, herbaceous element to the salsa. Wash the cilantro thoroughly, removing any wilted leaves. Roughly chop the cilantro leaves, aiming for a consistent texture, but don’t over-process it. You want to retain the vibrant green color and fresh flavor.
Preparing the Lime Juice: Freshly squeezed lime juice is essential for balancing the flavors of the salsa and adding a touch of acidity. Roll the lime on a flat surface to soften it before juicing. Use a citrus juicer or a fork to extract the juice. Avoid using bottled lime juice, as it lacks the freshness and vibrancy of fresh lime juice.
Once all ingredients are prepared, you’re ready to combine them and create your perfect salsa! Remember that proper preparation is the cornerstone of a delicious and well-balanced salsa. Taste and adjust seasonings as needed before serving.
Combining Ingredients
Once you’ve prepped all your ingredients (see previous sections on selecting and preparing ingredients), it’s time to bring them together to create your perfect salsa. The order in which you combine the ingredients can impact the final texture and flavor, so following these steps carefully is crucial.
Begin with the Aromatics: Start by gently combining your finely chopped onion (approximately ½ cup, or one medium onion), cilantro (½ cup, loosely packed), and jalapeño (1-2, depending on desired heat level, finely minced – remove seeds and membranes for less heat). Use a large bowl to give yourself ample space. Gently toss these ingredients together; you want to avoid bruising the herbs, which can lead to a less vibrant flavor and color. Do not overmix.
Incorporating Tomatoes: Next, add your tomatoes. For a classic salsa, use about 4 cups of finely diced Roma tomatoes. Roma tomatoes offer a great balance of texture and flavor, but you can experiment with other varieties. If using cherry or grape tomatoes, halve or quarter them before adding. Gentle handling is key here to avoid crushing the tomatoes and releasing excess liquid, which can make your salsa watery. A light toss is all that’s needed to combine them with the aromatics.
Adding the Remaining Ingredients: Now, incorporate the remaining ingredients. This typically includes lime juice (juice of 2 limes), salt (1-1.5 teaspoons, or to taste), and cumin (½ teaspoon). Taste and adjust seasoning as you go. The salt enhances the flavors of the tomatoes and other ingredients, so don’t be shy with it, but remember that you can always add more, you can’t take it away. The cumin adds a warm, earthy note that complements the other flavors beautifully. Again, a gentle toss is sufficient to combine everything evenly. If you’re using any additional ingredients like corn, black beans, or mango, add them now and gently fold them in.
Maceration (Optional but Recommended): For the best flavor development, allow your salsa to sit for at least 15-30 minutes before serving. This process, known as maceration, allows the flavors of the ingredients to meld together and deepen. Cover the bowl and refrigerate during this time. If you’re short on time, you can skip this step, but the flavor will be significantly improved with a brief rest. The longer it sits (up to a few hours), the more the flavors will develop.
Final Check and Adjustments: After the maceration period, give your salsa one final taste. Adjust seasoning as needed – you might want to add more lime juice for acidity, salt for saltiness, or jalapeño for heat. If the salsa is too watery, you can gently press the mixture through a fine-mesh sieve to remove excess liquid. Remember, the best salsa is the one that tastes best to you! Experiment with different combinations of ingredients and seasonings to find your perfect recipe.
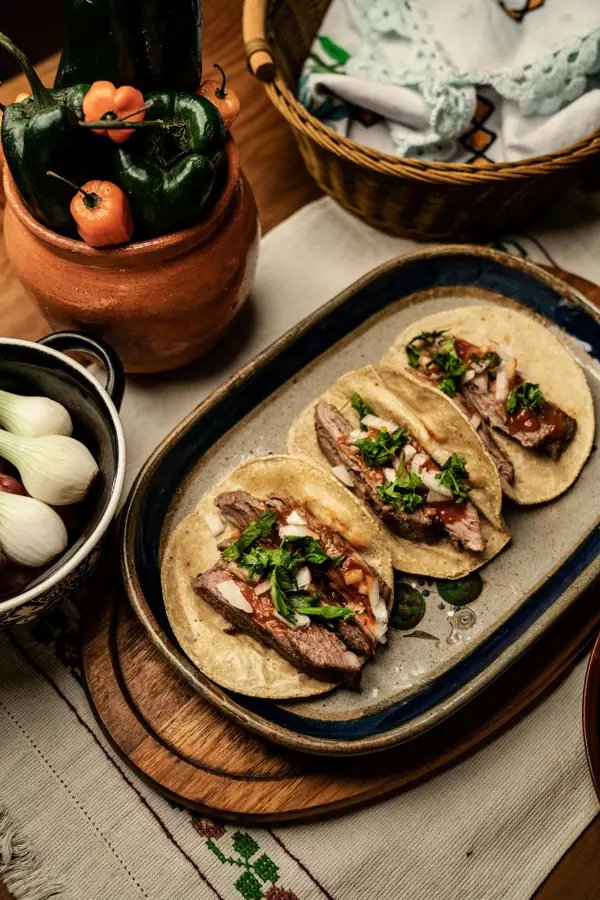
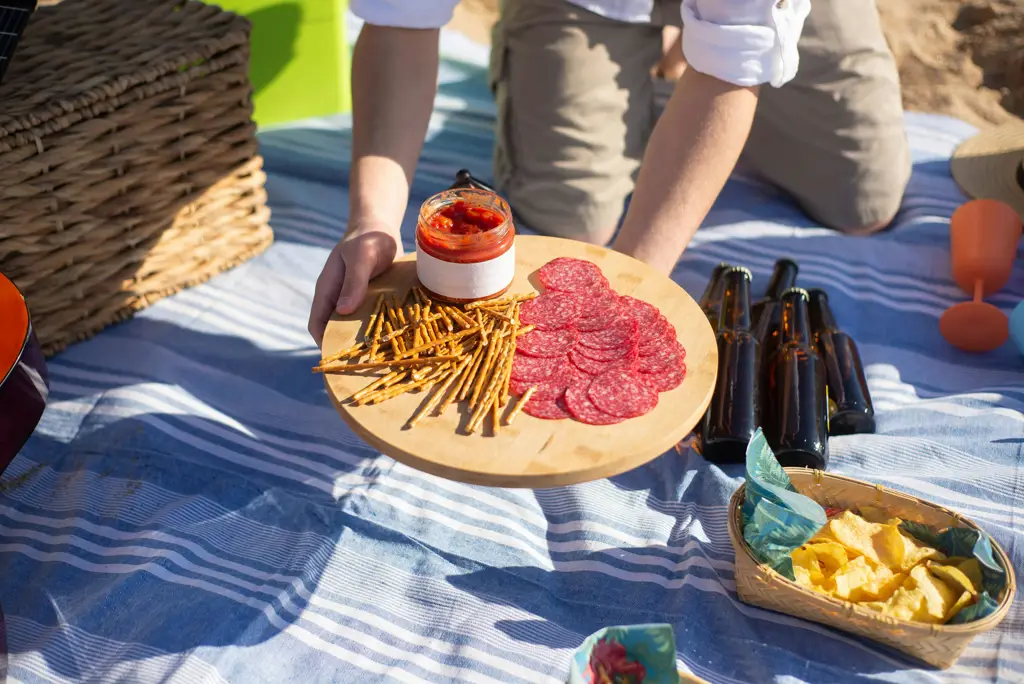
Serving Suggestion: Serve your freshly made salsa with tortilla chips, grilled fish, tacos, or any dish you desire.
Adjusting Seasoning and Taste
Creating the perfect salsa is an iterative process. Even with a precise recipe, the final taste can vary depending on the ripeness of your ingredients. This section focuses on fine-tuning your salsa’s seasoning and overall flavor profile after the initial mixing.
Taste and Adjust: The most crucial step is tasting your salsa before making any adjustments. Scoop a spoonful and savor the flavors. Identify what’s lacking or overpowering. Is it too acidic? Not salty enough? Does it need more heat? This initial taste test will guide your next steps.
Acidity Adjustment: If your salsa is too bland or lacks brightness, a touch of acidity can elevate it. Start with small increments of lime juice (1/2 teaspoon at a time). Avoid adding too much at once, as it’s difficult to correct excessive acidity. Alternatively, a splash of good quality white vinegar (1/4 teaspoon at a time) can provide a sharper, more pungent acidity.
Salt Adjustment: Salt is essential for balancing flavors in salsa. If your salsa tastes flat, add kosher salt, a pinch at a time (1/4 teaspoon increments). Kosher salt is preferred because its larger crystals dissolve more evenly and allow for more precise seasoning. Taste frequently, as salt’s effect can build up. Remember that salt enhances other flavors, so don’t over-salt.
Heat Adjustment: The level of heat is entirely a matter of personal preference. If your salsa needs more kick, add finely minced jalapeño or serrano peppers, starting with 1/4 to 1/2 of a small pepper. Always wear gloves when handling chilies to avoid irritating your skin. For a more subtle heat, use a pinch of cayenne pepper (start with 1/8 teaspoon). Remember that heat builds slowly, so add small amounts and taste before adding more.
Sweetness Adjustment: Some salsas benefit from a touch of sweetness to balance the acidity and heat. A small amount of sugar (1/2 teaspoon at a time) or a few drops of agave nectar can add subtle sweetness. Avoid using too much sugar, as it can overpower the other flavors. Consider the sweetness already present in your tomatoes and other ingredients.
Other Flavor Enhancers: Consider adding other flavor enhancers to complement your salsa’s base. A pinch of cumin or coriander can add depth and warmth. A few drops of your favorite hot sauce can boost the heat. Fresh cilantro can lighten up the flavor profile, while a squeeze of orange juice can add a citrusy complexity. Experiment with small additions to discover what works best for your palate.
Resting Time: Once you’ve adjusted the seasoning, allow the salsa to rest for at least 15-30 minutes before tasting again. The flavors will meld and deepen during this time, giving you a more accurate representation of the final product. This allows the flavors to balance and ensures that the salt and other seasonings are evenly distributed.
Professional Tip: Always taste your salsa at room temperature. Cold salsa can mask some flavors, leading to inaccurate adjustments. Taste at room temperature to get the truest picture of your salsa’s flavor profile. This final taste test will help you perfect your creation.
Storage Recommendations
Proper storage is crucial for maintaining the vibrant flavor and freshness of your homemade salsa. Improper storage can lead to bacterial growth, oxidation, and a significant decline in quality, quickly transforming your delicious salsa into a less-than-desirable culinary experience. Following these recommendations will ensure your salsa remains at its peak for as long as possible.
For immediate consumption (within 2-3 hours): If you’re making salsa for a party or immediate consumption, simply keep it in a large, clean bowl at room temperature. This allows the flavors to meld and develop. However, it’s crucial to consume it within 2-3 hours to avoid bacterial contamination, especially in warmer climates.
Refrigerator Storage (for best quality): For longer storage, refrigeration is essential. Transfer your salsa into an airtight container. Glass containers are ideal as they prevent the absorption of odors and don’t react with the ingredients. Avoid using metal containers, which can affect the flavor of the salsa over time. Fill the container completely to minimize air exposure which can cause oxidation and browning. A good quality, tightly sealed container will help keep your salsa fresh for 3-5 days.
Freezing Salsa (for extended storage): Freezing salsa is a great way to preserve it for longer periods, extending its shelf life to 2-3 months. However, the texture might change slightly upon thawing, becoming slightly softer. For best results, freeze your salsa in smaller portions, such as 1-cup or ½-cup containers. This allows for easier thawing and prevents unnecessary waste. Use freezer-safe containers or heavy-duty freezer bags, ensuring they are tightly sealed to prevent freezer burn. Allow the salsa to thaw completely in the refrigerator before serving.
Quantity Considerations: The amount of salsa you prepare will influence your storage strategy. For smaller batches (less than 2 cups), a single airtight container in the refrigerator is sufficient. Larger batches (over 2 cups) might benefit from portioning into multiple containers for easier access and to reduce the risk of spoilage. Remember to always label your containers with the date to ensure you use the oldest salsa first.
Important Note on Safety: Always practice safe food handling techniques. Wash your hands thoroughly before preparing and handling the salsa. Use clean utensils and containers. If you notice any signs of spoilage, such as mold, unusual odor, or off-color, discard the salsa immediately. Do not consume salsa that has been left at room temperature for longer than 2-3 hours, or shows any signs of spoilage.
By following these storage recommendations, you can enjoy your homemade salsa at its peak flavor and freshness for days, or even months, after preparation. Remember that proper storage is just as important as the recipe itself when it comes to achieving perfect salsa.
Recommendations for Perfect Salsa
To achieve truly perfect salsa, several key recommendations should be followed. First, freshness is paramount. Use the ripest, most flavorful tomatoes, onions, and cilantro you can find. Consider using heirloom tomatoes for a richer, more complex flavor profile. If using canned tomatoes, opt for high-quality, fire-roasted varieties to enhance the depth of flavor. Don’t be afraid to experiment with different types of chiles to adjust the heat level to your preference. A good balance of sweet, sour, and spicy is key to a well-rounded salsa.
Secondly, proper chopping techniques significantly impact the final texture and taste. Finely dice your onions and peppers to prevent overwhelming chunks, while slightly coarser chopping of the tomatoes adds a pleasant textural contrast. For a smoother salsa, consider briefly pulsing the ingredients in a food processor, but avoid over-processing, which can result in a mushy consistency. Remember to taste and adjust seasoning as you go. The balance of salt, lime juice, and cilantro is crucial for a vibrant and delicious result. A pinch of sugar can help balance the acidity in some tomato varieties.
Regarding serving suggestions, consider the occasion and your guests’ preferences. A chunky salsa is ideal for dipping tortilla chips, while a smoother version works well as a topping for tacos, burritos, or grilled fish. You can also experiment with adding different toppings to your salsa, such as avocado, mango, or pomegranate seeds, for added flavor and visual appeal. Serve your salsa chilled or at room temperature, depending on personal preference. Chilled salsa offers a refreshing contrast on a hot day, while room temperature salsa allows the flavors to fully meld.
Proper storage is essential to maintain the quality of your salsa. Store leftover salsa in an airtight container in the refrigerator. It will generally keep for 3-5 days, but the flavor will begin to diminish after a couple of days. For longer storage, consider freezing your salsa in ice cube trays or small containers. Avoid storing salsa in metal containers, as this can affect the flavor and color.
Many dishes pair beautifully with homemade salsa. Classic pairings include tortilla chips, tacos, enchiladas, burritos, quesadillas, and nachos. However, the versatility of salsa extends beyond Mexican cuisine. It complements grilled meats, fish, poultry, and even eggs. Consider using it as a topping for grilled chicken salad, or as a vibrant addition to a black bean burger. The possibilities are endless!
Nutritional Information (per 1/2 cup serving, approximate values will vary based on ingredients): Calories: 50-70, Fat: 1-3g, Saturated Fat: 0-1g, Cholesterol: 0mg, Sodium: 100-200mg (depending on salt added), Carbohydrates: 10-15g, Fiber: 2-4g, Sugar: 4-7g, Protein: 1-2g. Note: These values are estimates and may vary based on the specific ingredients and quantities used. For precise nutritional information, use a nutrition calculator with your exact recipe.
Finally, don’t be afraid to experiment and personalize your salsa. Adjust the ingredients and seasonings to your liking. The beauty of homemade salsa lies in its adaptability. With practice, you’ll find the perfect balance of flavors to create your signature salsa masterpiece.