Lemon bars, those sunshine-yellow squares of buttery shortbread crust topped with a tangy, intensely lemony curd, are more than just a delicious dessert; they’re a testament to the enduring power of simple, quality ingredients. While pinning down their exact origin is tricky, the consensus points to a likely evolution from earlier lemon desserts and variations of shortbread, possibly emerging in the United States sometime in the early to mid-20th century. Unlike many desserts with centuries-old histories, precise documentation of lemon bars’ inception is scarce. Instead, their rise is a reflection of the growing popularity of citrus fruits and readily available baking ingredients in the American home kitchen.
The popularity of lemon bars exploded in the latter half of the 20th century, fueled by the rise of readily available baking ingredients and the increasing cultural emphasis on easy-to-make, yet impressive desserts. While precise sales figures for lemon bars are difficult to obtain, their prevalence in bakeries, cafes, and home kitchens across the country speaks volumes about their enduring appeal. Online recipe searches consistently place lemon bars among the top-searched dessert recipes, highlighting their continued relevance in modern culinary culture. This enduring popularity is largely due to their versatility – they can be easily adapted to include variations like berries, chocolate, or even a sprinkle of powdered sugar, making them a blank canvas for creative bakers.
Beyond their simple elegance, lemon bars hold a certain cultural significance, often associated with summertime gatherings, potlucks, and bake sales. Their bright, cheerful appearance and refreshing taste perfectly complement warm weather festivities. Moreover, the relatively easy-to-follow recipe makes them a perfect project for both novice and experienced bakers, fostering a sense of accomplishment and shared culinary experience. Some might even argue that the perfect lemon bar represents a balance of sweet and tart, a reflection of life’s own delicate equilibrium. The simplicity of the ingredients – butter, sugar, eggs, lemons, and flour – belies the complex flavors and textures that result, making them a testament to the magic of baking.
Interestingly, the ratio of shortbread crust to lemon curd can significantly impact the overall taste and texture of the lemon bar. Some recipes favor a thicker crust, while others prioritize a generous layer of tangy curd. This variation itself points to the adaptable nature of the recipe and allows for individual preference and creative expression. Ultimately, the perfect lemon bar is subjective, but the quest for that perfect balance of sweet and tart, crunchy and creamy, is what keeps bakers returning to this classic dessert time and time again. The enduring legacy of the lemon bar isn’t about a specific historical event, but rather about its continued ability to bring joy and satisfaction to bakers and eaters alike.
Ingredients and Measurements
Crafting perfect lemon bars requires precision in both ingredient quality and measurement. Using fresh, high-quality ingredients will significantly impact the final taste and texture. Below, you’ll find a detailed breakdown of the ingredients needed, along with precise measurements and helpful tips for success.
For the Crust:
- 1 ½ cups (190g) all-purpose flour: Using freshly milled flour, if possible, enhances the flavor and texture of the crust. Make sure to fluff the flour in the measuring cup before scooping to avoid packing it down, which leads to a denser crust.
- ½ cup (100g) powdered sugar: Powdered sugar contributes to a sweeter and more tender crust. Sift the powdered sugar before measuring for a smoother consistency. Avoid using granulated sugar as it will result in a coarser texture.
- ½ teaspoon salt: Salt enhances the flavors of both the crust and the lemon filling. Don’t underestimate the importance of this small amount; it balances the sweetness and makes the other flavors pop.
- ½ cup (113g) unsalted butter, cold and cubed: Using cold, cubed butter is crucial for creating a flaky crust. The cold butter prevents the gluten from developing too much, resulting in a tender, crumbly texture. If your butter is too soft, chill it in the refrigerator for at least 30 minutes before proceeding.
For the Lemon Filling:
- 1 ½ cups (300g) granulated sugar: Granulated sugar provides the sweetness for the lemon filling. Use a fine-grained granulated sugar for even distribution and dissolving.
- 1/4 cup (60ml) freshly squeezed lemon juice: Freshly squeezed lemon juice is paramount. Bottled lemon juice lacks the vibrant, zesty flavor of freshly squeezed juice, significantly impacting the overall taste of the bars. Use about 3-4 large lemons, depending on their size.
- 1 tablespoon lemon zest: Lemon zest adds a concentrated burst of lemon flavor and aroma. Use a microplane or fine grater to obtain the zest without getting any of the bitter white pith.
- 4 large eggs: Use large, fresh eggs for optimal binding and texture. Room temperature eggs are recommended as they incorporate more easily into the batter, creating a smoother filling.
- 1/4 cup (60ml) unsalted butter, melted: Melted butter adds richness and moisture to the lemon filling, contributing to a smooth and creamy texture. Let the melted butter cool slightly before adding it to the other ingredients.
- ¼ teaspoon baking powder: Baking powder helps to create a slightly airy texture in the lemon filling, preventing it from becoming too dense.
- ¼ teaspoon salt: As with the crust, salt balances the sweetness and brings out the lemon flavor.
Optional additions: Consider adding a teaspoon of vanilla extract to the filling for an extra layer of flavor complexity. A pinch of poppy seeds sprinkled on top before baking adds visual appeal and a subtle textural contrast.
Precise measurements are essential for achieving optimal results. Using a kitchen scale for weighing ingredients, especially dry ingredients, ensures consistent accuracy and helps you replicate the recipe successfully every time.
Crust Preparation
The foundation of any great lemon bar lies in its buttery, shortbread-like crust. This recipe focuses on creating a crust that is both tender and subtly sweet, providing the perfect counterpoint to the tart lemon filling. We’ll be using a classic method that prioritizes proper mixing techniques for optimal results.
Ingredients:
- 1 ½ cups (190g) all-purpose flour – Using all-purpose flour ensures a tender and easily rolled-out crust. Avoid using cake flour, as it will result in a crumbly crust that is difficult to handle.
- ½ cup (100g) powdered sugar – Powdered sugar contributes to the sweetness and tenderness of the crust. Granulated sugar can also be used, but it will result in a slightly coarser texture.
- ½ teaspoon salt – Salt enhances the flavors of the other ingredients and balances the sweetness.
- 1 cup (2 sticks, 227g) unsalted butter, cold and cubed – Using cold butter is crucial for achieving a flaky crust. The cold butter prevents the gluten from developing too much, resulting in a tender texture. Make sure your butter is well-chilled before starting.
Instructions:
1. Whisk dry ingredients: In a large bowl, whisk together the flour, powdered sugar, and salt. This ensures even distribution of the dry ingredients and prevents pockets of flour from forming in the crust. Thorough whisking is key.
2. Cut in the butter: Add the cold, cubed butter to the dry ingredients. Using a pastry blender or your fingertips, cut the butter into the flour mixture until the mixture resembles coarse crumbs with some pea-sized pieces of butter remaining. Avoid overmixing at this stage. Overmixing will develop the gluten in the flour, resulting in a tough crust. Work quickly to keep the butter cold.
3. Press into pan: Press the crumbly mixture firmly and evenly into a greased 9×13 inch baking pan. Use the bottom of a measuring cup or your fingers to ensure even distribution and an even thickness. The crust should be compacted, but not overly dense. A slightly uneven surface is fine, as it adds to the rustic charm.
4. Pre-bake (optional): For a crispier crust, pre-bake the crust for 10-12 minutes in a preheated oven at 350°F (175°C). This step is optional, but recommended for a more substantial crust that holds up better under the weight of the lemon filling. Keep a close eye on it to prevent burning. Watch for light golden browning around the edges.
5. Cool completely: Whether you pre-bake the crust or not, allow it to cool completely before adding the lemon filling. This prevents the filling from becoming runny or the crust from becoming soggy. Cooling completely is essential for a successful lemon bar.
Professional Tip: For an even more flavorful crust, consider adding a teaspoon of vanilla extract to the dry ingredients. This will enhance the overall aroma and taste of the bars.
Lemon Filling Preparation
The lemon filling is the star of the show in these lemon bars, so let’s make sure it’s absolutely perfect! This recipe focuses on a bright, tangy, and not-too-sweet filling that beautifully complements the buttery shortbread crust. We’ll be using fresh lemon juice for the best flavor, but feel free to add a touch of lemon zest for an extra burst of citrusy aroma.
Ingredients:
- 1 ½ cups granulated sugar
- 1/4 cup cornstarch
- 1/4 teaspoon salt
- 1 ½ cups freshly squeezed lemon juice (approximately 6-8 large lemons)
- 4 large eggs
- 2 tablespoons unsalted butter, melted (optional, for extra richness)
- 1 teaspoon lemon zest (optional, for enhanced flavor)
Instructions:
First, whisk together the sugar and cornstarch in a medium-sized heatproof bowl. This step ensures that there are no lumps of cornstarch in your final filling, leading to a smoother texture. Thoroughly whisking the dry ingredients is crucial for a flawless lemon filling.
Next, gradually whisk in the freshly squeezed lemon juice. Make sure to use freshly squeezed lemon juice, as bottled juice often contains preservatives that can affect the texture and taste of your filling. Don’t rush this step; whisk continuously until the mixture is completely smooth and free of any lumps. The mixture will be quite liquid at this stage.
Now, whisk in the eggs one at a time, ensuring that each egg is fully incorporated before adding the next. Whisk vigorously to create a homogenous mixture. This helps to prevent the eggs from scrambling during the cooking process.
If desired, stir in the melted butter and lemon zest. The butter adds a lovely richness and creaminess to the filling, while the zest enhances the overall citrus flavor. Both are optional, but highly recommended for an elevated lemon bar experience.
Once all the ingredients are well combined, pour the mixture through a fine-mesh sieve into a separate bowl. This helps to remove any stray bits of zest or any small lumps that might have formed. Sieving ensures a silky smooth texture for your lemon filling.
Your lemon filling is now ready to be poured over your prepared shortbread crust. Remember to pre-bake your crust for about 12-15 minutes before adding the filling to prevent a soggy bottom. Proceed to bake according to the recipe instructions.
Professional Tip: For an even more vibrant lemon flavor, use Meyer lemons. Their sweeter and less acidic nature creates a delightful balance.
Important Note: The filling will thicken considerably as it bakes. Don’t be alarmed if it seems quite thin before going into the oven.
Baking Instructions
Preheat your oven to 350°F (175°C). This is crucial for ensuring the crust bakes evenly and the lemon filling sets properly. Don’t skip this step! While your oven preheats, prepare your baking pan. Line a 9×13 inch baking pan with parchment paper, leaving an overhang on the sides to easily lift the finished bars out later. This prevents sticking and makes for cleaner presentation.
Making the Crust: In a medium bowl, whisk together 1 ½ cups (190g) all-purpose flour, ½ cup (100g) powdered sugar, and ½ teaspoon salt. Cut in ½ cup (113g) cold unsalted butter, using a pastry blender or your fingers, until the mixture resembles coarse crumbs. Work quickly to prevent the butter from melting. Cold butter is key to a flaky crust.
Press the crumb mixture evenly into the bottom of the prepared baking pan. Use the bottom of a measuring cup or your fingers to create a compact, even layer. Avoid pressing too hard, as this can result in a tough crust. Bake for 15-20 minutes, or until the edges are lightly golden brown. Keep a close eye on it, as ovens vary.
Making the Lemon Filling: While the crust is baking, prepare the lemon filling. In a large bowl, whisk together 1 ¾ cups (350g) granulated sugar, ¼ cup (50g) all-purpose flour, ¼ teaspoon salt, and the zest of 2 large lemons. Gradually whisk in 1 cup (240ml) freshly squeezed lemon juice. Use freshly squeezed lemon juice for the best flavor; bottled juice often lacks the necessary acidity and brightness.
Whisk in 4 large eggs one at a time, ensuring each egg is fully incorporated before adding the next. Whisk vigorously to avoid lumps. Pour the lemon filling evenly over the pre-baked crust.
Baking the Lemon Bars: Bake for 25-30 minutes, or until the filling is set around the edges and slightly jiggly in the center. Do not overbake; overbaked lemon bars will be dry and cracked. The center will still be slightly jiggly when you remove them from the oven; it will set as it cools.
Cooling and Serving: Let the lemon bars cool completely in the pan on a wire rack before cutting. This allows the filling to fully set. Once completely cooled, lift the bars out of the pan using the parchment paper overhang. Cut into squares and dust with powdered sugar, if desired. Refrigerate leftover lemon bars for up to 3 days for optimal freshness. Enjoy!
Cooling and Setting
Once your lemon bars are baked to a beautiful golden brown, the crucial next step is proper cooling and setting. This ensures that you get perfectly firm bars that are easy to cut and serve. Improper cooling can lead to crumbly bars or a soggy crust.
The first step is to let the lemon bars cool completely in the pan. This is absolutely essential. Resist the urge to cut them warm! Leave the bars undisturbed in the baking pan for at least 1 hour at room temperature. This allows the filling to set properly and prevents it from breaking apart when you cut it. The longer you can let them cool, the better – up to 2 hours is ideal.
During this cooling period, you’ll notice that the filling will begin to firm up. The edges will solidify first, while the center might take a bit longer. Patience is key here; rushing this process will result in a less-than-perfect outcome. The warmth from the oven needs to dissipate completely before you proceed to the next step.
After the initial hour (or two), transfer the baking pan to the refrigerator. Refrigerate the lemon bars for at least 4 hours, or preferably overnight. This extended chilling time allows the filling to fully set and creates a nice, firm texture. Refrigerating also helps the flavors meld together, resulting in a more delicious final product.
Why is refrigeration so important? The pectin in the lemon juice, combined with the eggs in the filling, needs time to set properly. Room temperature alone isn’t enough to achieve this firm texture. Refrigeration accelerates this setting process, resulting in bars that hold their shape beautifully and are easy to cut.
Once the lemon bars have spent at least 4 hours in the refrigerator, you can carefully remove them from the pan. To do this, run a thin, flexible spatula or knife around the edges of the pan to loosen the bars. If the bars are sticking, you can gently warm the bottom of the pan with a hair dryer for a few seconds to soften the crust (be careful not to overheat). Then, carefully invert the pan onto a cutting board or serving platter.
Finally, you’re ready to cut the lemon bars into squares. Use a sharp knife, wiping it clean between each cut to prevent sticking. Cut the bars into even squares, approximately 1 ½ to 2 inches in size, depending on your preference. Dust with powdered sugar (optional) before serving, and enjoy your perfectly cooled and set lemon bars!
Pro Tip: For even easier cutting, consider lining your baking pan with parchment paper that extends slightly beyond the edges. This allows you to lift the entire slab of lemon bars out of the pan with the parchment paper, making cutting and serving a breeze.
Cutting and Serving
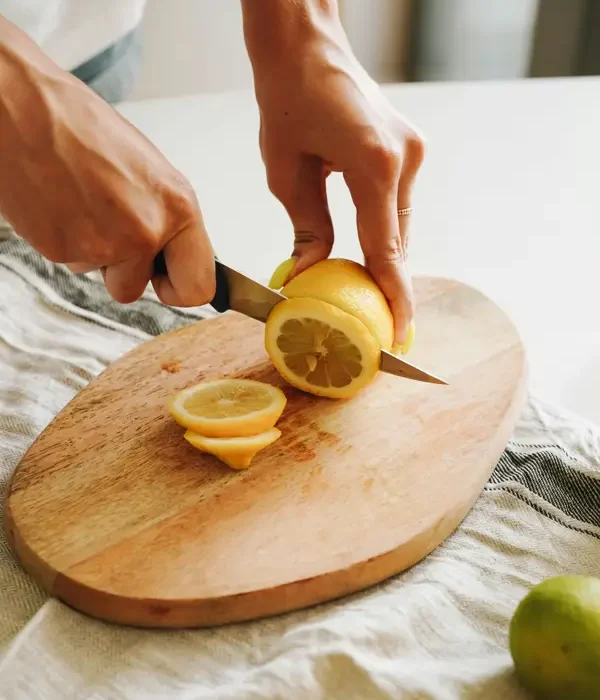
Cutting lemon bars perfectly is crucial for both presentation and portion control. A clean cut ensures even-sized bars, preventing some from being overly thick and others too thin. This section details the best methods and tools to achieve that professional look and ensure your lemon bars are enjoyed to the fullest.
Choosing the Right Knife: Using a sharp, thin-bladed knife is paramount. A dull knife will crush the delicate crust and curd, resulting in uneven, jagged pieces. A serrated knife, like a bread knife, is ideal for cutting through the crust without crumbling it. If you don’t have a serrated knife, a very sharp chef’s knife will also work, but requires a more gentle hand.
Preparing the Pan: Before cutting, ensure your baking pan is completely cool. Cutting warm lemon bars will lead to a messy and uneven result. Allow the bars to cool completely at room temperature, ideally for at least 2 hours, or even better, refrigerate them for 4-6 hours. This allows the curd to set fully and makes cutting much easier.
The Cutting Technique: First, lightly dust your knife with powdered sugar. This prevents sticking and ensures cleaner cuts. Next, using a ruler or measuring tape, lightly score the top of the lemon bars to mark your desired size. Aim for 1 ½ to 2-inch squares or rectangles, depending on your preference and pan size. This pre-scoring acts as a guide for your cuts.
Making the Cuts: Carefully begin cutting along your scored lines. Apply gentle, even pressure and avoid sawing back and forth. A single, firm pass is better than several hesitant ones. If your knife gets sticky, wipe it clean with a damp paper towel and re-dust it with powdered sugar between cuts.
Serving Suggestions: Once cut, carefully lift each lemon bar with a spatula or offset spatula. Avoid using a metal spatula directly on the bars, as it can scratch the pan. Arrange the lemon bars neatly on a serving platter or individual plates.
Garnishing (Optional): For an extra touch of elegance, consider garnishing your lemon bars. A dusting of powdered sugar is classic, or you could add a fresh raspberry, a sprig of mint, or a thin lemon zest curl to each bar. Keep garnishes simple and avoid overpowering the delicate lemon flavor.
Storage: Store leftover lemon bars in an airtight container at room temperature for up to 3 days, or in the refrigerator for up to a week. Refrigeration will help prevent the crust from becoming soggy. If freezing, wrap the bars individually in plastic wrap and then place them in a freezer-safe bag. Frozen lemon bars can be stored for up to 2 months.
Serving Temperature: Lemon bars are delicious served at room temperature or slightly chilled. Some people prefer the slightly firmer texture of chilled bars, while others enjoy the softer texture of room-temperature bars. Ultimately, the best serving temperature is a matter of personal preference.
By following these steps, you’ll be able to cut and serve perfectly portioned, beautiful lemon bars that will impress your friends and family. Remember, practice makes perfect, so don’t be discouraged if your first attempt isn’t flawless. With each batch, you’ll become more proficient at achieving those clean, even cuts.
Recommendations
To achieve the perfect lemon bar, meticulous attention to detail is key. Ensure your butter is softened but not melted for the crust, as this impacts its texture. Over-mixing the crust can result in a tough outcome, so mix until just combined. Similarly, don’t overbake the bars; slightly underbaked bars will be more tender and less dry. A toothpick inserted into the center should come out with moist crumbs, not completely clean. If the edges are browning too quickly, tent the pan with foil.
For the lemon filling, using fresh, high-quality lemons is paramount. The brightness of the lemon flavor directly correlates to the quality of the fruit. If your lemons are less juicy, you may need to add a tablespoon or two of lemon juice to achieve the desired consistency and tartness. Taste the filling before pouring it onto the crust and adjust the sugar to your preference. Some prefer a tangier lemon bar, while others prefer a sweeter one.
Proper cooling is crucial for achieving the perfect set. Allow the lemon bars to cool completely in the pan before cutting and serving. This prevents them from crumbling and ensures a neat presentation. Cutting them while still warm will lead to a messy and less appealing result. Use a sharp knife, and for clean cuts, dip the knife in warm water between each slice.
Storage is important for maintaining freshness and quality. Store leftover lemon bars in an airtight container at room temperature for up to 3 days. For longer storage, refrigerate them for up to a week. However, refrigeration may slightly alter the texture, making them slightly less crisp. Freezing is also an option; wrap individual bars tightly in plastic wrap and then place them in a freezer-safe bag or container. They can be stored frozen for up to 2 months. Thaw overnight in the refrigerator before serving.
Serving suggestions abound! Lemon bars are delightful on their own, but they can also be paired with a dollop of whipped cream, a scoop of vanilla ice cream, or a sprinkle of powdered sugar. A dusting of confectioners’ sugar adds a touch of elegance and sweetness. They also pair well with a cup of tea, coffee, or even a light dessert wine.
Complementary dishes can enhance the overall dining experience. A light salad with citrus vinaigrette or a fruit salad featuring berries complements the tartness of the lemon bars. For a more substantial pairing, consider serving them alongside a light and refreshing sorbet or a simple sponge cake.
Approximate Nutritional Information (per bar, varies depending on size and recipe): Calories: 250-300; Fat: 15-20g; Saturated Fat: 10-15g; Cholesterol: 30-40mg; Sodium: 50-70mg; Carbohydrates: 30-40g; Sugar: 20-25g; Protein: 2-3g. This is an estimate and may vary based on specific ingredients and portion size. For accurate nutritional information, use a nutrition calculator with your exact recipe ingredients and measurements.