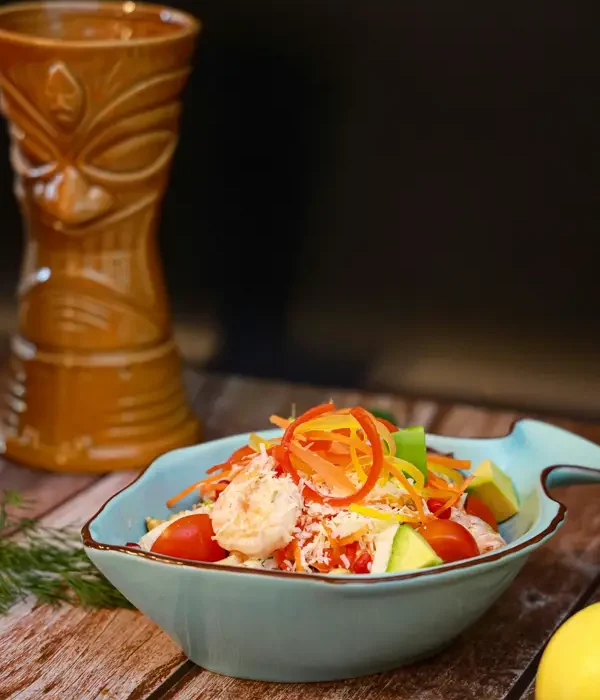
Shrimp scampi, a seemingly simple dish of succulent shrimp bathed in a garlicky, buttery sauce, boasts a surprisingly rich history and cultural significance far beyond its straightforward preparation. While its precise origins are debated, the dish’s core elements point towards Italian coastal cuisine, likely emerging from the fishing villages of Italy sometime before the 20th century. The name itself, scampi, is Italian for scamp, referring to a type of large prawn or shrimp, suggesting the dish’s close ties to seafood-rich regions. Early versions likely involved simpler preparations, focusing on highlighting the natural sweetness of the shrimp with minimal additions, perhaps a touch of lemon juice and olive oil.
The evolution of shrimp scampi into the globally recognized dish we know today is a fascinating journey. Its popularity exploded in the mid-20th century, primarily in the United States, where it quickly became a restaurant staple and a home-cooking favorite. The addition of butter, garlic, and white wine, which are now hallmarks of the dish, likely contributed significantly to its widespread appeal. While precise statistics on shrimp scampi consumption are difficult to obtain, its ubiquity on menus across the country and its frequent appearance in home cookbooks indicates its enduring popularity. Many variations have emerged, incorporating ingredients like parsley, red pepper flakes, and even different types of pasta, showcasing the dish’s adaptability and ongoing evolution.
Beyond its culinary appeal, shrimp scampi holds a certain cultural cachet. It represents a sophisticated yet approachable dish, frequently associated with romantic dinners or special occasions. Its presence on restaurant menus often signifies a commitment to fresh, high-quality ingredients, reflecting a certain level of culinary expertise. Moreover, the ease of recreating shrimp scampi at home allows individuals to share a taste of this Italian-inspired delicacy with family and friends, fostering a sense of connection through shared culinary experiences. This accessibility, combined with its deliciousness, likely contributes to its enduring popularity and global recognition. The dish’s simplicity belies its complex cultural journey, highlighting how a seemingly basic recipe can become a culinary icon.
Ingredients and Measurements
Creating a truly delicious shrimp scampi hinges on using high-quality ingredients and precise measurements. This recipe serves 2-3 people generously. Adjust quantities proportionally for larger servings.
Shrimp: You’ll need 1 pound (450g) of large shrimp, peeled and deveined. Choosing the right shrimp is crucial. Look for firm, plump shrimp with a translucent, almost pearly appearance. Avoid shrimp that are mushy, have a strong fishy odor, or show signs of discoloration. If buying frozen shrimp, ensure they are completely thawed and patted dry before cooking to prevent excess moisture from diluting the scampi sauce.
Butter: We’ll be using 6 tablespoons (85g) of unsalted butter. Unsalted butter allows for better control over the saltiness of the dish. Using salted butter might lead to an overly salty scampi. High-quality butter will significantly enhance the flavor of the dish. Consider using European-style butter for a richer, more nuanced taste.
Garlic: You’ll need 4-6 cloves of fresh garlic, minced finely. The amount of garlic is adjustable to your preference, but using too little will diminish the characteristic garlic flavor of scampi. If you’re concerned about strong garlic breath, consider using a gentler garlic alternative like garlic powder (1 teaspoon). However, fresh garlic provides a superior flavor profile.
White Wine: 1/2 cup (120ml) of dry white wine is essential. A crisp, dry white wine like Sauvignon Blanc or Pinot Grigio complements the shrimp and garlic beautifully. Avoid using sweet wines, as they will clash with the overall flavor profile. If you prefer not to use alcohol, you can substitute with an equal amount of chicken broth or even white grape juice, but the flavor will be subtly altered.
Lemon Juice: The zest and juice of 1 large lemon add brightness and acidity. Using both the zest and the juice is key for a well-balanced scampi. The zest adds a fragrant citrus note, while the juice provides acidity that cuts through the richness of the butter. Freshly squeezed lemon juice is always preferable to bottled juice.
Olive Oil: A tablespoon (15ml) of extra virgin olive oil is used to prevent the butter from browning too quickly and burning. High-quality olive oil adds a subtle complexity to the scampi and aids in creating a flavorful base for the sauce.
Pasta (Optional): If serving over pasta, use 1 pound (450g) of linguine or spaghetti. Cook the pasta according to package directions until al dente. Reserve about 1/2 cup of the pasta cooking water before draining. This starchy water can be added to the sauce to help thicken it and create a creamy consistency.
Seasoning: Salt and freshly ground black pepper to taste. Seasoning is crucial to balance the flavors. Add salt and pepper sparingly initially, tasting and adjusting as you go. Freshly ground black pepper offers a more vibrant flavor than pre-ground pepper.
Fresh Parsley (Optional): A few tablespoons of chopped fresh parsley are used for garnish. Fresh parsley adds a pop of color and freshness to the finished dish.
Red Pepper Flakes (Optional): A pinch of red pepper flakes adds a touch of heat. Add to your preference, beginning with a small amount and increasing if desired.
Equipment Preparation
Before you even think about peeling shrimp, ensuring you have the right equipment ready will make the entire shrimp scampi process smoother and more enjoyable. Proper preparation minimizes stress and maximizes efficiency in the kitchen.
The most crucial piece of equipment is a large skillet. A 12-inch skillet with a heavy bottom is ideal. Heavy-bottomed skillets distribute heat evenly, preventing hot spots that can burn the garlic or shrimp. Avoid non-stick pans for this recipe; the high heat and potential for browning may damage the non-stick coating.
Next, you’ll need a cutting board, preferably one made of wood or high-quality plastic. Avoid porous materials like bamboo, which can harbor bacteria. A sharp chef’s knife is essential for quickly and cleanly prepping the shrimp and garlic. A dull knife will crush the shrimp, resulting in a less appealing texture. Consider having a smaller paring knife handy for more delicate tasks like mincing garlic.
Measuring tools are vital for consistent results. A set of measuring cups and spoons is a must. Accurate measurements of butter, white wine, and lemon juice are crucial for achieving the perfect balance of flavors. A liquid measuring cup with a spout is particularly helpful for accurately measuring the wine.
A good quality wooden spoon or spatula is necessary for stirring and tossing the ingredients in the skillet. The wooden utensil won’t scratch the pan and is ideal for scraping up those delicious browned bits from the bottom. Metal utensils are acceptable, but avoid using anything too thin or flimsy which might bend or break under the heat.
Don’t forget servingware! A large pasta bowl or shallow serving dish is the perfect vessel for your finished shrimp scampi. Consider having tongs or a slotted spoon available for serving, to avoid transferring excess butter and oil to the serving dish. If you are serving it over pasta, pre-cook and set aside a large quantity of your chosen pasta (linguine or spaghetti are classic options).
Optional but highly recommended: a garlic press. While you can certainly mince garlic with a knife, a garlic press makes the process significantly faster and more efficient, ensuring evenly sized garlic pieces that cook evenly and don’t burn. If you don’t have a press, a fine grater can also work effectively.
Finally, before you begin, ensure your skillet is clean and dry. A clean, dry surface is essential for proper heat distribution and preventing sticking. Having all your equipment prepped and within easy reach will contribute to a more efficient and stress-free cooking experience, allowing you to focus on creating a delicious shrimp scampi.
Shrimp Preparation (Cleaning and Deveining)
Before you begin cooking your delicious shrimp scampi, proper preparation is key to ensuring a high-quality final dish. This section details how to clean and devein 1 pound of raw shrimp, but the process can easily be scaled up or down depending on your recipe needs.
Start with fresh, high-quality shrimp. Look for shrimp with firm flesh, a translucent appearance, and a mild, fresh ocean scent. Avoid any shrimp that smell strongly of ammonia or have discolored spots.
Thaw frozen shrimp completely before cleaning. If using frozen shrimp, transfer them to the refrigerator overnight to thaw slowly and evenly. Rapid thawing methods can compromise the texture of the shrimp. Never thaw shrimp at room temperature.
Rinse the shrimp thoroughly under cold running water. This removes any excess ice crystals (if thawed from frozen) or debris. Gently rub the shrimp under the water to loosen any dirt or grit.
Remove the heads (optional). While some recipes call for head-on shrimp, for scampi, removing the heads generally improves presentation and makes eating easier. To remove the heads, simply grasp the head just behind the eyes and gently twist and pull. The head should come off easily.
Peel the shrimp. Starting at the head end, gently peel off the outer shell. Work your way down the body of the shrimp, removing the shell completely. Be careful not to tear the delicate flesh.
Deveining the shrimp: This step removes the dark intestinal tract, also known as the vein. While not harmful to eat, many find it aesthetically unappealing and it can sometimes have a slightly bitter taste. There are two methods for deveining:
Method 1: Using a small, sharp knife. With the shrimp lying flat, make a shallow cut along the back of the shrimp, just deep enough to expose the dark vein. Use the tip of your knife to gently lift and remove the vein. Avoid cutting too deep, as this can damage the shrimp’s flesh. A paring knife or even a small, sharp-pointed vegetable peeler works well for this task.
Method 2: Using a toothpick. This method is quicker and less likely to damage the shrimp but may require a bit more practice. Insert the toothpick into the back of the shrimp, along the line where the vein is located. Gently slide the toothpick along the vein, lifting and removing it. Discard the vein and rinse the shrimp again under cold water.
Rinse the cleaned shrimp one last time before proceeding with the scampi recipe. This ensures that any remaining debris or remnants of the vein are removed. Pat the shrimp dry with paper towels to remove excess moisture. This will help them brown properly when cooking.
Properly cleaned and deveined shrimp will contribute significantly to the overall quality and taste of your shrimp scampi. Take your time with this step for best results.
Garlic and Butter Sauté
The heart of any great shrimp scampi lies in the flavorful garlic butter sauté. This stage builds the rich, aromatic base that will coat your succulent shrimp. Get this right, and your scampi will be unforgettable.
Begin by prepping your aromatics. We’ll be using 6 tablespoons (3 ounces) of unsalted butter. Unsalted allows you to control the saltiness of the dish. Let the butter soften slightly at room temperature; this will help it melt more evenly and create a smoother sauce. Next, prepare 6-8 large cloves of garlic, finely minced. Don’t be shy with the garlic – it’s the star of this show! If you prefer a milder garlic flavor, you can use a little less, but we recommend at least 6 cloves for a truly authentic scampi experience.
Choosing the right pan is crucial. A wide, shallow skillet, preferably non-stick, is ideal. This allows for even cooking and prevents the garlic from burning. Heat the skillet over medium heat. You want the pan hot enough to melt the butter quickly but not so hot that it burns. A good indicator is when a drop of water sizzles immediately upon contact with the pan’s surface.
Add the softened butter to the hot pan. Swirl the pan gently to distribute the butter evenly. As the butter melts, it will begin to foam. This is a sign that it’s reaching the right temperature. Once the butter is completely melted and just beginning to turn a light golden color, add the minced garlic. Immediately reduce the heat to low. This is vital! High heat will cause the garlic to burn, turning bitter and ruining your sauce. Low and slow is the key to perfectly sautéed garlic.
Cook the garlic for 2-3 minutes, stirring frequently. You’re looking for a fragrant, soft garlic that’s slightly golden around the edges, but not brown. Brown garlic means burnt garlic! If you notice any browning, remove the pan from the heat immediately. The aroma should be intense and inviting. Be patient during this stage; rushing it will result in a burnt, unpleasant taste.
Once the garlic is perfectly sautéed, your flavorful base is ready. At this point, you can add a splash of white wine (about 1/4 cup) to deglaze the pan, scraping up any browned bits from the bottom. This adds another layer of depth and complexity to your sauce. Allow the wine to reduce slightly before proceeding to the next step – adding your shrimp. Remember to adjust seasoning at this stage with salt and freshly ground black pepper to taste.
Professional Tip: For an extra touch of richness, consider adding a tablespoon of lemon juice or a pinch of red pepper flakes at the end of the sauté process. This adds a bright acidity or a subtle kick, depending on your preference. The key is to experiment and find what suits your palate best!
Adding Shrimp and Cooking
Once your garlic butter sauce is simmering beautifully, it’s time to introduce the star of the show: the shrimp! For this recipe, we’ll be using 1 pound (450g) of large, peeled and deveined shrimp. Ensure your shrimp are completely thawed and patted dry before adding them to the pan. Excess moisture will lower the pan temperature and prevent proper browning, resulting in mushy, rather than succulent, shrimp.
Gently add the shrimp to the hot garlic butter sauce, being careful not to overcrowd the pan. Overcrowding will also lead to steaming instead of searing, affecting the final texture and flavor. It’s best to cook the shrimp in two batches if necessary, ensuring each batch has ample space for even cooking. This will guarantee that every shrimp receives a beautiful sear and cooks through evenly.
Once the shrimp are in the pan, resist the urge to stir constantly. Let them cook undisturbed for about 1-2 minutes per side. You’ll know they’re ready when they turn a beautiful pink color and are opaque throughout. Avoid overcooking the shrimp, as this will make them tough and rubbery. Overcooked shrimp will also release excess moisture into the sauce, thinning it out and impacting the overall consistency.
During the cooking process, gently tilt the pan and spoon some of the hot garlic butter sauce over the top of the shrimp. This helps to baste them and ensures they are evenly coated in the flavorful sauce. Use a gentle hand when spooning the sauce; you want to coat, not crush, the delicate shrimp.
After about 2-3 minutes of cooking, use tongs to carefully remove the cooked shrimp from the pan and set them aside on a plate. Do not return the cooked shrimp to the pan to avoid overcooking them while you finish the sauce. This allows the shrimp to rest, retaining their juices, resulting in a more tender and flavorful final product.
Professional Tip: For an extra touch of elegance, consider using a combination of shrimp sizes. Add a few larger shrimp to the pan first for a visually appealing presentation, followed by smaller shrimp to round out the dish. This creates a more sophisticated and interesting visual element to your scampi.
Important Note: The cooking time for shrimp can vary slightly depending on their size and the heat of your stovetop. Always check for doneness by cutting into a shrimp to ensure it is opaque and cooked through. If you’re unsure, it’s always better to slightly undercook the shrimp, as they will continue to cook slightly from the residual heat.
Once all your shrimp are cooked, you’re ready to move on to the final step: combining everything and serving your delicious homemade shrimp scampi! Remember to adjust cooking times based on the size of your shrimp and the heat of your stove. Happy cooking!
Wine and Lemon Infusion: The Heart of Your Scampi
The magic of shrimp scampi lies in its vibrant, flavorful sauce. This section details how to create a stunning wine and lemon infusion that will elevate your dish from good to unforgettable. We’ll focus on building layers of flavor, ensuring a balanced and delicious result.
Choosing your Wine: For the best scampi, opt for a dry white wine with bright acidity and subtle fruit notes. Sauvignon Blanc, Pinot Grigio, or a dry Vermentino are excellent choices. Avoid overly oaky or sweet wines, as these can overpower the delicate shrimp flavor. A good rule of thumb is to use a wine you’d enjoy drinking on its own. We’ll be using 1 cup (240ml) of your chosen wine.
Lemon Power: Freshly squeezed lemon juice is paramount. Avoid bottled lemon juice, as it lacks the vibrancy and complexity of fresh juice. We recommend using the juice of 2 large lemons (approximately ¼ cup or 60ml). The zest adds another dimension of flavor, so don’t skip it! Finely grate the zest of one lemon (about 1 tablespoon) – be careful to avoid the bitter white pith underneath the zest.
Infusion Process: In a medium saucepan over medium heat, combine your chosen white wine (1 cup), freshly squeezed lemon juice (¼ cup), and lemon zest (1 tablespoon). Bring the mixture to a gentle simmer, allowing the alcohol to evaporate slightly. This process, which should take about 5-7 minutes, concentrates the flavors and creates a more intense sauce. Do not boil the mixture vigorously, as this can make the sauce bitter.
Building the Foundation: Once simmering, add 2 cloves of minced garlic (or more, to taste). Allow the garlic to infuse in the wine and lemon mixture for about 2 minutes, stirring occasionally to prevent burning. The garlic should soften and become fragrant, but not brown. Overcooked garlic can become acrid, so keep a close eye on it.
Adding Depth: For a richer, more complex sauce, you can incorporate additional ingredients at this stage. A tablespoon of butter adds richness and body, while a pinch of red pepper flakes introduces a touch of heat. Adjust the amount of red pepper flakes according to your preference for spice. A small sprig of fresh thyme or rosemary can also be added for an herbaceous note. Remember to remove the herbs before adding the shrimp.
Reduction (Optional): If you prefer a thicker sauce, continue to simmer the wine and lemon infusion for a few more minutes, allowing it to reduce slightly. This will concentrate the flavors further. Be careful not to reduce it too much, or it may become too thick. The ideal consistency should be slightly syrupy, coating the back of a spoon.
Your fragrant and flavorful wine and lemon infusion is now ready to be the star of your homemade shrimp scampi. Remember to taste and adjust the seasoning (salt and pepper) to your liking before adding the shrimp.
Recommendations for the Perfect Homemade Shrimp Scampi
To elevate your homemade shrimp scampi to the next level, consider these recommendations. Freshness is paramount. Use the highest quality shrimp you can find – ideally, wild-caught and sustainably sourced. Look for shrimp with firm flesh and a pleasant, slightly sweet aroma. Avoid shrimp that smell fishy or have a slimy texture. Similarly, using fresh garlic and lemon juice makes a significant difference in flavor. Don’t be afraid to experiment with the amount of garlic; some prefer a more intense garlic flavor, while others prefer a subtler touch.
Proper cooking technique is key to ensuring perfectly cooked shrimp. Overcooked shrimp will be rubbery and tough, while undercooked shrimp can be unsafe to eat. Aim for a cooking time of 2-3 minutes per side, or until the shrimp turn pink and opaque. Using a thermometer is a great way to ensure accuracy; the internal temperature should reach 145°F (63°C). Don’t overcrowd the pan when sautéing the shrimp; this will lower the temperature and lead to steaming instead of sautéing, resulting in less flavorful shrimp.
Pasta selection impacts the overall dish. Linguine or spaghetti are classic choices, but fettuccine, angel hair, or even zucchini noodles offer interesting variations. Ensure the pasta is cooked al dente – slightly firm to the bite – before adding it to the scampi. Tossing the pasta with the scampi sauce while it’s still slightly warm helps the sauce cling to the noodles better. Consider adding a touch of white wine or dry vermouth to the sauce for extra depth of flavor.
Serving Suggestions: Shrimp scampi is delicious on its own, but you can elevate the presentation and experience with some simple additions. Garnish with fresh parsley, lemon wedges, or a sprinkle of red pepper flakes for a touch of heat. Serving it with crusty bread for dipping into the delicious sauce is a must. A simple side salad with a light vinaigrette complements the richness of the scampi nicely.
Storage and Leftovers: Store leftover shrimp scampi in an airtight container in the refrigerator for up to 3 days. Reheat gently in a pan over low heat or in the microwave, adding a splash of water or broth to prevent dryness. The flavor may slightly diminish over time, so it’s best enjoyed fresh.
Complementary Dishes: A crisp, white wine such as Pinot Grigio or Sauvignon Blanc perfectly pairs with the light and bright flavors of shrimp scampi. For a more substantial meal, consider serving it alongside a side of grilled asparagus, roasted vegetables, or a simple Caprese salad. The scampi itself is a relatively light dish, so heartier sides can balance the meal.
Nutritional Information (per serving, approximate): This will vary greatly depending on the ingredients and portion size. However, a typical serving of shrimp scampi (with pasta) might contain approximately 400-600 calories, 20-30g of protein, 40-60g of carbohydrates, and 15-25g of fat. Nutritional values are estimates and may vary depending on the specific ingredients used and portion sizes. For accurate nutritional information, use a nutrition calculator with your specific recipe details.