Pesto, that vibrant green sauce bursting with herbaceous flavor, is far more than just a culinary delight; it’s a testament to the ingenuity and resourcefulness of Italian cuisine. Originating in Genoa, Italy, in the 19th century, its invention is often credited to Ligurian cooks who sought a way to preserve the abundance of their basil harvest. The original recipe, a simple mixture of basil, garlic, olive oil, and cheese, was a practical solution, allowing them to enjoy the taste of summer long after the growing season had ended. There’s a fascinating debate surrounding the precise origins, with some claiming it predates the 19th century, but the widespread popularity and standardization of the recipe undoubtedly took hold during this period.
Historically, pesto’s ingredients reflected the readily available produce of the Ligurian region. Pine nuts, a key component in many modern recipes, were not always as universally accessible as they are today, leading to regional variations and substitutions. Walnuts, almonds, or even sunflower seeds were often used, proving that the true essence of pesto lies in its balance of fresh basil and good quality olive oil, rather than a single specific nut. This adaptability showcased the resourceful nature of Italian cooking, demonstrating how a simple sauce could be adapted to local resources and preferences. In fact, it’s estimated that over 70% of Italian households make pesto at home at least once a year, highlighting its enduring popularity and cultural significance.
Beyond its practical origins, pesto holds a significant place in Italian culture. It’s more than just a condiment; it’s a symbol of Ligurian heritage and a taste of the sun-drenched Italian Riviera. Its vibrant green color evokes the lush landscape, and its intense aroma transports you to the fragrant basil fields of the region. Today, pesto transcends its regional roots, enjoyed globally as a versatile ingredient in pasta dishes, sandwiches, pizzas, and even as a marinade for meat and vegetables. While many variations exist, the fundamental principles remain the same: fresh, high-quality ingredients and a harmonious blend of flavors. This recipe will explore how to make a delicious pesto without pine nuts, demonstrating that delicious, authentic pesto can be created even without this traditionally expensive ingredient.
Ingredients and Measurements
This recipe for pine nut-free pesto relies on a robust base of fresh basil and high-quality olive oil. The absence of pine nuts necessitates a thoughtful substitution to maintain the desired creaminess and flavor profile. We’ll be using sunflower seeds as our substitute, offering a slightly milder, nutty flavor that complements the basil beautifully.
Basil: You’ll need 2 cups of tightly packed fresh basil leaves. Use only the freshest basil you can find; the flavor of your pesto hinges on this key ingredient. Avoid using wilted or yellowing leaves. If your basil is particularly large-leaved, you may need slightly less; if it’s small-leaved, you might need a bit more to reach the 2-cup volume.
Sunflower Seeds: ½ cup of raw, unsalted sunflower seeds provides the necessary texture and a subtle nutty element. Toasting the sunflower seeds before adding them to the pesto is highly recommended. This enhances their flavor and gives them a slightly crispier texture, a welcome contrast to the smooth basil.
Garlic: 3 large cloves of garlic add a pungent, savory note. Adjust the amount of garlic to your preference. If you’re sensitive to garlic, start with 2 cloves and add more to taste. Use fresh garlic for the best flavor; pre-minced garlic from a jar lacks the same vibrancy.
Parmesan Cheese: ½ cup of freshly grated Parmesan cheese is crucial for the pesto’s sharp, salty, and umami notes. Use high-quality Parmesan cheese; the difference in flavor is significant. Pre-grated Parmesan often contains cellulose, which can affect the texture and flavor of your pesto. Grate your own cheese for the best results.
Olive Oil: ½ cup of extra virgin olive oil is essential for binding the ingredients and adding richness. Use a good quality olive oil with a fruity and robust flavor, as it will be a prominent component of the final taste. Start with ½ cup and add more if needed to achieve your desired consistency.
Salt and Pepper: Season generously with salt and freshly ground black pepper to taste. Start with a teaspoon of salt and adjust according to your preference. Freshly ground black pepper enhances the overall flavor profile.
Lemon Juice (Optional): A tablespoon of fresh lemon juice adds brightness and acidity, balancing the richness of the olive oil and the Parmesan cheese. This is optional but highly recommended.
Equipment List
Making delicious pesto without pine nuts requires the right tools to ensure a smooth, consistent, and flavorful result. While you can adapt some steps, having the correct equipment will significantly enhance the process and the final product’s quality.
Food Processor: This is arguably the most crucial piece of equipment. A good quality food processor with a powerful motor is essential for achieving the desired creamy texture. A smaller processor might struggle with the volume of ingredients, especially if you’re making a larger batch. Aim for a food processor with a minimum of 600-watt motor.
Measuring Cups and Spoons: Accurate measurements are key to achieving the perfect balance of flavors. Invest in a set of reliable measuring cups and spoons. Using a kitchen scale is even more precise, particularly for measuring the basil leaves and cheese. This ensures consistency across batches.
Cutting Board: A sturdy cutting board, preferably made of wood or plastic, is necessary for preparing the basil and garlic. Choose a large cutting board to accommodate the volume of basil leaves you’ll be working with. A smaller board can make the process more cumbersome and potentially lead to uneven chopping.
Sharp Knife: A sharp knife is crucial for efficiently chopping the basil and garlic. A chef’s knife is ideal, but any sharp knife will work as long as it’s comfortable to use. A dull knife will bruise the basil leaves, leading to a less vibrant green color and potentially a bitter taste.
Rubber Spatula or Scraper: This tool is essential for scraping down the sides of the food processor to ensure all ingredients are thoroughly incorporated. A silicone spatula is recommended as it is flexible and won’t scratch the bowl of the food processor.
Airtight Container: Once your pesto is made, you’ll need an airtight container to store it. Glass jars are ideal for storing pesto in the refrigerator, as they prevent oxidation and preserve the vibrant color and fresh flavor for longer. Ensure the container is thoroughly cleaned and dried before storing your pesto.
Optional: A small bowl for pre-measuring ingredients can help streamline the process. Additionally, a fine-mesh sieve might be helpful if you prefer a completely smooth pesto without any visible herb pieces.
Preparation of Basil and Garlic
The success of your pesto, even without pine nuts, hinges on the quality and preparation of your basil and garlic. We’ll be using approximately 2 cups of packed fresh basil leaves and 4 large cloves of garlic for a generous batch of pesto. Adjust these quantities to suit your needs, maintaining a ratio of roughly 1 cup of packed basil leaves per 2 large cloves of garlic.
Begin by thoroughly washing your basil leaves. Do not skip this step! Pesticides and dirt can significantly impact the flavor of your pesto. Rinse the leaves under cool running water, gently separating them to ensure all surfaces are cleaned. Then, gently pat them dry with a clean kitchen towel or paper towels. Excess moisture will dilute your pesto and hinder its ability to emulsify properly.
Next, we tackle the garlic. For a smoother pesto, consider using a microplane or a fine grater to mince the garlic. This method creates a finer texture than simply chopping, which can lead to gritty bits in your final product. If you prefer to chop, aim for a very fine chop, as larger pieces can be unpleasant in the finished pesto. Remember to peel the garlic cloves before mincing or chopping. A simple trick to easily peel garlic is to roughly crush the cloves with the flat side of a knife before peeling.
Once the garlic is finely minced or grated, combine it with the washed and dried basil leaves. Avoid over-processing the basil at this stage; you want to retain as much of its vibrant green color and fresh flavor as possible. If you plan to use a food processor for the next steps, it’s perfectly acceptable to leave the basil and garlic slightly chunky at this point. If using a mortar and pestle, however, a slightly finer chop of the basil will assist in the grinding process.
Finally, before moving onto the next steps of pesto making, give your basil and garlic mixture a quick visual inspection. Make sure there are no large stems or unwanted debris remaining. Removing any larger stems now will prevent them from becoming overly prominent in the finished product. A little extra attention to detail at this stage will pay off handsomely in the quality of your homemade pesto.
Making the Pesto Base
This section details the creation of the flavorful pesto base, omitting pine nuts for a delicious and adaptable alternative. We’ll be focusing on achieving the perfect balance of herbs, garlic, and olive oil for a vibrant and aromatic pesto.
Begin by gathering your ingredients: 2 cups of fresh basil leaves (packed), 1/2 cup grated Parmesan cheese (Parmigiano-Reggiano is recommended for its superior flavor), 2 large cloves of garlic, 1/2 teaspoon of sea salt, and 3/4 cup of extra virgin olive oil. Ensure your basil is fresh and vibrant; wilted leaves will impact the final flavor.
Wash the basil leaves thoroughly and gently pat them dry with a clean kitchen towel. This step is crucial to prevent excess water from diluting your pesto. Removing excess moisture will also help prevent your pesto from going rancid quickly.
Combine the basil leaves, Parmesan cheese, garlic, and sea salt in a food processor. Pulse the ingredients several times until they are coarsely chopped. Avoid over-processing, as this can create a paste-like consistency rather than the desired texture. You want to see some small pieces of basil remaining for visual appeal and textural contrast.
With the food processor running, slowly drizzle in the olive oil. This gradual addition ensures that the oil is properly emulsified with the other ingredients, creating a smooth and creamy pesto. Stop the processor periodically to scrape down the sides of the bowl, ensuring all ingredients are incorporated evenly. If you prefer a thinner pesto, add a tablespoon or two of water at this stage.
Once all the olive oil is incorporated, taste the pesto and adjust the seasoning as needed. You may wish to add more salt, garlic, or even a squeeze of lemon juice for brightness. The taste should be vibrant, herbaceous, and slightly salty. Transfer the pesto to an airtight container and refrigerate for at least 30 minutes before serving to allow the flavors to meld. This will also help the pesto thicken slightly.
Your homemade pesto base is now ready! You can use this base as is, or add other ingredients such as sun-dried tomatoes, roasted red peppers, or different nuts (walnuts or cashews work well) for variation.
Adjusting Consistency and Flavor
Once you’ve blended your pesto base, it’s time to fine-tune the consistency and flavor to your liking. The beauty of homemade pesto is its adaptability! You can easily adjust it to be thicker or thinner, and to better suit your palate.
Adjusting Consistency: If your pesto is too thick, simply add a tablespoon or two of extra virgin olive oil at a time, blending briefly after each addition until you reach your desired consistency. Start with 1 tablespoon and assess; you can always add more, but you can’t easily take it away. Conversely, if your pesto is too thin, add a tablespoon of grated Parmesan cheese or a handful of fresh basil leaves (roughly 1/4 cup packed). The cheese will add richness and creaminess, while the extra basil will thicken it slightly and boost the flavor. Avoid adding bread crumbs or other fillers unless absolutely necessary, as they can significantly alter the texture and overall taste.
Adjusting Flavor: Taste your pesto carefully before serving. It’s crucial to balance the flavors. If it needs more salt, add a pinch at a time, tasting after each addition. Remember that Parmesan cheese is already quite salty, so add salt cautiously. If the garlic is too strong, you can add a small amount of lemon juice (about 1/2 teaspoon) to cut through the sharpness; be mindful of not adding too much lemon juice, as it can overpower the other flavors. For a sweeter pesto, you can add a teaspoon of sugar or a pinch of honey, but use sparingly. Avoid overwhelming the fresh basil flavor; the basil should be the star of the show.
Experiment with other additions: Once you’re comfortable with the basic recipe, don’t be afraid to experiment! A pinch of red pepper flakes can add a subtle kick. A tablespoon of toasted sunflower seeds or pumpkin seeds can add a different nutty note. A squeeze of fresh lime juice can provide a brighter, more citrusy profile. Remember to add these ingredients gradually and taste along the way to ensure you achieve the perfect balance. Always taste and adjust at each step for the best results.
Storage: Once you’ve perfected your pesto, store it properly to maintain its freshness and vibrant green color. Transfer it to an airtight container, press a layer of olive oil on top to prevent oxidation, and refrigerate it. Your pesto should last for about 5 days in the refrigerator. You can also freeze it in ice cube trays for longer storage; simply pop out the frozen cubes and store them in a freezer bag.
Storage Suggestions
Proper storage is crucial for maintaining the vibrant flavor and color of your homemade pesto, especially when you’ve opted for an alternative to pine nuts. Following these guidelines will ensure you enjoy your pesto for as long as possible.
Refrigeration is key. Once your pesto is prepared, transfer it to an airtight container. A glass jar with a tight-fitting lid is ideal. Avoid using metal containers as they can react with the basil and affect the flavor. Fill the container completely to minimize air exposure. This helps prevent oxidation, which can lead to browning and a loss of freshness. Your pesto should keep well in the refrigerator for about 3-5 days.
Freezing for longer-term storage. For longer shelf life, consider freezing your pesto in ice cube trays or small freezer-safe containers. Portioning your pesto into individual servings (approximately 2-3 tablespoons per portion) makes it easy to thaw and use as needed. This prevents large portions from thawing and refreezing repeatedly, which negatively impacts quality and texture. Once frozen solid, you can transfer the pesto cubes to a freezer bag for more efficient storage. Frozen pesto can last for 2-3 months.
Adding a layer of olive oil. A thin layer of extra virgin olive oil on top of your stored pesto (refrigerated or frozen) creates an additional barrier against air and helps maintain freshness. This is particularly helpful for longer storage periods. Aim for about a ¼ inch layer of olive oil over the surface of your pesto. Ensure the oil is completely covering the pesto to prevent oxidation.
Avoid storing pesto in large quantities. It’s often better to make smaller batches of pesto more frequently than to make a large batch and risk spoilage. Making a smaller batch also ensures that the pesto is used within its optimal window of freshness. Smaller batches are much more manageable, especially for those with smaller households.
Thawing frozen pesto. When ready to use frozen pesto, simply transfer the desired amount to the refrigerator overnight to thaw slowly. Alternatively, you can thaw it quickly in the microwave, but be mindful of potential changes in texture. Never refreeze thawed pesto.
By following these storage suggestions, you can enjoy your delicious homemade pesto, regardless of your chosen nut substitute, for an extended period without sacrificing flavor or quality.
Recommendations
This recipe for homemade pesto without pine nuts offers a delicious and versatile alternative to traditional pesto. For a richer flavor, consider using a combination of toasted walnuts and sunflower seeds instead of just one. Experiment with different types of cheeses to find your perfect balance; Parmesan, Pecorino Romano, or even a blend work well. Adjust the amount of garlic to your preference; start with less and add more if needed. Remember that fresh basil is key to a vibrant pesto; use only the highest quality leaves you can find.
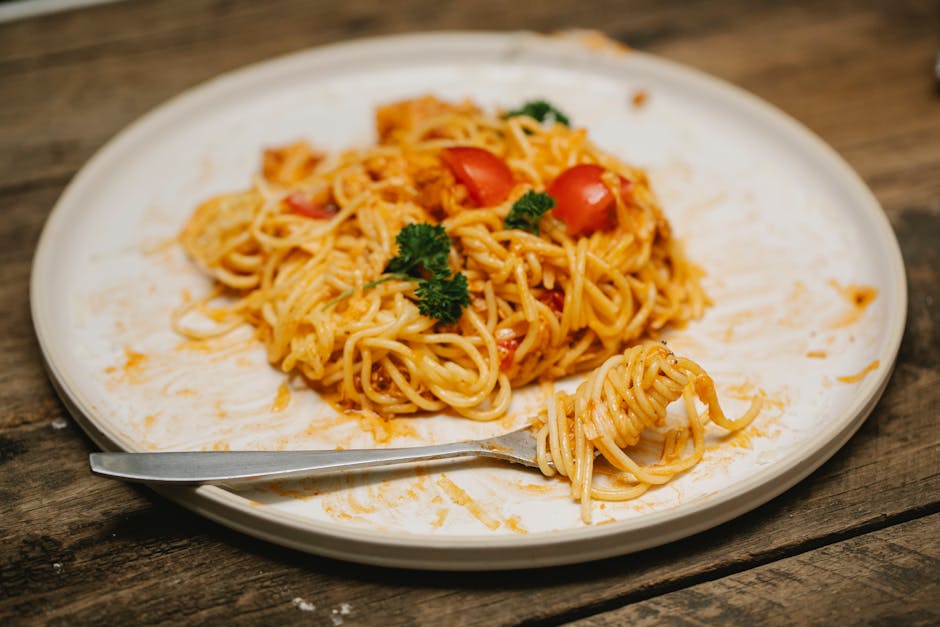
Serving Suggestions: This pesto is excellent tossed with pasta, particularly long shapes like linguine or spaghetti. It also makes a fantastic spread for sandwiches, wraps, or crostini. Try it as a pizza topping, added to omelets, or stirred into soups for a burst of fresh flavor. A dollop on grilled chicken or fish adds a sophisticated touch.
Storage: To maintain freshness and prevent discoloration, store leftover pesto in an airtight container in the refrigerator. For longer storage (up to a week), add a thin layer of olive oil to the surface of the pesto before sealing to create a barrier against air. Freezing is also an option; portion the pesto into ice cube trays, freeze, and then transfer to a freezer bag for longer-term storage (up to 3 months).
Complementary Dishes: This pesto pairs beautifully with dishes featuring tomatoes, zucchini, and other summer vegetables. It’s a wonderful addition to grilled meats and seafood. Consider serving it alongside roasted vegetables, salads, or as a dip for crusty bread. The herbaceous notes of the pesto complement the earthy flavors of roasted root vegetables like potatoes and carrots.
Nutritional Information (per serving, approximate): The exact nutritional content will vary depending on the specific ingredients and quantities used. However, a typical serving (about 2 tablespoons) may contain approximately 150-200 calories, 15-20g of fat (mostly healthy unsaturated fats from olive oil), 2-4g of protein, and 5-7g of carbohydrates. This is a rough estimate and should be considered a guideline only. For more precise nutritional information, use a nutrition calculator with the exact ingredients and quantities in your recipe.