Hummus, a culinary cornerstone of the Middle East and Mediterranean, is far more than just a dip; it’s a vibrant tapestry woven from history, culture, and culinary innovation. Its origins trace back millennia, with evidence suggesting variations existed in ancient Egypt as early as the 13th century BC. However, the hummus we know and love—a creamy blend of chickpeas, tahini, lemon juice, garlic, and olive oil—emerged primarily in the Levant region, encompassing modern-day Lebanon, Syria, Palestine, and Israel. While the exact birthplace remains a subject of friendly debate among these nations, its enduring popularity across the globe is undeniable.
The word hummus itself derives from the Arabic word ḥummuṣ, meaning chickpea. This simple, yet evocative name perfectly encapsulates the dish’s core ingredient and its humble beginnings. Through the centuries, hummus evolved from a simple chickpea paste into the sophisticated culinary creation we enjoy today. Different regions and families developed their unique variations, resulting in a spectrum of textures and flavors, from the intensely garlicky hummus of Lebanon to the smoother, more subtly spiced versions found in other parts of the Middle East. This regional diversity speaks to the dish’s adaptability and its capacity to reflect the diverse culinary landscapes it inhabits.
Hummus’ cultural significance extends beyond its deliciousness. It’s a staple food, a social lubricant, and a symbol of culinary heritage. It’s frequently served as a mezze, a selection of small dishes enjoyed before a larger meal, fostering a sense of community and shared experience. Globally, the hummus market is booming, with statistics showing a significant rise in consumption in recent years. This surge in popularity highlights not only its delicious taste but also its versatility. It can be enjoyed as a dip with pita bread, vegetables, or crackers; as a spread in sandwiches; or as an ingredient in more complex dishes like salads or bowls. Its adaptability and nutritional value—packed with protein and fiber—contribute to its widespread appeal.
Beyond its culinary importance, hummus has also become a symbol of cultural pride and identity for many in the Middle East. Its widespread popularity has led to international recognition, but it’s essential to acknowledge its roots and appreciate the rich cultural heritage it embodies. Learning to make hummus at home offers an opportunity to connect with this history, to understand the nuances of flavour and texture, and to appreciate the simple yet profound impact of a dish that has captivated palates for millennia.
Ingredients and Measurements
Creating the perfect hummus relies heavily on precise ingredient measurements and quality. Don’t be tempted to substitute ingredients willy-nilly; each component plays a crucial role in the final texture and flavor profile. Below, we’ve detailed the quantities for a classic batch, yielding approximately 2 cups of hummus.
Chickpeas (Garbanzo Beans): You’ll need 1 ½ cups of dried chickpeas, or 2 (15-ounce) cans of chickpeas, rinsed and drained thoroughly. Using dried chickpeas is strongly recommended for the best flavor and texture. If using dried chickpeas, soak them in cold water for at least 8 hours, or preferably overnight. This soaking process significantly reduces cooking time and improves digestibility. After soaking, drain the chickpeas and rinse them well before cooking.
Tahini: This sesame seed paste is the heart and soul of hummus. Use 1/2 cup of high-quality tahini. The flavor and texture of your tahini will directly impact the final product. Look for tahini that is smooth and creamy, with a rich, nutty aroma. If your tahini is particularly thick, you might need to add a tablespoon or two of extra water to achieve the desired consistency.
Lemon Juice: Freshly squeezed lemon juice is essential for brightness and acidity. Use the juice of 1 large lemon (approximately 2-3 tablespoons). Avoid using bottled lemon juice as it often lacks the vibrancy of freshly squeezed juice. The acidity helps to balance the richness of the tahini and chickpeas.
Garlic: For a robust garlic flavor, use 2-3 cloves of garlic, minced finely. Start with 2 cloves and add the third if you prefer a stronger garlic taste. Too much garlic can overpower the other flavors, so start conservatively and adjust to your preference.
Olive Oil: Use 1/4 cup of high-quality extra virgin olive oil. The quality of your olive oil matters, so choose a good one with a fruity aroma. You’ll add most of this after blending, but a tablespoon or two can be added to the blender for smoother processing.
Water: The amount of water needed will depend on the desired consistency of your hummus. Start with 1/4 cup of ice-cold water. Adding ice-cold water helps to keep the hummus cool and creamy during blending. You may need to add more water, a tablespoon at a time, until you reach your preferred consistency. It’s easier to add more water than to take some away.
Salt: Season generously with salt to taste. Start with 1 teaspoon of salt, but adjust according to your preference. Taste the hummus as you blend and add more salt as needed. Salt enhances the flavors of all the other ingredients.
Optional additions: You can enhance your hummus with various additions such as cumin (1 teaspoon), paprika (1/2 teaspoon), or a pinch of cayenne pepper for a spicy kick. Chopped fresh parsley or roasted red peppers can also add visual appeal and extra flavor.
Equipment Preparation
Making smooth, creamy hummus requires the right tools. Proper equipment preparation ensures a seamless and efficient process, resulting in a superior final product. Before you even think about soaking chickpeas, let’s get our equipment ready.
First, you’ll need a food processor. A high-powered food processor is highly recommended for achieving the desired texture. A less powerful model might struggle to create a completely smooth hummus, leaving you with gritty bits. If you’re using a smaller food processor, you may need to process the ingredients in batches to avoid overloading the motor. Ensure your food processor is clean and dry before starting. Any lingering food particles can affect the taste and texture of your hummus.
Next, gather your measuring tools. You’ll need accurate measuring cups and spoons for precise ingredient measurements. Using the correct quantities is crucial for achieving the perfect balance of flavors and consistency. Inaccurate measurements can significantly impact the final product, resulting in hummus that’s too thick, too thin, or lacking in flavor.
You will also need a good quality chef’s knife for peeling and chopping the garlic and potentially the onion, if you’re adding it to your recipe. A sharp knife ensures clean cuts, preventing bruising and maximizing the flavor. A dull knife will crush the garlic and onion, releasing more enzymes that can lead to a bitter taste. Remember to wash and dry your knife thoroughly after use.
For measuring liquids, a liquid measuring cup is essential. This allows for precise measurement of tahini, lemon juice, and water. Using a standard measuring cup for liquids can lead to inaccuracies, affecting the consistency of your hummus. A small bowl is also helpful for holding ingredients while you are preparing them, preventing accidental spills and keeping your workspace organized.
Finally, consider your serving vessels. Once your hummus is ready, you’ll want to present it beautifully. A shallow bowl or a small serving dish is ideal for showcasing your homemade hummus. You may also want to prepare a small bowl for garnish, such as paprika, olive oil, or toasted pine nuts. Presentation matters; a nicely presented bowl of hummus enhances the overall dining experience.
In summary, preparing your equipment correctly is a crucial step in making delicious hummus. By ensuring your food processor is clean and powerful, your measuring tools are accurate, and your knife is sharp, you’ll set yourself up for success. Don’t underestimate the importance of this initial step – it lays the foundation for a perfectly smooth and flavorful hummus.
Chickpea Preparation (Soaking/Boiling)
The foundation of exceptional hummus lies in perfectly prepared chickpeas. While you can use canned chickpeas, for the creamiest, most flavorful hummus, nothing beats starting with dried chickpeas. This section details the crucial soaking and boiling process.
Soaking: Why it’s essential Soaking dried chickpeas overnight significantly reduces cooking time and improves their texture. It also helps break down complex sugars, resulting in a less gassy hummus. Proper soaking is key to achieving that velvety smooth consistency we all crave.
The Soaking Process: Begin by measuring out 1 cup of dried chickpeas. Rinse them thoroughly under cold water in a fine-mesh sieve to remove any debris or small stones. Transfer the rinsed chickpeas to a large bowl and cover them with at least 3 inches of cold water. Ensure the chickpeas are fully submerged; add more water if necessary.
Soaking Time: Ideally, soak the chickpeas for at least 8-12 hours, or preferably overnight. This extended soaking time allows for maximum hydration and softening. You can leave them at room temperature, but for food safety reasons, particularly during warmer months, refrigerating is recommended. If you’re short on time, a quick soak method is possible. Bring the chickpeas and water to a boil, then remove from heat and let them sit for at least 1 hour. This method will still reduce cooking time but may result in slightly less tender chickpeas.
Boiling the Chickpeas: After soaking, drain the chickpeas thoroughly. Place them in a large pot and cover with fresh, cold water – about 6 cups. Add 1 teaspoon of baking soda (optional, but highly recommended). Baking soda helps to break down the chickpeas’ outer skins, resulting in a creamier hummus.
Cooking Time: Bring the pot to a rolling boil over high heat, then reduce the heat to a gentle simmer. Continue simmering for 60-90 minutes, or until the chickpeas are completely tender and easily mashed between your fingers. Check for doneness periodically. Overcooked chickpeas will result in a mushy hummus, while undercooked chickpeas will be coarse and unpleasant.
Important Note: Cooking times can vary depending on the age and type of chickpeas. Some chickpeas may require slightly longer cooking times. Always check for tenderness before draining. If you find your chickpeas are still too firm after 90 minutes, continue simmering in 15-minute increments until they reach the desired consistency.
Once the chickpeas are cooked, drain them well and set aside to cool slightly before proceeding with the next steps of your hummus recipe. Remember to save about 1/2 cup of the cooking liquid; this aquafaba can be added to your hummus to adjust the consistency if needed.
Tahini Paste Preparation (Toasting/Blending)
Creating the perfect tahini paste is crucial for achieving a deeply flavorful and smooth hummus. While you can use store-bought tahini, making your own allows for greater control over the flavor profile and texture. This section details how to toast and blend sesame seeds into a luscious tahini paste.
Quantity: This recipe yields approximately 1 cup of tahini paste, sufficient for multiple batches of hummus.
Ingredients:
- 1 cup raw sesame seeds (hulled or unhulled, your preference affects the color and flavor – hulled produces a lighter, sweeter tahini)
Equipment:
- Large, dry skillet (cast iron is ideal)
- High-powered blender (Vitamix or similar is recommended for optimal smoothness)
- Spatula
- Optional: Food processor (can be used but may result in a slightly less smooth texture)
Instructions:
Step 1: Toasting the Sesame Seeds: This step is critical for developing the nutty flavor of the tahini. Heat the skillet over medium-low heat. Add the sesame seeds and, using a spatula, constantly stir them to prevent burning. Toasting takes approximately 8-12 minutes, or until the seeds are fragrant and lightly golden brown. Keep a close eye on them as they can burn quickly. The seeds should be fragrant but not dark brown or bitter.
Step 2: Cooling the Toasted Seeds: Once toasted, immediately remove the seeds from the skillet and transfer them to a bowl. Allow them to cool completely. This prevents the heat from damaging the blender and ensures smoother blending. Do not skip this step.
Step 3: Blending into Tahini Paste: Add the cooled sesame seeds to your high-powered blender. Begin blending on a low speed, gradually increasing to high. Blend for at least 3-5 minutes, scraping down the sides of the blender as needed. The paste will initially be quite dry, then it will gradually come together into a thick, creamy consistency. The longer you blend, the smoother the final product will be. If using a food processor, blend for a slightly longer duration, pausing to scrape down the sides frequently.
Step 4: Adjusting the Consistency: If your tahini is too thick, you can add a tablespoon or two of neutral-flavored oil (like canola or grapeseed) at a time while blending. This will help to create a smoother, more pourable consistency. Start with small amounts of oil and add more as needed, until you achieve your desired texture.
Step 5: Storing the Tahini: Once your tahini paste is ready, transfer it to an airtight container. Store it in the refrigerator for up to 2 weeks. The tahini may thicken slightly in the refrigerator, so you may need to add a little extra oil before using it for your hummus.
Professional Recommendation: For the most authentic flavor, use high-quality, raw sesame seeds. Experiment with hulled versus unhulled seeds to see which you prefer. The difference in flavor and color is noticeable.
Troubleshooting: If your tahini is gritty, you may not have blended it long enough or your blender may not be powerful enough. Try blending for a longer period or using a more powerful blender.
Blending the Hummus
Now that you’ve prepared all your ingredients, it’s time for the most satisfying part: blending the hummus! This stage requires a bit of finesse to achieve that perfectly smooth and creamy texture we all crave. We’ll be using a high-powered blender, such as a Vitamix or Blendtec, for optimal results. If you’re using a less powerful blender, you may need to add a little more liquid, and blend in stages.
Begin by adding the 1 ½ cups of cooked chickpeas (reserve about ¼ cup of the cooking liquid – this is crucial for adjusting the consistency later) to your blender. Also add the ⅓ cup tahini, ¼ cup lemon juice, 2 cloves garlic (minced), 1 teaspoon ground cumin, ½ teaspoon salt, and ¼ teaspoon black pepper. Ensure all ingredients are evenly distributed within the blender jar before starting. This prevents clumps from forming and ensures a more uniform blend.
Start the blender on a low speed, gradually increasing to medium. Scrape down the sides of the blender jar with a spatula every 15-20 seconds. This is essential to incorporate all the ingredients and prevent them from sticking to the sides. If you skip this step, you might end up with unevenly blended hummus or even a clogged blender.
Once the mixture is mostly combined, begin to slowly drizzle in the reserved chickpea liquid, starting with about 2 tablespoons. The amount of liquid needed will vary depending on the desired consistency and the size of your chickpeas. Some chickpeas are naturally drier than others. Continue blending, scraping down the sides as needed, until the hummus is completely smooth and creamy. If you prefer a slightly chunkier hummus, you can stop blending a little sooner. But aim for a mostly smooth texture for a classic hummus experience.
Taste the hummus and adjust the seasoning as necessary. You may need to add more lemon juice for acidity, salt for savoriness, or cumin for warmth. Remember that the flavors will meld and intensify as the hummus sits, so don’t be afraid to err on the side of slightly under-seasoning initially. A pinch of cayenne pepper can add a touch of heat for those who prefer a spicier hummus.
Once you’ve achieved your desired consistency and flavor profile, transfer the hummus to a serving bowl. For an even smoother texture, you can pass the hummus through a fine-mesh sieve. This will remove any remaining skins from the chickpeas and result in an exceptionally silky smooth hummus. However, this step is optional and perfectly good hummus can be enjoyed without it.
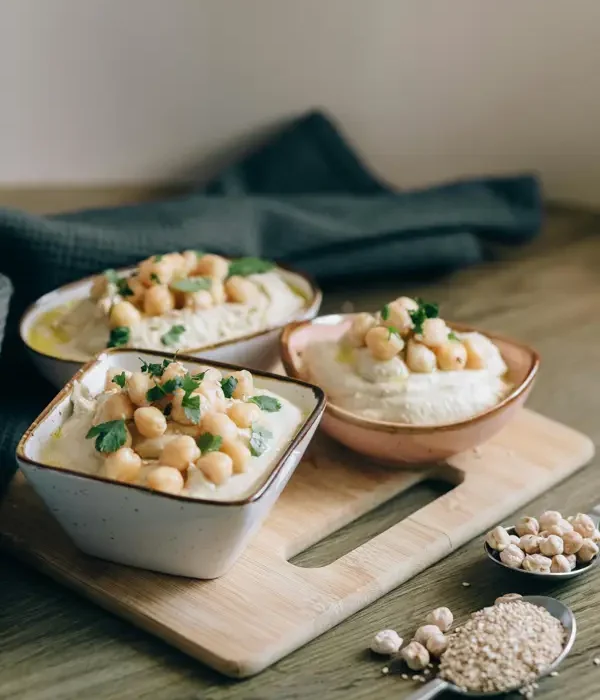
Finally, drizzle with extra virgin olive oil, sprinkle with paprika, and garnish with a few whole chickpeas and a sprig of fresh parsley for a beautiful presentation. Cover and refrigerate your homemade hummus for at least 30 minutes to allow the flavors to meld and the hummus to chill before serving. Enjoy your delicious, homemade creation!
Seasoning and Flavor Adjustments
Achieving the perfect hummus balance hinges on precise seasoning and thoughtful flavor adjustments. While the basic recipe provides a delicious foundation, tailoring it to your preferences is key. This section explores various options to elevate your homemade hummus from good to extraordinary.
Salt is fundamental. Start with 1 teaspoon of kosher salt per cup of chickpeas, but taste and adjust accordingly. Fine sea salt is also suitable, but remember it’s more concentrated, so use slightly less. Never underestimate the importance of tasting throughout the process! The salt level will affect other seasonings, so adjust accordingly.
Lemon Juice provides brightness and acidity, cutting through the richness of the tahini and chickpeas. Start with 2 tablespoons of fresh lemon juice per cup of chickpeas. The acidity of lemons can vary, so add more gradually, tasting as you go. You can substitute with lime juice for a slightly different, more subtle citrus flavor.
Garlic is a quintessential hummus ingredient. The amount depends on your preference. Start with 2-3 cloves of garlic, minced or pressed. For a milder flavor, use less; for a more pungent taste, add more. Consider roasting the garlic beforehand for a sweeter, less harsh flavor profile. Roasting mellows out the garlic’s sharpness, creating a smoother, more rounded taste.
Tahini is the creamy heart of hummus. The quality of your tahini significantly impacts the overall flavor. Use a good quality tahini, preferably one that’s not overly bitter. If your tahini is particularly bitter, you might need to adjust the amount of lemon juice to balance its flavor. The standard ratio is roughly 1/2 cup of tahini per cup of chickpeas, but adjust based on your desired creaminess and taste.
Spice it up! Adding a pinch of cayenne pepper or a dash of your favorite hot sauce introduces a welcome kick. Start with a small amount and gradually increase until you achieve your preferred level of heat. Other spices that work well include cumin, paprika, or sumac, adding depth and complexity. A 1/2 teaspoon of cumin or paprika per cup of chickpeas is a good starting point.
Olive Oil is more than just a garnish; it contributes to the overall flavor and texture. A good quality extra virgin olive oil will enhance the hummus’s taste significantly. Start by adding 2-4 tablespoons, emulsifying it into the mixture for a smooth, glossy finish. More olive oil will create a smoother, richer hummus.
Water is your balancing agent. The consistency of hummus should be smooth and creamy, not too thick or too thin. Add ice water one tablespoon at a time until you reach your desired consistency. Be patient and add the water gradually to avoid making the hummus too runny.
Experiment! Don’t be afraid to experiment with different flavor combinations. Roasted red peppers, sun-dried tomatoes, or even a sprinkle of za’atar can add unique and delicious twists to your homemade hummus. The possibilities are endless! Remember to taste and adjust seasonings frequently to perfect your own signature hummus recipe.
Recommendations for Your Homemade Hummus
Congratulations on making your own delicious hummus! To ensure you get the most out of your homemade creation, follow these recommendations for serving, storage, and pairing with other dishes. Proper storage is key to maintaining the freshness and quality of your hummus. Store your hummus in an airtight container in the refrigerator. It should remain fresh for 3-5 days. For longer storage, consider freezing your hummus in airtight containers or freezer bags, it can last for up to 3 months in the freezer. Remember to thaw it overnight in the refrigerator before serving.
Serving Suggestions: The versatility of hummus is one of its greatest assets. It’s fantastic as a dip with an array of vegetables like carrots, celery, bell peppers, and cucumber. Use it as a spread on sandwiches, wraps, or pita bread for a healthy and flavorful addition. Consider adding a drizzle of extra virgin olive oil and a sprinkle of paprika or za’atar for an extra layer of flavor and visual appeal. You can also use it as a base for other dishes, incorporating it into salads, grain bowls, or as a topping for roasted vegetables or grilled meats.
Complementary Dishes: Hummus pairs beautifully with a wide variety of cuisines. It complements Mediterranean dishes perfectly, working wonderfully alongside falafel, baba ghanoush, tabbouleh, and grilled halloumi cheese. It also adds a creamy, flavorful element to Mexican-inspired meals, such as tacos or burritos. Its versatility extends even to Indian cuisine, where it can be a delicious accompaniment to naan bread and various curries. Experiment with different flavor combinations to find your favorites!
Nutritional Information (per 1/4 cup serving, approximate values): The nutritional content of your hummus will vary depending on the ingredients used. However, a typical serving provides approximately 150-200 calories, 10-15 grams of fat (mostly healthy unsaturated fats), 5-8 grams of protein, and a good source of fiber. It’s also a rich source of various vitamins and minerals, particularly vitamin E, folate, and iron, depending on the ingredients. Note: These values are estimates and can change based on the specific ingredients and quantities used in your recipe.
Tips for Enhancing Your Hummus: To elevate your homemade hummus, consider adding roasted red peppers for sweetness and color, sun-dried tomatoes for a more intense flavor, or a squeeze of lemon juice for extra brightness. Experiment with different types of tahini for variations in taste and texture. Adding a pinch of cumin or garlic powder can also significantly enhance the overall flavor profile. Don’t be afraid to get creative and personalize your hummus to your liking!
Enjoy your homemade hummus! Remember to store it properly, explore different serving suggestions, and experiment with complementary dishes to fully appreciate its deliciousness and versatility.