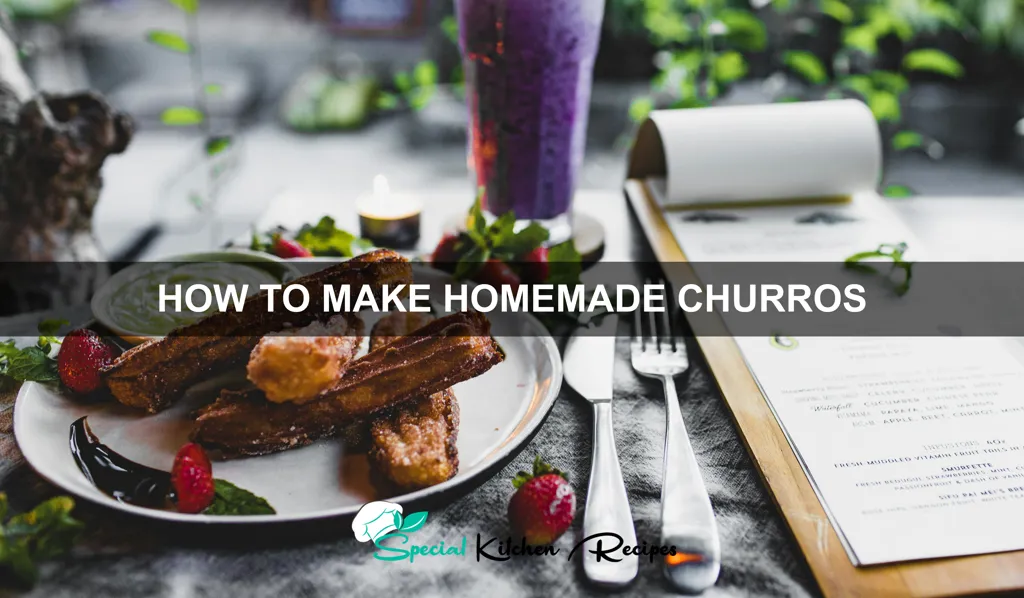
Prepare to embark on a culinary journey to Spain, where we’ll unlock the secrets to crafting delectable homemade churros! These beloved fried-dough pastries boast a rich and fascinating history, stretching back centuries. While pinpointing the exact origin is difficult, evidence suggests churros emerged in Spain during the 16th century, possibly originating amongst shepherds in the mountainous regions. Lacking ovens in their nomadic lifestyle, they cleverly adapted readily available ingredients – simple flour, water, and oil – to create this crispy, golden treat, fried over open fires. This ingenious adaptation led to a food that was both portable and satisfying, perfect for sustaining them through long journeys.
Over time, churros transcended their humble beginnings, evolving into a cherished culinary symbol of Spanish culture. Their popularity spread rapidly, eventually making their way to the Americas and other parts of the world, adapting and evolving along the way. Today, churros are enjoyed globally, with variations in recipes and presentation depending on the region. In fact, the global churro market is estimated to be worth billions of dollars, a testament to their enduring appeal across generations and cultures. This widespread popularity speaks volumes about the irresistible combination of crispy exterior, soft interior, and the delightful sweetness provided by the accompanying chocolate sauce.
The cultural significance of churros is undeniable. They’re a staple at Spanish festivals and celebrations, often served alongside hot chocolate, creating a classic pairing. Many families have their own treasured churro recipes, passed down through generations. This simple pastry represents more than just a delicious treat; it embodies tradition, shared experiences, and the warmth of community gatherings. This recipe will guide you through the process of making these iconic treats from scratch, allowing you to experience the joy of creating and sharing this historically significant and undeniably delicious food. Get ready to indulge in the delightful crunch and melt-in-your-mouth texture of homemade churros!
Ingredients and Measurements
Creating perfectly crisp and fluffy churros hinges on precise measurements and high-quality ingredients. Don’t be tempted to substitute; the recipe relies on a delicate balance of flavors and textures.
For this recipe, we’ll be making approximately 20-24 churros, depending on the size you pipe them.
Water: 1 cup (240ml). Use filtered or bottled water for the best results. Tap water can sometimes contain minerals that affect the texture of the dough.
Unsalted Butter: 1/2 cup (113g). Use unsalted butter to control the salt content in your churros. Salted butter can make them overly salty. Make sure your butter is softened but not melted; this is crucial for proper emulsification with the water.
Salt: 1/4 teaspoon. A pinch of salt enhances the overall flavor of the churros without making them salty. Don’t skip this! It balances the sweetness and brings out the other flavors.
Granulated Sugar: 1/2 cup (100g). This is for the dough. We’ll use additional sugar for coating later. Use fine granulated sugar for even distribution in the dough.
All-Purpose Flour: 2 cups (250g). Use all-purpose flour, not cake flour or bread flour. Make sure to spoon the flour into your measuring cup and level it off; don’t scoop directly from the bag, as this can pack the flour and result in a denser dough.
Eggs: 2 large. Use large eggs at room temperature. Room temperature eggs will emulsify better with the other ingredients, resulting in a smoother dough.
Vegetable Oil: Approximately 3 cups (700ml) for frying. You’ll need enough oil to completely submerge the churros. Use a high-smoke-point oil, such as vegetable, canola, or peanut oil. Avoid olive oil, as its low smoke point can impart a bitter taste.
Cinnamon Sugar for Coating: Combine 1/4 cup granulated sugar with 1-2 teaspoons ground cinnamon. Adjust the cinnamon to your preference. Ensure your sugar is finely ground for a better coating.
Optional: For added flavor, consider adding a teaspoon of vanilla extract to the dough along with the eggs.
Important Note: Accurately measuring your ingredients is key to success. Use a kitchen scale for the most precise measurements, especially for the flour and butter.
Equipment Preparation
Making churros requires specific equipment to achieve the perfect texture and shape. Proper preparation of your tools is crucial for a smooth and successful churro-making experience. Let’s start by gathering everything you’ll need.
First, you’ll need a large, heavy-bottomed saucepan (at least 2 quarts) for frying. A heavy bottom prevents scorching and ensures even oil temperature distribution. Avoid using non-stick pans for deep frying as they can be damaged by high temperatures.
Next, acquire a deep-fry thermometer. This is absolutely essential for monitoring the oil temperature. The ideal temperature for frying churros is between 350°F (175°C) and 375°F (190°C). Using a thermometer ensures consistent cooking and prevents burning or undercooked churros. Do not attempt to guess the oil temperature; it can lead to unevenly cooked churros and potential safety hazards.
You’ll also need a large bowl for mixing the churro batter. Choose a bowl that’s large enough to comfortably accommodate the ingredients and allows for easy mixing. A sturdy bowl is recommended to prevent spills during vigorous mixing.
For piping the churro batter, a pastry bag fitted with a large star tip (approximately ½ inch to ¾ inch) is necessary. If you don’t have a pastry bag, a zip-top bag with a corner snipped off can serve as a substitute, although a pastry bag provides better control and consistency. Ensure the tip is large enough to create the characteristic churro shape but not so large that the batter is too thin.
Finally, prepare a large plate or baking sheet lined with paper towels for draining the fried churros. This will absorb excess oil, resulting in less greasy churros. Having multiple plates ready will speed up the process, particularly if you are making a large batch.
Before you begin, thoroughly clean all your equipment. This ensures food safety and prevents any unwanted flavors from affecting your churros. Make sure all your equipment is dry before you start mixing the batter or frying.
Preheating the oil is also a critical step. Allow the oil to reach the target temperature (350°F-375°F) before adding the churro batter. This ensures even cooking and prevents the churros from absorbing too much oil.
Churro Dough Preparation (including resting time)
Making perfect churros starts with the dough. This recipe yields approximately 24 churros, depending on size.
Ingredients:
- 1 cup (240ml) water
- 1/2 cup (100g) unsalted butter, cut into pieces
- 1/4 teaspoon salt
- 1 1/2 cups (180g) all-purpose flour
- 2 large eggs
- Vegetable oil, for frying (enough to fill a deep fryer or large pot about 3 inches deep)
- Optional: Cinnamon sugar for coating (see coating instructions later)
Instructions:
1. Combine water, butter, and salt: In a medium saucepan over medium heat, combine the water, butter, and salt. Bring the mixture to a rolling boil, stirring occasionally until the butter is completely melted and the mixture is smooth. This is crucial for a smooth dough.
2. Add the flour: Once boiling, remove the saucepan from the heat. Quickly add the all-purpose flour all at once, stirring vigorously with a wooden spoon or spatula until a smooth, thick dough forms. Work quickly to prevent lumps from forming. The dough will pull away from the sides of the pan and form a ball.
3. Cool slightly: Return the saucepan to very low heat for about 1 minute, continuing to stir, to cook out any excess moisture. This helps to create a smoother, more pliable dough. Remove from heat and let the dough cool slightly, about 5 minutes. This prevents the eggs from cooking prematurely.
4. Incorporate the eggs: Add the eggs one at a time, beating vigorously with a wooden spoon or electric mixer until each egg is fully incorporated before adding the next. Ensure the dough is completely smooth and glossy. If using an electric mixer, use a low speed to avoid splattering.
5. Rest the dough: This is a very important step. Transfer the dough to a bowl, cover it tightly with plastic wrap, and let it rest at room temperature for at least 30 minutes. This allows the gluten to relax, resulting in a lighter and more easily piped dough. Resting for up to 2 hours is even better for optimal texture. The longer it rests, the easier it will be to pipe and the lighter the churros will be.
Professional Tip: For perfectly smooth churros, pass the dough through a fine-mesh sieve after resting. This removes any lumps and ensures a consistent texture.
Now that your churro dough is prepared, you’re ready to proceed to the next step: shaping and frying your churros!
Frying the Churros (Oil Temperature Control)
Achieving perfectly golden and crispy churros hinges on maintaining the correct oil temperature throughout the frying process. Using a thermometer is crucial; don’t rely on visual estimations alone. A deep, heavy-bottomed pot or Dutch oven is best, as it distributes heat evenly and prevents scorching. Fill your pot with approximately 3-4 quarts of vegetable oil or canola oil – a high-smoke point oil is essential. Avoid using olive oil, as its lower smoke point can lead to burning and an unpleasant flavor.
Heat the oil over medium-high heat. The ideal temperature for frying churros is between 350°F (175°C) and 375°F (190°C). Use a deep-fry thermometer to monitor the temperature constantly. If the oil is too cold, the churros will absorb too much oil, becoming greasy and soggy. If it’s too hot, they’ll burn on the outside before cooking through on the inside.
Once the oil reaches the desired temperature, carefully add the churros to the pot, working in batches to avoid overcrowding. Overcrowding will lower the oil temperature significantly, resulting in unevenly cooked churros. Aim for 3-4 churros at a time, depending on the size of your pot. Use tongs or a slotted spoon to gently submerge each churro, ensuring it’s fully immersed in the hot oil.
Fry for approximately 1-2 minutes per side, or until they are a deep golden brown. Regularly check the oil temperature and adjust the heat as needed to maintain it within the 350°F-375°F (175°C-190°C) range. If the temperature drops too low, increase the heat slightly. If it gets too high, reduce the heat or temporarily remove the churros from the oil.
Use a slotted spoon or spider to carefully remove the fried churros from the oil and place them on a wire rack lined with paper towels to drain excess oil. This allows for even draining and prevents the churros from becoming soggy. Avoid piling them on top of each other, as this can trap steam and make them less crispy.
After frying each batch, allow the oil temperature to return to the ideal range before adding the next batch. This ensures consistent cooking and prevents temperature fluctuations that can lead to unevenly fried churros. Once all the churros are fried, carefully dispose of the used oil according to your local regulations.
With careful attention to oil temperature, you’ll achieve perfectly golden, crispy churros every time. Enjoy!
Making the Chocolate Sauce (if applicable)
A rich chocolate sauce perfectly complements the crispy exterior and fluffy interior of homemade churros. This recipe creates a smooth, decadent sauce that’s not overly sweet, allowing the churro’s flavor to shine through. Feel free to adjust the sweetness to your preference.
Ingredients:
- 1 cup heavy cream
- 6 ounces (170g) semi-sweet chocolate, finely chopped (Use good quality chocolate for the best flavor)
- 2 tablespoons unsalted butter
- 1 teaspoon vanilla extract
- Pinch of salt
- Optional: 1 tablespoon powdered sugar (for extra sweetness)
Instructions:
- Heat the cream: In a small saucepan over medium-low heat, gently warm the heavy cream. Do not let it boil; you want it to be just simmering. Avoid scorching the cream, as this can impart a burnt flavor to the sauce.
- Melt the chocolate: Remove the cream from the heat and add the chopped semi-sweet chocolate, butter, and salt. Let it sit for a minute to allow the butter to begin melting before stirring gently. Use a whisk or spatula to ensure a smooth, lump-free consistency. Continue stirring until the chocolate is completely melted and the sauce is smooth and glossy.
- Add flavorings: Stir in the vanilla extract and optional powdered sugar. Taste the sauce and adjust sweetness or vanilla as needed. Remember that the sauce will thicken slightly as it cools.
- Cool and serve: Let the chocolate sauce cool slightly before serving. It’s best served warm but not hot. If the sauce becomes too thick, you can gently reheat it over low heat, adding a teaspoon of cream at a time until you reach your desired consistency. Store leftover chocolate sauce in an airtight container in the refrigerator for up to 3 days. Reheat gently before serving.
Professional Tip: For an even richer chocolate flavor, consider using a combination of semi-sweet and dark chocolate. You can also add a pinch of cayenne pepper for a subtle kick.
Important Note: Always use caution when working with hot liquids and melted chocolate. Ensure the cream is heated gently to prevent scorching. Use oven mitts when handling hot pans and allow the chocolate sauce to cool slightly before handling.
Cooling and Draining Churros
Once your churros are golden brown and perfectly puffed, the next crucial step is cooling and draining them properly. This process prevents soggy churros and ensures a crisp exterior. Improper cooling can lead to a gummy texture, completely ruining your delicious creation. Therefore, careful attention to detail here is essential for success.
Immediately after frying, carefully remove the churros from the hot oil using a slotted spoon or spider. Avoid overcrowding the spoon; this will lower the oil temperature and make the churros soggy. Work in batches if necessary to ensure each churro receives individual attention.
Transfer the fried churros to a wire rack placed over a baking sheet lined with paper towels. The wire rack allows for excellent air circulation, preventing steam from accumulating and softening the churros. Using paper towels is also vital; they absorb excess oil, contributing to a crispier final product. Avoid piling the churros on top of each other; this will trap heat and moisture, resulting in a less-than-ideal texture.
Let the churros cool completely on the wire rack. This process usually takes around 15-20 minutes, depending on the size and thickness of your churros. Do not rush this step. Allowing the churros to cool fully ensures the exterior becomes crisp and the interior sets properly. Impatience can lead to broken churros or a soft, unpleasant texture.
While the churros are cooling, you can prepare your cinnamon sugar mixture. This is a classic churro topping, and the warm churros will pick up the cinnamon sugar beautifully. For a standard batch, you’ll need approximately ½ cup of granulated sugar and 2 tablespoons of ground cinnamon. Mix these together in a bowl before the churros have fully cooled.
Once the churros are completely cool, gently toss them in the cinnamon sugar mixture, ensuring each churro is evenly coated. Avoid over-handling the churros once they’ve cooled as they can become fragile. Serve immediately for the best texture and flavor. For longer storage (though ideally eaten fresh), store cooled churros in an airtight container at room temperature for up to 2 days. However, they are best enjoyed immediately after frying and cooling.
By following these steps carefully, you’ll ensure perfectly crispy, delicious churros every time. Remember, the cooling and draining process is just as important as the frying itself!
Recommendations
For the best churro experience, ensure your oil is at the correct temperature. Using a thermometer is highly recommended to prevent burning or undercooked churros. Overly hot oil will result in dark brown, possibly burnt churros, while oil that’s too cool will produce soggy, greasy ones. Aim for a consistent temperature throughout the frying process.
Freshly made churros are best enjoyed immediately. Their crispy exterior and soft interior are most delightful when warm. However, if you have leftovers, store them in an airtight container at room temperature for up to 2 days. They will lose some crispiness, but reheating them in a preheated oven at 350°F (175°C) for a few minutes can help restore some of their texture.
Serving suggestions are endless! Classic pairings include a rich chocolate dipping sauce (melted dark chocolate with a touch of cream), cinnamon sugar, or a dulce de leche caramel. For a more adventurous approach, try a salted caramel sauce, a fruit compote (strawberry or mango work beautifully), or even a light vanilla bean custard.
Churros complement many dishes, especially those with contrasting flavors and textures. They make a fantastic dessert alongside a light and refreshing fruit salad, or a scoop of vanilla ice cream. They can also be incorporated into a brunch menu, served alongside a light and fruity yogurt parfait.
Nutritional Information (per churro, approximate): Calories will vary depending on size and ingredients used, but expect around 150-200 calories per churro. The primary nutritional components are carbohydrates from the flour and sugar, and fat from the frying oil. While delicious as a treat, churros are not a low-calorie or particularly nutritious option, so moderation is key. Specific nutritional information can be calculated using online nutrition calculators, inputting the exact ingredients and quantities used.
Important Note: Always supervise children when working with hot oil. Allow the oil to cool completely before attempting to clean up.