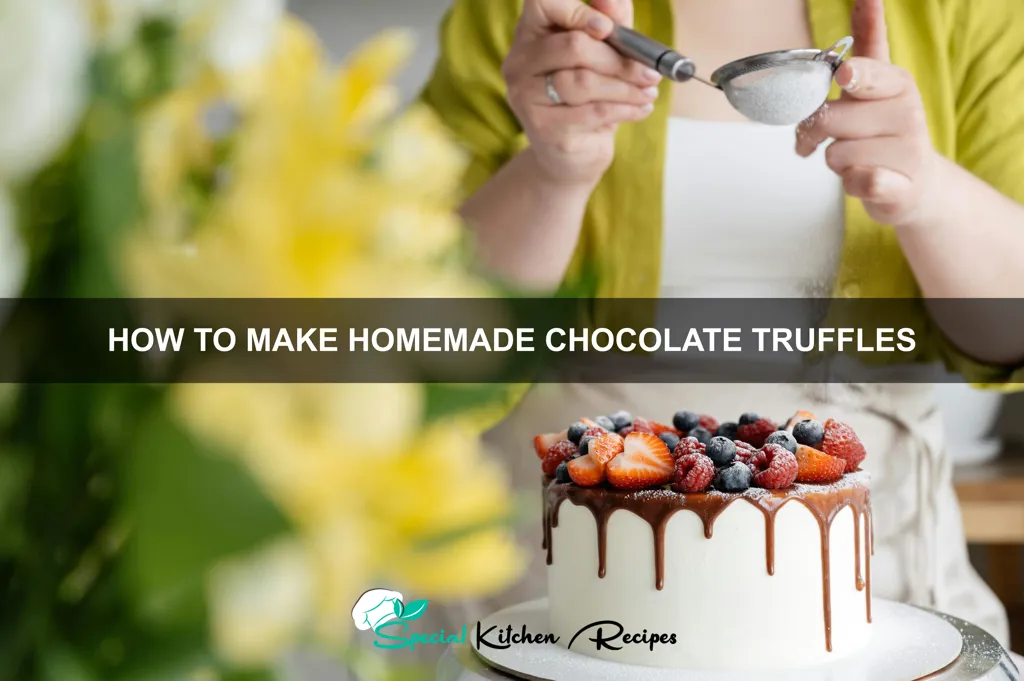
Indulge in the decadent world of homemade chocolate truffles, a confectionery delight with a rich and fascinating history. While pinpointing the exact origin is difficult, many culinary historians trace the truffle’s ancestry back to France in the 19th century. Legend speaks of a chef accidentally dropping ganache onto a cold marble slab, resulting in the creation of this now globally-loved treat. However, the concept of using chocolate in a similar spherical form existed long before, with historical accounts mentioning chocolate-based sweets in various cultures throughout the centuries.
Truffles quickly transitioned from a happy accident to a sophisticated dessert, gaining popularity among the elite and eventually becoming a staple in high-end patisseries. The 20th century saw the explosion of truffle variations, with countless recipes emerging, each boasting unique flavor profiles and textures. Today, the global chocolate confectionery market is a multi-billion dollar industry, with truffles holding a significant portion of that market share. Estimates suggest that the global chocolate market alone exceeds $100 billion annually, highlighting the enduring appeal of chocolate-based treats like truffles.
Beyond their deliciousness, chocolate truffles hold cultural significance in numerous societies. They are frequently associated with luxury, celebration, and romance. Their appearance, often elegant and beautifully presented, makes them a perfect gift for special occasions or a self-indulgent treat. The smooth, intense flavor of a well-made truffle offers a sensory experience that transcends a simple dessert; it’s an experience that many cultures associate with moments of joy and indulgence. From the simple elegance of a classic dark chocolate truffle to the playful addition of nuts, liqueurs, or spices, the world of truffle-making is a testament to the boundless creativity of culinary arts.
This guide will walk you through the process of creating your own exquisite homemade chocolate truffles, allowing you to experience the satisfaction of crafting these delectable treats from scratch. We will explore the techniques for achieving the perfect ganache, the art of shaping and coating the truffles, and finally, the joy of indulging in your handcrafted culinary masterpiece. Get ready to embark on a journey of chocolatey delight!
Ingredients and Measurements
Creating perfectly decadent chocolate truffles requires precise measurements and high-quality ingredients. The success of your truffles hinges on the balance of flavors and textures, so careful attention to detail is key.
For this recipe, we’ll be using 8 ounces (227 grams) of high-quality dark chocolate. The percentage of cacao is your choice; 70% is a good starting point for a rich, bittersweet truffle. However, feel free to experiment with higher percentages for a more intense chocolate flavor, or lower percentages for a milder taste. Ensure your chocolate is finely chopped; this will facilitate even melting and a smoother final product. Using a chef’s knife or a vegetable peeler to create small, uniform pieces is recommended.
Next, we need 1/2 cup (113 grams) of heavy cream. The fat content in heavy cream is crucial for achieving that luxurious, melt-in-your-mouth texture. Do not substitute with light cream or milk, as this will significantly alter the consistency of your truffles. Make sure your heavy cream is cold before you use it.
For a hint of sweetness and to balance the bitterness of the dark chocolate, we’ll add 1/4 cup (50 grams) of granulated sugar. You can adjust this amount to your preference, but remember that too much sugar can overpower the delicate chocolate flavor. Use a fine-grained sugar for easier incorporation and a smoother final product.
Finally, for optional additions to enhance the flavor profile, consider adding 1 teaspoon of vanilla extract for a classic touch, or a pinch of sea salt to enhance the chocolate’s flavor complexity. A tablespoon of your favorite liqueur (like Grand Marnier or coffee liqueur) can also create a sophisticated and delicious twist. Remember that additions like these should complement the chocolate and not overpower it.
Ingredient quality significantly impacts the final product. Investing in good-quality chocolate will yield superior results. Similarly, using fresh, high-fat heavy cream is essential for achieving the desired texture. Measure your ingredients accurately using a kitchen scale for the most precise results. This will ensure consistency and prevent imbalances in flavor and texture.
Equipment Preparation
Before you begin crafting your delectable homemade chocolate truffles, ensuring you have the right equipment ready will streamline the process and contribute to a smoother, more enjoyable experience. Proper preparation is key to achieving perfectly formed and beautifully finished truffles.
You’ll need several key pieces of equipment. First, a double boiler is essential. This allows for gentle, even melting of the chocolate, preventing scorching and ensuring a smooth, glossy finish. If you don’t own a double boiler, you can improvise by using a heatproof bowl set over a saucepan of simmering water, ensuring the bottom of the bowl doesn’t touch the water. Maintain a low, consistent heat throughout the melting process.
Next, prepare your mixing bowls. You’ll need at least two – one for melting the chocolate and another for mixing the truffle filling. Choose bowls that are of a suitable size for your recipe quantities. For a standard batch of truffles, two medium-sized bowls (approximately 8-10 inch diameter) should suffice.
Measuring tools are crucial for accuracy. Invest in reliable measuring cups and spoons to ensure consistent results. Precision in measuring your ingredients, especially the chocolate and butter, will directly impact the texture and flavor of your truffles. A kitchen scale is highly recommended for more precise measurements, particularly for the chocolate.
For shaping your truffles, you’ll need a parchment paper-lined baking sheet. This prevents sticking and makes cleanup a breeze. A spatula or spoon will be helpful for transferring the truffle mixture onto the baking sheet. Additionally, you’ll need a small bowl of cocoa powder, chopped nuts, or other desired coating materials.
Finally, consider your cooling tools. A wire rack is ideal for cooling the truffles after they’ve been shaped and coated, allowing for air circulation to prevent them from becoming sticky or melting. If you don’t have a wire rack, a parchment-lined baking sheet will work, but the cooling process may take slightly longer.
Remember to thoroughly clean and dry all your equipment before starting. Any residual moisture can affect the chocolate’s texture and lead to undesirable results. Having all your equipment prepared and organized beforehand will make the truffle-making process significantly more efficient and enjoyable.
Melting and Tempering Chocolate (if applicable)
Melting chocolate correctly is crucial for achieving a smooth, glossy, and properly setting truffle. For many truffle recipes, using high-quality chocolate already tempered simplifies the process. However, if your recipe requires melting and tempering chocolate chips or blocks, follow these steps carefully.
Choose the right chocolate: For truffles, dark chocolate, milk chocolate, or white chocolate can be used, either individually or in combination. Use high-quality chocolate as it will yield better flavor and texture. Avoid using chocolate with added fillers or oils, as these can hinder proper tempering.
Method 1: Melting Chocolate (without tempering): This method is suitable for recipes that don’t require a perfectly shiny, crisp shell. Chop 8 ounces (227g) of chocolate into small pieces. Place the chocolate in a heatproof bowl set over a pan of simmering water (double boiler method). Ensure the bottom of the bowl doesn’t touch the water. Stir gently and frequently until the chocolate is completely melted and smooth. Avoid overheating, as this can scorch the chocolate and affect its texture. Remove from heat immediately once melted.
Method 2: Tempering Chocolate (for a glossy, crisp shell): Tempering involves carefully heating and cooling chocolate to create a stable crystal structure, resulting in a beautiful sheen and snap. This is essential for achieving professional-looking truffles. We’ll use the seeding method for tempering 8 ounces (227g) of chocolate:
Step 1: Melt a portion: Melt 2 ounces (57g) of finely chopped chocolate using the double boiler method as described above. Ensure it’s completely melted and smooth.
Step 2: Seed the melted chocolate: Add the remaining 6 ounces (170g) of finely chopped chocolate to the melted portion. Let it sit for a minute before gently stirring until fully incorporated and smooth. This process is called seeding, and it introduces stable crystals into the melted chocolate.
Step 3: Temperature Check (optional but recommended): For precise tempering, use a candy thermometer. The ideal temperature for dark chocolate is around 88-90°F (31-32°C), milk chocolate 86-88°F (30-31°C), and white chocolate 84-86°F (29-30°C). If the temperature is too high, let it cool slightly. If too low, gently reheat using the double boiler method.
Step 4: Maintain temperature: Once the chocolate reaches the correct temperature, keep stirring gently to maintain it. Avoid overheating. The tempered chocolate is now ready to use for coating your truffles.
Important Note: If the chocolate seizes (becomes thick and grainy), it’s usually due to moisture. Try adding a teaspoon of melted chocolate, stirring constantly, to re-incorporate the seized chocolate. If this doesn’t work, you may need to start the tempering process again.
Ganache Preparation
The ganache is the heart of your chocolate truffles, so taking your time and paying attention to detail here will make all the difference. This recipe uses a classic ratio of cream to chocolate, resulting in a smooth, rich ganache perfect for truffle making. We’ll be making a dark chocolate ganache, but feel free to experiment with milk or white chocolate depending on your preference.
Ingredients:
- 1 cup (240ml) heavy cream
- 8 ounces (227g) finely chopped dark chocolate (at least 70% cacao for best results)
- 1 tablespoon (14g) unsalted butter, at room temperature
- 1 teaspoon vanilla extract (optional, but highly recommended)
Instructions:
1. Heat the cream: In a small saucepan, heat the heavy cream over medium heat. Do not boil. You want the cream to be hot, but not simmering. Small bubbles around the edges are a good indicator. Remove from heat as soon as it reaches this point.
2. Melt the chocolate: Place the finely chopped dark chocolate in a heatproof bowl. Slowly pour the hot cream over the chocolate, making sure to pour it evenly over the surface. Let it sit for about 1 minute to allow the chocolate to soften slightly.
3. Combine and whisk: Using a whisk, gently stir the mixture in a circular motion, starting from the center and working your way outwards. Be patient and avoid vigorous whisking which can incorporate too much air and lead to a less smooth ganache. Continue whisking until the chocolate is completely melted and the mixture is smooth and glossy. This may take a few minutes.
4. Incorporate butter and vanilla: Add the softened butter and vanilla extract (if using) to the ganache. Whisk until the butter is fully incorporated and the ganache is completely smooth. If the ganache seems too thick, you can add a teaspoon or two of warm cream at a time until you achieve your desired consistency.
5. Cool and chill: Pour the ganache into a shallow, wide container (like a baking dish) to allow it to cool quickly and evenly. Cover the container with plastic wrap, pressing it directly onto the surface of the ganache to prevent a skin from forming. Refrigerate for at least 2-3 hours, or preferably overnight, until the ganache is firm enough to scoop and roll into balls.
Professional Tip: For an even smoother ganache, you can use a fine-mesh sieve to strain the ganache after it’s melted and combined. This will remove any lumps or unmelted chocolate bits.
Truffle Shaping and Coating
Once your ganache has reached the perfect consistency – firm enough to hold its shape but still pliable – it’s time to shape your truffles. This is where your creativity can truly shine! You’ll need a small bowl of cocoa powder, finely chopped nuts (like almonds or pistachios), or other coating ingredients like melted chocolate, for rolling.
Using a small spoon or a melon baller (for perfectly round truffles), scoop out approximately 1-inch portions of ganache. Aim for consistency in size for a uniform look. Roll each portion gently between your palms to create a smooth, round ball. If the ganache is too sticky, chill it in the refrigerator for 10-15 minutes to firm up before shaping. If it’s too firm, let it soften slightly at room temperature.
For perfectly spherical truffles, consider using a truffle shaping mat. These mats have small, evenly sized wells that guide you to create consistently sized and shaped truffles. Alternatively, you can use a small spoon to scoop the ganache and then gently roll it into a ball on a piece of parchment paper.
Now comes the fun part: coating! For a classic look, place your cocoa powder in a shallow dish. Gently roll each truffle in the cocoa powder, ensuring it’s completely coated. Tap off any excess powder. For a more sophisticated touch, use a sieve to dust the truffles with cocoa powder for an even coating. This prevents clumps and ensures a smooth finish.
If using chopped nuts, follow the same process, replacing the cocoa powder with your chosen nuts in a shallow dish. Press the truffles gently into the nuts to ensure good adhesion. For a luxurious finish, melt high-quality chocolate (dark, milk, or white) and dip each truffle using a fork. Allow the excess chocolate to drip off before placing the truffles onto a parchment-lined baking sheet.
Important Note: Regardless of your chosen coating, ensure your truffles are fully coated and that there are no gaps or uncovered areas of ganache. Once coated, immediately place the truffles onto a parchment-lined baking sheet or tray to prevent sticking. Refrigerate the truffles for at least 30 minutes to allow the coating to set completely before serving. This will also help them firm up and enhance their flavor.
Experiment with different coatings and decorations to create unique and personalized truffles. You can add sprinkles, edible glitter, or even drizzle melted white chocolate over dark chocolate truffles for an elegant contrast.
Chilling and Setting
Chilling your chocolate truffle mixture is a crucial step that shouldn’t be rushed. Proper chilling firms up the ganache, making it easier to handle and resulting in beautifully shaped, melt-in-your-mouth truffles. Insufficient chilling will lead to soft, shapeless truffles that are difficult to coat and prone to melting.
The ideal chilling time is at least 2-3 hours, but preferably 4-6 hours, or even overnight. This allows the ganache to fully set and develop its rich, creamy texture. A shorter chilling time will result in softer truffles that are more prone to sticking to your hands and tools.
Transfer your prepared ganache into a shallow, airtight container. A wide, shallow container ensures even chilling and faster setting. Avoid using a deep container, as this will prolong chilling time and may result in unevenly set ganache. A rectangular container is ideal for easy scooping and shaping.
Cover the container tightly with plastic wrap, pressing it directly onto the surface of the ganache to prevent a skin from forming. This skin can affect the texture and appearance of your finished truffles. Alternatively, you can use a silicone lid or airtight seal to achieve the same result.
Place the container in the refrigerator. Avoid placing it in the freezer, as this can cause the ganache to freeze solid and become grainy, ruining the smooth texture. The refrigerator’s consistent, cool temperature provides the optimal environment for gradual and even setting.
Once the ganache is thoroughly chilled, it should be firm enough to hold its shape when you scoop it. If it’s still too soft, chill it for another hour or two. A properly chilled ganache will be firm but still slightly malleable, making it easy to roll into balls without cracking or crumbling.
If you’re short on time, you can speed up the chilling process slightly by using a smaller, shallower container and ensuring good airflow around it in the refrigerator. However, never compromise on the minimum 2-3 hour chilling time. Remember, patience is key to creating perfect chocolate truffles!
Recommendations
For the richest flavor, allow your homemade chocolate truffles to chill in the refrigerator for at least 2 hours before serving. This allows the chocolate to firm up and develop a delightful snap. For best results, don’t rush the chilling process; longer chilling times (up to 24 hours) can enhance the texture further.
Serving Suggestions: These decadent truffles are perfect as an after-dinner treat, a sophisticated addition to a dessert platter, or a delightful gift for friends and family. Consider serving them on small decorative plates or in elegant paper cups. A dusting of cocoa powder, finely chopped nuts, or sea salt flakes adds a beautiful and flavorful finishing touch.
Storage: Store your chocolate truffles in an airtight container in the refrigerator for up to one week. To prevent them from absorbing odors, it’s best to keep them sealed tightly. If you want to store them longer, consider freezing them for up to three months. Allow them to thaw slowly in the refrigerator before serving.
Complementary Dishes: These rich truffles pair beautifully with a variety of beverages and desserts. Consider serving them alongside a strong espresso, a glass of chilled dessert wine (like Port or Sauternes), or a creamy cappuccino. For a complete dessert experience, serve them with a scoop of vanilla ice cream or a light fruit sorbet to provide a refreshing contrast to the richness of the chocolate.
Nutritional Information (per truffle – approximate, varies based on ingredients): These values are estimates and can change depending on the specific chocolate and other ingredients used. Calories: Approximately 100-150 calories. Fat: High in fat due to the chocolate and cream. Sugar: High in sugar due to the chocolate and added sweeteners. Protein: Low. For a more precise nutritional analysis, use a nutrition calculator and input your specific ingredients and quantities.
Important Note: Always handle chocolate carefully, avoiding excessive heat, as it can melt easily. Use high-quality chocolate for the best flavor and texture. Experiment with different flavor additions like espresso powder, peppermint extract, or orange zest to create your own unique truffle variations. Enjoy!