Few desserts evoke such comforting nostalgia and universal appeal as chocolate pudding. Its creamy texture and intensely rich chocolate flavor have captivated palates for centuries, transcending cultural boundaries and becoming a beloved treat across the globe. While pinpointing the exact origins is difficult, the earliest forms of pudding can be traced back to ancient civilizations, with evidence suggesting variations existed in medieval Europe, often featuring bread or rice as a base, sweetened with honey or fruits. These early versions were far from the smooth, decadent chocolate pudding we know today, a transformation driven by advancements in cocoa processing and sugar refining.
The development of chocolate pudding as we recognize it is intrinsically linked to the rise in popularity of chocolate itself. The introduction of cocoa beans from the Americas to Europe in the 16th century revolutionized confectionery, albeit initially as a bitter beverage for the elite. As processing techniques improved and sugar became more accessible, chocolate’s versatility expanded, leading to the creation of various desserts, including early forms of chocolate pudding. The 19th and 20th centuries saw a surge in its popularity, fueled by mass production and the development of readily available instant pudding mixes. This accessibility democratized the dessert, making it a staple in households across socioeconomic strata.
Chocolate pudding’s cultural significance is undeniable. It holds a special place in childhood memories for millions, often associated with birthday parties, school lunches, and comforting moments at home. Its prevalence in popular culture, from cartoons to literature, further solidifies its iconic status. In the United States alone, the market for pudding and similar desserts represents a multi-billion dollar industry, with countless variations and flavors vying for consumer attention. Interestingly, while instant pudding mixes dominate the market, the demand for homemade versions persists, reflecting a desire for more control over ingredients and a deeper connection to the culinary process. This speaks to the enduring appeal of a classic dessert, one that transcends mere sustenance and becomes a symbol of comfort, joy, and shared experiences.
Today, learning to make homemade chocolate pudding allows us to reconnect with this rich history and craft a dessert tailored to our preferences. This recipe will guide you through creating a luxurious, creamy pudding from scratch, highlighting the simple satisfaction of transforming basic ingredients into a culinary masterpiece. Forget the artificial flavors and preservatives; get ready to experience the true, rich, and intensely satisfying flavor of homemade chocolate pudding.
Ingredients and Measurements
Creating a truly decadent homemade chocolate pudding requires careful attention to ingredient quality and precise measurements. The success of your pudding hinges on this foundational step, so take your time and ensure accuracy.
For this recipe, we’ll be using a combination of unsweetened chocolate and cocoa powder for a deep, rich chocolate flavor. Avoid using overly processed cocoa powders as they can impart a bitter or chalky taste. Look for a high-quality Dutch-processed cocoa powder for the best results. The cornstarch is crucial for thickening the pudding, so don’t substitute it with other starches unless you’re experienced in adjusting recipes for different thickening agents.
Milk: We’ll be using 2 cups (475ml) of whole milk. Whole milk provides the richest, creamiest texture. You can substitute with 2% milk, but expect a slightly thinner consistency. Skim milk is not recommended as it lacks the fat content necessary for optimal creaminess. Ensure your milk is cold; this helps prevent the pudding from becoming grainy.
Sugar: The recipe calls for ¾ cup (150g) of granulated sugar. This amount provides the perfect balance of sweetness. Adjust to your preference, but remember that too much sugar can overpower the chocolate flavor. Using a fine-grained sugar will ensure it dissolves completely, avoiding gritty textures in your finished pudding.
Unsweetened Chocolate: We’ll be using 4 ounces (113g) of high-quality unsweetened chocolate, finely chopped. The finer the chop, the faster and more evenly it will melt. Using good quality chocolate is paramount; it directly impacts the overall flavor profile of your pudding. Substituting with chocolate chips is not recommended as they contain added ingredients that may affect the texture and taste.
Cocoa Powder: Adding ¼ cup (30g) of Dutch-processed cocoa powder intensifies the chocolate flavor and adds depth. While not strictly necessary, the cocoa powder enhances the richness and creates a more complex chocolate profile. Ensure the cocoa powder is fresh; stale cocoa powder can have an off-putting taste.
Cornstarch: ¼ cup (30g) of cornstarch is the thickening agent. Measure this accurately; too little will result in a runny pudding, while too much will create a gummy texture. Whisk the cornstarch with a small amount of cold milk before adding it to the rest of the ingredients to prevent lumps from forming.
Salt: A pinch of salt (⅛ teaspoon) enhances the chocolate flavor. Don’t underestimate the power of salt in balancing sweetness and bringing out the best in the other ingredients. Use fine sea salt or table salt.
Vanilla Extract: 1 teaspoon of pure vanilla extract adds a touch of warmth and complexity. Use pure vanilla extract, not imitation, for the best flavor. This seemingly small addition significantly elevates the pudding’s overall taste.
Butter: 2 tablespoons (28g) of unsalted butter, added at the end, contributes to the pudding’s richness and creates a luxuriously smooth texture. Using unsalted butter allows you to control the salt content of the pudding.
Equipment List
Making homemade chocolate pudding requires a modest but essential collection of equipment. The right tools will not only ensure a smoother, easier process but also contribute to the final quality of your pudding. Investing in a few key items will elevate your pudding-making experience significantly.
A medium-sized saucepan (2-quart capacity): This is your primary cooking vessel. A heavier-bottomed saucepan is preferable as it distributes heat more evenly, preventing scorching and ensuring a smooth, lump-free pudding. Avoid using non-stick pans for this recipe, as the starch in the pudding can sometimes damage the non-stick coating over time.
Whisk (balloon whisk preferred): A balloon whisk is ideal for incorporating the ingredients smoothly and preventing lumps. Its multiple thin wires efficiently whip the cornstarch and milk mixture to a smooth consistency, creating a creamy texture in the finished pudding. A sturdy whisk is crucial; a flimsy one will be difficult to maneuver and may not effectively incorporate the ingredients.
Measuring cups and spoons: Accurate measurements are paramount in baking and dessert-making. Use standard measuring cups and spoons—liquid measuring cups for liquids and dry measuring cups for solids—to ensure consistent results. Invest in a good quality set for accuracy. Consider using a kitchen scale for even more precision, particularly for cocoa powder.
Rubber spatula or wooden spoon: Once the pudding starts to thicken, a rubber spatula or wooden spoon is invaluable for scraping down the sides and bottom of the saucepan. This ensures that all the ingredients are thoroughly combined and prevents any sticking or burning. A sturdy rubber spatula is particularly useful for transferring the finished pudding into serving dishes.
Fine-mesh sieve (optional but recommended): While not strictly necessary, a fine-mesh sieve can significantly improve the texture of your pudding. Sieving the cocoa powder before adding it to the mixture removes any lumps, resulting in a smoother, richer chocolate flavor. This step is particularly helpful when using unsweetened cocoa powder.
Heatproof bowl (for tempering chocolate, optional): If you are adding melted chocolate to your pudding for an extra decadent touch, you’ll need a heatproof bowl for tempering the chocolate. A heatproof glass or stainless-steel bowl is recommended. Avoid plastic bowls as they can warp or melt when exposed to high temperatures.
Serving dishes or individual ramekins: Once your pudding is ready, you’ll need attractive serving dishes or individual ramekins to present your culinary creation. Choose dishes that complement the richness of the chocolate pudding. You might consider small glass bowls or elegant ramekins for an upscale presentation.
Refrigerator: After cooking, the pudding needs to be refrigerated to allow it to fully set and cool. Ensure you have enough space in your refrigerator to accommodate the pudding dish.
Optional: Double boiler (for melting chocolate): A double boiler provides a gentle, even heat for melting chocolate, minimizing the risk of scorching. While you can melt chocolate in a microwave or in a bowl set over a saucepan of simmering water, a double boiler offers superior control and even heating.
Preparation Phase: (Includes melting chocolate, whisking etc.)
Before you begin assembling your luscious homemade chocolate pudding, meticulous preparation is key to achieving a flawlessly smooth and decadent texture. This phase focuses on melting the chocolate correctly and preparing the other components to ensure seamless integration later on. We’ll be using 6 ounces (170g) of high-quality dark chocolate, ideally with a minimum of 70% cacao for a rich, intense flavor. You can adjust the type and amount of chocolate to your preference, but remember that the higher the cocoa percentage, the more intense the chocolate flavor will be.
Melting the Chocolate: The most crucial step is melting the chocolate gently and evenly to prevent seizing. Seizing occurs when water or moisture comes into contact with the chocolate, resulting in a grainy, lumpy texture. To avoid this, use a double boiler or a heat-safe bowl set over a pan of simmering water (make sure the bottom of the bowl doesn’t touch the water). Chop the chocolate into small, roughly equal-sized pieces for even melting. This helps distribute the heat more uniformly. Stir the chocolate occasionally with a spatula or heat-resistant spoon, using gentle, circular motions. Avoid vigorous stirring, which can incorporate air bubbles and lead to a less smooth consistency.
Whisking the Wet Ingredients: While the chocolate melts, prepare the other ingredients. We’ll need 1 ½ cups (355ml) of whole milk – whole milk provides a creamier texture compared to skim or 2% milk. In a separate bowl, whisk together the milk with ¼ cup (50g) of granulated sugar. Ensure the sugar dissolves completely; a slightly warmed milk helps with this process. You can gently heat the milk on the stovetop before adding the sugar, but be careful not to let it boil.
Preparing the Egg Yolks: The egg yolks will act as an emulsifier, creating a lusciously smooth pudding. Separate 2 large eggs, carefully separating the yolks from the whites. Reserve the egg whites for another use (meringue, for example). Whisk the egg yolks lightly in a small bowl until they are slightly pale and thickened. This step aerates the yolks, contributing to a lighter final product. You can add a pinch of salt to the egg yolks to enhance the flavor and help stabilize the emulsion.
Cornstarch Slurry: To achieve the desired pudding consistency, we’ll use a cornstarch slurry. In a small bowl, whisk together 2 tablespoons (15g) of cornstarch with 2 tablespoons (30ml) of cold whole milk until completely smooth. This prevents lumps from forming in the final pudding. A smooth slurry is paramount; any lumps will be difficult to eliminate later.
Once the chocolate is completely melted and smooth, and the other ingredients are prepared, you are ready to proceed to the next step – combining all the elements to create your delectable homemade chocolate pudding. Remember, patience and attention to detail in this preparation phase are crucial for achieving a truly exceptional result.
Cooking Techniques: Simmering, Whisking, and Thickening
Making a smooth, luxurious homemade chocolate pudding requires mastering a few key cooking techniques. Let’s delve into simmering, whisking, and thickening – crucial steps to pudding perfection.
Simmering is a gentle cooking method where the liquid is just below the boiling point, producing a slow, even heat. For our chocolate pudding, we’ll be simmering the milk and chocolate mixture. This allows the chocolate to melt completely and the flavors to meld beautifully without scorching. Bring your milk and sugar mixture to a simmer over medium-low heat. Avoid high heat, as this can cause the milk to scorch and create a burnt taste. You’ll know it’s simmering when you see tiny bubbles gently rising to the surface. Once simmering, reduce the heat to maintain a gentle simmer.
Whisking is essential for creating a smooth, lump-free pudding. It incorporates air, preventing the pudding from becoming grainy. We’ll be whisking frequently throughout the cooking process. Use a sturdy whisk and whisk constantly while adding the dry ingredients to the hot milk mixture. This prevents lumps from forming and ensures a smooth, homogenous texture. Vigorous whisking is crucial, especially when incorporating cornstarch or other thickening agents. Consistent whisking helps to activate the starch and create the desired creamy consistency. Continue whisking for at least 2-3 minutes after adding the dry ingredients to ensure the thickening agent is fully incorporated and cooked through.
Thickening is achieved through the use of a starch-based thickening agent, typically cornstarch in chocolate pudding recipes. Cornstarch, when heated in a liquid, swells and thickens it. For a classic chocolate pudding recipe, you might use 2 to 3 tablespoons of cornstarch mixed with 1/4 cup of cold milk or water to create a slurry. This slurry prevents lumps from forming when added to the hot milk mixture. Add the cornstarch slurry to the simmering chocolate mixture slowly while whisking constantly. This gradual addition allows the cornstarch to fully incorporate and prevents clumping. Continue to whisk vigorously for several minutes to ensure the pudding reaches the desired thickness. As the pudding simmers and thickens, it will become glossy and cling to the whisk.
Professional Recommendation: For an extra-smooth pudding, strain the cooked mixture through a fine-mesh sieve after it has thickened. This removes any lingering lumps or uncooked cornstarch. Allow the pudding to cool completely before serving, as it will continue to thicken as it cools. Remember to always taste and adjust the sweetness and chocolate intensity to your preference.
By mastering these three techniques – simmering, whisking, and thickening – you’ll be well on your way to creating a delectable homemade chocolate pudding that rivals any store-bought version. Patience and careful attention to detail are key to success.
Cooling and Setting
The cooling and setting process is crucial for achieving the perfect creamy texture of your homemade chocolate pudding. Rushing this step can result in a grainy or lumpy pudding, while proper cooling allows the cornstarch to fully hydrate and the pudding to set beautifully. We’ll guide you through the best practices to ensure a flawlessly smooth and delectable dessert.
Immediately after removing the pudding from the heat, stir in 2 tablespoons of cold unsalted butter. This step is vital for preventing a skin from forming on the surface and adding a luxurious richness to the pudding. Work the butter in thoroughly until it’s completely incorporated and the pudding appears glossy. The butter acts as an emulsifier, helping to create a smoother, more velvety texture.
Next, pour the hot pudding into a medium-sized bowl. This allows for quicker cooling and prevents the pudding from continuing to cook in the saucepan. A wider surface area promotes more efficient heat dissipation.
Press a piece of plastic wrap directly onto the surface of the pudding. This prevents a skin from forming, a common problem with custards and puddings. Make sure the plastic wrap is in direct contact with the pudding to eliminate air pockets.
Allow the pudding to cool completely at room temperature. This usually takes about 30-45 minutes, depending on the ambient temperature and the volume of pudding. During this time, the cornstarch will continue to hydrate, leading to a thicker and more stable pudding. Resist the urge to speed up this process by placing it in the refrigerator immediately; doing so can result in an unevenly set pudding.
Once the pudding has cooled to room temperature, refrigerate it for at least 2-3 hours, or preferably overnight. This allows the pudding to fully set and develop its rich, creamy texture. The longer it chills, the firmer it will become. If you’re short on time, 2 hours is sufficient, but overnight refrigeration will yield the best results.
Before serving, gently stir the pudding. This will break up any slight settling that may have occurred during refrigeration and ensure a uniform consistency. Avoid over-stirring, as this can incorporate too much air and make the pudding less smooth.
Professional Tip: For an extra-smooth pudding, strain the cooled pudding through a fine-mesh sieve before chilling. This removes any lumps or un-dissolved cornstarch particles, resulting in a truly luxurious texture. This step is optional but highly recommended for perfectionists!
Important Note: The setting time might vary slightly depending on the type and quantity of cornstarch used, and the ambient temperature. If you’re concerned about the setting, you can always add a tiny bit more cornstarch (1/2 teaspoon at a time) to the mixture before cooking, but be careful not to add too much, as it can make the pudding taste starchy.
Following these steps will ensure your homemade chocolate pudding achieves its optimum texture and flavor. Enjoy!
Serving Suggestions
Your homemade chocolate pudding is now ready, and the possibilities for serving are endless! From simple elegance to decadent indulgence, we’ve compiled some suggestions to make your pudding shine.
Classic Simplicity: The beauty of a truly great chocolate pudding lies in its simplicity. Serve it chilled directly from the refrigerator in individual dessert glasses or bowls. A generous 1/2 cup to 3/4 cup serving per person is perfect. Consider garnishing each portion with a dollop of freshly whipped cream (about 1-2 tablespoons) for a touch of lightness and sweetness.
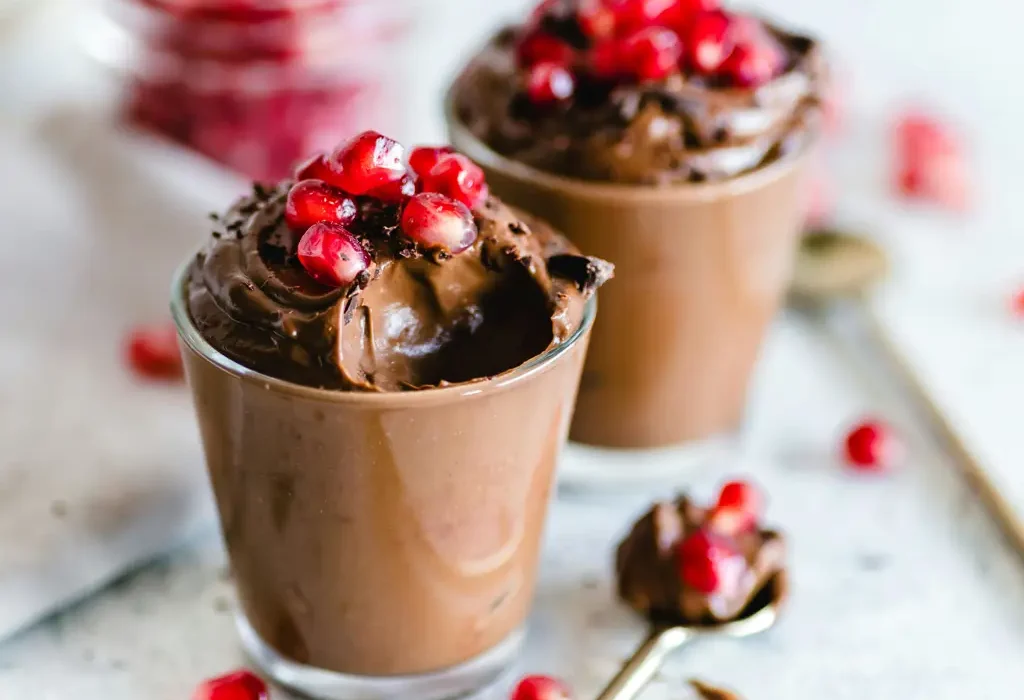
Elevated Elegance: For a more sophisticated presentation, layer your pudding with other delicious components. A layer of crushed chocolate cookies (about 1/4 cup per serving) at the bottom of your glass provides a delightful textural contrast. You could also layer in fresh berries (1/4 cup mixed berries, such as raspberries and blueberries) for a burst of tartness that complements the rich chocolate. Finish with a dusting of cocoa powder (1/2 teaspoon) for a visually appealing and flavourful touch.
Decadent Dessert: Transform your pudding into a truly decadent dessert by incorporating elements of other classic treats. A scoop of vanilla bean ice cream (about 1/2 cup) nestled on top of your pudding creates a cold, creamy contrast that is heavenly. Alternatively, consider a swirl of caramel sauce (2 tablespoons) for a salty-sweet combination that’s irresistible. A sprinkle of chopped nuts (1 tablespoon of toasted pecans or almonds) adds a satisfying crunch.
Pudding Parfaits: For a fun and visually appealing presentation, build pudding parfaits. Layer your chocolate pudding with crushed graham crackers (about 1/4 cup), whipped cream (2 tablespoons), and chocolate shavings (1 tablespoon) in a tall glass or parfait cup. Repeat the layers for a visually stunning dessert. Remember to chill the parfait for at least 30 minutes before serving for optimal enjoyment.
Chocolate Pudding Cups: For a portable and convenient option, portion your pudding into small, individual cups. These are perfect for parties, potlucks, or as a grab-and-go treat. You can use small plastic cups or even mini mason jars for a rustic charm. Decorate the tops with a sprinkle of chocolate shavings or a small chocolate candy.
Serving Temperature: For the best flavour and texture, always serve your chocolate pudding chilled. Allow it to cool completely before refrigerating for at least 2 hours, or preferably overnight, to allow the flavours to meld and the pudding to set properly.
Important Note: Adjust the quantities of garnishes and additions to suit your personal preferences and the size of your servings. Remember to always use fresh, high-quality ingredients for the best results. Enjoy!
Recommendations for Homemade Chocolate Pudding
This homemade chocolate pudding recipe is incredibly versatile and can be adapted to suit various tastes and dietary needs. To achieve the richest, smoothest texture, ensure your chocolate is of good quality. Using bittersweet or semisweet chocolate will provide a more intense chocolate flavor than using milk chocolate. Experiment with different types of chocolate to find your preferred taste profile. For a richer, more decadent pudding, consider adding a tablespoon of strong brewed coffee or espresso to the mixture.
Serving Suggestions: The possibilities are endless! Serve your chocolate pudding chilled in individual ramekins or a larger bowl. Garnish with whipped cream, a sprinkle of cocoa powder, chocolate shavings, chopped nuts (like pecans or walnuts), or fresh berries for a beautiful presentation and added flavor. A dusting of sea salt can surprisingly enhance the chocolate flavor. For a more sophisticated touch, consider serving it in elegant dessert glasses. You can also layer it with other desserts, such as crushed cookies or crumbled brownies, for a delicious parfait.
Storage Conditions: Store leftover chocolate pudding in an airtight container in the refrigerator for up to 3 days. The pudding will thicken slightly as it chills. To maintain the smoothest texture, give it a good stir before serving. Avoid freezing the pudding, as it may alter its texture and flavor significantly.
Complementary Dishes: This rich and decadent chocolate pudding pairs beautifully with a variety of dishes. It’s a perfect ending to a hearty meal, complementing dishes such as grilled chicken, roasted meats, or even lighter fare like salads with a vinaigrette dressing. For a truly indulgent experience, serve it alongside fresh baked goods like shortbread cookies, chocolate chip cookies, or even a slice of pound cake. The contrast in textures and flavors will create a delightful culinary experience.
Nutritional Information (per serving, approximate): The exact nutritional information will vary depending on the specific ingredients and quantities used. However, a typical serving of homemade chocolate pudding might contain approximately 250-300 calories, 10-15 grams of fat, 30-40 grams of carbohydrates, and 5-7 grams of protein. This is a rough estimate, and it’s recommended to use a nutrition calculator with your specific recipe ingredients for a more accurate analysis. Remember that the nutritional content can be adjusted by using alternative ingredients, such as low-fat milk or sugar substitutes.
Dietary Adaptations: This recipe can be easily adapted for various dietary needs. For a vegan version, use plant-based milk and vegan butter. For those with dairy sensitivities, use a dairy-free milk alternative like almond milk or soy milk. To reduce the sugar content, use a sugar substitute or reduce the amount of sugar called for in the recipe. Always check ingredient labels to ensure they meet your specific dietary requirements.