The humble chicken burrito, a seemingly simple culinary creation, boasts a surprisingly rich and complex history intertwined with the vibrant tapestry of Mexican-American culture. While pinpointing its exact origin is difficult, its evolution is a delicious blend of Mexican traditions and American ingenuity. The story begins with the tortilla, a staple of Mexican cuisine for centuries, made from corn or wheat flour. These flatbreads, readily available and incredibly versatile, formed the foundation for countless dishes, including tacos and enchiladas. The filling, however, underwent a significant transformation as Mexican ingredients and techniques blended with American preferences.
The rise of the burrito as a widely popular food item is largely a 20th-century phenomenon. While variations of filled tortillas existed in Mexico for much longer, the modern burrito, particularly the large, filled variety we often see today, developed largely in the United States, particularly in the Southwest. Many credit Northern New Mexico with early iterations, with street vendors and small restaurants serving flavorful filled tortillas. The exact inventor remains a mystery, lost in the mists of time and numerous family recipes. However, its popularity exploded in the latter half of the 20th century, fueled by the fast-food industry and the ever-increasing demand for convenient, satisfying meals.
The chicken burrito, a specific variation, further illustrates this adaptation. The use of chicken, a readily available and relatively inexpensive protein source in the US, became a popular filling choice, allowing for a wider accessibility and affordability compared to more traditional fillings. This adaptation is a testament to the dynamism of food culture, showcasing how dishes evolve to meet the tastes and needs of different populations. Today, the chicken burrito is a ubiquitous presence in American cuisine, a staple of lunch counters, casual dining establishments, and home kitchens alike. Statistics show that the burrito market in the US is a multi-billion dollar industry, with chicken burritos comprising a significant portion of that market share. This incredible growth underscores the enduring appeal of this simple yet satisfying dish.
Beyond its economic impact, the chicken burrito’s cultural significance lies in its ability to transcend geographical and socioeconomic boundaries. It’s a dish that unites people from diverse backgrounds, a reflection of the melting pot that is American culture. From upscale restaurants offering gourmet versions to humble street vendors serving classic recipes, the chicken burrito remains a testament to the power of food to connect and delight. Its adaptability – easily customizable with various sauces, toppings, and vegetables – further solidifies its place as a beloved and enduring culinary icon. Making your own chicken burritos at home allows you to explore this rich history and create a dish both personal and delicious.
Ingredients and Measurements
Creating delicious homemade chicken burritos hinges on using fresh, high-quality ingredients and precise measurements. Below, you’ll find a detailed list to guide you through the process. Remember to adjust quantities based on the number of burritos you’re making.
For the Chicken Filling:
- 1.5 lbs boneless, skinless chicken breasts: Choose chicken breasts that are plump and firm to ensure a juicy and flavorful filling. Avoid breasts that appear dry or discolored. You can substitute with thighs for a richer flavor, but adjust cooking time accordingly.
- 1 tbsp olive oil: This provides the base for sautéing the chicken and adds a subtle richness. You can substitute with avocado oil or another high-heat oil.
- 1 medium onion, chopped: Yellow or white onions work well; red onions will impart a slightly sharper flavor. Ensure the onion is finely chopped for even cooking and distribution throughout the filling.
- 2 cloves garlic, minced: Freshly minced garlic provides the best flavor. If using pre-minced garlic, use a slightly smaller amount as it’s often more potent.
- 1 (15-ounce) can black beans, rinsed and drained: Rinsing the beans removes excess sodium and starch, resulting in a less mushy filling. You can substitute with pinto beans or kidney beans, if desired.
- 1 (15-ounce) can corn, drained: Using canned corn is convenient; however, you can use fresh or frozen corn for a brighter, sweeter flavor. If using frozen, thaw completely before adding to the filling.
- 1 (10-ounce) can diced tomatoes and green chilies (Rotel), undrained: This adds a spicy kick and vibrant color to the filling. For a milder flavor, drain some of the liquid. Alternatively, you can use diced tomatoes and add your preferred chili peppers separately.
- 1 tbsp chili powder: Adjust this amount to your preferred spice level. Using a blend of chili powders, such as ancho and chipotle, can add complexity to the flavor profile.
- 1 tsp cumin: Ground cumin adds warmth and earthiness. Toasted cumin seeds will provide a more intense flavor.
- 1/2 tsp smoked paprika: Smoked paprika adds a smoky depth of flavor. If you don’t have smoked paprika, you can substitute with regular paprika, but the flavor will be less intense.
- 1/4 tsp cayenne pepper (optional): This adds heat; adjust the amount based on your spice preference. Omit if you prefer a milder filling.
- Salt and pepper to taste: Season generously throughout the cooking process.
For the Burritos:
- 12 large flour tortillas: Choose soft flour tortillas for easy wrapping. Burrito-sized tortillas are ideal; however, you can use larger tortillas and make larger burritos.
- Toppings of your choice: Shredded cheese (cheddar, Monterey Jack), sour cream, guacamole, salsa, lettuce, etc. The possibilities are endless! Prepare your toppings before assembling the burritos for efficient assembly.
Important Note: Accurate measurements are crucial for achieving the desired flavor and consistency. Use a kitchen scale for precise measurements, especially for the spices, for the best results. Always taste and adjust seasonings as needed throughout the cooking process.
Equipment Checklist
Making delicious homemade chicken burritos requires the right tools. This checklist ensures you have everything you need for a smooth and efficient cooking process, from preparation to serving. Don’t underestimate the importance of having the proper equipment; it significantly impacts the quality and ease of your burrito-making experience.
Cutting & Preparation: You’ll need a sharp chef’s knife (approximately 8-inch blade) for precise cutting of vegetables and chicken. A dull knife is dangerous and inefficient. A good quality cutting board, at least 12×15 inches, is essential to prevent damage to your countertops and provide ample space for chopping. Consider using two cutting boards – one for raw chicken and another for vegetables – to avoid cross-contamination. A sturdy vegetable peeler will make quick work of prepping onions and other vegetables. For efficient mincing of garlic and herbs, a garlic press and a small, sharp paring knife are highly recommended.
Cooking Utensils: A large skillet (12-inch diameter) is perfect for cooking the chicken and sautéing the vegetables. Ensure it’s oven-safe if you plan to finish the chicken in the oven. You’ll need a pair of tongs for easily flipping the chicken and vegetables. A sturdy wooden spoon or spatula is ideal for stirring and scraping the bottom of the pan. A large pot (at least 6-quart capacity) is necessary if you’re boiling or steaming the chicken. Consider using a thermometer to ensure your chicken reaches a safe internal temperature of 165°F (74°C).
Measuring Tools: Accurate measurements are crucial for consistent results. Invest in a set of reliable measuring cups and spoons. A kitchen scale is also beneficial, particularly for measuring spices and accurately portioning the chicken. Having both liquid and dry measuring cups will prevent errors and improve the overall flavor profile of your burritos.
Serving & Assembly: A large mixing bowl (at least 5-quart capacity) is needed for combining the cooked chicken and other burrito fillings. You’ll need a warm tortilla warmer or a microwave-safe plate to keep your tortillas pliable. Having several plates handy will help with efficient assembly. Consider using a small bowl for your toppings, such as salsa, sour cream, and guacamole. Aluminum foil is useful for wrapping finished burritos for easy handling and storage.
Cleaning & Storage: Remember the importance of cleaning as you go. Have a sponge, dish soap, and a dish rack readily available. Plastic wrap and airtight containers are necessary for storing leftover ingredients and finished burritos. Proper food safety is paramount. Wash your hands frequently, and sanitize your cutting boards and utensils after handling raw chicken.
Optional but Recommended: A food processor can significantly speed up the preparation process, especially when chopping vegetables. A stand mixer can be helpful for making larger batches of the filling. If you’re making a significant quantity of burritos, consider investing in a tortilla press for perfectly sized and shaped tortillas.
In summary: By having this equipment ready beforehand, you’ll streamline the burrito-making process, ensuring a more enjoyable and efficient cooking experience. Investing in quality tools will pay off in the long run, leading to better results and a more satisfying culinary journey.
Chicken Preparation (Marination & Cooking)
The success of your chicken burritos hinges on perfectly cooked and flavorful chicken. This section details the marination and cooking process to ensure tender, juicy, and intensely delicious chicken every time.
Marination: We’ll be using a simple yet effective marinade that balances acidity, spice, and savory notes. For approximately 1.5 lbs of boneless, skinless chicken breasts, you’ll need:
- 1/2 cup lime juice (about 2-3 limes)
- 1/4 cup olive oil
- 2 tablespoons chili powder
- 1 tablespoon cumin
- 1 teaspoon smoked paprika
- 1 teaspoon garlic powder
- 1/2 teaspoon onion powder
- 1/2 teaspoon salt
- 1/4 teaspoon black pepper
In a medium bowl, whisk together all the marinade ingredients until well combined. Ensure the spices are thoroughly mixed to avoid pockets of intense spice or blandness. Cut the chicken breasts into 1-inch cubes. Add the chicken to the marinade, ensuring each piece is coated evenly. Cover the bowl with plastic wrap and refrigerate for at least 30 minutes, or preferably 2-4 hours. The longer the chicken marinates, the more flavorful it will be, but 30 minutes is sufficient for a quick meal.
Cooking: There are several ways to cook the marinated chicken; we’ll outline two popular methods: skillet cooking and baking.
Skillet Cooking: Heat 1 tablespoon of olive oil in a large skillet over medium-high heat. Once the oil is hot, add the marinated chicken in a single layer, avoiding overcrowding. Overcrowding will result in steaming rather than browning, leading to less flavorful chicken. Cook for 5-7 minutes per side, or until the chicken is cooked through and has a nice golden-brown crust. Use a meat thermometer to ensure the internal temperature reaches 165°F (74°C).
Baking: Preheat your oven to 400°F (200°C). Spread the marinated chicken in a single layer on a baking sheet lined with parchment paper. Ensure the chicken pieces are not touching to allow for even cooking. Bake for 20-25 minutes, or until the chicken is cooked through and reaches an internal temperature of 165°F (74°C). You can flip the chicken halfway through for even browning.
Important Note: Regardless of your cooking method, always use a meat thermometer to ensure the chicken is cooked to a safe internal temperature of 165°F (74°C). Undercooked chicken can be dangerous, so don’t skip this crucial step. Once cooked, remove the chicken from the heat and let it cool slightly before using it in your burritos. Shred the chicken with two forks for easier burrito assembly.
Now you have perfectly cooked and flavorful chicken ready to be incorporated into your delicious homemade chicken burritos!
Rice Preparation
Perfectly cooked rice is the backbone of a delicious chicken burrito. While you can certainly use pre-cooked rice, making your own allows for greater control over flavor and texture. This recipe uses long-grain white rice, but feel free to experiment with brown rice or other varieties, adjusting cooking times accordingly. Remember to always rinse your rice before cooking – this removes excess starch and helps prevent stickiness.
For this recipe, we’ll be making approximately 3 cups of cooked rice, which is sufficient for 6-8 burritos. Begin by measuring 1 cup of long-grain white rice. Give the rice a thorough rinse under cold running water in a fine-mesh sieve until the water runs clear. This step is crucial for preventing a gummy texture.
In a medium saucepan, combine the rinsed rice with 2 cups of water and a generous pinch of salt (approximately 1/2 teaspoon). The water-to-rice ratio is essential for fluffy rice; using too much water will result in mushy rice, while too little will leave it dry and hard. You can also add other flavorings at this stage, such as a bay leaf or a small piece of onion for a subtle savory note. However, for a clean taste that complements the chicken and other burrito fillings, sticking to salt is often preferred.
Bring the water to a rolling boil over high heat. Once boiling, immediately reduce the heat to the lowest setting, cover the saucepan tightly with a lid, and simmer for 15-18 minutes. Do not lift the lid during cooking, as this will release steam and affect the cooking process. The rice should absorb all the water during this time.
After 15-18 minutes, remove the saucepan from the heat and let it sit, covered, for another 5-10 minutes. This allows the rice to steam and finish cooking evenly. This resting period is crucial for achieving that perfectly fluffy texture. After this resting period, gently fluff the rice with a fork to separate the grains. Avoid over-fluffing, as this can break the grains and make the rice mushy.
Once the rice has cooled slightly, you can transfer it to a large bowl and set it aside until you’re ready to assemble your burritos. If you’re making the rice ahead of time, store it in an airtight container in the refrigerator for up to 3 days. Reheat gently before using, either in the microwave or on the stovetop, to prevent it from drying out. Adding a tablespoon or two of water while reheating can help restore moisture.
Remember, the success of your rice hinges on precise measurements, consistent simmering, and that crucial resting period. Follow these steps carefully and you’ll have perfectly cooked rice every time, making your homemade chicken burritos truly exceptional.
Bean Preparation (if using)
Adding beans to your chicken burritos adds a fantastic boost of protein, fiber, and flavor. While you can certainly use canned beans for convenience, cooking your own beans from dried offers a superior taste and texture. This section details both methods.
Using Canned Beans: If opting for canned beans, choose high-quality brands with minimal added sodium. Rinse the beans thoroughly under cold water before using. This crucial step removes excess sodium and starch, preventing a slimy texture in your burritos. A 15-ounce can of beans will generally be sufficient for 4-6 burritos, depending on your desired bean-to-chicken ratio. After rinsing, you can gently heat the beans in a saucepan with a tablespoon of olive oil and a pinch of your favorite seasonings (cumin, chili powder, garlic powder are all excellent choices) for about 5-7 minutes, or until warmed through. Avoid overcooking, as this can lead to mushy beans.
Cooking Dried Beans from Scratch: For the best flavor and texture, start with dried beans. This method requires more time but delivers a superior result. Begin by sorting through your dried beans to remove any debris or damaged beans. Then, rinse them thoroughly under cold water. For a 1-cup serving of cooked beans (enough for approximately 2 burritos), use about ½ cup of dried beans.
Soaking the beans overnight significantly reduces cooking time and improves digestibility. Place the dried beans in a bowl, cover them with at least 2 inches of cold water, and let them soak for at least 8 hours, or preferably overnight. After soaking, drain the water and rinse the beans again. Combine the soaked beans with about 4 cups of fresh water (adjust according to bean type and desired consistency; some beans absorb more water than others) in a large pot. Bring the mixture to a boil, then reduce heat to low, cover, and simmer for 45-60 minutes, or until the beans are tender but not mushy. Check the beans frequently during cooking and add more water if necessary to prevent sticking or burning.
Seasoning your homemade beans is key to enhancing their flavor profile. Once cooked, drain any excess water and mash about 1/3 of the beans with a potato masher or fork for a slightly chunky texture. This adds body and prevents the beans from becoming overly smooth. Stir in 1 tablespoon of olive oil, ½ teaspoon of cumin, ¼ teaspoon of chili powder, and a pinch of salt and pepper. Adjust seasonings to taste. Don’t be afraid to experiment with different spices and herbs to create your own signature bean flavor. Adding a squeeze of lime juice just before serving adds a vibrant touch.
Important Note: Always taste your beans before adding them to your burritos and adjust seasonings as needed. Properly cooked beans should be tender and easily mashed with a fork. Overcooked beans will be mushy and unpleasant. Undercooked beans will be hard and potentially indigestible.
Salsa and Other Topping Preparation
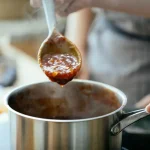
The success of your homemade chicken burritos hinges not only on the delicious chicken filling but also on the vibrant and flavorful toppings. A well-made salsa and a selection of complementary additions elevate the burrito experience from good to unforgettable. Let’s delve into creating the perfect accompaniments.
Classic Pico de Gallo: This fresh and zesty salsa is a must-have. For a medium-sized batch (enough for 6-8 burritos), you’ll need: 2 ripe tomatoes (diced), ½ red onion (finely diced), ½ cup chopped cilantro, 1 jalapeño pepper (seeded and minced – adjust to your spice preference), 2 tablespoons lime juice, 1 teaspoon salt, and ½ teaspoon cumin. Combine all ingredients in a medium bowl, gently toss, and let it sit for at least 15 minutes to allow the flavors to meld. Tip: For a smoother texture, you can finely chop the tomatoes or briefly pulse them in a food processor before mixing.
Guacamole: Creamy guacamole adds a luxurious touch. Mash 3 ripe avocados with ¼ cup chopped red onion, 2 tablespoons lime juice, 1 tablespoon chopped cilantro, ½ teaspoon salt, and ¼ teaspoon cumin. Important: Use a fork to mash the avocados, leaving some chunks for texture. Don’t over-mash, as it can make the guacamole watery. Add a pinch of cayenne pepper for extra heat, if desired. To prevent browning, cover the guacamole with plastic wrap, pressing the wrap directly onto the surface to minimize air exposure.
Sour Cream or Mexican Crema: A dollop of creamy sour cream or Mexican crema provides a cool counterpoint to the spicy salsa and warm chicken. For a homemade Mexican crema, combine 1 cup heavy cream, 2 tablespoons lime juice, and ½ teaspoon salt in a bowl. Whisk until slightly thickened. Refrigerate for at least 30 minutes to allow the flavors to blend. Recommendation: If using store-bought sour cream, opt for a full-fat variety for a richer flavor and creamier texture.
Shredded Cheese: A generous sprinkle of shredded cheese is essential. Monterey Jack, cheddar, or a Mexican blend are all excellent choices. Consider this: Pre-shredded cheese often contains cellulose which can affect the melt. For best results, shred your own cheese using a box grater. Approximately 1 ½ cups of shredded cheese should be sufficient for 6-8 burritos.
Other Optional Toppings: Don’t limit yourself! Consider adding other flavorful elements like pickled jalapeños for an extra kick, finely diced bell peppers for sweetness and color, or a sprinkle of toasted sesame seeds for added crunch. Professional Tip: Prepare all your toppings ahead of time and store them separately in airtight containers in the refrigerator. This allows you to assemble your burritos efficiently and keeps everything fresh.
Storage: Leftover salsa and guacamole can be stored in airtight containers in the refrigerator for up to 3 days. Sour cream and Mexican crema will also keep for several days in the refrigerator. Remember to always taste and adjust seasoning to your preference before serving.
Recommendations for Your Homemade Chicken Burritos
To elevate your homemade chicken burrito experience, consider these recommendations for preparation, serving, storage, and pairings. Remember that nutritional information is an estimate and can vary based on specific ingredients and portion sizes.
Serving Suggestions: For a truly satisfying meal, don’t underestimate the power of presentation and accompaniments. Serve your burritos warm, either straight from the skillet or briefly reheated in the microwave or oven. Consider cutting them in half diagonally for easier handling and a more visually appealing presentation. A simple garnish of fresh cilantro and a dollop of sour cream or Mexican crema adds a vibrant pop of color and flavor. For a more substantial meal, offer a side of Mexican rice and refried beans. The contrasting textures and flavors complement the burrito perfectly.
Storage Conditions: Properly storing your leftover chicken burritos is crucial to maintain their quality and safety. Allow them to cool completely before storing. Wrap individual burritos tightly in plastic wrap, followed by aluminum foil for added protection, or use airtight containers. Store refrigerated burritos for up to 3 days. To freeze, wrap each burrito tightly in plastic wrap and then place it in a freezer-safe bag or container. Frozen burritos can be stored for up to 3 months. When reheating, thaw frozen burritos overnight in the refrigerator and then reheat in the microwave or oven until thoroughly heated. Ensure the internal temperature reaches 165°F (74°C) to guarantee safety.
Complementary Dishes: To create a well-rounded Mexican meal, consider serving your chicken burritos with a variety of complementary dishes. A simple side salad with a lime vinaigrette adds freshness and lightness to the meal. Guacamole, salsa, and pico de gallo offer diverse flavor profiles and textures that complement the richness of the chicken filling. For a spicier kick, consider serving a side of jalapeños or a spicy salsa. Chips and a creamy cheese dip are also a classic pairing that is always a crowd-pleaser. Don’t forget a refreshing beverage, such as horchata or a Mexican Coke, to complete the dining experience.
Nutritional Information (Approximate per burrito, based on a 10-inch burrito with 4oz chicken): These values are estimates and will vary depending on the specific ingredients used. This information is for guidance only, and it’s always recommended to use a nutrition calculator with your specific recipe for accurate results.
Calories: Approximately 450-600 calories
Protein: Approximately 30-40 grams
Fat: Approximately 20-30 grams
Carbohydrates: Approximately 50-70 grams
Fiber: Approximately 8-12 grams
Sodium: Varies significantly depending on ingredients used. Try to use lower-sodium ingredients where possible.
Important Note: These are estimates. The actual nutritional content will depend on the specific ingredients and quantities used in your recipe. For precise nutritional information, use a nutrition calculator and input your exact ingredients and measurements.