Homemade almond milk: a creamy, subtly sweet beverage with a history as rich and nuanced as its flavor profile. While its modern popularity is undeniable – the global almond milk market is projected to reach $30 billion by 2028, according to a report by Grand View Research – its origins stretch back centuries. The earliest forms of almond milk weren’t exactly the shelf-stable cartons we see today; instead, they were likely a simple mixture of almonds and water, a resourceful way to utilize readily available ingredients. These early iterations served a crucial purpose, providing a plant-based alternative to dairy milk in regions where access to animal products was limited or culturally restricted. This ingenuity highlights the enduring adaptability of almond milk, evolving from a practical necessity to a sought-after beverage and ingredient.
The precise origin of almond milk is difficult to pinpoint, but its historical significance is evident across various cultures. Ancient Mediterranean civilizations, including the Greeks and Romans, are known to have utilized almonds in their culinary traditions, and it’s plausible that early forms of almond milk existed within these cultures. However, it was likely in the Middle East and parts of Asia that almond milk truly flourished, becoming an integral part of vegetarian and vegan diets. These regions often experienced periods of drought or limited access to dairy, making almond milk a crucial source of sustenance and nutrients. The versatility of almonds—easily ground into paste and diluted with water—made it an ideal replacement for milk in recipes, offering a similar creamy texture and nutritional value, albeit with a distinct flavor.
Today, almond milk’s cultural significance continues to evolve. It’s no longer just a dietary necessity; it’s a symbol of conscious consumption and health-conscious lifestyles. Its popularity has skyrocketed in recent years, driven by factors such as increased awareness of lactose intolerance, the rise of veganism, and a growing demand for plant-based alternatives to traditional dairy products. The versatility of almond milk extends beyond its use as a beverage; it features heavily in coffee shops, is incorporated into various recipes (from smoothies to baking), and even serves as a base for vegan cheeses and yogurts. This widespread adoption underscores its adaptability and its place in the modern culinary landscape, highlighting its transformation from a simple, functional beverage to a versatile and widely appreciated ingredient.
This recipe will guide you through the process of making your own homemade almond milk, allowing you to control the ingredients and sweetness, ensuring a fresh, flavorful, and satisfying result. You’ll discover how easy it is to create a delicious, healthy, and cost-effective alternative to store-bought varieties, while understanding the rich history and cultural significance behind this increasingly popular beverage.
Ingredients and Measurements
Making homemade almond milk is surprisingly simple and allows for a great deal of customization. The core ingredients are few, but the quality of these ingredients significantly impacts the final product. Let’s explore each component in detail, including recommended quantities and practical tips for achieving the best results.
Almonds: The star of the show! You’ll need 1 cup of raw, unsalted almonds. Avoid using blanched almonds as the skins contribute to the creamy texture and nutritional value of the milk. If you prefer a smoother milk, you can soak the almonds for at least 4 hours, or preferably overnight, in filtered water. This soaking process softens the almonds, making them easier to blend and resulting in a creamier, less gritty final product. Remember to rinse the almonds thoroughly before soaking to remove any debris.
Water: The quantity of water is adjustable depending on your desired consistency. Start with 4 cups of filtered water. This will produce a milk that’s relatively creamy. If you prefer a thinner milk, add more water, a half cup at a time, until you reach your preferred consistency. Using filtered water is recommended to avoid any unpleasant tastes or odors from tap water that might interfere with the delicate flavor of the almond milk.
Sweetener (Optional): Many people prefer to sweeten their homemade almond milk. The amount is entirely to your preference. Consider using 2-4 tablespoons of your preferred sweetener. Popular choices include maple syrup, agave nectar, or honey. Start with the lower end of the range (2 tablespoons) and add more to taste. Remember that the sweetness will intensify as the almond milk chills.
Salt (Optional): A pinch of salt (about 1/4 teaspoon) enhances the flavor of the almond milk, balancing the sweetness and adding a subtle savory note. This is completely optional, but highly recommended by many almond milk enthusiasts. It helps to bring out the best flavors in the almonds and prevents the milk from tasting overly sweet or bland.
Vanilla Extract (Optional): For a richer, more decadent flavor, add 1 teaspoon of pure vanilla extract. This is a fantastic way to elevate the taste of your homemade almond milk, making it suitable for both drinking straight and using in recipes. Be mindful of the quality of your vanilla extract, as it significantly impacts the final flavor profile.
Other Additions (Optional): Feel free to experiment with other flavorings! A dash of cinnamon, cardamom, or cocoa powder can add interesting layers of complexity. You can also add a few pitted dates for extra sweetness and thickness. Remember to adjust the quantity of water accordingly if adding thicker ingredients.
Important Note: These measurements are a guideline. Adjust the quantities to your liking. The beauty of homemade almond milk is the ability to personalize it to match your taste preferences perfectly.
Soaking the Almonds
Soaking almonds before making almond milk is a crucial step that significantly improves the final product’s taste, texture, and nutritional value. This process, known as soaking and sprouting, breaks down phytic acid, an antinutrient that can hinder the absorption of minerals like calcium, magnesium, and zinc. It also softens the almonds, making them easier to blend into a smooth, creamy milk. Without soaking, your almond milk might taste bitter and have a gritty texture.
For this recipe, we’ll use 1 cup (approximately 200 grams) of raw almonds. Avoid using blanched almonds, as the soaking process is designed to remove the skins, and blanched almonds have already had their skins removed. Choose high-quality, raw almonds to maximize the nutritional benefits and flavor of your homemade almond milk.
Begin by rinsing your almonds thoroughly under cold, running water. This helps remove any surface debris or potential contaminants. Use a fine-mesh sieve to ensure all the loose particles are washed away. Thorough rinsing is essential for food safety.
Once rinsed, place the almonds in a large bowl. Cover them completely with filtered or spring water. Avoid using chlorinated tap water, as the chlorine can affect the taste of your almond milk. Add about 2-3 cups of water, ensuring the almonds are fully submerged.
Now, the soaking process begins. For optimal results, soak the almonds for at least 8 hours, ideally overnight (12-16 hours). This allows ample time for the phytic acid to be broken down and the almonds to soften considerably. Longer soaking times generally lead to a creamier, smoother milk, but you can adjust this based on your schedule.
After the soaking period, drain the water from the bowl. You’ll notice the almonds have expanded significantly and appear plump. Give them a quick rinse again to remove any loose skins that might have come off during soaking. This rinsing step helps prevent any skin fragments from ending up in your final almond milk, resulting in a smoother texture.
At this point, your almonds are ready for the next step in the almond milk making process – blending! Remember to always use fresh, high-quality ingredients for the best results. The soaking process is a simple yet vital step that elevates your homemade almond milk from good to exceptional.
Blending the Almonds
This section details the crucial step of blending your almonds to create the almond milk base. The process is straightforward, but attention to detail will significantly impact the final product’s texture and taste. We’ll be focusing on achieving a smooth, creamy consistency without any gritty bits.
First, you’ll need to measure out your almonds. For this recipe, we’re using 1 cup of raw almonds. It’s essential to use raw almonds, as blanched or roasted almonds will impact the flavor profile of your final almond milk. Before blending, soak the almonds in at least 4 cups of filtered water for a minimum of 8 hours, or preferably overnight. This soaking process significantly softens the almonds, making them easier to blend and resulting in a smoother, creamier texture. It also helps to break down enzyme inhibitors, making the nutrients more bioavailable.
After soaking, drain the almonds thoroughly. You can use a fine-mesh sieve or a colander to ensure all the excess water is removed. Leaving excess water in the mixture will dilute the final product and affect its richness. Once drained, add the almonds to your high-powered blender. A high-powered blender is highly recommended for this process; a standard blender may struggle to create a completely smooth almond milk.
Now, it’s time to add the liquid. We recommend adding 4 cups of fresh, filtered water to the blender along with the soaked almonds. You can adjust the water amount slightly depending on your desired consistency. For a thinner almond milk, add more water; for a thicker, creamier almond milk, add less. Start with the recommended amount and adjust as needed after blending.
Secure the lid of your blender tightly. Begin blending on a low speed to avoid splashing and to incorporate the almonds and water evenly. Gradually increase the speed to high and blend for at least 1-2 minutes, or until the mixture is completely smooth and creamy. You should not see any whole almonds or large almond pieces remaining. Scrape down the sides of the blender as needed to ensure all ingredients are thoroughly blended.
If you notice any small, gritty particles remaining after blending, you can strain the mixture through a nut milk bag or a fine-mesh sieve for an even smoother texture. This step is optional but highly recommended for a truly luxurious almond milk experience. However, be aware that straining will result in a slightly lower yield.
Once you’ve achieved your desired consistency, you’re ready to move on to the next stage of the process: straining and sweetening your homemade almond milk. Remember, the quality of your blending process directly impacts the overall quality of your final product, so take your time and ensure a completely smooth mixture before proceeding.
Straining the Almond Milk
After soaking and blending your almonds, the next crucial step is straining the mixture to separate the creamy almond milk from the almond pulp. This process significantly impacts the texture and quality of your final product. Proper straining yields a smooth, delicious almond milk free of gritty particles.
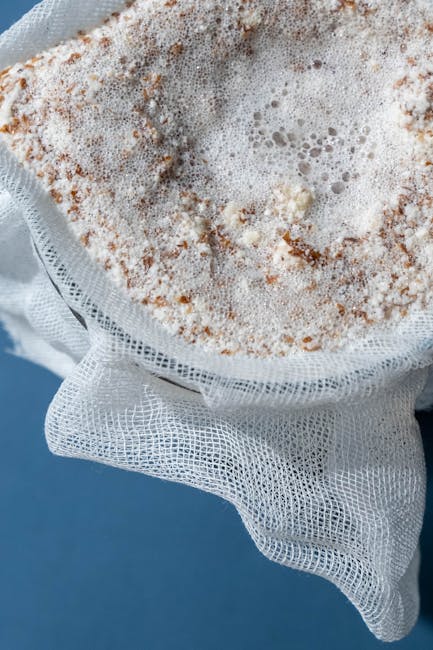
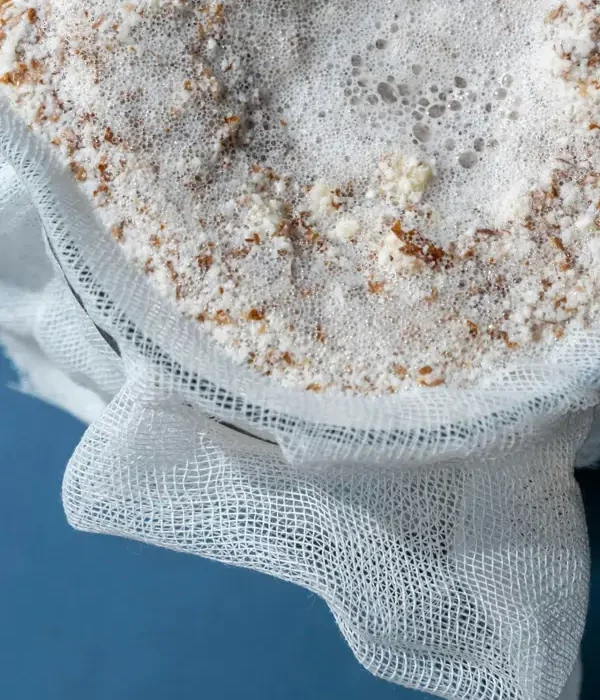
You’ll need a few key items for straining: a fine-mesh strainer, a cheesecloth (or nut milk bag), and a large bowl placed underneath to collect the strained milk. A nut milk bag is highly recommended as it provides a finer filtration than a standard strainer alone, resulting in a smoother, silkier almond milk. If using only a fine-mesh strainer, be prepared for a slightly more textured final product.
Begin by placing your fine-mesh strainer over the large bowl. If using a cheesecloth or nut milk bag, line the strainer with it. Ensure the cheesecloth or nut milk bag is securely fastened to prevent any accidental spills or leaks. It’s helpful to fold the cheesecloth or bag several times to create a thicker layer for more effective straining.
Slowly pour the blended almond mixture into the strainer. Avoid pouring too quickly, as this may overwhelm the strainer and lead to clogging. A steady, gentle stream is best. Use a spatula to help guide the mixture and ensure all of the liquid is transferred.
Once all the almond mixture is in the strainer, you’ll need to gently press on the pulp to extract as much almond milk as possible. Don’t squeeze too forcefully, as this can result in a bitter almond milk due to the release of excess oils from the pulp. Use a light, even pressure, working your way around the entire surface of the pulp. This process may take a few minutes.
After straining, you should have a significant amount of almond pulp remaining in the strainer. This pulp can be used in other recipes, such as muffins, granola, or even as a facial scrub. Don’t discard the pulp! It is a valuable byproduct rich in fiber and nutrients.
Once you’ve pressed out as much milk as you comfortably can, carefully remove the strainer and discard the used cheesecloth or nut milk bag (or clean it for later use). Your creamy, homemade almond milk should be waiting in the bowl below. You’ll notice that the amount of milk recovered will depend on the quantity of almonds used and the thoroughness of your straining process. Expect to yield approximately 4-6 cups of almond milk from 1 cup of raw almonds, depending on factors like the soaking time and the type of almonds used.
Now you’re ready to proceed with sweetening and flavoring your almond milk according to your preferences. Remember, the straining process is crucial for the overall quality and texture of your homemade almond milk, so take your time and be patient for the best results.
Sweetening and Flavoring (Optional)
While homemade almond milk is delicious on its own, adding sweeteners and flavorings can elevate it to a truly personalized beverage. This section explores various options and provides guidance on achieving your desired taste profile. Remember, sweetness and flavor are entirely optional; the base almond milk recipe is perfectly enjoyable without additions.
Sweeteners: The choice of sweetener depends on your dietary preferences and desired level of sweetness. A common starting point is using 1-2 tablespoons of sweetener per cup of almond milk, but adjust to your taste. Experiment with smaller amounts initially to avoid over-sweetening.
Maple Syrup: Provides a rich, complex sweetness with subtle caramel notes. Use 1-2 tablespoons of pure maple syrup per cup of almond milk. Avoid using pancake syrup, as it contains artificial ingredients.
Honey: Offers a slightly floral and intensely sweet flavor. One to two tablespoons per cup of almond milk is a good starting point. Note that honey should not be given to infants under one year of age.
Agave Nectar: Possesses a milder sweetness than honey or maple syrup with a slightly fruity undertone. Start with 1-2 tablespoons per cup and adjust to your liking. Agave nectar has a higher glycemic index than some other sweeteners, so use it in moderation.
Dates: Adding a few pitted Medjool dates (2-3 per cup of almond milk) during the blending process creates a naturally sweet and creamy almond milk. This method adds both sweetness and a slightly thicker texture.
Stevia or other sugar substitutes: These are excellent options for those watching their sugar intake. Use according to package directions, as the required amount varies significantly between brands. Start with a small amount, as the intensity of these sweeteners can be surprising.
Flavorings: Beyond sweetness, you can enhance the flavor of your almond milk with various extracts and spices. A few drops go a long way, so start with small amounts and taste as you go.
Vanilla Extract: A classic choice that complements the nutty flavor of almond milk. Add ½ – 1 teaspoon per cup of almond milk.
Spices: Experiment with cinnamon (½ – 1 teaspoon), cardamom (a pinch), nutmeg (a pinch), or even a dash of ginger for warming, aromatic notes. Remember that spices can be potent; start with small amounts and gradually increase to your preference.
Cocoa Powder: For a chocolate almond milk, add 1-2 tablespoons of unsweetened cocoa powder per cup of almond milk. You may need to adjust the sweetness accordingly.
Other Flavor Ideas: Consider adding a pinch of sea salt to enhance the overall flavor profile. For a more decadent treat, blend in a tablespoon of nut butter (almond, cashew, or peanut) for added creaminess and flavor.
Important Note: Always add sweeteners and flavorings after straining the almond milk to prevent clogging the strainer. Stir well to ensure even distribution of flavor.
Storage Instructions
Proper storage is crucial for maintaining the freshness and safety of your homemade almond milk. Improper storage can lead to spoilage, bacterial growth, and an unpleasant taste or smell. Follow these instructions carefully to enjoy your delicious almond milk for as long as possible.
Refrigeration is key. Once you’ve strained your homemade almond milk, immediately transfer it to an airtight container. Glass jars or food-grade plastic containers are ideal. Avoid using metal containers as they can react with the milk and affect its taste. Ensure the container is thoroughly clean and dry before pouring in the almond milk to prevent contamination.
Quantity matters. If you’ve made a large batch (for example, more than 4 cups), consider dividing it into smaller, more manageable containers. This allows for easier pouring and reduces the risk of spoilage. Using smaller containers also helps the milk chill down faster in the refrigerator.
Label and date. Always label your container with the date of preparation. This helps you track the freshness and ensures you consume your almond milk within its optimal shelf life. Homemade almond milk generally lasts for 3-5 days when refrigerated properly. After 5 days, it’s best to discard it, even if it still appears to be safe.
Refrigerate promptly. Do not leave your homemade almond milk at room temperature for extended periods. Bacteria multiply rapidly at room temperature, significantly shortening the shelf life and potentially increasing the risk of foodborne illness. Aim to refrigerate your almond milk within 1-2 hours of preparation.
Observe for spoilage signs. Before consuming, always check your almond milk for signs of spoilage. This includes: a sour or off-putting smell, curdling or separation, mold growth (visible fuzzy spots), or an unusual change in color or texture. If you notice any of these signs, discard the almond milk immediately. Do not risk consuming spoiled milk, as it can cause digestive upset or more serious health issues.
Freezing for longer storage. If you wish to store your almond milk for a longer period, you can freeze it. Pour the almond milk into freezer-safe containers, leaving about an inch of headspace to allow for expansion during freezing. Frozen almond milk can last for 2-3 months. When ready to use, thaw it overnight in the refrigerator. Note that the texture might slightly change after freezing, but it will still be safe and delicious to consume.
Important note: The shelf life of your homemade almond milk can be affected by several factors, including the freshness of the ingredients, the cleanliness of your equipment, and the temperature of your refrigerator. Always prioritize food safety and discard any milk that shows signs of spoilage.
By following these storage guidelines, you can enjoy your homemade almond milk safely and confidently for several days, maximizing its deliciousness and nutritional value.
Recommendations for Homemade Almond Milk
Homemade almond milk offers a delicious and healthy alternative to commercially produced varieties. To maximize its flavor and nutritional benefits, consider these recommendations:
Serving Suggestions: Enjoy your homemade almond milk in a variety of ways! It’s a fantastic base for smoothies, adding creaminess and a subtly nutty flavor. Use it in your morning cereal or oatmeal, replacing cow’s milk for a lighter, nuttier experience. It also works wonderfully in coffee and tea, providing a unique and subtly sweet twist. For a refreshing treat, try it chilled straight from the refrigerator, perhaps with a touch of honey or maple syrup for added sweetness. Get creative and experiment – it’s also great in baking recipes that call for milk, adding a distinct almond flavor to cakes, muffins, and pancakes.
Storage Conditions: Proper storage is crucial for maintaining the freshness and quality of your homemade almond milk. Store your almond milk in an airtight container in the refrigerator. It should remain fresh for 3-5 days. For longer storage, consider freezing your almond milk in ice cube trays or freezer-safe bags. Frozen almond milk can be stored for up to 3 months. Thaw frozen almond milk overnight in the refrigerator before using.
Complementary Dishes: The mild, nutty flavor of homemade almond milk pairs well with a wide range of dishes. It complements the sweetness of fruits in smoothies and parfaits. It enhances the savory notes of curries and soups, adding a creamy texture without overpowering other flavors. Consider using it in creamy pasta sauces or risottos for a unique twist. Its subtle sweetness also makes it a perfect accompaniment to breakfast dishes like pancakes, waffles, and French toast.
Nutritional Information (per 8-ounce serving, approximate values will vary based on recipe and ingredients): The nutritional content of homemade almond milk depends heavily on the recipe used, particularly the amount of almonds and water. However, a typical serving provides approximately 30-50 calories. It’s a good source of vitamin E and contains small amounts of calcium and vitamin D, depending on whether these are added to the recipe. It is also a source of healthy fats. Note: These are estimates, and the actual nutritional values may vary.
Calorie Reduction Tips: If you are watching your calorie intake, you can reduce the amount of almonds used in your recipe to decrease the calorie count. Alternatively, using more water will dilute the mixture and lower the calorie density. However, keep in mind that reducing the almond content will also reduce the creaminess and nutritional value.
Important Note: Always use high-quality almonds. Soaked almonds will produce a creamier, smoother milk. If you have any nut allergies, exercise caution when making and consuming almond milk. Consult a doctor or allergist if you have any concerns.
Enjoy your homemade almond milk! Experiment with different recipes and additions to find your perfect blend.