The Grilled Chicken Caesar Wrap—a seemingly simple yet incredibly popular culinary creation—boasts a surprisingly rich history interwoven with the evolution of two iconic dishes: the Caesar salad and the humble wrap. While pinpointing the exact origin of the grilled chicken Caesar wrap is difficult, its existence is a testament to our ever-evolving food culture, a culture of fusion and convenience. The Caesar salad itself, famously invented in 1924 by Italian-American chef Caesar Cardini in Tijuana, Mexico, quickly gained international acclaim. Its creamy dressing, crisp romaine lettuce, and crunchy croutons became a staple, demonstrating the power of simple ingredients expertly combined. The salad’s popularity skyrocketed, becoming a global phenomenon, with an estimated annual consumption in the US alone exceeding billions of servings.
The wrap, on the other hand, represents a more recent culinary innovation, reflecting modern demands for portability and convenience. While variations existed throughout history (think burritos or spring rolls), the modern flatbread wrap as a vehicle for various fillings gained significant traction in the latter half of the 20th century. Its versatility allowed for creative combinations, leading to the eventual marriage of the Caesar salad’s vibrant flavors with the ease of the wrap format. This fusion likely emerged in the fast-casual dining scene, a sector that experienced explosive growth in the late 20th and early 21st centuries, driven by busy lifestyles and a desire for quick, satisfying meals. Restaurants and food trucks quickly recognized the appeal of a pre-portioned, ready-to-eat meal that offered both taste and convenience.
The cultural significance of the Grilled Chicken Caesar Wrap lies in its adaptability and widespread appeal. It transcends geographical boundaries and cultural differences, offering a familiar and satisfying experience to a diverse range of consumers. Its popularity reflects our modern desire for convenient yet flavorful meals, showcasing a willingness to embrace culinary fusion and reinterpret classic dishes for contemporary palates. The wrap itself has become a symbol of on-the-go dining, a convenient alternative to traditional sit-down meals. The incorporation of grilled chicken adds a protein boost, further enhancing its nutritional value and making it a suitable option for a quick and healthy lunch or dinner. This recipe celebrates this cultural phenomenon by providing a step-by-step guide to creating a delicious and satisfying Grilled Chicken Caesar Wrap at home.
Ingredients and Measurements
This recipe yields two generous Grilled Chicken Caesar Wraps. Accurate measurements are crucial for achieving the perfect balance of flavors and textures. Use a kitchen scale for the most precise results, especially when measuring spices.
For the Grilled Chicken:
- 2 boneless, skinless chicken breasts (approximately 6 ounces each): Choose breasts that are evenly sized for consistent cooking. Avoid overly large breasts, as they may require longer grilling time and result in dry meat.
- 1 tablespoon olive oil: A high-quality extra virgin olive oil will enhance the chicken’s flavor.
- 1 teaspoon garlic powder: Freshly minced garlic can be substituted for a more intense garlic flavor. Use about 2 cloves, finely minced.
- 1/2 teaspoon paprika: Smoked paprika adds a delightful smoky depth; regular paprika works well too.
- 1/4 teaspoon salt: Adjust to your preferred level of saltiness. Taste the chicken before seasoning fully, as the salt content of pre-packaged chicken can vary.
- 1/4 teaspoon black pepper: Freshly ground black pepper is always best.
For the Caesar Salad:
- 4 cups romaine lettuce, chopped: Wash and thoroughly dry the lettuce to prevent a soggy wrap. Using a salad spinner is highly recommended.
- 1/2 cup Caesar dressing: Use your favorite store-bought or homemade Caesar dressing. The creamy texture of the dressing is essential for the wrap’s overall taste and consistency.
- 1/4 cup grated Parmesan cheese: Freshly grated Parmesan cheese provides the best flavor and melts beautifully.
- 2 tablespoons croutons: Homemade croutons are easy to make and far superior to store-bought versions. Alternatively, buy high-quality croutons.
For the Wrap:
- 2 large flour tortillas (10-12 inches): Choose tortillas that are soft and pliable. Warming the tortillas slightly before assembling the wraps improves their texture and prevents tearing.
Optional additions: Consider adding cherry tomatoes (halved), sliced avocado, or a sprinkle of fresh herbs like parsley or chives for extra flavor and visual appeal. Remember to adjust the quantities according to your preferences.
Chicken Marinade Preparation
Creating a flavorful marinade is crucial for tender and juicy grilled chicken. This recipe uses a classic combination of lemon, garlic, and herbs, but feel free to adapt it to your taste preferences. We’ll be marinating approximately 1.5 lbs of boneless, skinless chicken breasts for this recipe. Ensure your chicken is completely thawed before beginning the marinating process.
First, in a medium-sized bowl, whisk together 1/4 cup of fresh lemon juice (about one large lemon). The acidity of the lemon juice helps tenderize the chicken and adds a bright, citrusy flavor. Next, add 4 cloves of minced garlic. Don’t be shy with the garlic; it’s a key ingredient in this marinade. For a smoother marinade, you can use a garlic press.
Now, we’ll incorporate the herbs. Add 2 tablespoons of chopped fresh oregano and 1 tablespoon of chopped fresh rosemary. Fresh herbs offer a superior flavor compared to dried herbs, so we strongly recommend using fresh if possible. If using dried herbs, reduce the quantity to about 1 teaspoon of each. The oregano and rosemary provide an earthy and slightly peppery depth to the marinade.
Next, add 2 tablespoons of olive oil. The olive oil helps to keep the chicken moist during grilling and adds richness. Then, season generously with 1 teaspoon of salt and 1/2 teaspoon of black pepper. Adjust the seasoning to your preference, but remember that the salt helps to draw out moisture, so don’t over-salt.
Finally, add your chicken breasts to the bowl and ensure they are fully coated in the marinade. Use tongs or your hands (washed thoroughly!) to gently toss the chicken to ensure even coverage. Cover the bowl with plastic wrap and refrigerate for at least 30 minutes, or preferably for 2-4 hours. Marinating for longer will result in more flavorful and tender chicken, but 30 minutes is the minimum for optimal results. Remember to remove the chicken from the refrigerator at least 30 minutes before grilling to allow it to come to room temperature for even cooking.
Once your chicken is marinated and ready to grill, you can proceed to the next step of the recipe. Enjoy your delicious Grilled Chicken Caesar Wrap!
Chicken Grilling
Grilling chicken for your Caesar wrap requires careful attention to achieve juicy, flavorful results. We’ll be using about 1.5 lbs of boneless, skinless chicken breasts for this recipe, yielding approximately 4-6 servings depending on wrap size.
Preparation is key. Begin by cutting the chicken breasts into 1-inch thick slices. This ensures even cooking and prevents dryness. Next, marinate the chicken for at least 30 minutes, or preferably up to 4 hours in the refrigerator. A simple marinade of 2 tablespoons olive oil, 1 tablespoon lemon juice, 1 teaspoon garlic powder, 1/2 teaspoon paprika, salt, and pepper will add fantastic flavor.
Preheat your grill to medium-high heat (approximately 375-400°F or 190-200°C). Ensure the grates are clean and lightly oiled to prevent sticking. This can be achieved by brushing the grates with oil using a grill brush or paper towels soaked in oil held with tongs.
Once the grill is hot, place the chicken slices on the preheated grates. Avoid overcrowding the grill; this will lower the temperature and lead to steaming instead of grilling. Work in batches if necessary. Grill for approximately 4-5 minutes per side, or until the internal temperature reaches 165°F (74°C) as measured by a food thermometer. This is crucial for food safety.
Watch for char marks – these are a sign of delicious grilling! However, be careful not to burn the chicken. If the chicken is browning too quickly, reduce the heat slightly or move it to a less intense area of the grill.
Once cooked through, remove the chicken from the grill and let it rest for 5-10 minutes before slicing or shredding. This allows the juices to redistribute, resulting in a more tender and flavorful final product. Resting is a crucial step often overlooked, but it significantly impacts the quality of your grilled chicken.
Professional Tip: For extra flavor, consider adding wood chips to your grill (soaked in water for at least 30 minutes beforehand) for a smoky aroma. Mesquite or hickory chips pair well with chicken.
With perfectly grilled chicken in hand, you’re well on your way to creating a fantastic Grilled Chicken Caesar Wrap. Remember, patience and attention to detail are key to grilling success!
Caesar Dressing Preparation
Making a delicious Caesar dressing from scratch is easier than you might think, and it elevates the entire wrap experience. This recipe focuses on a classic, creamy Caesar, but feel free to adjust to your taste preferences. We’ll be making enough dressing for approximately four wraps, with leftovers perfect for salads or future wraps.
Ingredients:
- 1/2 cup mayonnaise (preferably high-quality, full-fat)
- 1/4 cup grated Parmesan cheese (freshly grated is best!)
- 2 tablespoons extra virgin olive oil
- 1 tablespoon lemon juice (freshly squeezed is key)
- 1 clove garlic, minced (or 1/2 teaspoon garlic powder)
- 1 teaspoon Dijon mustard
- 1/2 teaspoon Worcestershire sauce
- 1/4 teaspoon black pepper
- Pinch of salt (start with a small amount and adjust to taste)
- Optional: 1-2 anchovy fillets, finely minced (for a more traditional, intensely savory flavor)
Instructions:
Begin by whisking together the mayonnaise and Parmesan cheese in a medium-sized bowl until well combined. Ensure the Parmesan is finely grated to prevent clumping. This step creates a creamy base for the dressing.
Next, add the olive oil, lemon juice, minced garlic (or garlic powder), Dijon mustard, Worcestershire sauce, black pepper, and salt. If using anchovies, incorporate them now. Taste the dressing at this point and adjust seasoning accordingly. You may need more lemon juice for acidity, salt for saltiness, or pepper for spice. The balance of flavors is crucial for a successful Caesar dressing.
Whisk vigorously for at least 1 minute to fully emulsify the dressing and create a smooth, creamy texture. This step is important; thorough whisking prevents separation and ensures a consistent flavor throughout.
Professional Tip: For an even richer flavor, let the dressing sit in the refrigerator for at least 30 minutes before using. This allows the flavors to meld and deepen, resulting in a more complex and satisfying taste.
Once the dressing is prepared, store it in an airtight container in the refrigerator until ready to use. It will keep for up to 3 days.
Important Note: The amount of dressing you need will depend on your personal preference and the size of your wraps. Start with a moderate amount and add more if necessary. It’s always easier to add more than to take away!
Vegetable Preparation
Proper vegetable preparation is key to a delicious and visually appealing Grilled Chicken Caesar Wrap. We’ll focus on crisp romaine lettuce and juicy, flavorful tomatoes. Start by washing all your produce thoroughly under cold running water. This removes any dirt, pesticides, or bacteria that might be present.
For the romaine lettuce, begin by removing the outer, often slightly wilted leaves. You’ll need approximately 4 large romaine lettuce leaves for this recipe. Discard the core and wash the leaves individually, ensuring that no sand or debris remains. After washing, gently pat the leaves dry with paper towels. Excess moisture will make your wrap soggy. Once dry, carefully tear or cut the leaves into manageable, bite-sized pieces. Avoid chopping them too finely, as larger pieces provide a better texture and visual appeal in the finished wrap.
Next, we’ll prepare the tomatoes. Use about 1 medium-sized ripe tomato, preferably a beefsteak or Roma tomato for their robust flavor and texture. Wash the tomato thoroughly and then slice it into thin, even slices. Approximately 6-8 thin slices should be sufficient. The thickness of the slices is important; too thick and they may overpower the other flavors, too thin and they might fall apart. Aim for a balance between texture and flavor.
Optional additions: Consider adding other crisp vegetables to enhance the flavor and nutritional profile of your wrap. A small amount of finely shredded red cabbage (about ¼ cup) adds a nice crunch and color contrast. Similarly, thinly sliced red onion (about 1 tablespoon, finely sliced) can provide a pungent bite, but use sparingly as it can be overpowering for some palates. Remember to wash and prepare these additional vegetables in the same meticulous way as the lettuce and tomatoes.
Professional Tip: For the best results, prepare your vegetables just before assembling the wraps. This will help maintain their freshness and crispness. Storing prepped vegetables for extended periods can lead to wilting and loss of flavor.
Once all your vegetables are prepared, set them aside in separate containers, ready for the final assembly of your Grilled Chicken Caesar Wraps. Proper preparation will ensure a high-quality final product that’s both tasty and visually appealing.
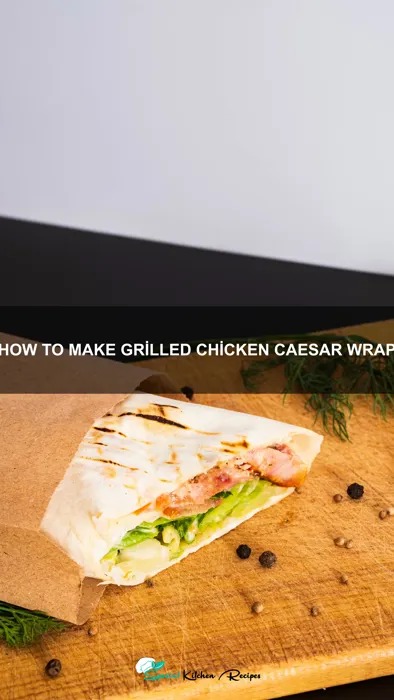
Wrap Assembly
With your perfectly grilled chicken and Caesar salad components prepared, it’s time to assemble the wraps. This stage is all about achieving a balanced, flavorful, and visually appealing final product. We’ll be using large flour tortillas, approximately 10 inches in diameter, but you can adjust based on your preference and the size of your fillings.
Begin by laying out your tortilla on a clean, flat surface. Ensure the tortilla is at room temperature; cold tortillas are more prone to cracking. This is crucial for preventing tears during the wrapping process. Using a slightly warmed tortilla will make the wrapping procedure much easier. You can lightly warm the tortilla in a microwave or on a skillet for a few seconds, if you prefer.
Next, distribute approximately 1/4 cup of the prepared Caesar salad mixture evenly across the center of the tortilla. Avoid piling it too high in the center; this can lead to overflowing and difficulty in wrapping. Aim for a consistent layer that leaves about 1.5 inches of clear tortilla space at the edges. This will provide sufficient area for wrapping and sealing the wrap.
Now, add the grilled chicken. We recommend using approximately 3-4 ounces of sliced chicken per wrap. Cut the chicken into strips or bite-sized pieces for easier handling and better distribution within the wrap. Arrange the chicken evenly over the salad, ensuring it’s also distributed across the center of the tortilla.
To begin wrapping, fold the bottom edge of the tortilla over the filling, tucking it snugly against the chicken and salad. Then, fold in the side edges, creating a neat and compact package. Finally, tightly roll the tortilla from the bottom up, creating a firm, cylindrical wrap.
To prevent the wrap from unraveling, you can use toothpicks or small skewers to secure the seam. Alternatively, if you’re confident in your rolling technique, you can skip this step, although a toothpick will ensure the wrap maintains its shape and prevents leakage. Once wrapped, you can cut the wrap in half diagonally for easier handling and a more aesthetically pleasing presentation.
For an extra touch, consider adding a drizzle of Caesar dressing or a sprinkle of Parmesan cheese on top of the finished wrap. This adds a final layer of flavor and visual appeal. Your Grilled Chicken Caesar Wraps are now ready to serve! Enjoy!
Recommendations
For the best Grilled Chicken Caesar Wrap experience, we recommend grilling your chicken to perfection – ensuring it’s juicy and flavorful. Don’t overcook the chicken; aim for an internal temperature of 165°F (74°C). Pre-grilling the chicken allows for easier assembly and ensures the wrap doesn’t become soggy.
To enhance the Caesar flavor, use high-quality ingredients. Freshly grated Parmesan cheese makes a significant difference. Consider adding a touch of lemon juice to your Caesar dressing for brightness. If you prefer a creamier dressing, you can incorporate a tablespoon of mayonnaise. Experiment with different types of lettuce; romaine is classic, but butter lettuce or even spinach can offer a delightful twist.
Serving Suggestions: These wraps are perfect for a quick and satisfying lunch or light dinner. Serve them alongside a side salad for a more balanced meal. A simple green salad with a light vinaigrette or a Caprese salad would complement the richness of the wrap beautifully. For a heartier meal, consider serving them with a side of roasted vegetables like asparagus or bell peppers.
Storage: Leftover wraps should be stored in an airtight container in the refrigerator for up to 2 days. Do not freeze the wraps, as the tortilla may become soggy upon thawing. It’s best to prepare them fresh for optimal taste and texture.
Nutritional Information (Approximate per wrap, based on a standard recipe): Calories: 450-550 (depending on ingredients and portion sizes), Protein: 30-40g, Fat: 20-25g, Carbohydrates: 40-50g. Note: This is an estimate and can vary depending on the specific ingredients used. Consult a nutrition calculator for more precise values based on your recipe modifications.
For a healthier option, consider using whole-wheat tortillas and reducing the amount of Caesar dressing. You can also add extra vegetables like chopped tomatoes, cucumbers, or bell peppers to increase the nutritional value and fiber content. Enjoy!