Cornbread, a staple in American cuisine, boasts a history as rich and varied as its flavor profiles. Its origins are deeply intertwined with the arrival of maize in the Americas, with evidence suggesting cornbread-like preparations existed long before European colonization. While the exact timeline is debated, Native American peoples developed various ways to utilize corn, creating dishes that likely served as precursors to the cornbread we know today. The introduction of European ingredients and techniques, particularly after the arrival of enslaved Africans who brought their own culinary traditions, significantly shaped its evolution.
The earliest forms of cornbread were likely simple, utilizing readily available ingredients. The addition of milk, eggs, and sweeteners varied greatly depending on regional availability and personal preference, leading to the diverse recipes we see today. During the colonial period and beyond, cornbread became a cornerstone of Southern cuisine, often served as a side dish or even a main course for those with limited resources. Its affordability and nutritional value made it a crucial part of everyday meals for many families, cemented by its versatility; it could be baked, fried, or even enjoyed as a porridge.
Today, cornbread’s popularity extends far beyond the Southern United States. In fact, approximately 85% of American households consume cornbread at least once a year, according to a recent survey by the National Corn Growers Association. This statistic highlights its enduring appeal and widespread presence in American kitchens. Its cultural significance is undeniable, appearing in countless cookbooks, regional variations, and even pop culture references. From sweet variations laden with sugar and molasses to savory versions studded with cheese and jalapeños, cornbread continues to adapt and evolve, reflecting the ever-changing culinary landscape while retaining its core identity as a comforting and flavorful classic.
Understanding the history and cultural significance of cornbread enriches the experience of making it. Knowing the generations of cooks who have perfected their own versions, the ingenuity involved in using readily available ingredients, and its importance in various communities adds a layer of appreciation to this seemingly simple dish. This recipe will guide you through creating your own delicious rendition of this timeless American classic.
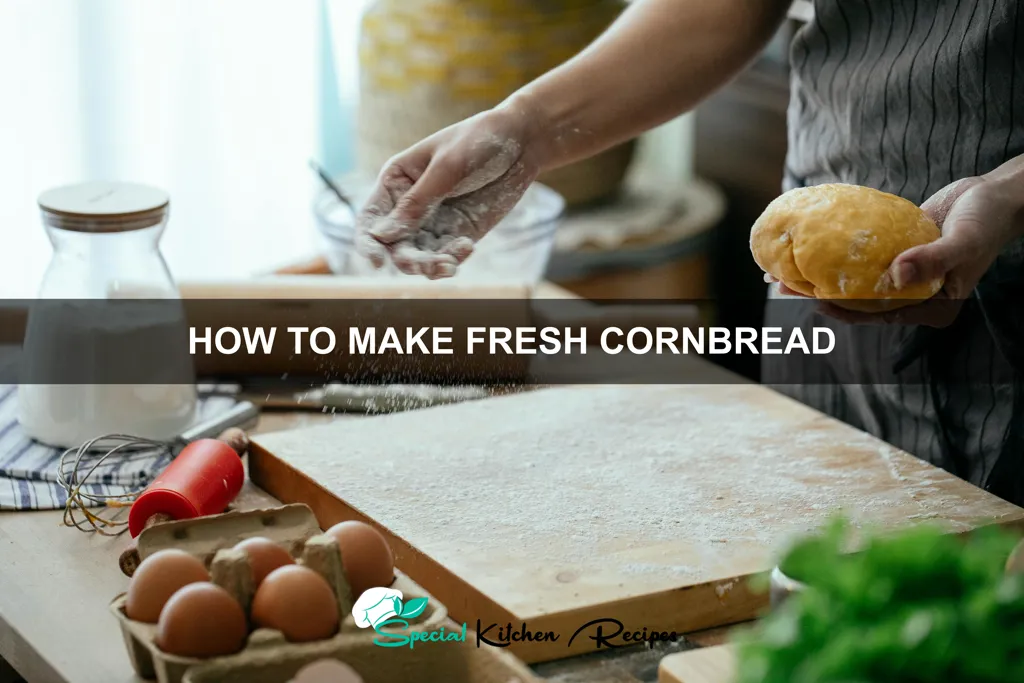
Ingredients and Measurements
This recipe yields a deliciously moist and flavorful 8-inch square cornbread. Accurate measurements are crucial for achieving the perfect texture, so please use a kitchen scale for the dry ingredients whenever possible for the most consistent results. If you don’t have a scale, use a measuring cup, ensuring you spoon the flour into the cup and level it off with a straight edge – don’t pack it down.
Fresh Corn Kernels: 2 cups. Use freshly picked corn for the best flavor. Cut the kernels from the cob, ensuring you scrape down the cob to get as much pulp as possible. Frozen corn can be substituted, but fresh corn offers a superior taste and texture.
All-Purpose Flour: 1 ½ cups. Using a good quality all-purpose flour is recommended. Cake flour will result in a more delicate crumb, while bread flour will make the cornbread denser. Avoid using self-rising flour unless you adjust the leavening agents accordingly; this recipe is specifically designed for all-purpose flour.
Granulated Sugar: ¼ cup. This provides a subtle sweetness that balances the corn’s natural flavor. Don’t be tempted to increase the sugar; it will overshadow the corn flavor.
Baking Powder: 2 teaspoons. This is the primary leavening agent, guaranteeing a light and airy crumb. Ensure your baking powder is fresh; old baking powder will not rise properly. Check the expiration date.
Salt: 1 teaspoon. Salt enhances the flavors of the other ingredients. Don’t skip the salt!
Eggs: 2 large. These bind the ingredients together and add richness. Use large eggs for consistent results. Room temperature eggs will incorporate more easily into the batter.
Buttermilk: 1 cup. Buttermilk adds a tangy flavor and helps create a tender crumb. If you don’t have buttermilk, you can substitute by adding 1 tablespoon of white vinegar or lemon juice to 1 cup of milk and letting it sit for 5-10 minutes.
Melted Unsalted Butter: ½ cup. The melted butter adds moisture and flavor. Let the butter cool slightly before adding it to the batter to prevent the eggs from curdling.
Optional additions: Consider adding ½ cup of shredded cheddar cheese, chopped jalapeños, or finely chopped chives for extra flavor and texture. Adjust the quantities to your preference.
Equipment Preparation
Before you even think about mixing your ingredients, ensuring you have the right equipment, clean and ready to go, is crucial for a smooth and successful cornbread baking experience. This section details the essential tools and their preparation.
The first and most important piece of equipment is your baking pan. A 9×13 inch baking pan is ideal for this recipe, providing ample space for even baking. Ensure your pan is thoroughly clean and completely dry. Any lingering residue can impact the cornbread’s texture and browning. For best results, lightly grease your pan with 1 tablespoon of unsalted butter or cooking spray. This prevents sticking and promotes even browning. Alternatively, you can line the pan with parchment paper, leaving an overhang on two opposite sides for easy removal. This method offers easy cleanup and prevents sticking completely.
Next, you’ll need mixing bowls. Two medium-sized bowls are recommended. One will be used for dry ingredients and the other for wet ingredients. Cleanliness is paramount; make sure both bowls are spotless to avoid any unwanted flavors or textures interfering with the delicate cornbread batter. It’s helpful to have a third, smaller bowl for whisking together the eggs and milk separately, if your recipe calls for it.
Measuring tools are essential for accuracy. You will need measuring cups (both dry and liquid) and measuring spoons. Accurate measurements are key to achieving the perfect cornbread texture and consistency. Invest in a good quality set to ensure accurate volume measurements. Use the appropriate measuring tools – don’t use a liquid measuring cup for dry ingredients, and vice versa. Level off dry ingredients with a straight edge to prevent over-measuring.
Finally, gather your utensils. You’ll need a whisk for blending wet ingredients, a spatula or wooden spoon for combining the wet and dry ingredients, and a rubber spatula for scraping down the sides of the bowl to ensure all ingredients are incorporated thoroughly. A wire rack is also highly recommended for cooling the cornbread after baking. This allows for even cooling and prevents the bottom from becoming soggy. Preheating your oven to the correct temperature (usually 400°F or 200°C) is absolutely crucial and should be done before beginning any mixing.
By meticulously preparing your equipment, you set the stage for a consistently delicious and perfectly baked cornbread every time. Remember, a little preparation goes a long way in achieving baking success.
Mixing the Batter (Wet and Dry Ingredients)
Creating a light and fluffy cornbread hinges on properly combining the wet and dry ingredients. This seemingly simple step requires attention to detail to avoid a gummy or dense final product. We’ll be using a classic recipe calling for 1 ½ cups of all-purpose flour, ¾ cup of fine cornmeal (preferably stone-ground for a deeper flavor), ¾ teaspoon of baking powder, ¾ teaspoon of baking soda, ½ teaspoon of salt, 1 cup of buttermilk (or 1 cup of milk with 1 tablespoon of white vinegar or lemon juice added and allowed to sit for 5 minutes to curdle), ¼ cup of melted unsalted butter (cooled slightly), and 1 large egg.
Begin by preheating your oven to 400°F (200°C). This ensures your cornbread bakes evenly and achieves that beautiful golden-brown crust. While the oven heats, whisk together the dry ingredients in a large bowl. Combine the 1 ½ cups of all-purpose flour, ¾ cup of cornmeal, ¾ teaspoon of baking powder, ¾ teaspoon of baking soda, and ½ teaspoon of salt. Make sure to whisk vigorously to distribute the leavening agents evenly throughout the flour mixture. Lumps of baking powder or soda will result in uneven rising and a less appealing texture.
In a separate bowl, whisk together the wet ingredients. Add the 1 cup of buttermilk (or the milk mixture), ¼ cup of slightly cooled melted butter, and 1 large egg. Whisk until everything is thoroughly combined and slightly frothy. Don’t over-whisk, as this can develop the gluten in the flour and lead to a tough cornbread. A few gentle whisks are all that’s needed to ensure the wet ingredients are incorporated.
Now, it’s time to gently combine the wet and dry ingredients. Gradually add the wet ingredients to the dry ingredients, mixing with a rubber spatula or a wooden spoon. Fold the wet ingredients into the dry ingredients using a gentle up-and-down motion, rather than a vigorous circular motion. Avoid overmixing; just mix until the dry ingredients are moistened and no visible streaks of flour remain. Overmixing will lead to a tough cornbread. A few lumps are perfectly acceptable.
Important Note: The batter should be slightly lumpy, not completely smooth. This is key to achieving a tender crumb. Once the batter is just combined, it’s ready to be poured into a greased and lightly floured 8×8 inch baking pan or a cast iron skillet. Bake for 20-25 minutes, or until a wooden skewer inserted into the center comes out clean.
Baking the Cornbread
Preheat your oven to 400°F (200°C). This high temperature is crucial for achieving a tender crumb and a nicely browned crust. Ensure your oven is properly preheated before placing the cornbread in; this prevents uneven baking.
Grease and flour a 9×13 inch baking pan. Alternatively, you can use a cast iron skillet for a more rustic, deeply browned cornbread. Generously greasing the pan is vital to prevent sticking and ensure easy removal of the cornbread once baked. Lightly dusting with flour helps the grease adhere and provides a further barrier against sticking.
Pour the prepared cornbread batter into the prepared pan, spreading it evenly to ensure consistent baking. A spatula or offset spatula works well for this task. Don’t overfill the pan; leave about half an inch of space at the top. The batter will rise during baking.
Bake for 20-25 minutes, or until a wooden skewer inserted into the center comes out clean. Start checking for doneness around the 20-minute mark, as oven temperatures can vary. Overbaking will result in a dry, crumbly cornbread.
The top of the cornbread should be golden brown and slightly firm to the touch. If the edges are browning too quickly, you can loosely tent the pan with aluminum foil to prevent over-browning. Avoid opening the oven door frequently during baking, as this can cause the cornbread to collapse.
Once baked, remove the cornbread from the oven and let it cool in the pan for 10-15 minutes before serving. This allows the cornbread to set and makes it easier to cut and serve. Serving it warm is ideal, but it can also be enjoyed at room temperature.
For a sweeter cornbread, you can brush the top with melted butter immediately after removing it from the oven. This adds extra richness and flavor. Experiment with different toppings like honey, butter, or even a sprinkle of sugar for varied taste experiences.
Proper baking technique is key to achieving perfectly moist and flavorful cornbread. Pay close attention to baking time and temperature, and don’t hesitate to adjust based on your oven and the specific recipe you’re using. Enjoy!
Cooling and Serving
Proper cooling is crucial for achieving the best texture and flavor in your fresh cornbread. Avoid the temptation to cut into the cornbread immediately after removing it from the oven. The internal temperature needs time to drop, preventing a crumbly texture and ensuring a moist, delicious result.
Let the cornbread cool in the pan for at least 15-20 minutes. This allows the internal heat to dissipate gradually. The pan’s residual heat will continue to cook the bread slightly, leading to a more even finish. Using a dark-colored cast iron skillet, for instance, will retain heat longer than a light-colored pan, so you might need to adjust cooling time slightly. For a lighter-colored pan, 15 minutes might suffice; for a darker pan, aim for closer to 20 minutes.
After the initial cooling period in the pan, you can carefully transfer the cornbread to a wire rack. A wire rack allows for even air circulation around the bread, preventing moisture buildup and promoting optimal cooling. Allow the cornbread to cool completely on the wire rack for at least 30-45 minutes before slicing and serving. This timeframe ensures the cornbread is completely set and won’t crumble excessively when cut.
Once completely cool, you can cut the cornbread into squares or wedges using a sharp knife. A serrated knife works particularly well for cutting cornbread, minimizing crumb breakage. For neat, even slices, use a long, sharp knife and cut slowly and deliberately. If you’re serving the cornbread warm, you can gently reheat individual pieces in the oven at 350°F (175°C) for 5-7 minutes, or until heated through. This will revitalize the texture and enhance the aroma.
Serving suggestions: Cornbread is incredibly versatile. Enjoy it warm with butter, honey, or your favorite jam. It also pairs beautifully with savory dishes such as chili, stews, and soups. You can even crumble it into salads for added texture and flavor. Leftover cornbread can be stored in an airtight container at room temperature for up to 2 days, or frozen for longer storage. For freezing, wrap the cooled cornbread tightly in plastic wrap and then place it in a freezer-safe bag or container.
Tips for the Best Cornbread
Making truly exceptional cornbread goes beyond simply following a recipe; it requires attention to detail and a few key techniques. This section provides professional tips to elevate your cornbread game.
Use fresh, high-quality ingredients: This is paramount. Stale cornmeal will result in dry, crumbly cornbread. Use freshly ground cornmeal if possible, or at least ensure your store-bought cornmeal is within its best-by date. The same applies to your other ingredients – fresh eggs, buttermilk (or the buttermilk substitute you make), and baking powder all contribute to a superior result.
Don’t overmix the batter: Overmixing develops the gluten in the cornmeal, leading to a tough texture. Mix only until the dry ingredients are just moistened. A few lumps are perfectly acceptable and even desirable. Gentle folding is key here; avoid vigorous stirring.
Get the right pan: A cast iron skillet is the traditional and arguably best choice for cornbread. Its excellent heat retention leads to a beautifully crisp crust and moist interior. If you don’t have a cast iron skillet, a dark-colored, heavy-bottomed baking pan will work well. Grease your pan generously, using either vegetable shortening, bacon grease (for extra flavor!), or a good quality cooking spray. Don’t skip this step!
Adjust your baking powder: The altitude at which you bake significantly impacts baking powder’s leavening power. At higher altitudes, you may need to slightly increase the amount of baking powder to achieve a properly risen cornbread. Consult a baking altitude chart for specific adjustments.
Bake at the correct temperature: The recipe’s recommended baking temperature is crucial. Baking too hot will burn the outside before the inside is cooked, while baking too low will yield a dense, undercooked loaf. Use an oven thermometer to ensure your oven is accurately calibrated. A properly preheated oven is non-negotiable.
Check for doneness: A toothpick inserted into the center should come out with just a few moist crumbs attached. If it comes out completely clean, your cornbread is likely overbaked. Start checking for doneness around the recommended baking time, as ovens can vary.
Let it cool slightly: Before slicing and serving, allow your cornbread to cool in the pan for at least 10-15 minutes. This allows the internal structure to set, preventing it from crumbling when you cut it. Serve warm, ideally with butter or your favorite toppings.
By following these tips, you’ll be well on your way to baking the best cornbread you’ve ever tasted. Enjoy!
Recommendations
For the best results, use freshly ground cornmeal for a superior texture and flavor. If using pre-ground cornmeal, be sure to check its freshness; stale cornmeal can result in a dry or crumbly cornbread. Don’t overmix the batter; overmixing develops gluten, leading to a tough cornbread. A few lumps are perfectly acceptable.
Serving Suggestions: This delicious cornbread is fantastic on its own, slightly warm, or served alongside a pat of butter. It pairs beautifully with chili, stews, soups, and BBQ. Consider crumbling it into your favorite casserole for added texture and flavor. It also makes a delightful accompaniment to grilled meats and vegetables.
Storage: Store leftover cornbread in an airtight container at room temperature for up to 3 days. For longer storage, wrap it tightly in plastic wrap and then aluminum foil, and freeze for up to 2 months. To reheat, simply microwave slices for 30-60 seconds or bake in a preheated oven at 350°F (175°C) for 10-15 minutes until heated through.
Complementary Dishes: This cornbread is incredibly versatile. It complements hearty dishes like pulled pork, brisket, or smoked ribs perfectly. Consider serving it alongside a creamy tomato soup, a robust vegetable stew, or a simple green salad to balance the richness of the cornbread. The slight sweetness pairs well with savory dishes, creating a delightful contrast in flavors and textures.
Nutritional Information (per serving, approximate): The nutritional content will vary depending on the specific ingredients used and serving size. However, a typical serving of cornbread (approximately 1/8 of a 9-inch square pan) may contain around 200-250 calories, 5-7g of protein, 30-40g of carbohydrates, and 8-12g of fat. This is an estimate, and precise nutritional information should be calculated based on your specific recipe and ingredient quantities. Note that this does not include added toppings such as butter or sweeteners.
Important Note: Always check the nutritional information of your specific ingredients, as variations in brands and types can affect the final calorie and nutritional values.