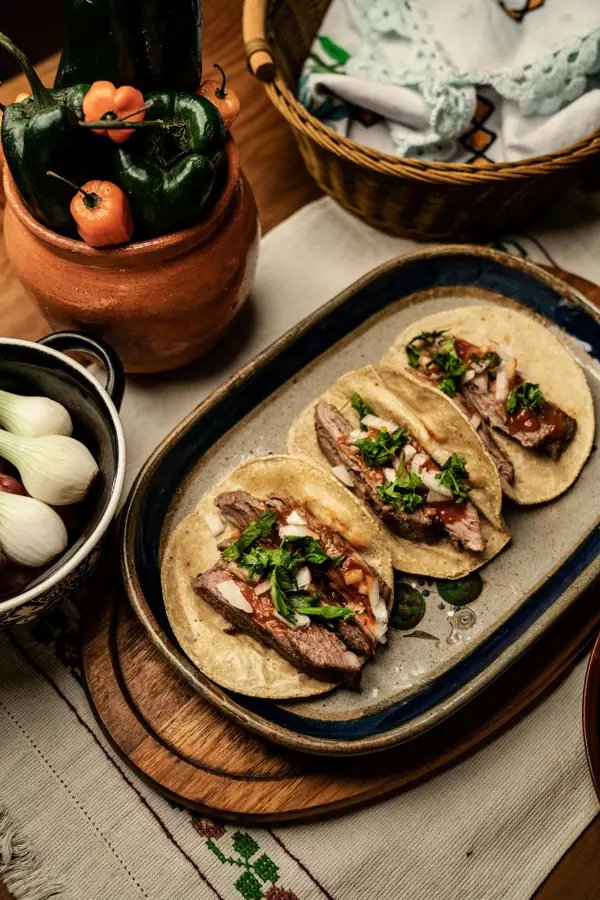
Quesadillas, a seemingly simple dish of melted cheese grilled between tortillas, boast a surprisingly rich history and cultural significance far beyond their humble appearance. While pinpointing their exact origin is difficult, their roots lie firmly in Mexican cuisine, likely emerging sometime before the 20th century within rural communities where readily available ingredients were key. Early versions probably consisted of just cheese and corn tortillas, reflecting the basic staples of the Mexican diet. The name itself, quesadilla, is derived from the Spanish word queso, meaning cheese, highlighting the central role this ingredient plays.
The evolution of the quesadilla showcases the adaptability of Mexican food. From simple peasant fare, it transformed into a versatile dish capable of incorporating a dazzling array of fillings. Today, you’ll find variations ranging from classic cheese to more elaborate combinations including meats like chicken or beef, vegetables such as onions and peppers, and even beans and various spices. This adaptability has contributed significantly to its global popularity. In fact, quesadillas have become a staple in many North American restaurants, often appearing on menus alongside more traditional Mexican dishes, demonstrating their widespread appeal and cultural integration.
The popularity of quesadillas is undeniable. While precise statistics on global consumption are difficult to obtain, anecdotal evidence and the ubiquity of the dish in restaurants worldwide suggest it’s a culinary powerhouse. It’s a favorite among both children and adults, appreciated for its ease of preparation, delicious flavors, and customizable nature. Furthermore, the quesadilla’s portability makes it an ideal snack, lunch, or even a light dinner option, contributing further to its widespread popularity. This quick and satisfying meal has transcended its humble origins, becoming a globally recognized and beloved dish that continues to evolve and delight.
Ingredients and Measurements
This recipe yields two generous quesadillas. Feel free to double or triple the recipe as needed for larger groups. The beauty of quesadillas is their adaptability; you can easily substitute ingredients based on your preferences and what you have on hand.
Flour Tortillas (2): Use 10-inch diameter flour tortillas for the best results. Smaller tortillas will cook faster, but larger ones offer more room for fillings. Look for tortillas that are soft and pliable, not dry and brittle. Store-bought tortillas are perfectly acceptable, but homemade tortillas, if you have the time, will elevate the flavor.
Shredded Cheese (2 cups): This is the heart of a quesadilla! A blend of cheeses is highly recommended. A classic combination is Monterey Jack and cheddar, offering a creamy texture and sharp flavor. However, feel free to experiment. Pepper Jack adds a spicy kick, while Oaxaca or queso fresco provide a unique melt and taste. Ensure your cheese is finely shredded for even melting and distribution.
Filling (1 cup): The possibilities are endless! For this recipe, we’ll use a simple and delicious combination. Cooked and seasoned chicken (1/2 cup, shredded or diced) provides protein, while diced bell peppers (1/4 cup) and diced onions (1/4 cup) add sweetness and texture. You could also use leftover steak, carnitas, black beans, or even just sautéed mushrooms and spinach. Make sure your filling is well-drained to prevent a soggy quesadilla.
Optional additions: Enhance your quesadillas with a sprinkle of your favorite spices. A pinch of chili powder, cumin, or garlic powder adds depth of flavor. Fresh cilantro or salsa fresca makes a delightful topping after cooking. For a creamier experience, consider adding a dollop of sour cream or guacamole.
Cooking Oil or Butter (1 tablespoon): A small amount of oil or butter is needed to prevent the tortillas from sticking to the pan and to ensure even browning. Use a high-smoke-point oil like avocado oil or canola oil for best results. Butter adds a delicious richness, but be mindful of burning at high heat.
Remember to prepare your ingredients before you start cooking. This will help you create delicious quesadillas quickly and efficiently. Having everything measured and ready to go will make the entire process much smoother.
Equipment Needed
Making delicious quesadillas is surprisingly simple, but having the right equipment on hand will make the process smoother and more efficient. While you might be able to improvise with some items, investing in a few key pieces will elevate your quesadilla game.
A large non-stick skillet (10-12 inches) is essential. The non-stick surface prevents the tortillas from sticking and burning, making flipping much easier. A good quality skillet will distribute heat evenly, leading to perfectly cooked quesadillas. Avoid using a cast iron skillet unless you are very experienced with it, as it can be difficult to achieve even cooking with delicate tortillas.
A spatula is your best friend when it comes to flipping quesadillas. A wide, thin spatula, ideally made of metal or silicone (for better heat resistance), allows you to get under the quesadilla easily and flip it without breaking it. Avoid using a flimsy plastic spatula as it may melt or warp under high heat.
Measuring cups and spoons are crucial for accurate ingredient measurements, especially if you’re following a specific recipe. Having a set of both metric and imperial measuring tools will ensure you can follow any recipe you find. Accurate measurements are key to achieving the perfect quesadilla texture and flavor.
A cutting board and sharp knife are necessary for preparing your fillings. A large cutting board provides ample space for chopping vegetables and meats. A sharp knife makes the chopping process faster and safer, preventing bruised ingredients and uneven cuts. Invest in a good quality knife and keep it sharp for optimal performance.
Optional but helpful tools include: a cheese grater for easily shredding cheese, tongs for handling hot quesadillas, and a small bowl for mixing any additional ingredients for your filling. While not strictly necessary, these tools can make the process even more efficient and enjoyable.
Finally, don’t forget oven mitts or pot holders to protect your hands from the hot skillet and quesadillas. Safety should always be your top priority when cooking.
In summary: your essential quesadilla-making equipment consists of a large non-stick skillet, a wide spatula, measuring cups and spoons, a cutting board and a sharp knife, and oven mitts. With these tools, you’ll be well-equipped to create delicious quesadillas every time.
Preparation of Ingredients (e.g., chopping, shredding)
Before you begin assembling your quesadillas, efficient ingredient preparation is key to a quick and smooth cooking process. We’ll be focusing on two main components: the cheese and the fillings. For this recipe, we’ll use 1 cup of shredded cheddar cheese and 1/2 cup of your favorite chopped filling. Let’s dive into the details.
Cheese Preparation: While pre-shredded cheese is convenient, freshly shredding your cheese often yields better results, as pre-shredded cheese sometimes contains cellulose which can prevent it from melting smoothly. If using a block of cheddar, use a box grater to shred approximately 1 cup. Aim for a consistent shred size to ensure even melting and distribution throughout the quesadilla. Avoid over-shredding, as this can lead to a dry, crumbly texture. Set the shredded cheese aside in a bowl.
Filling Preparation: The possibilities for quesadilla fillings are endless! For this easy recipe, we’ll use 1/2 cup of prepped filling. Consider your desired cooking time when selecting your filling. For example, finely chopped vegetables like onions and bell peppers (about 1/4 cup each) will cook quickly, while larger chunks of chicken or steak may require pre-cooking. If using pre-cooked meat, simply shred or chop it into bite-sized pieces (around 1/4 cup). If using raw meat, ensure it’s fully cooked before adding it to the quesadilla to avoid foodborne illnesses.
Vegetable Preparation: If incorporating vegetables, proper chopping is crucial. For optimal cooking, aim for consistently sized pieces. Overly large pieces will remain undercooked while smaller pieces might burn before the cheese melts. Use a sharp knife for clean cuts to prevent bruising or tearing the vegetables. For onions and bell peppers, a fine dice (about 1/4 inch) is ideal. If using other vegetables like mushrooms or zucchini, slice them thinly to ensure even cooking.
Important Note: Prepare all your ingredients before you start cooking. This will streamline the process and prevent delays once the pan is hot. Having everything measured and ready to go will make assembling your quesadillas a breeze, allowing you to focus on achieving perfectly golden-brown, cheesy goodness.
Assembling the Quesadillas
Now that your fillings are prepped and your tortillas are ready, it’s time to assemble your delicious quesadillas! For this recipe, we’ll be making two generously sized quesadillas, but you can easily adjust the quantities to make more or less.
Lay out two large flour tortillas (about 10-12 inches in diameter) on a clean, flat surface. Ensure your work surface is clean and dry to prevent the tortillas from sticking. If your tortillas are dry, you might want to lightly dampen them with a spray bottle to make them more pliable and prevent tearing. However, be careful not to over-wet them, as this can lead to soggy quesadillas.
For each quesadilla, spread approximately 1/4 cup of your chosen cheese evenly over one half of the tortilla, leaving about a 1-inch border. Don’t overload the tortilla with cheese; this can make it difficult to fold and cook evenly, and could lead to overflowing cheese. A good mix of melting cheeses works best, such as a combination of cheddar, Monterey Jack, and pepper jack.
Next, add your prepared fillings. For two quesadillas, aim for roughly 1/2 cup of filling per quesadilla. Distribute the filling evenly over the cheese, again staying within the inner half of the tortilla. Avoid overfilling, as this can also lead to messy spills and uneven cooking. Experiment with different combinations! Some popular choices include seasoned ground beef, shredded chicken, black beans, sautéed vegetables (onions, peppers, mushrooms), or even leftover cooked steak.
Once your fillings are in place, carefully fold the other half of the tortilla over the filling, creating a half-moon shape. Press down gently but firmly on the edges to seal them together, ensuring that the filling is completely enclosed. This prevents leakage and ensures even cooking.
You can use a fork to crimp the edges for a more professional look and to further secure the filling. Alternatively, you can use a rolling pin to gently roll over the folded quesadilla to flatten it and ensure even cooking. This step is particularly helpful if you are using a thicker filling.
Now you’re ready to cook your quesadillas! Proceed to the next section for cooking instructions.
Cooking the Quesadillas (Stovetop or Microwave Methods)
Once your quesadillas are assembled (see previous section), it’s time to cook them! You have two primary methods: stovetop and microwave. Both offer quick and easy results, but each has its own advantages.
Stovetop Method: For perfectly crisp quesadillas
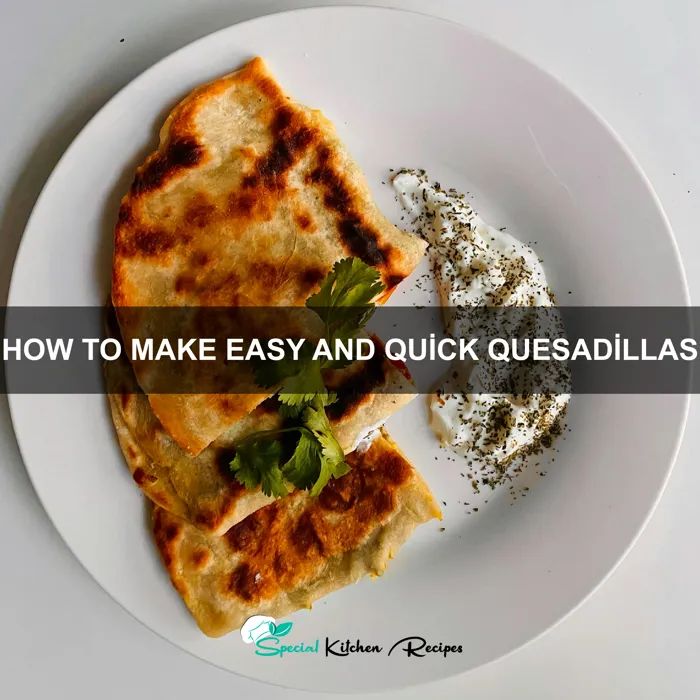
This method yields beautifully browned and crispy quesadillas. Heat a large non-stick skillet or griddle over medium heat. Avoid using high heat, as this can burn the tortillas before the cheese melts. Add 1 tablespoon of oil or butter to the pan. Once the oil is shimmering, carefully place one quesadilla in the pan. Cook for 2-3 minutes per side, or until the tortilla is golden brown and the cheese is melted and gooey. You’ll know it’s ready to flip when the edges start to lift slightly and the cheese is bubbling. Use a spatula to carefully flip the quesadilla. For extra crispy quesadillas, press down gently on the quesadilla with a spatula while cooking. Repeat with remaining quesadillas. If you’re making multiple quesadillas, you may need to work in batches to avoid overcrowding the pan.
Microwave Method: For a quick and easy solution
The microwave offers a faster cooking time, perfect for a quick lunch or snack. Place the assembled quesadilla on a microwave-safe plate. Microwave on high for 1-2 minutes, or until the cheese is melted and bubbly. Cooking time will vary depending on your microwave’s power and the thickness of your quesadilla. Start with one minute and check for doneness; add 30-second intervals as needed. Be careful when removing the quesadilla from the microwave as it will be hot. The tortilla will likely not be as crispy as the stovetop method, but the cheese will be perfectly melted.
Professional Recommendations:
Regardless of the method you choose, ensure your filling is evenly distributed to prevent uneven cooking and pockets of unmelted cheese. Don’t overcrowd the pan when using the stovetop method; this will lower the temperature and result in soggy quesadillas. If using the microwave, consider using a microwave-safe cover to help the cheese melt more evenly and prevent splattering. Finally, always use oven mitts or pot holders when handling hot pans and plates.
Serving Suggestions:
Once cooked, cut your quesadillas into wedges and serve immediately. Enjoy them plain, or add your favorite toppings like salsa, sour cream, guacamole, or shredded lettuce.
Checking for Doneness
Knowing when your quesadillas are perfectly cooked is crucial for achieving that delicious, melty cheese center without burning the tortillas. There are several ways to check for doneness, and the best method depends on your preferred level of crispiness.
The Visual Cue: The most straightforward method is to visually inspect your quesadilla. Look for golden-brown spots appearing on the surface of the tortilla. This indicates that the tortilla is browning nicely and the cheese inside is likely melting. Aim for a consistent, even browning across the entire surface. Avoid burning; dark brown or black spots mean it’s overcooked.
The Touch Test: Gently press down on the center of the quesadilla with a spatula. If the tortilla feels firm and springy, and the cheese is soft and pliable, it’s likely done. If the center feels soft and doughy, it needs more cooking time. Be careful not to press too hard, as you could break the tortilla.
The Peek Test (for extra cheese): If you’re using a particularly generous amount of cheese, or if you’re unsure about the doneness, you can carefully lift a corner of the quesadilla to peek inside. Look for the cheese to be fully melted and bubbly. If the cheese is still stringy or unmelted, return the quesadilla to the pan and cook for another minute or two. Remember to be gentle when peeking, as hot cheese can splatter.
Timing Considerations: While visual cues are the most reliable, timing can also be a helpful guide. For a standard 10-inch quesadilla with a moderate amount of filling, cooking time usually ranges from 2-4 minutes per side over medium heat. Adjust cooking time based on the heat of your stovetop and the thickness of your filling. Thicker fillings will require longer cooking times.
Don’t Overcrowd the Pan: Overcrowding the pan prevents even cooking and can lead to soggy quesadillas. Cook your quesadillas in batches if necessary to ensure they cook evenly and achieve that perfect golden-brown crispness. This allows for proper heat distribution and prevents steaming which can make the tortilla soggy.
Professional Tip: For extra crispy quesadillas, consider using a cast-iron skillet. Its even heat distribution helps achieve a perfectly browned and crispy exterior. Regardless of your pan, always use medium heat to prevent burning. Low heat will take too long and result in a soggy tortilla, while high heat will burn the outside before the inside is cooked through.
Recommendations
For the quickest and easiest quesadillas, pre-shred your cheese and have all your fillings prepped and ready to go before you start cooking. This will streamline the process and prevent your tortillas from getting soggy while you’re assembling. Consider using a nonstick skillet to minimize the need for added oil or butter, promoting a healthier option.
Serving Suggestions: Quesadillas are incredibly versatile! Serve them as a standalone meal, cut into wedges for easy sharing. They’re fantastic accompanied by a simple side salad with a light vinaigrette for a refreshing contrast of textures and flavors. Sour cream, guacamole, salsa, or pico de gallo are classic additions that elevate the taste experience. For a heartier meal, consider serving them with black beans, rice, or a side of roasted vegetables.
Storage: Leftover quesadillas can be stored in an airtight container in the refrigerator for up to 3 days. To reheat, simply place them in a microwave-safe dish and microwave for 1-2 minutes, or until heated through. For a crispier texture, you can reheat them in a skillet over medium heat for a minute or two per side.
Complementary Dishes: The beauty of quesadillas lies in their adaptability. They pair wonderfully with Mexican-inspired side dishes like Mexican rice, refried beans, or a simple corn salad. For a non-Mexican twist, try serving them with a side of roasted sweet potatoes or a vibrant fruit salsa for a sweet and savory combination.
Nutritional Information (Approximate per serving, based on a 6-inch quesadilla with cheese and one other filling): The nutritional content will vary significantly depending on the fillings used. A basic cheese quesadilla might contain approximately 250-350 calories, with varying amounts of fat, protein, and carbohydrates. For a more accurate nutritional breakdown, consider using a nutrition calculator and inputting your specific ingredients and quantities. Always check the nutritional labels of your ingredients to make informed choices.
Important Note: This nutritional information is an estimate and may vary based on the specific ingredients and portion sizes used. For precise nutritional data, it is recommended to use a nutrition calculator that takes all ingredients into account.