Chicken wings, a seemingly simple dish, boast a surprisingly rich and complex history, far exceeding their status as a ubiquitous bar snack. While pinpointing their exact origin is difficult, their rise to prominence is undeniably linked to the American culinary landscape, specifically the Buffalo, New York region. Legend attributes their invention to Teressa Bellissimo, owner of the Anchor Bar, in the 1960s, who reportedly created them as a late-night snack for her son and his friends. This accidental culinary creation, born out of necessity and a desire to satisfy hungry patrons, quickly transcended its humble beginnings.
The initial recipe, featuring a simple coating of hot sauce and butter, was a revelation. The combination of crispy skin, juicy meat, and fiery flavor proved irresistible, and the dish rapidly gained popularity throughout Buffalo and beyond. This seemingly straightforward preparation sparked a culinary evolution, with countless variations emerging over the decades. Today, chicken wings are a global phenomenon, enjoyed in diverse cultures with an array of flavor profiles ranging from classic buffalo to teriyaki, garlic parmesan, and countless more creative iterations.
The cultural significance of chicken wings is undeniable. They’re no longer just a simple appetizer; they’ve become a central part of sporting events, social gatherings, and casual meals. The Super Bowl, for instance, sees an estimated 1.4 billion chicken wings consumed annually in the United States alone, a testament to their enduring appeal. This massive consumption translates to a significant economic impact, with wing production and sales contributing billions of dollars to the food industry worldwide. Moreover, the popularity of chicken wings has fueled the growth of specialized wing restaurants and spurred countless culinary competitions, solidifying their place in popular culture.
Beyond the statistics, the allure of chicken wings lies in their versatility. They cater to a wide range of palates, from mild to intensely spicy, and can be prepared in countless ways – baked, fried, grilled, or even air-fried. Their adaptability makes them a perfect canvas for culinary creativity, allowing chefs and home cooks alike to experiment with different flavors, sauces, and seasonings. This guide will explore the art of making delicious chicken wings, from selecting the perfect ingredients to achieving that coveted crispy skin and juicy interior, ensuring you can recreate this beloved dish at home, regardless of your culinary skill level.
Ingredients and Measurements
The success of delicious chicken wings hinges on using high-quality ingredients and precise measurements. Below, we detail the components for a batch of approximately 2 pounds (900g) of chicken wings, enough to serve 4-6 people. Feel free to adjust quantities proportionally for larger or smaller batches.
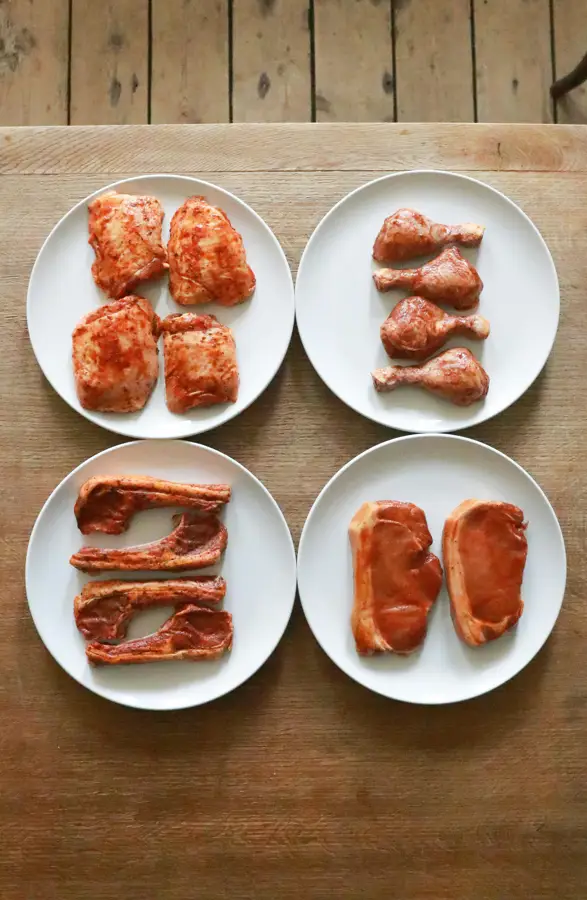
Chicken Wings: You’ll need about 2 pounds (900g) of chicken wings, separated into drumettes and flats. Avoid using frozen wings, as they tend to become dry and tough during cooking. Fresh, chilled wings will yield the best results. If you must use frozen wings, ensure they are thoroughly thawed and patted completely dry before proceeding. The extra moisture from frozen wings will negatively impact the crispiness of your final product.
Dry Rub: The dry rub is where you can truly customize your wings. This recipe provides a foundational blend, but feel free to experiment with your favorite spices. We recommend using freshly ground spices for the best flavor. For this recipe, you’ll need:
- 2 tablespoons (30g) paprika (sweet or smoked, depending on preference)
- 1 tablespoon (15g) garlic powder
- 1 tablespoon (15g) onion powder
- 1 tablespoon (10g) brown sugar
- 1 teaspoon (5g) cayenne pepper (or more, to taste)
- 1 teaspoon (3g) black pepper
- 1 teaspoon (2g) salt (adjust to your taste; kosher salt is recommended)
- ½ teaspoon (1g) dried oregano
- ½ teaspoon (1g) dried thyme
Important Note about Salt: Salt is crucial for both flavor and achieving crispy skin. Don’t be shy with the salt, but also avoid over-salting. Start with the recommended amount and adjust to your preference. It’s easier to add more salt than to remove it.
Sauce (Optional): Many enjoy their wings sauced. The amount of sauce will depend on your preference, but a general guideline is about ½ cup (120ml) of your favorite wing sauce per pound of wings. Popular choices include buffalo sauce, teriyaki sauce, BBQ sauce, or even a homemade honey garlic sauce. Remember to adjust the sauce quantity based on your desired level of sauciness.
Cooking Oil/Fat: For baking, you’ll need a minimal amount of oil to prevent sticking. About 1-2 tablespoons (15-30ml) of high-heat oil like vegetable or canola oil should suffice. For frying, you will need enough oil to completely submerge the wings, approximately 2-3 quarts (2-3 liters) depending on the size of your pot or fryer.
Baking/Frying Considerations: The quantity of oil needed varies depending on your chosen cooking method. Baking requires less oil, while deep frying requires significantly more. Always exercise caution when working with hot oil. Use appropriate safety measures and equipment.
Equipment and Utensils
Making delicious chicken wings requires the right tools to ensure even cooking and effortless preparation. While you might already have most of these items in your kitchen, having the right equipment will significantly improve your wing-making experience.
For optimal results, you’ll need a large bowl, preferably at least 3 quarts in capacity. This is crucial for properly tossing the wings in your chosen sauce and marinade. A smaller bowl might lead to overcrowding and uneven coating. Avoid using a bowl that is too shallow, as this can make the coating process messy and inefficient.
Next, you’ll need at least two baking sheets. If you’re making a large batch of wings (say, more than 2 pounds), using two baking sheets prevents overcrowding, which is essential for achieving crispy wings. Overcrowding leads to steaming instead of crisping, resulting in soggy wings. Use standard-sized baking sheets, approximately 18 x 26 inches. Line them with parchment paper for easy cleanup and to prevent sticking.
A sturdy wire rack placed on top of your baking sheet is highly recommended. This allows for better air circulation around the wings, contributing significantly to a crispier outcome. Avoid placing the wings directly on the baking sheet; the wire rack is a game-changer for achieving that perfect texture. If you don’t have a wire rack, you can try spacing the wings well apart on the baking sheet, but a rack is definitely preferable.
Measuring cups and spoons are essential for accurate ingredient measurement, especially when dealing with sauces and marinades. Inaccurate measurements can significantly affect the taste and consistency of your final product. Invest in a good quality set to ensure precision. You’ll need at least 1 cup, ½ cup, ¼ cup, 1 tablespoon, 1 teaspoon, and ½ teaspoon measuring tools.
A good pair of tongs is indispensable for turning and handling the wings during and after cooking. Avoid using forks, as they pierce the skin, leading to moisture loss and less crispy wings. Tongs allow for gentler handling, preserving the integrity of the wing and its crispy skin.
Finally, you’ll need a high-quality oven thermometer. Oven temperatures can fluctuate, so an oven thermometer ensures accurate temperature control, crucial for perfectly cooked chicken wings. An inaccurate oven temperature can lead to undercooked or overcooked wings. Ensure your thermometer is placed correctly in the center of your oven to get the most accurate reading.
While optional, a meat thermometer is highly recommended for ensuring the chicken is cooked to a safe internal temperature of 165°F (74°C). This guarantees food safety and prevents undercooked chicken. Food safety is paramount, so always check the internal temperature of your chicken wings before serving.
Preparation of Chicken Wings (Cleaning, Cutting, etc.)
Before you embark on the journey to creating mouthwatering chicken wings, proper preparation is paramount. This section will guide you through the essential steps of cleaning and cutting your chicken wings to ensure optimal cooking results and a safe, delicious final product. We’ll be working with approximately 2 pounds (900g) of chicken wings for this recipe, but you can easily scale it up or down.
Step 1: Thawing and Washing. If your chicken wings are frozen, ensure they are completely thawed before proceeding. The safest method is overnight refrigeration. Once thawed, rinse the wings thoroughly under cold, running water. Avoid soaking the wings, as this can lead to excess moisture and affect the crispiness during cooking. Pat the wings dry with paper towels; this is crucial for achieving that perfectly crispy skin.
Step 2: Separating the Wing Sections. A chicken wing typically consists of three sections: the drumette (the small part closest to the body), the flat (the middle section), and the wing tip. The wing tip is generally discarded as it contains little meat and tends to burn during cooking. To separate the sections, simply grasp each section firmly and bend it until it naturally breaks at the joints. You can use a sharp knife to sever any remaining connective tissue if needed, but be cautious to avoid cutting yourself. For this recipe, we’ll be using the drumettes and flats.
Step 3: Trimming Excess Fat (Optional). While some fat contributes to flavor and juiciness, excessive fat can lead to greasy wings. If you prefer leaner wings, you can trim away any visible excess fat from the drumettes and flats using kitchen shears or a sharp knife. Be mindful not to remove too much fat, as this will dry out the wings during cooking. A little fat is your friend!
Step 4: Cleaning and Inspection. After separating and trimming (if applicable), carefully inspect each wing section for any remaining feathers, cartilage, or other undesirable bits. Remove anything you find. This step ensures a clean and appealing final product. A good tip is to run your fingers along the wing to check for any stray pieces you may have missed.
Step 5: Portioning (Optional). Depending on your preference, you can further cut the flats in half lengthwise to create smaller, more evenly cooked pieces. This is particularly useful if you’re serving a crowd or if you prefer smaller, more manageable portions. Cut carefully to ensure even pieces.
Professional Tip: For extra crispy skin, you can score the skin of the chicken wings with a sharp knife before seasoning. This allows for better penetration of seasonings and promotes crispier skin during cooking. However, avoid cutting too deeply into the meat. A shallow score is all you need.
Once your chicken wings are cleaned, cut, and prepped, you’re ready to move on to the next stage of the recipe: seasoning and cooking! Remember, proper preparation is key to achieving perfectly delicious and crispy chicken wings.
Marinade or Seasoning Preparation
The success of delicious chicken wings hinges significantly on the marinade or seasoning you choose. A well-crafted marinade not only adds flavor but also tenderizes the meat, resulting in juicy, flavorful wings. Conversely, a simple yet effective seasoning can deliver a crispy, flavorful exterior.
For a classic honey garlic marinade, you’ll need:
- 1/2 cup soy sauce (low sodium preferred)
- 1/4 cup honey
- 1/4 cup rice vinegar
- 2 tablespoons minced garlic
- 1 tablespoon grated ginger
- 1 teaspoon sesame oil
- 1/2 teaspoon black pepper
Whisk all ingredients together in a bowl until well combined. Ensure the honey is fully dissolved. This marinade is ideal for at least 4 hours, or even overnight in the refrigerator. The longer the wings marinate, the more flavorful they will become. However, marinating for longer than 24 hours is generally not recommended.
Alternatively, for a robust dry rub seasoning, try this recipe:
- 2 tablespoons paprika
- 1 tablespoon garlic powder
- 1 tablespoon onion powder
- 1 tablespoon brown sugar
- 1 tablespoon chili powder
- 1 teaspoon cayenne pepper (optional, for extra heat)
- 1 teaspoon black pepper
- 1 teaspoon salt
In a small bowl, thoroughly combine all the dry ingredients. Adjust the amount of cayenne pepper according to your spice preference. For a more intense flavor, you can lightly toast the spices in a dry skillet before mixing. This enhances their aroma and adds depth to the flavor profile. Generously coat the chicken wings with the dry rub, ensuring even distribution across all surfaces.
Important Considerations:
- Food Safety: Always marinate chicken in the refrigerator. Never leave marinated chicken at room temperature for extended periods.
- Wing Size: Adjust the marinade or seasoning quantity according to the amount of chicken wings you are preparing. For larger batches, simply multiply the recipe accordingly.
- Taste Test: Before marinating the entire batch, it’s advisable to taste a small amount of the marinade or seasoning to adjust the flavor profile to your preference. You can add more honey for sweetness, more soy sauce for saltiness, or more spice for heat.
- Storage: Leftover marinade should not be reused. Discard any remaining marinade after use.
Remember, the preparation of your marinade or seasoning is a crucial step in achieving perfectly delicious chicken wings. Experiment with different flavor combinations to find your personal favorite!
Cooking Method (Baking, Frying, Grilling etc.)
Choosing the right cooking method for your chicken wings is crucial for achieving the perfect texture and flavor. While frying delivers incredibly crispy skin, baking offers a healthier alternative, and grilling imparts a smoky char. Let’s explore each method in detail:
Baking: This method produces juicy wings with crispy skin, though it might not be as intensely crispy as frying. It’s a healthier option as it requires less oil. Preheat your oven to 400°F (200°C). Toss 2 lbs of chicken wings (patted dry) with 2 tablespoons of olive oil, 1 tablespoon of your favorite seasoning blend (paprika, garlic powder, onion powder, salt, and pepper work well), and ½ teaspoon of baking powder (this helps crisp the skin!). Spread the wings in a single layer on a large baking sheet. Avoid overcrowding the pan; this will lead to steaming instead of crisping. Bake for 45-55 minutes, flipping halfway through, until the wings are golden brown and cooked through (internal temperature reaches 165°F/74°C). For extra crispiness, broil the wings for the last 2-3 minutes, keeping a close eye to prevent burning.
Frying: Deep frying yields the crispiest, most flavorful wings. However, it’s the highest calorie option. Use a deep fryer or a large, heavy-bottomed pot filled with about 3 inches of vegetable oil. Heat the oil to 350°F (175°C). Use a thermometer to monitor the oil temperature precisely; this is critical for even cooking and preventing burning. Carefully add about 1 lb of chicken wings (patted dry) to the hot oil. Avoid overcrowding the pot; work in batches if necessary. Fry for 8-10 minutes, turning occasionally, until golden brown and cooked through. Remove the wings with a slotted spoon and place them on a wire rack to drain excess oil. Season immediately with your favorite dry rubs or sauces.
Grilling: Grilling imparts a delicious smoky flavor to chicken wings. Preheat your grill to medium-high heat. Ensure the grill grates are clean and well-oiled to prevent sticking. Place the wings (patted dry and seasoned) directly on the grill grates. Grill for 10-12 minutes, turning frequently, until cooked through and slightly charred. For even cooking, consider using a grill basket, especially for smaller wings. Grilling times may vary depending on the intensity of your grill heat. Use a meat thermometer to ensure the internal temperature reaches 165°F (74°C).
Air Frying: This method offers a healthier alternative to deep frying while still achieving crispy results. Preheat your air fryer to 400°F (200°C). Arrange the seasoned chicken wings in a single layer in the air fryer basket, ensuring they aren’t overcrowded. Air fry for 20-25 minutes, shaking the basket halfway through, until golden brown and cooked through. Check for doneness frequently as air fryers can vary in cooking times.
Important Note: Regardless of the cooking method you choose, always ensure the chicken wings are cooked to an internal temperature of 165°F (74°C) to ensure food safety. Using a meat thermometer is highly recommended.
Checking for Doneness
Achieving perfectly cooked chicken wings requires careful attention to doneness. Undercooked wings are a food safety hazard, while overcooked wings become dry and tough. Therefore, mastering the art of checking for doneness is crucial for creating delicious, juicy wings.
The first and most important method is using a meat thermometer. This provides the most accurate measurement of internal temperature. Insert the thermometer into the thickest part of the wing, avoiding the bone, and ensure it reaches the center of the meat. The USDA recommends a minimum internal temperature of 165°F (74°C) for safe consumption. Don’t rely solely on the visual appearance; even if the wings look browned and crispy, they might still be undercooked inside.
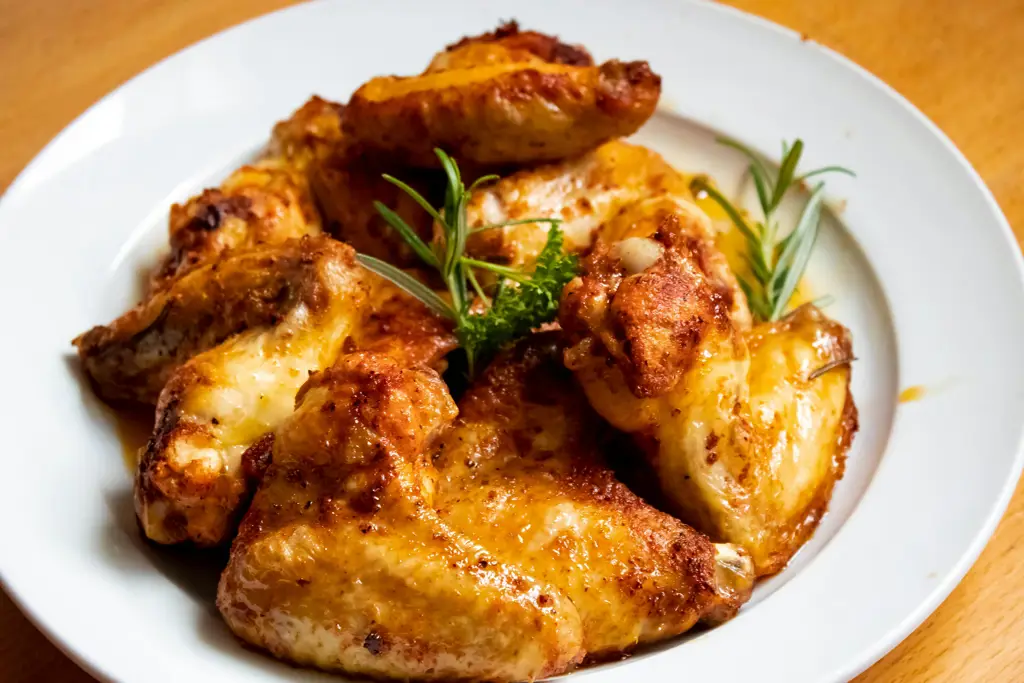
While a thermometer is the most reliable method, visual cues can provide supplementary information. The skin should be deeply golden brown and crispy, almost mahogany in color for those who prefer extra crispiness. The meat should appear opaque and no longer pink. However, relying solely on color can be misleading, particularly with larger wings or those cooked using different methods.
The texture of the cooked wing is another important indicator. Gently press on the thickest part of the wing with your fingers. A properly cooked wing will feel firm and offer slight resistance. An undercooked wing will feel soft and almost jiggly, while an overcooked wing will feel exceptionally firm and potentially dry.
For those using a baking method, you can visually inspect the wings after about 20-25 minutes of baking at 400°F (200°C). At this point, you should start checking the internal temperature with your thermometer. If the temperature is below 165°F (74°C), continue baking in 5-minute increments, checking the temperature each time. Remember to rotate the wings halfway through the baking process for even cooking. If you are using an air fryer, the cooking time will be significantly shorter, likely between 15-20 minutes at 400°F (200°C). Always check the temperature with a thermometer regardless of the cooking method.
For those frying their wings, the cooking time will depend on the size of the wings and the temperature of the oil. Maintain a consistent oil temperature around 350°F (175°C) for optimal results. Use tongs to gently remove a few wings and check their doneness using the thermometer and visual cues described above. If needed, continue frying in batches, ensuring the oil temperature doesn’t drop significantly. Overcrowding the fryer will lower the oil temperature, resulting in unevenly cooked wings.
Remember to always prioritize food safety. Err on the side of caution; it’s better to have slightly less crispy wings that are fully cooked than to risk foodborne illness. Using a meat thermometer and understanding the visual and textural cues will help you consistently produce perfectly cooked and delicious chicken wings.
Recommendations for Delicious Chicken Wings
To achieve truly exceptional chicken wings, meticulous attention to detail is crucial throughout the entire process. Properly drying the wings before cooking is paramount; this ensures a wonderfully crispy skin. Pat them thoroughly with paper towels after washing and even consider letting them air dry for 30 minutes before seasoning. This simple step significantly elevates the final product.
Don’t overcrowd the pan or baking sheet when cooking. Overcrowding leads to steaming instead of crisping, resulting in soggy wings. Work in batches to ensure even cooking and maximum crispiness. For frying, maintaining the correct oil temperature is essential. Use a thermometer to monitor the oil and adjust the heat as needed to stay within the ideal range (around 350°F or 175°C).
Experiment with different seasonings and sauces to discover your perfect wing flavor profile. While classic buffalo sauce is a perennial favorite, consider venturing into the realm of teriyaki, sweet chili, garlic parmesan, or even a dry rub with paprika, chili powder, and cumin. The possibilities are endless! Don’t be afraid to get creative and develop your signature wing sauce.
Regarding serving suggestions, consider offering a variety of dipping sauces alongside your wings. Ranch dressing, blue cheese dressing, honey mustard, and even a spicy mayo are all excellent choices. Serve your wings with celery sticks and carrot sticks for a classic appetizer presentation. For a more substantial meal, consider serving them with a side of potato salad, coleslaw, or french fries.
Proper storage is key to maintaining freshness and quality. Cooked chicken wings should be stored in an airtight container in the refrigerator for up to 3-4 days. To freeze them, ensure they are completely cooled before placing them in freezer-safe bags or containers. Frozen wings can last for up to 3 months. Always ensure food safety practices are followed when handling and storing cooked chicken.
Complementary dishes can significantly enhance the overall dining experience. A refreshing side salad with a light vinaigrette can cut through the richness of the wings. For a heartier meal, consider pairing your wings with mac and cheese, cornbread, or even a simple green bean casserole. The options are virtually limitless, depending on your preferences.
Nutritional Information (per average wing, approximate values): The nutritional content will vary greatly depending on the cooking method (baked, fried, etc.), the size of the wing, and the type and amount of sauce used. However, a general estimate for a medium-sized baked chicken wing without added sauce is approximately: Calories: 80-100; Protein: 7-10g; Fat: 6-8g; Carbohydrates: 0-1g. These are estimates and should not be considered exact.
Important Note: These calorie and nutritional values are approximations. The actual values can vary significantly depending on the specific ingredients, cooking methods, and portion sizes used. For precise nutritional information, use a nutrition calculator and input your specific recipe details.