The humble baked potato, a culinary staple across the globe, boasts a surprisingly rich history far exceeding its simple appearance. While pinpointing its exact origin is difficult, evidence suggests potatoes, originally cultivated in the Andes Mountains of South America, were being baked long before European colonization. Indigenous populations in the region developed various cooking methods, with baking in hot ashes being a particularly common technique. This method, passed down through generations, formed the foundation for the baked potato we know and love today.
The potato’s journey to global prominence began with the Spanish conquest of the Inca Empire in the 16th century. From South America, potatoes spread across Europe, initially facing resistance due to unfounded fears and misconceptions. However, their nutritional value and ease of cultivation eventually won over skeptics. By the 18th and 19th centuries, potatoes became a crucial part of the European diet, particularly amongst the working classes, who relied on its affordability and filling nature. The Irish Potato Famine, a tragic event in the mid-19th century, starkly highlighted the potato’s importance as a primary food source and the devastating consequences of its failure. This historical event profoundly impacted the global perception of the potato and continues to shape conversations about food security today.
Today, the baked potato remains a beloved dish, transcending cultural boundaries. It’s estimated that Americans consume over 2 billion pounds of potatoes annually, with a significant portion prepared as baked potatoes. Its versatility is a key factor in its enduring popularity. From simple salt and butter to elaborate toppings like chili, cheese, sour cream, and chives, the baked potato offers endless customization options catering to diverse palates. Its nutritional profile, rich in potassium and fiber, also contributes to its widespread appeal. Beyond the individual level, the baked potato frequently features on restaurant menus globally, demonstrating its consistent relevance in modern culinary landscapes. Interestingly, the Super Bowl is often associated with a massive increase in potato consumption, indicating its connection to social gatherings and sporting events.
This recipe will guide you through the process of creating perfectly baked potatoes, highlighting techniques to achieve fluffy interiors and crispy skins. We’ll delve into various cooking methods, exploring the differences between oven baking, microwave baking, and even campfire baking, providing options for different preferences and equipment availability. Get ready to experience the simple pleasure of a perfectly executed baked potato, a dish with a history as rich and satisfying as its taste.
Ingredients and Measurements
The beauty of a baked potato lies in its simplicity. However, even simple recipes benefit from careful attention to ingredient selection and precise measurements. Here’s a breakdown of what you’ll need to create perfectly baked potatoes, along with recommendations for optimal results.
Potatoes: The foundation of your delicious baked potato is, of course, the potato itself. We recommend using russet potatoes, also known as Idaho potatoes. Their fluffy interior and slightly mealy texture are ideal for baking. Aim for potatoes that are roughly the same size, around 8-10 ounces each (about 225-285 grams). This ensures even cooking. Avoid potatoes with bruises, blemishes, or soft spots, as these can indicate spoilage.
Quantity: The number of potatoes you need will depend on the number of servings. For a single serving, one large potato is usually sufficient. For a family meal, you may need 4-6 potatoes. Plan ahead and purchase the appropriate quantity to avoid last-minute shopping trips.
Optional Ingredients for Enhanced Flavor: While a plain baked potato is delicious, adding a few extra ingredients can elevate the experience significantly. These additions are entirely optional, based on your preferences. We suggest considering the following:
Olive Oil (1 tablespoon per potato): A light coating of olive oil before baking adds moisture and enhances the potato’s natural flavor. Use extra virgin olive oil for the best taste. Don’t be afraid to experiment with other oils, like avocado or even a flavored oil like garlic-infused oil.
Salt (1 teaspoon per potato): Salt is essential for bringing out the potato’s flavor. Use kosher salt or sea salt for a more nuanced taste. Sprinkle the salt liberally over the oiled potatoes before baking.
Black Pepper (1/2 teaspoon per potato): A dash of freshly ground black pepper adds a subtle spice that complements the potato’s earthiness. Freshly ground pepper is always preferable to pre-ground pepper, as it retains more of its flavor and aroma.
Herbs (Optional): Dried herbs like rosemary, thyme, or oregano can be added before baking for an aromatic touch. Use about 1/2 to 1 teaspoon per potato, depending on your preference. Fresh herbs, like chopped chives or parsley, can be added as a garnish after baking.
Garlic Powder (Optional): A sprinkle of garlic powder (about 1/4 teaspoon per potato) can add a savory depth of flavor. Use sparingly, as too much garlic powder can overpower the potato.
Important Note: These measurements are guidelines. Feel free to adjust them to your personal taste and the size of your potatoes. The key is to ensure even seasoning and sufficient oil to prevent dryness.
Equipment and Utensils
Making the perfect baked potato requires the right tools. While seemingly simple, the equipment you use significantly impacts the final result, influencing both cooking time and the potato’s texture. Let’s explore the essential equipment and utensils needed for a truly delicious baked potato experience.
The Oven: This is, of course, the primary piece of equipment. A conventional oven is ideal, offering even heat distribution for consistent baking. Avoid using a toaster oven unless it’s exceptionally large, as smaller models may not accommodate larger potatoes effectively, leading to uneven cooking. Ensure your oven is preheated to the correct temperature – we’ll discuss this in the recipe section – as this is crucial for achieving a perfectly cooked interior and crispy skin.
Baking Sheet or Rack: While you can bake potatoes directly on the oven rack, using a baking sheet or a wire rack offers several advantages. A baking sheet catches any drips or spills from the potatoes, preventing messes and making cleanup easier. A wire rack allows for better air circulation around the potatoes, promoting even browning and crispier skin. Choose a baking sheet that’s large enough to comfortably accommodate your potatoes without overcrowding.
Potatoes: This might seem obvious, but selecting the right potatoes is essential. Russet potatoes are generally preferred for their fluffy interior and ability to crisp up nicely. Choose potatoes of similar size for even cooking. Aim for medium to large potatoes, around 8-10 ounces each. Too small, and they’ll cook quickly but may lack a substantial fluffy interior. Too large, and they will require significantly longer cooking times.
Fork or Potato Piercer: Before baking, it’s crucial to pierce the potatoes several times with a fork or a dedicated potato piercer. This allows steam to escape during baking, preventing the potatoes from exploding in the oven. Pierce each potato at least 5-6 times, ensuring the punctures are evenly distributed across the surface. This simple step is critical for safe and successful baking.
Measuring Cups and Spoons (Optional): While not strictly necessary for baking the potatoes themselves, measuring cups and spoons are needed if you plan to add any toppings or seasonings before or after baking. Accurate measurements ensure consistent flavor profiles in your toppings.
Serving Utensils: Once your potatoes are baked, you’ll need utensils to serve them. Oven mitts or gloves are essential for safely removing the hot baking sheet or potatoes from the oven. A sturdy serving spoon or tongs are helpful for transferring the baked potatoes to plates. Consider using a small bowl or ramekins for serving any toppings separately.
Optional Utensils: Depending on your preferred methods and toppings, you may also find yourself using a microwave for a quick initial cook (for larger potatoes), a food processor for making toppings, or a knife and cutting board for preparing toppings.
Potato Preparation and Washing
Selecting the right potatoes is paramount to achieving perfectly baked potatoes. Russet potatoes, also known as Idaho potatoes, are the ideal choice due to their high starch content, which results in a fluffy interior after baking. Avoid potatoes with blemishes, bruises, or sprouting eyes, as these can affect the texture and flavor. Aim for potatoes that are roughly the same size, approximately 8-10 ounces each, for even cooking.
Once you’ve selected your potatoes, thorough washing is crucial. Dirt and debris can harbor bacteria and affect the taste. Begin by rinsing the potatoes under cool running water, scrubbing gently with your hands or a vegetable brush to remove any loose soil. Pay close attention to the crevices and eyes of the potato.
For a more thorough cleaning, consider soaking the potatoes in a bowl of cool water for about 10-15 minutes. This allows any embedded dirt to loosen and float to the surface. After soaking, drain the water and give the potatoes another good scrub. Avoid using soap, as it can leave a residue that will affect the flavor of your baked potatoes.
Following the initial wash, you have a few options for further preparation. Some recipes call for piercing the potatoes with a fork several times before baking. This helps to prevent steam buildup inside the potato, which can cause it to explode in the oven. Piercing also allows for faster and more even cooking. Aim for at least 6-8 evenly spaced holes across the surface of each potato.
Another popular preparation method involves scrubbing the potatoes with a stiff brush and then thoroughly rinsing them before patting them completely dry with a clean kitchen towel or paper towels. Ensuring the potatoes are completely dry is important, as excess moisture on the surface can prevent the skin from becoming crispy during the baking process. This method is particularly useful if you plan on rubbing the potatoes with oil or herbs before baking.
For larger batches, a vegetable scrubbing brush with a long handle can be very efficient. Consider using a colander to rinse and drain the potatoes easily and quickly after each washing stage. Proper cleaning and preparation are key steps that contribute significantly to the overall quality and taste of your final product. Don’t rush this process; taking the time to ensure your potatoes are clean will be well worth the effort.
Finally, if you are aiming for extra crispy skin, you can consider lightly scrubbing the potatoes with a little bit of vegetable oil after drying, before placing them in the oven. This will help to enhance the browning and crispness of the skin during baking.
Pricking and Oiling the Potatoes
Before you even think about tossing those potatoes into the oven, the crucial first step is properly preparing them. This involves two simple yet essential actions: pricking and oiling. These seemingly minor steps significantly impact the final result, ensuring fluffy insides and crispy skins.
Pricking the potatoes is vital to prevent them from exploding in the oven. As the potatoes bake, steam builds up inside. If this steam has nowhere to escape, the pressure will eventually cause the potato to rupture, potentially making a mess and ruining your perfectly planned meal. To avoid this, use a fork to prick the potatoes all over. Don’t just do a few superficial pokes; you need to pierce the skin thoroughly, creating multiple small holes across the entire surface. Aim for at least 10-12 holes per potato, distributing them evenly.
The size of the potato influences the number of pricks needed. Smaller potatoes (around 5-6 inches long) might require fewer holes, while larger potatoes (7 inches or more) will need more extensive pricking. Feel free to be generous with the pricks – it is better to have too many than too few. You’re aiming for a good release of steam, not just a few escape routes.
Once pricked, it’s time to oil your potatoes. This step isn’t just about adding flavor; it’s crucial for achieving that desirable crispy skin. The oil helps to conduct heat efficiently, promoting browning and crispness. We recommend using a high-smoke-point oil, such as olive oil, avocado oil, or vegetable oil. Avoid oils with low smoke points, like butter or coconut oil, as they can burn at high oven temperatures.
For best results, use approximately 1-2 tablespoons of oil per pound of potatoes. This might seem like a lot, but it’s essential for even coating and optimal crispiness. After measuring your oil, pour it into a large bowl. Add your pricked potatoes to the bowl and toss gently to coat them thoroughly. Ensure all surfaces of the potatoes are lightly oiled. Don’t be afraid to use your hands; this ensures even distribution.
Professional Tip: For extra flavor, consider adding herbs and spices to your oil before coating the potatoes. Rosemary, thyme, garlic powder, or even a pinch of paprika can elevate the taste of your baked potatoes. Simply add your chosen seasonings to the oil in the bowl before adding the potatoes.
Important Note: Over-oiling can lead to soggy potatoes, so avoid using excessive amounts. The goal is a light, even coating, not a greasy layer. After oiling, you’re ready to proceed to the baking stage, confident that your potatoes are perfectly prepared for oven perfection.
Baking Method Selection (Oven, Microwave, Grill)
Choosing the right baking method for your potatoes significantly impacts the final texture and flavor. While all three methods – oven, microwave, and grill – can yield a cooked potato, each offers distinct advantages and disadvantages. Selecting the best method depends on your desired outcome, available equipment, and time constraints.
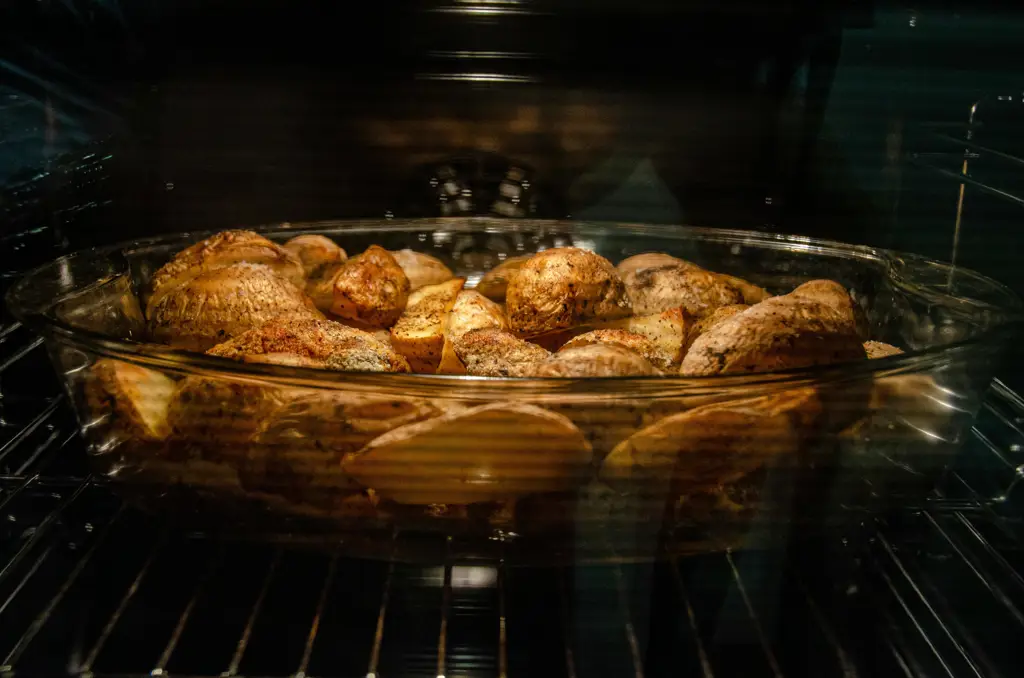
Oven Baking: The Classic Approach
Oven baking is the traditional and often preferred method for achieving perfectly baked potatoes. It provides even cooking throughout the potato, resulting in a fluffy interior and crispy skin. For optimal results, scrub 2-3 medium-sized russet potatoes (approximately 1 pound total) thoroughly and pierce them several times with a fork to prevent steam buildup and potential explosion. Rub the potatoes lightly with olive oil and season generously with salt and pepper. You can also add other seasonings like garlic powder, paprika, or herbs.
Place the potatoes directly on the oven rack (for crispier skin) or on a baking sheet. Bake in a preheated oven at 400°F (200°C) for approximately 60-75 minutes, or until a fork easily pierces the center. Baking time will vary depending on the size of the potatoes. Larger potatoes will require longer cooking times. For extra crispy skin, you can increase the oven temperature to 425°F (220°C) for the last 15-20 minutes of cooking.
Microwave Baking: The Speedy Solution
Microwave baking offers the fastest cooking time, making it ideal when you’re short on time. However, it often results in a less crispy skin and a slightly moister interior compared to oven baking. Wash and pierce 1-2 medium-sized potatoes as described above. Place them on a microwave-safe plate and cook on high for 5-8 minutes per potato, rotating halfway through. Cooking time will depend on the wattage of your microwave and the size of the potatoes. Check for doneness by piercing with a fork. If the potato isn’t fully cooked, microwave in 1-minute increments until tender.
To improve the texture, you can add a tablespoon of water to the plate before microwaving to create steam and help with even cooking. After microwaving, you can optionally broil the potato for a few minutes to crisp the skin. This method is best for potatoes that will be mashed or used in other recipes where skin crispiness is less important.
Grill Baking: The Smoky Delight
Grilling offers a unique smoky flavor and crispy skin, but requires careful attention to prevent burning. Prepare the potatoes as described above, ensuring they are thoroughly oiled and seasoned. Preheat your grill to medium heat. Place the potatoes directly on the grill grates. Turn the potatoes frequently to ensure even cooking and prevent burning. This method typically takes 20-30 minutes, depending on the size of the potatoes and the heat of the grill. Check for doneness by piercing with a fork.
Grilling is best suited for smaller potatoes or those cut in half to ensure they cook through evenly. Be mindful of flare-ups, and if necessary, move the potatoes to a cooler part of the grill. This method lends itself well to potatoes that will be served as a side dish, enhancing their smoky flavor profile.
Ultimately, the best baking method depends on your preferences and the time you have available. Experiment with each method to discover your favorite way to enjoy a delicious baked potato.
Baking/Cooking Process
The baking process for achieving perfectly fluffy and crispy baked potatoes hinges on several key factors: potato selection, preparation, and baking method. Let’s delve into the details to ensure your potatoes are restaurant-quality.
Potato Selection: Start with the right potatoes. Russet potatoes, with their high starch content, are ideal for baking. They produce a light and fluffy interior. Avoid potatoes with bruises, cuts, or soft spots. Choose potatoes of roughly uniform size for even cooking. Aim for medium to large potatoes, approximately 8-10 ounces each. Larger potatoes will require longer cooking times.
Preparation: Thoroughly wash the potatoes under cold running water, scrubbing away any dirt or debris. You can leave the skins on for added flavor and nutrients, but make sure they’re clean. Do not pierce the potatoes before baking. Piercing them prematurely releases moisture, resulting in a drier, less fluffy interior. You can, however, lightly rub them with a little olive oil or melted butter for enhanced flavor and a crispier skin.
Oven Baking Method: Preheat your oven to 400°F (200°C). Place the potatoes directly on the oven rack. This allows for even heat circulation and maximum crispiness. If you prefer, you can place them on a baking sheet, but direct heat on the rack yields superior results. Bake for approximately 60-75 minutes, depending on the size of the potatoes. Larger potatoes will require closer to 75 minutes. To test for doneness, pierce the potatoes with a fork. They should be easily pierced and offer little resistance. If they’re still firm, continue baking in 10-15 minute increments until tender.
Microwave Baking Method (for faster cooking): For a quicker method, you can partially cook the potatoes in the microwave. Wash and prepare them as described above. Microwave the potatoes on high for 5-7 minutes, flipping them halfway through. This softens the potatoes, reducing oven baking time. Then, transfer them to the preheated oven (400°F/200°C) and bake for an additional 30-45 minutes, or until tender and the skin is crispy. This method is ideal if you’re short on time but may result in slightly less crispy skin compared to oven-only baking.
Alternative Cooking Methods: While oven baking is the classic method, you can also cook baked potatoes in a slow cooker or Instant Pot. For slow cooker methods, place the potatoes in the slow cooker, add a little water to the bottom, and cook on low for 6-8 hours or high for 3-4 hours. For Instant Pot methods, place the potatoes in the Instant Pot with 1/2 cup of water, and cook on high pressure for 20-25 minutes followed by a natural pressure release for 10 minutes. However, note that these methods may not yield the same crispy skin as oven baking.
Important Note: Cooking times can vary slightly depending on your oven and the size of the potatoes. Always check for doneness using a fork. Overcooked potatoes will become dry and mealy, while undercooked potatoes will be hard and unappetizing. Practice makes perfect! Experiment with different methods and timing to find what works best for your oven and preferences.
Recommendations for Delicious Baked Potatoes
To achieve perfectly baked potatoes every time, remember these key recommendations. Start with the right potatoes: Russet, Idaho, or Yukon Gold potatoes are ideal for baking due to their fluffy texture and ability to absorb flavor. Avoid potatoes with bruises or soft spots. Scrub them thoroughly under cold water before baking to remove any dirt or debris. Properly preparing the potatoes is crucial: Prick the potatoes several times with a fork before baking to allow steam to escape and prevent them from exploding in the oven. This step is critical for even cooking and prevents a potentially messy oven clean-up.
Baking methods influence the outcome: While conventional oven baking (at 400°F (200°C) for approximately 60-75 minutes, or until tender) is the most common method, consider experimenting. For a quicker option, try microwaving the potatoes for about 5-7 minutes, then finishing them in the oven for optimal texture. Alternatively, wrapping the potatoes in foil before baking helps retain moisture and yields a softer interior. Don’t underestimate the power of seasoning: Experiment with different seasonings beyond simple salt and pepper. Consider adding herbs like rosemary, thyme, or chives; spices like garlic powder, paprika, or chili powder; or even a drizzle of olive oil before baking for enhanced flavor.
Serving suggestions greatly enhance your baked potato experience: The possibilities are endless! A classic topping is butter, sour cream, and chives. For a heartier meal, consider chili, pulled pork, broccoli and cheese, or even a simple tuna salad. Vegetarians can explore options like roasted vegetables, sautéed mushrooms, or a creamy spinach and artichoke dip. Don’t forget the potential of different cheeses, such as cheddar, Monterey Jack, or crumbled blue cheese. The combination of flavors is entirely up to your culinary preferences. Remember to consider dietary restrictions and preferences when selecting toppings.
Storage is important to maintain freshness: Leftover baked potatoes should be stored in an airtight container in the refrigerator for up to 3-4 days. To reheat, simply microwave or bake until heated through. You can also use leftover baked potatoes to create potato salad or soup. Avoid freezing baked potatoes as the texture will significantly change upon thawing.
Complementary dishes can elevate your meal: Baked potatoes pair well with a variety of dishes. A simple green salad provides a refreshing contrast to the richness of the potato. Steamed or roasted vegetables, such as broccoli, asparagus, or green beans, offer a healthy and balanced accompaniment. For a protein source, consider grilled chicken, fish, or a hearty stew. The versatility of the baked potato makes it a perfect centerpiece for a wide range of meal combinations.
Nutritional Information (per medium-sized baked potato, approximately 150g): Calories: Approximately 160-180; Protein: 4-5g; Carbohydrates: 37-40g; Fiber: 4-5g; Fat: 0.5-1g. Note: Nutritional content can vary depending on the size of the potato and added toppings.
Important Note: Always wash your hands thoroughly before and after handling food. Ensure your oven is preheated to the correct temperature for optimal baking results. Enjoy your delicious and perfectly baked potatoes!