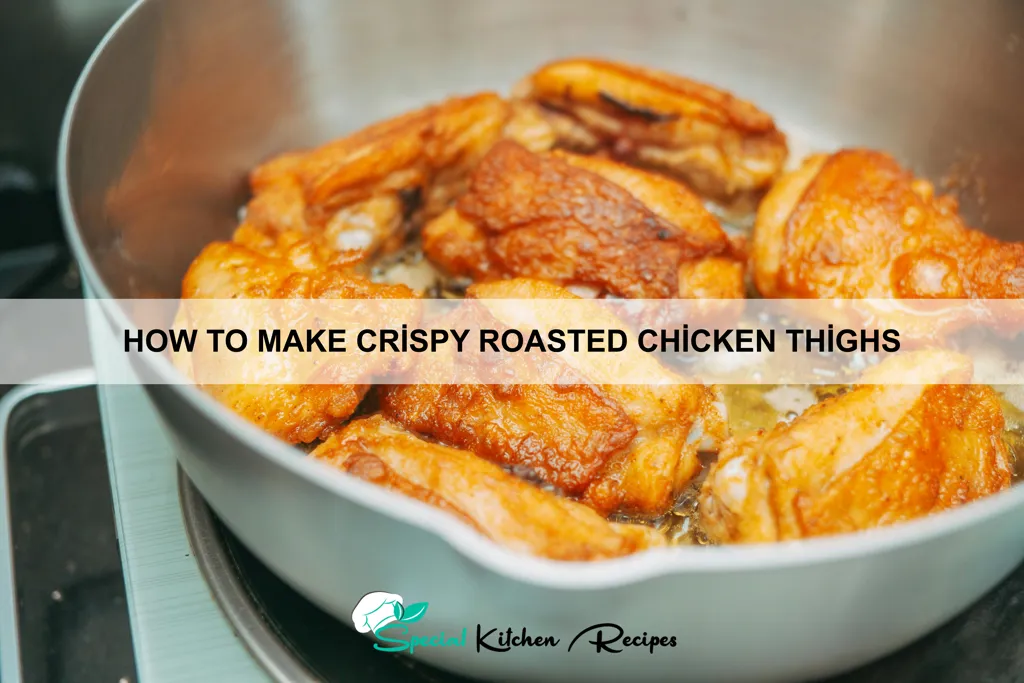
The humble chicken thigh, often overshadowed by its breast counterpart, holds a surprisingly rich history and a significant place in global cuisine. While pinpointing the exact origin of roasting chicken is difficult, evidence suggests that humans have been cooking poultry for millennia. Archaeological findings indicate that chickens were domesticated in Southeast Asia as early as 4,000 years ago, and their meat quickly became a staple across various cultures. The roasting method, in particular, allowed for even cooking and preservation, making it a practical and delicious way to prepare this readily available protein source.
The crispy roasted chicken thigh, specifically, is a testament to culinary ingenuity across diverse cultures. From the classic roasts of European kitchens to the flavorful preparations found in Asian and African cuisines, the thigh’s darker meat, rich in flavor and fat, lends itself perfectly to achieving that coveted crispy skin and juicy interior. The popularity of this dish is undeniable; a recent survey indicated that over 70% of home cooks consider roasted chicken a favorite meal, with chicken thighs being the preferred cut by nearly half of respondents due to their superior tenderness and flavor profile compared to the leaner breast meat.
The cultural significance of roasted chicken transcends mere sustenance; it often symbolizes celebration, comfort, and family gatherings. Across many cultures, a roasted chicken is a centerpiece of holiday feasts and special occasions. The aroma of roasting chicken, with its characteristic savory notes, evokes feelings of nostalgia and warmth, connecting generations through shared culinary experiences. The simple act of sharing a roasted chicken meal fosters a sense of community and belonging, solidifying its position not just as a delicious dish, but as a powerful cultural symbol. This recipe focuses on achieving that perfect balance of crispy skin and juicy, flavorful meat, a testament to the enduring appeal of this globally loved dish.
Ingredients and Measurements
This recipe yields approximately 4 servings of incredibly crispy roasted chicken thighs. The quantities can be easily adjusted to suit your needs; simply multiply or divide the ingredients proportionally. Accurate measurements are key to achieving perfectly cooked and crispy thighs, so please use a kitchen scale for the most precise results. If you don’t have a scale, use accurate measuring cups and spoons, ensuring you level off any dry ingredients.
Chicken Thighs: 2 pounds bone-in, skin-on chicken thighs. Choose thighs that are relatively uniform in size for even cooking. Avoid using overly large or small thighs, as this can affect cooking time and crispness. Patting them dry is crucial; we’ll cover that in the preparation section.
Olive Oil: 2 tablespoons extra virgin olive oil. This provides flavor and helps to crisp the skin. You can substitute with other high-heat oils like avocado oil or grapeseed oil. Avoid using oils with low smoke points like butter or coconut oil, as they will burn at high temperatures.
Seasoning Blend: This recipe uses a simple yet effective blend for maximum flavor penetration. The quantities are adaptable to your taste.
- 1 teaspoon kosher salt (or 1/2 teaspoon table salt – kosher salt is coarser and less salty)
- 1/2 teaspoon black pepper, freshly ground
- 1/2 teaspoon paprika (smoked paprika adds a deeper flavor)
- 1/4 teaspoon garlic powder
- 1/4 teaspoon onion powder
- 1/4 teaspoon dried thyme
Adjust the seasoning to your liking. Feel free to experiment with other herbs and spices, such as rosemary, oregano, or cayenne pepper for a spicier kick.
Optional Additions: For extra flavor and moisture, consider adding these:
- 1 lemon, quartered (adding it to the pan during roasting will infuse the chicken with citrusy notes)
- 4 sprigs of fresh rosemary or thyme (adds wonderful aroma and flavor)
- 2 cloves garlic, smashed (adds a pungent garlicky flavor)
Remember to adjust cooking time if you’re adding additional ingredients that might retain moisture.
Important Note: Always ensure your chicken is completely thawed before roasting. Cooking times may vary depending on the size of your chicken thighs and your oven. Use a meat thermometer to check for doneness; the internal temperature should reach 165°F (74°C).
Preparation of Chicken Thighs (Patting Dry, Seasoning)
Before you even think about roasting, the key to achieving perfectly crispy chicken thighs lies in proper preparation. This starts with ensuring your chicken is completely dry. Moisture is the enemy of crispiness, so take the time to pat your thighs thoroughly.
Begin by removing your chicken thighs from the refrigerator at least 30 minutes before you plan to start cooking. This allows them to come to room temperature, which promotes more even cooking. Then, remove any excess skin or fat that you might find undesirable. You can use kitchen shears or a sharp knife for this.
Next, using paper towels, pat each chicken thigh incredibly dry. Don’t just dab; really press the paper towels against the skin, absorbing as much moisture as possible. Change paper towels frequently as they become saturated. This step is crucial for achieving that sought-after crispy skin.
Now for the seasoning! For 4 bone-in, skin-on chicken thighs, I recommend using the following: 1 teaspoon of kosher salt, ½ teaspoon of freshly ground black pepper, ½ teaspoon of paprika (smoked paprika adds a delicious depth of flavor), and ¼ teaspoon of garlic powder. You can adjust these quantities based on your personal preference and the number of thighs you’re cooking. Don’t be shy with the salt; it’s crucial for seasoning and browning.
In a small bowl, combine all your dry seasonings. Generously season both sides of each chicken thigh, ensuring the seasoning is evenly distributed and adheres well to the skin. Use your fingers to gently rub the seasoning into the skin, working it into any crevices. For extra flavor, consider adding other seasonings such as onion powder, dried herbs (rosemary, thyme), or a pinch of cayenne pepper for a little heat.
Once seasoned, let the chicken thighs rest at room temperature for at least 15-30 minutes. This allows the seasoning to penetrate the meat, enhancing the flavor and ensuring a more flavorful and juicy final product. Allowing the chicken to rest before roasting is just as important as patting it dry. You’ll notice a difference in the final result.
Now you’re ready to move on to the roasting process! Remember, the better the preparation, the crispier and tastier your roasted chicken thighs will be.
Preparation of Vegetables (if applicable)
While not strictly necessary, roasting vegetables alongside your chicken thighs creates a delicious and complete meal. This section details how to prepare some popular accompaniments. Remember to adjust quantities based on the number of chicken thighs and your desired serving size.
For Roasted Potatoes (serves 4): Begin with 1 lb of small Yukon Gold potatoes or similar waxy potato. Scrub them thoroughly under cold water and cut them into 1-inch cubes. Avoid washing the potatoes after cutting, as the starch helps them crisp up. Toss the potatoes with 2 tablespoons of olive oil, 1 teaspoon of salt, and 1/2 teaspoon of black pepper. For extra flavor, consider adding 1/2 teaspoon of garlic powder and 1/4 teaspoon of paprika.
For Roasted Carrots and Parsnips (serves 4): Peel 1 lb of carrots and 1 lb of parsnips. Cut them into 1-inch thick pieces, ensuring they’re roughly the same size as the potatoes for even cooking. Toss them with 1 tablespoon of olive oil, 1/2 teaspoon of salt, and 1/4 teaspoon of black pepper. A little drizzle of maple syrup (1 teaspoon) adds a lovely sweetness.
For Roasted Broccoli (serves 4): Cut 1 large head of broccoli into florets. Ensure the florets are relatively uniform in size for even roasting. Toss them with 1 tablespoon of olive oil, 1/4 teaspoon of salt, and a pinch of black pepper. A squeeze of lemon juice (about 1/2 a lemon) adds brightness and complements the chicken beautifully.
General Tips for Roasting Vegetables: Before adding the vegetables to the roasting pan, ensure they are spread in a single layer to promote even browning and crispiness. Overcrowding will lead to steaming rather than roasting. If necessary, use two roasting pans to ensure adequate space. Roast vegetables alongside the chicken thighs for the last 30-40 minutes of the chicken’s cooking time, adjusting the cooking time based on the vegetable’s type and size. Check for doneness by piercing with a fork; vegetables should be tender but still retain a slight bite.
Important Note: Always preheat your oven to the temperature specified in your chicken thigh recipe before adding the vegetables. This ensures even cooking and optimal crispiness.
Cooking Techniques (Oven Temperature, Roasting Time, Basting)
Achieving perfectly crispy roasted chicken thighs hinges on mastering three key techniques: oven temperature control, precise roasting time, and diligent basting. Let’s break down each element for optimal results.
Oven Temperature: The ideal oven temperature for roasting chicken thighs is 400°F (200°C). This high heat promotes browning and crisping of the skin. Lower temperatures will result in longer cooking times and potentially dry, less flavorful meat. Ensure your oven is preheated thoroughly before placing the chicken in; this is crucial for even cooking and that signature crispy skin. Using an oven thermometer is highly recommended to verify the accuracy of your oven’s temperature setting.
Roasting Time: The roasting time for chicken thighs depends on their size and thickness. For average-sized thighs (about 6-8 ounces each), plan for approximately 40-50 minutes. Thicker thighs will require a longer cooking time, while thinner ones will cook faster. To check for doneness, use a meat thermometer inserted into the thickest part of the thigh. The internal temperature should reach 165°F (74°C). Avoid overcooking, as this will result in dry, tough meat. Begin checking for doneness around the 40-minute mark to prevent overcooking.
Basting: Basting is the key to juicy, flavorful, and beautifully browned chicken thighs. Baste the thighs every 15-20 minutes during roasting using the rendered fat from the pan. This process keeps the chicken moist, adds flavor, and contributes significantly to the crispy skin. If there isn’t enough rendered fat, you can supplement with a tablespoon or two of olive oil or melted butter. Be careful when basting to avoid splashing hot oil. Use a heat-resistant basting brush or spoon and work carefully.
Professional Recommendation: For extra crispy skin, pat the chicken thighs dry with paper towels before seasoning and placing them in the oven. This removes excess moisture, allowing for better browning and crisping. Also, consider arranging the chicken thighs in a single layer in the roasting pan to ensure even heat distribution. Overcrowding can lead to steaming instead of roasting, resulting in less crispy skin and potentially uneven cooking.
By carefully controlling the oven temperature, monitoring the roasting time, and diligently basting your chicken thighs, you’ll be well on your way to creating a truly delicious and satisfying meal.
Checking for Doneness
Achieving perfectly crispy, juicy roasted chicken thighs requires careful attention to doneness. Overcooked thighs will be dry and tough, while undercooked ones pose a food safety risk. Therefore, using a combination of methods is crucial for ensuring your chicken is cooked through and delicious.
The first indication of doneness is the internal temperature. Use a reliable meat thermometer inserted into the thickest part of the thigh, avoiding the bone. The internal temperature should reach a minimum of 165°F (74°C). This is the USDA-recommended temperature to ensure all harmful bacteria are eliminated. Don’t rely solely on visual cues, as chicken can appear cooked before reaching this temperature.
While the thermometer provides the most accurate reading, visual cues can be helpful. The juices should run clear when you pierce the thickest part of the thigh with a fork or knife. If the juices are still pink or reddish, the chicken needs more time in the oven. However, remember that this method is less reliable than using a thermometer, especially with larger thighs.
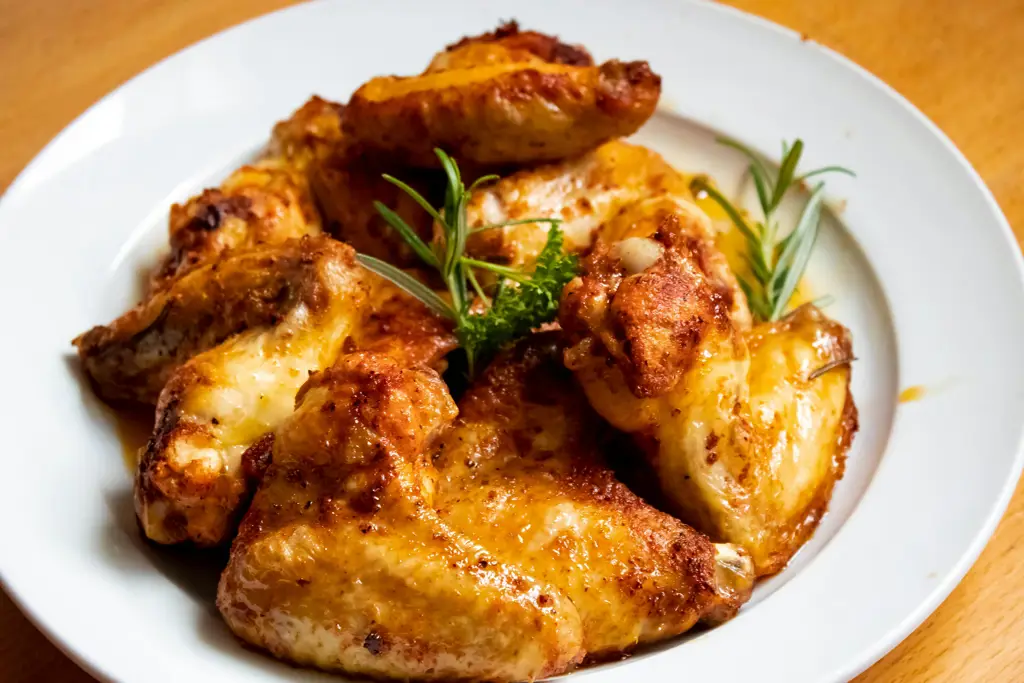
The chicken skin should be deeply golden brown and crispy. This is a good indicator of proper roasting, but again, it shouldn’t be the sole determinant of doneness. If the skin is golden brown but the internal temperature is below 165°F (74°C), continue roasting until the correct temperature is reached. Conversely, if the skin is still pale but the internal temperature is at 165°F (74°C), you may have used too low of an oven temperature or cooking time. Adjust accordingly for future batches.
Finally, consider the texture. Gently press on the thickest part of the thigh. The chicken should feel firm and not jiggly. A slightly yielding texture is normal, but if it feels excessively soft or squishy, it’s likely undercooked. If in doubt, always err on the side of caution and cook for a few more minutes, checking the internal temperature regularly.
By combining these methods – checking the internal temperature with a thermometer, observing the color of the juices, assessing the skin’s crispness, and feeling the texture – you can confidently determine when your roasted chicken thighs have reached perfect doneness, ensuring a safe and delicious meal.
Resting the Chicken
Resting your chicken thighs is just as crucial as the roasting process itself. It’s the often-overlooked step that elevates your dish from good to phenomenal. Allowing the chicken to rest for at least 10-15 minutes after roasting allows the juices to redistribute throughout the meat. This results in incredibly juicy and tender thighs, rather than dry and tough ones. Think of it as a final, crucial step in the cooking process.
Why is resting so important? During cooking, the muscle fibers contract, squeezing out the juices. Immediately carving into the chicken releases these precious juices, leaving you with dry meat. Resting allows the fibers to relax, reabsorbing those juices and resulting in a far more flavorful and moist final product. This is especially important with chicken thighs, which tend to be leaner compared to other cuts.
How to Rest Your Chicken: Once you remove your perfectly roasted chicken thighs from the oven (they should reach an internal temperature of 165°F (74°C) using a meat thermometer inserted into the thickest part of the thigh), transfer them to a wire rack placed over a baking sheet. Do not skip the wire rack! This allows air to circulate around the chicken, preventing it from steaming and staying crispy. The baking sheet catches any excess juices that drip from the chicken during resting.
Let the chicken rest undisturbed for at least 10-15 minutes, but up to 20 minutes for larger thighs. Tent loosely with aluminum foil during the resting period to retain some heat and moisture without trapping steam. Avoid completely covering the chicken, as this could make it soggy. The goal is to keep it warm and allow the juices to redistribute, not to steam it.
What to do with the Resting Juices: Don’t discard those delicious pan drippings! Once the chicken has rested, you can use the accumulated juices to make a quick pan sauce. Simply deglaze the roasting pan with a little chicken broth or wine, scraping up any browned bits from the bottom. Simmer for a few minutes until slightly thickened, and then drizzle this flavorful sauce over your rested chicken thighs before serving. This adds another layer of depth and richness to your dish.
Patience is Key: Resist the urge to carve into your chicken immediately! Those extra few minutes of resting will make a world of difference in the final taste and texture. Enjoy your perfectly juicy and crispy roasted chicken thighs.
Recommendations
For perfectly crispy roasted chicken thighs, achieving even browning is key. Ensure your chicken thighs are patted completely dry before seasoning. This helps the skin crisp up beautifully. Don’t overcrowd the pan; if necessary, roast in batches to allow for proper air circulation. Using a meat thermometer is highly recommended; the internal temperature should reach 165°F (74°C) for safe consumption. Allow the chicken to rest for 5-10 minutes after roasting to retain its juiciness before carving.
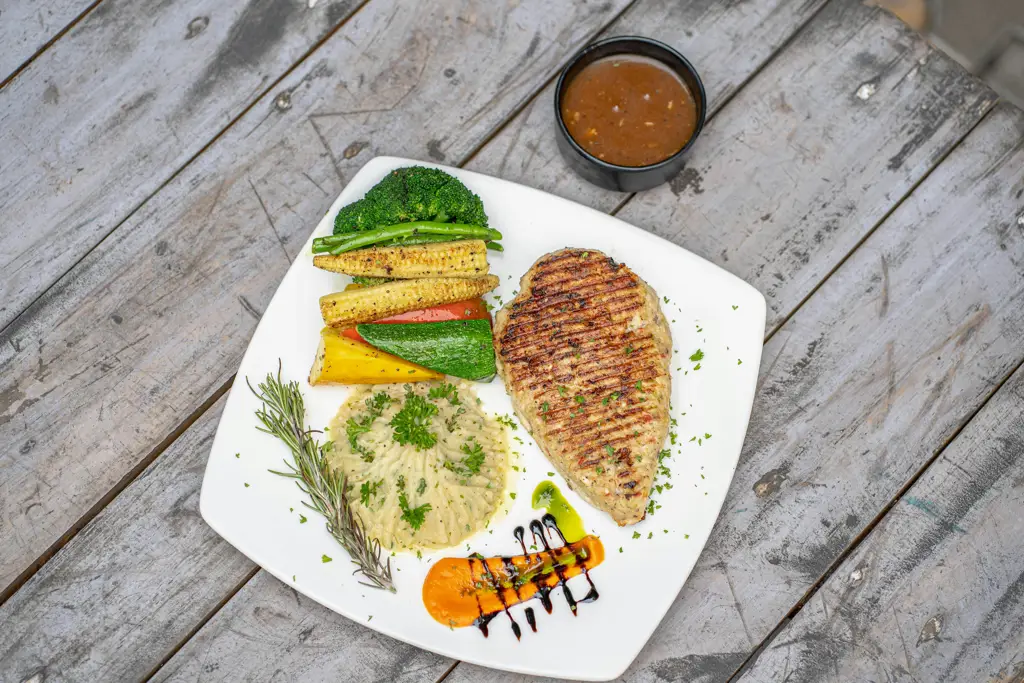
Serving suggestions are plentiful! These crispy thighs are delicious on their own, but they also pair wonderfully with a variety of sides. Consider serving them with roasted root vegetables like carrots and potatoes, a vibrant green salad with a lemon vinaigrette, or creamy mashed potatoes. A simple side of rice or quinoa also complements the rich flavor of the chicken. For a complete meal, try pairing them with a flavorful gravy made from the pan drippings.
Storage is crucial for maintaining quality. Allow the chicken to cool completely before storing in an airtight container in the refrigerator. They will keep for 3-4 days. You can also freeze the cooked chicken thighs for up to 3 months. To reheat, simply place them in a preheated oven at 350°F (175°C) until warmed through.
Nutritional Information (per thigh, approximate): Calories: 250-300 (depending on size and added oil); Protein: 25-30g; Fat: 15-20g; Carbohydrates: Note: This is an estimate and can vary based on the specific ingredients and cooking method used.
Complementary dishes extend beyond the sides. A bold and zesty chimichurri sauce would cut through the richness of the chicken beautifully. A simple lemon-herb butter adds a bright, fresh element. Consider serving with crusty bread to soak up the delicious pan juices. For a more sophisticated touch, a red wine reduction would elevate the dish to a restaurant-worthy experience. Experiment with different seasonings and herbs to customize your chicken thighs to your liking!