The satisfying crunch of perfectly fried fish is a culinary experience enjoyed across the globe, its origins stretching back centuries. While pinpointing the exact birthplace is difficult, evidence suggests that frying fish emerged independently in numerous cultures, driven by the need for preservation and the simple pleasure of enhancing flavor. Early forms likely involved shallow frying in animal fats, a technique prevalent in many ancient societies. The widespread adoption of frying, however, is largely attributed to the development of more stable cooking oils and the refinement of breading and battering techniques. This evolution, spanning millennia, has resulted in the diverse array of fried fish dishes we see today.
In many coastal communities, fried fish played, and continues to play, a crucial role in sustenance and local economies. Globally, the seafood industry is a multi-billion dollar enterprise, with fried fish representing a significant portion of seafood consumption. Statistics show that fried fish is a popular choice in fast food restaurants and is a staple in numerous cuisines. For example, fish and chips, a British classic, has become a national symbol, with estimates suggesting that over 250 million portions are consumed annually in the UK alone. Its cultural significance extends beyond mere sustenance; it’s often associated with seaside holidays, family gatherings, and even specific cultural events.
The cultural significance of fried fish varies greatly depending on location and tradition. In some cultures, it’s a celebratory dish, served during festivals and special occasions. In others, it’s an everyday meal, providing a readily available and affordable source of protein. The methods of preparation, from the type of fish used to the spices and batters employed, reflect local traditions and flavor profiles. From the tempura of Japan to the fish tacos of Mexico, each region boasts its unique take on this beloved dish. Understanding this broad culinary history and global reach adds a layer of appreciation to the seemingly simple act of frying a piece of fish.
Ingredients and Measurements
The success of crispy fried fish hinges on the quality and precise measurement of your ingredients. Don’t skimp on the details – accurate measurements are key to achieving that perfect golden-brown, crunchy exterior and flaky, moist interior.
For this recipe, we’ll be using 1 pound (450g) of firm white fish fillets. Cod, haddock, or tilapia work exceptionally well. Avoid overly delicate fish, as they may fall apart during frying. Ensure your fish fillets are patted completely dry with paper towels before proceeding. Excess moisture will result in soggy fish, not crispy.
Next, we need our breading. We’ll start with 1 cup (120g) of all-purpose flour. This provides the base for our coating. For extra flavor and a crispier crust, add 1 teaspoon of salt and ½ teaspoon of black pepper to the flour. You can also experiment with other spices like paprika, garlic powder, or onion powder – about ½ teaspoon of each. Remember to whisk the flour and spices together thoroughly to ensure even distribution.
Now for the egg wash: Crack 2 large eggs into a shallow dish and whisk them vigorously until the yolks and whites are fully combined. This will help the flour adhere to the fish and create a cohesive coating. Adding a splash of milk or water (about 1 tablespoon) to the eggs can help create a lighter, airier batter.
Finally, we’ll use 1 ½ cups (150g) of breadcrumbs for the outer layer. Panko breadcrumbs are highly recommended for their extra-crisp texture, but regular breadcrumbs will work just fine. Ensure your breadcrumbs are fresh, as stale breadcrumbs will not produce the desired crispiness.
For frying, you’ll need approximately 2 cups (475ml) of vegetable oil in a heavy-bottomed skillet or deep fryer. The oil should be heated to 350°F (175°C). Use a thermometer to ensure the oil reaches the correct temperature. Too low a temperature will result in greasy fish, while too high a temperature will burn the outside before the inside is cooked through.
Remember to adjust ingredient quantities based on the amount of fish you are frying. Maintain the ratios between the flour, egg wash, and breadcrumbs for optimal results.
Equipment and Utensils
Achieving perfectly crispy fried fish hinges not only on the recipe but also on the right equipment and utensils. Investing in a few key items will significantly elevate your frying game and ensure consistent results every time.
First and foremost, you’ll need a deep, heavy-bottomed pot or Dutch oven with a capacity of at least 6 quarts. This is crucial for even heat distribution and preventing the oil temperature from fluctuating wildly, which can lead to unevenly cooked fish. A smaller pot will overcrowd the fish and lower the oil temperature too much, resulting in soggy fish instead of crispy goodness. Avoid using non-stick cookware for deep frying as the high temperatures can damage the coating.
Next, you’ll need a candy thermometer. This is absolutely essential for monitoring the oil temperature accurately. The ideal temperature for frying fish is between 350°F (175°C) and 375°F (190°C). Using a thermometer is the only way to ensure your oil is at the correct temperature, leading to consistently crispy results. Without it, you’re essentially guessing, and the consequences can be burnt fish or undercooked, greasy fish.
For handling the hot oil and fish safely, a pair of long-handled tongs are indispensable. These will allow you to gently lower the fish into the hot oil and remove it without risking burns. A slotted spoon or spider is also helpful for removing the fried fish from the oil; it allows excess oil to drain back into the pot.
In terms of preparation, you’ll need several bowls. One large bowl for dredging the fish in the seasoned flour mixture, and at least two smaller bowls – one for the beaten egg wash (if using) and one for the bread crumbs or other coating. Having separate bowls prevents the dry ingredients from becoming gummy and ensures an even coating on the fish. Use shallow, wide bowls to facilitate even coating.
Finally, you’ll need paper towels for draining the excess oil from the fried fish. Line a baking sheet or wire rack with several layers of paper towels to ensure maximum oil absorption and prevent soggy fish. Don’t forget a sturdy spatula for flipping the fish halfway through the frying process if needed, though many prefer to leave it undisturbed.
By gathering these essential tools and following the proper techniques, you’ll be well on your way to creating perfectly crispy, golden-brown fried fish every time.
Fish Preparation (Cleaning, Cutting, etc.)
Proper fish preparation is crucial for achieving crispy, flavorful fried fish. The type of fish you choose will influence the cleaning and cutting process, but the general principles remain the same. We’ll focus on preparing fillets, as they are easiest for home cooks. If using whole fish, you’ll need to scale, gut, and fillet it first. Many fishmongers will happily do this for you if requested.
Choosing your fish: For optimal results, select firm, white-fleshed fish fillets like cod, haddock, pollock, or tilapia. These fish tend to hold their shape well during frying and absorb less oil. Avoid overly thin fillets, as they may become dry and brittle when fried. Aim for fillets that are approximately 1-1.5 inches thick.
Cleaning and Patting Dry: Once you have your fillets, rinse them gently under cold running water to remove any debris or blood. Thoroughly pat the fillets dry with paper towels. This is incredibly important; excess moisture will prevent the breading from adhering properly and result in soggy fish. Make sure to dry both sides and the edges.
Cutting (Optional): If your fillets are very large, you may want to cut them into smaller, more manageable pieces. This ensures even cooking and makes it easier to serve. Aim for pieces that are roughly 3-4 inches long and 2-3 inches wide. Avoid making them too small, as they may overcook easily.
Making Butterfly Cuts (Optional): For a beautiful presentation and faster cooking time, you can make a butterfly cut. This involves making a shallow, horizontal cut almost all the way through the thickest part of the fillet, allowing it to lie flat and cook more evenly. Be careful not to cut all the way through.
Seasoning (Pre-Breading): Before breading, lightly season your fish fillets with salt and freshly ground black pepper. You can also add other seasonings like garlic powder, onion powder, paprika, or cayenne pepper to enhance the flavor. Don’t over-season; the breading will also add flavor.
Important Note: Always handle fish with clean hands and utensils. Ensure your work surface is clean and sanitized to prevent cross-contamination.
Batter/Breading Preparation
Achieving that perfectly crispy fried fish relies heavily on the preparation of your batter and breading. This section details two popular methods: a simple breading and a classic beer batter. Choose the method that best suits your preferences and available ingredients.
Method 1: Simple Breading (for a crispier, less greasy result)
This method uses a straightforward three-step process: flour, egg wash, and breadcrumbs. For approximately 1 pound of fish fillets, you’ll need:
- 1 cup all-purpose flour
- 2 large eggs, lightly beaten with 2 tablespoons of water
- 1 1/2 cups breadcrumbs (panko breadcrumbs are recommended for extra crispiness)
- Salt and pepper to taste
- Optional: 1 teaspoon paprika or other spices for added flavor
Preparation: Season the flour with salt, pepper, and any desired spices. In a shallow dish, place the seasoned flour. In a separate shallow dish, place the beaten eggs. In a third shallow dish, place the breadcrumbs. Dredge each fish fillet first in the flour, ensuring it’s fully coated. Then, dip it into the egg wash, allowing excess to drip off. Finally, coat the fillet thoroughly in the breadcrumbs, gently pressing to adhere. Set aside the breaded fish until ready to fry.
Method 2: Classic Beer Batter (for a lighter, crispier outer layer)
A beer batter creates a wonderfully light and airy crust. For approximately 1 pound of fish fillets, you will need:
- 1 cup all-purpose flour
- 1/2 teaspoon baking powder
- 1/2 teaspoon salt
- 1 cup ice-cold beer (lager or pilsner work best)
Preparation: In a large bowl, whisk together the flour, baking powder, and salt. Gradually whisk in the ice-cold beer until a smooth batter forms. Do not overmix; a few lumps are acceptable. The batter should be thick enough to coat the fish but not so thick that it’s clumpy. The key to a light batter is using ice-cold beer and avoiding overmixing. Dip each fish fillet into the batter, ensuring it’s fully coated. Immediately place the battered fish into the hot oil.
Important Note: Regardless of the chosen method, ensure your fish fillets are completely dry before breading or battering. Excess moisture will result in a soggy, less crispy finished product. Allow the breaded or battered fish to rest for a few minutes before frying to help the coating adhere better.
Frying Technique (Oil Temperature, Cooking Time, etc.)
Achieving perfectly crispy fried fish hinges on mastering the frying technique. This involves careful control of oil temperature and precise cooking times, both crucial for a golden-brown, crunchy exterior and a flaky, moist interior.
Oil Temperature: The ideal oil temperature for frying fish is between 350°F (175°C) and 375°F (190°C). Using a thermometer is essential for accuracy. Too low a temperature results in greasy fish that absorbs excess oil, while too high a temperature leads to burning before the inside cooks through. A candy thermometer or a deep-fry thermometer is highly recommended for precise temperature monitoring.
Testing the Oil: Before adding the fish, test the oil by dropping a small piece of batter into the hot oil. If it sizzles immediately and floats to the surface, the oil is ready. If it sinks or bubbles slowly, adjust the heat accordingly. Never overcrowd the pan. This will lower the oil temperature significantly and result in soggy fish.
Cooking Time: Cooking time depends on the thickness of the fish fillets. For fillets about ½ inch thick, fry for approximately 3-4 minutes per side, or until golden brown and crispy. Thicker fillets (¾ inch or more) may require 5-6 minutes per side. Always use tongs to gently flip the fish, avoiding splashing hot oil. Overcrowding the pan can also significantly increase cooking time and result in uneven cooking.
Monitoring the Fish: Keep a close eye on the fish while it fries. The color will change from a light golden to a deep golden brown as it cooks. Don’t constantly move the fish around; let it cook undisturbed for the first few minutes to achieve a good crust. Once flipped, monitor closely to ensure even browning.
Draining the Fish: Once cooked, remove the fish from the oil using a slotted spoon or spider and place it on a wire rack or paper towel-lined plate. This allows excess oil to drain away, contributing to a crispier result. Avoid piling the fish on top of each other, as this will make them soggy. Let the fish rest for a few minutes before serving to allow the internal juices to redistribute, ensuring a moist and tender texture.
Oil Management: After frying, allow the oil to cool completely before storing. Do not pour hot oil down the drain as this can cause clogging. Instead, let it cool and then discard it properly according to your local regulations.
Draining and Resting
Proper draining and resting are crucial steps often overlooked, yet they significantly impact the final crispness and overall quality of your fried fish. Neglecting these steps can lead to soggy fish and a less-than-ideal eating experience. After removing the fish from the hot oil, immediate action is key.
First, use tongs to carefully transfer the fried fish pieces from the fryer to a wire rack set over a baking sheet lined with paper towels. Avoid overcrowding the rack; this will hinder proper draining and steaming, leading to a less crispy result. Ideally, leave at least ½ inch of space between each piece.
The paper towels will absorb excess oil, but the wire rack is essential. Do not place the fish directly on paper towels; this will trap the heat and steam, resulting in a soggy texture. The wire rack allows for air circulation, facilitating better draining and preventing the fish from becoming saturated with its own rendered fat.
Allow the fish to rest on the wire rack for at least 5-7 minutes. This resting period is vital for several reasons. First, it allows the batter to fully crisp up. The residual heat from the fish continues the cooking process, creating a shatteringly crisp exterior. Second, resting helps the fish to firm up, improving its texture and making it easier to handle.
For larger fish fillets (over 1 inch thick), you may need to extend the resting time to 10-12 minutes to ensure the inside cooks thoroughly while maintaining a crisp exterior. Monitor the fish closely during this time. If you notice the batter is becoming too dark, you can transfer it to a cooling rack set over a baking sheet to prevent further browning.
Proper draining and resting are the final touches that elevate your fried fish from good to exceptional. By following these simple steps, you’ll achieve a perfectly crispy exterior, a moist and flaky interior, and a truly unforgettable fried fish experience. Remember, patience is key, and these few extra minutes will make all the difference.
Once rested, your crispy fried fish is ready to be served immediately with your favorite dipping sauces and sides. Enjoy!
Recommendations for Crispy Fried Fish
For the crispiest results, ensure your fish fillets are completely dry before breading. Pat them thoroughly with paper towels to remove excess moisture. This prevents the batter from steaming the fish instead of crisping it. Also, don’t overcrowd the pan when frying; work in batches to maintain a consistent oil temperature and ensure even cooking. Overcrowding will lower the oil temperature, resulting in soggy fish.
Serving Suggestions: This crispy fried fish is incredibly versatile. Serve it immediately after frying for optimal crispiness. It’s delicious on its own, with a squeeze of lemon or lime. You can also enjoy it in fish tacos, atop a fresh salad, or nestled in a soft bun with tartar sauce and coleslaw for a delicious fish sandwich. Consider serving with a side of vibrant, tangy coleslaw to cut through the richness of the fried fish.
Storage: Leftover fried fish should be stored in an airtight container in the refrigerator for up to 2 days. For the best quality, consume it within 24 hours. Reheating can be done in a preheated oven at 350°F (175°C) for about 5-7 minutes, or until heated through. Avoid microwaving, as this will make the fish soggy.
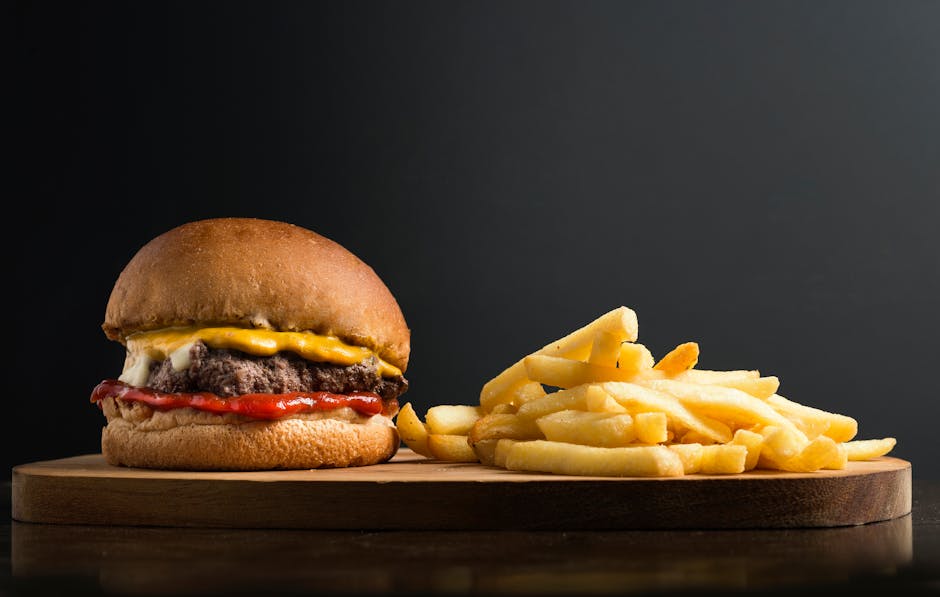
Complementary Dishes: To round out your meal, consider serving your crispy fried fish with classic sides like french fries, onion rings, creamy mashed potatoes, or a simple side salad. A light and refreshing tartar sauce or a spicy remoulade complements the fried fish beautifully. For a more sophisticated touch, pair it with a lemon-dill aioli or a vibrant mango salsa.
Nutritional Information (per serving – approximate, varies based on fish type and breading): Calorie count will vary greatly depending on the type of fish and the amount of breading used. A typical serving might contain anywhere from 300-500 calories. The nutritional profile will include protein, healthy fats (depending on the fish), and carbohydrates from the breading. Precise nutritional information requires specific ingredient details and portion sizes. It’s best to use a nutritional calculator with your specific recipe ingredients for accurate values.