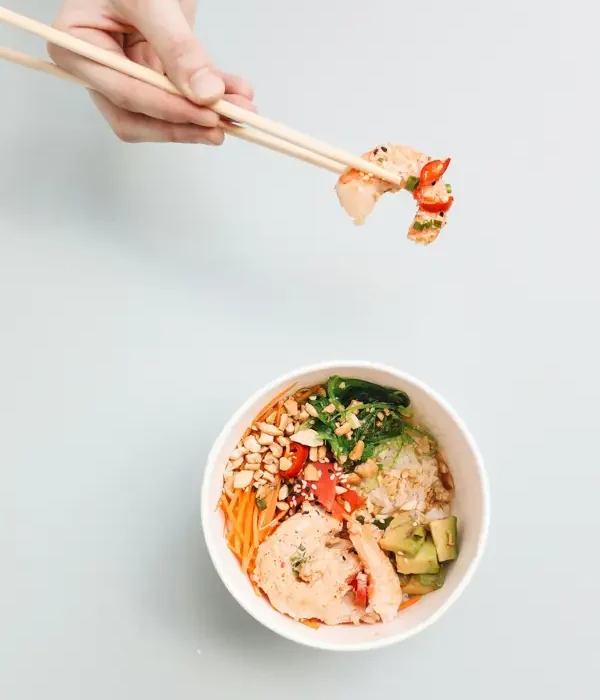
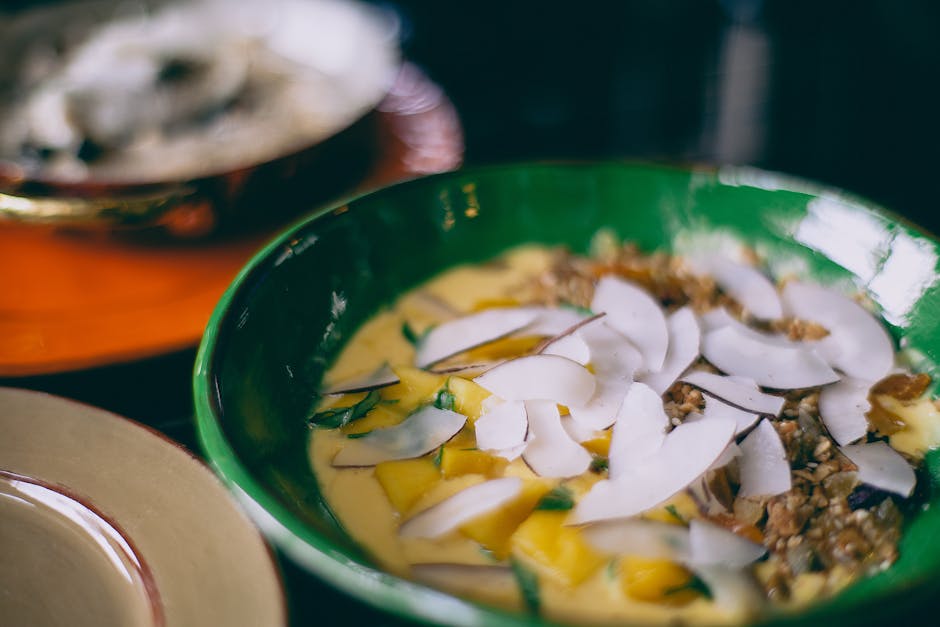
Coconut shrimp, a seemingly simple dish of succulent shrimp coated in shredded coconut and deep-fried to golden perfection, boasts a surprisingly rich and complex history. While pinpointing its exact origin is difficult, its popularity is undeniably linked to the rise of Polynesian and Asian-influenced cuisine in the Western world. The dish likely emerged as a fusion creation, combining the readily available shrimp of coastal regions with the ubiquitous coconut prevalent in tropical climates. Its exact timeline remains elusive, but its appearance on menus in the latter half of the 20th century, particularly in American restaurants specializing in tropical or Hawaiian themes, suggests a mid-century evolution.
The widespread adoption of coconut shrimp can be partly attributed to its inherent appeal. The crunchy, sweet coconut contrasts beautifully with the delicate, savory shrimp, creating a flavor profile that is both familiar and exciting. This pleasing combination, coupled with its relatively simple preparation, made it a quick favorite among home cooks and restaurant chefs alike. Its popularity skyrocketed in the 1980s and 90s, becoming a staple appetizer in casual dining establishments across the United States. While precise sales figures for coconut shrimp are hard to come by, its consistent presence on menus and as a featured item in numerous chain restaurants speaks to its enduring commercial success. It’s a testament to its adaptability; it’s easily incorporated into various cuisines and dietary preferences (with modifications).
Beyond its culinary appeal, coconut shrimp holds a certain cultural significance. It highlights the global exchange of culinary traditions, showcasing how ingredients and techniques from different parts of the world can converge to create something entirely new and delicious. In many ways, it represents a democratization of food, taking elements of perhaps more complex or regionally specific dishes and making them accessible to a broader audience. The coconut, a symbol of tropical abundance and relaxation, contributes to the dish’s overall perception as a lighthearted and enjoyable treat. Furthermore, coconut shrimp’s prevalence in restaurants often associated with vacation or tropical themes reinforces its association with leisure and celebration, solidifying its place in popular culture.
Interestingly, while coconut shrimp is commonly perceived as a distinctly American dish, its popularity extends globally, albeit with variations in preparation and presentation. Different cultures might incorporate local spices and sauces, reflecting the adaptability of the core concept. This adaptability, alongside its deliciousness and relative ease of preparation, guarantees that coconut shrimp will continue to be a beloved dish for many years to come. Whether served as an appetizer, a main course, or even part of a larger buffet, its enduring appeal makes it a culinary success story.
Ingredients and Measurements
Creating perfectly crispy and flavorful coconut shrimp hinges on using high-quality ingredients and precise measurements. The following list details everything you’ll need, along with recommendations for achieving optimal results. Remember to bring all ingredients to room temperature before beginning, especially the shrimp, for even cooking.
For the Shrimp:
- 1 pound (450g) large, raw shrimp, peeled and deveined. Ensure the shrimp are consistently sized for uniform cooking. Larger shrimp will require slightly longer cooking time. You can purchase pre-peeled and deveined shrimp to save time, but always inspect them carefully for any remaining shells or veins.
- 1/2 teaspoon salt. This is a base seasoning; adjust to your taste preference.
- 1/4 teaspoon black pepper, freshly ground. Freshly ground pepper offers a superior flavor compared to pre-ground.
For the Coconut Breading:
- 1 cup (120g) all-purpose flour. Using all-purpose flour creates a lighter, crispier crust compared to other types of flour. Ensure the flour is free of lumps. Sieving it before use is recommended.
- 1 large egg, lightly beaten. Room temperature eggs help create a better binding agent for the breading. A whisking fork can achieve the desired level of beaten-ness.
- 1 1/2 cups (150g) sweetened shredded coconut. Use a high-quality sweetened shredded coconut for the best flavor and texture. Avoid using desiccated coconut, as it will result in a dry and less flavorful coating.
- 1/2 cup (75g) panko bread crumbs (optional). Adding panko bread crumbs enhances the crispiness of the coconut shrimp. If omitting panko, increase the amount of shredded coconut slightly.
For Frying (choose one method):
- Deep Frying: 3 cups (700ml) vegetable oil, peanut oil, or canola oil. Use a high-smoke-point oil for deep frying to prevent burning. Ensure the oil reaches the appropriate temperature (350°F or 175°C) before adding the shrimp. Use a thermometer to monitor the oil temperature for consistent results.
- Shallow Frying/Pan-Frying: 2 tablespoons (30ml) vegetable oil, peanut oil, or canola oil. Use a heavy-bottomed pan to distribute heat evenly. Adjust the amount of oil depending on the size of your pan.
For Serving (optional):
- Your favorite dipping sauce, such as sweet chili sauce, mango salsa, or aioli. The possibilities are endless!
- Lime wedges for a zesty garnish.
Important Note: These measurements are for approximately 2-3 servings. Adjust the quantities accordingly if you need to make a larger or smaller batch.
Professional Tip: For extra crispy shrimp, allow the breaded shrimp to rest for about 15-20 minutes in the refrigerator before frying. This allows the breading to set and prevents it from falling off during cooking.
Equipment Preparation
Before you even think about cracking open a coconut, proper equipment preparation is crucial for a smooth and efficient coconut shrimp cooking process. This ensures consistent results and prevents frustrating delays mid-recipe.
First, let’s address the tools you’ll need for prepping the shrimp. You’ll require at least three shallow dishes or wide, flat containers. The first dish will hold the beaten egg mixture (we’ll discuss quantities in the ingredient section), the second will hold the shredded coconut, and the third will be for the breadcrumbs. Using shallow dishes allows for optimal coating and prevents excess batter from accumulating.
The dimensions of these dishes are less critical than their shallow depth; aim for dishes approximately 1 inch deep and large enough to comfortably accommodate your shrimp in a single layer. Overcrowding will lead to uneven coating and potentially soggy shrimp. Avoid using deep bowls as this will make the coating process cumbersome.
Next, consider your cooking equipment. For frying, a large, heavy-bottomed skillet or deep fryer (if you have one) is ideal. A heavy-bottomed pan ensures even heat distribution, preventing hot spots that can burn the shrimp before the inside is cooked through. If using a skillet, aim for at least a 12-inch diameter to comfortably accommodate the shrimp without overcrowding. A deep fryer offers more precise temperature control, leading to consistently crispy results.
Regardless of whether you opt for a skillet or deep fryer, you’ll need a thermometer to monitor the oil temperature. Maintaining the correct oil temperature (around 350°F or 175°C) is paramount. Too low, and your shrimp will be greasy and undercooked; too high, and they’ll burn on the outside before cooking through. An instant-read thermometer is the most efficient way to achieve this accuracy.
For draining the cooked shrimp, have a wire rack placed over a baking sheet ready. This allows excess oil to drain away, resulting in less greasy shrimp. Alternatively, you can use paper towels, but the wire rack is preferred for its better air circulation. Paper towels can sometimes stick to the shrimp, especially when they are still hot.
Finally, gather your utensils. You’ll need tongs or a slotted spoon for carefully transferring the shrimp into and out of the hot oil. A whisk is handy for beating the eggs smoothly and a large fork is useful for ensuring the shrimp are fully coated in the coconut mixture. Preparing these items beforehand will streamline the cooking process and contribute to a more efficient and enjoyable experience.
Shrimp Preparation (e.g., cleaning, deveining)
Properly preparing your shrimp is crucial for achieving perfectly cooked, delicious coconut shrimp. This section details the steps involved in cleaning and deveining 1 pound (approximately 450 grams) of raw shrimp, typically enough for 4-6 servings of coconut shrimp. Use fresh, high-quality shrimp for the best results. Frozen shrimp will also work; just ensure they are completely thawed before proceeding.
1. Thawing (if using frozen shrimp): If using frozen shrimp, thaw them completely in the refrigerator overnight. Never thaw shrimp at room temperature to prevent bacterial growth. Once thawed, gently rinse them under cold running water to remove any ice crystals.
2. Removing the Heads and Shells: Most shrimp sold for cooking already have their heads removed. However, if yours still have heads, gently twist and pull them off. To remove the shells, peel them from the tail towards the head. You can leave the tails on for presentation, but it’s easier to cook them evenly if you remove them. If removing tails, make a small cut with a sharp knife at the base of the tail before pulling it off. This helps to prevent tearing.
3. Deveining the Shrimp: This step removes the dark vein running along the back of the shrimp, which is the shrimp’s digestive tract. While it’s not harmful to consume, many find it unpleasant. There are two methods:
Method 1: Using a Small Knife: Using a sharp paring knife, carefully make a shallow cut along the back of the shrimp, from the head to the tail (or from the cut end to the tail if the tails are already removed). Gently insert the tip of the knife under the vein and lift it out. Be careful not to cut too deeply, as you’ll lose valuable shrimp meat.
Method 2: Using a Deveining Tool (optional): A shrimp deveining tool is a small, inexpensive tool designed specifically for this task. It makes the process quicker and easier. Follow the manufacturer’s instructions for use. This tool is particularly useful for those new to shrimp preparation.
4. Rinsed and Patted Dry: Once all the shrimp are deveined, rinse them again under cold running water to remove any lingering debris. Then, thoroughly pat them dry with paper towels. Moisture on the shrimp will prevent the coconut coating from adhering properly.
5. Optional: Butterfly the Shrimp (For Even Cooking): For more even cooking, especially with larger shrimp, you can butterfly them. This involves making a shallow cut along the back of the shrimp, almost all the way through, to flatten it slightly. This allows for faster and more even cooking.
Important Note: Always handle raw shrimp with care and ensure your hands and work surfaces are clean. Cook shrimp thoroughly to a safe internal temperature of 145°F (63°C) to prevent foodborne illnesses.
Coconut Batter Preparation
Creating the perfect coconut batter is crucial for achieving deliciously crispy and flavorful coconut shrimp. This section outlines a detailed process for preparing a batter that will adhere beautifully to the shrimp and result in a satisfyingly crunchy texture. The key is to balance the wet and dry ingredients carefully to avoid a gummy or overly dry coating.
Ingredients:
- 1 cup all-purpose flour
- 1/2 cup cornstarch (this adds extra crispness)
- 1 teaspoon baking powder (for a lighter texture)
- 1/2 teaspoon salt
- 1/4 teaspoon white pepper (optional, enhances flavor)
- 1 cup unsweetened shredded coconut (finely shredded is best)
- 1 cup ice water (or very cold water)
- 1 large egg, lightly beaten
Instructions:
Step 1: Dry Ingredients: In a large mixing bowl, whisk together the all-purpose flour, cornstarch, baking powder, salt, and white pepper (if using). Ensure all the dry ingredients are thoroughly combined to prevent clumps in the batter. This step is essential for a consistent coating on the shrimp.
Step 2: Incorporating Wet Ingredients: Gently whisk in the beaten egg. Avoid over-mixing at this stage, as this can develop the gluten in the flour and result in a tough batter. Add the ice water gradually, whisking constantly until a smooth, slightly thick batter forms. The consistency should be similar to pancake batter – not too thin, not too thick. The use of ice water is crucial; it helps prevent the batter from becoming gummy and ensures a crispier final product.
Step 3: Adding the Coconut: Gently fold in the shredded coconut. Do not overmix; you want to evenly distribute the coconut throughout the batter without breaking it down too much. Overmixing will create a pasty texture and may result in the coconut falling off the shrimp during frying.
Step 4: Resting the Batter (Optional but Recommended): Allow the batter to rest for at least 15-20 minutes. This allows the flour to fully hydrate, resulting in a smoother, less likely to crack batter. This resting period significantly improves the final texture and adhesion of the coconut coating.
Professional Recommendations:
- For an even crispier coating, you can add a tablespoon of vegetable oil to the batter.
- If your batter seems too thick, add a tablespoon of ice water at a time until you reach the desired consistency. If it’s too thin, add a tablespoon of flour.
- Ensure your shrimp are completely dry before dipping them in the batter to aid in proper adhesion.
- Use a light hand when coating the shrimp to avoid a thick, heavy batter. Work quickly!
Following these steps carefully will guarantee a delicious and perfectly textured coconut shrimp coating that will impress your friends and family.
Breading the Shrimp
Breading the shrimp is crucial for achieving that perfectly crispy, golden-brown exterior we all crave in coconut shrimp. This process involves a three-step system: dredging in flour, dipping in egg wash, and finally, coating generously in coconut flakes. Proper execution of each step ensures optimal adhesion and a delightful texture.
Prepare your stations: Before you begin, set up three shallow dishes. The first will hold the all-purpose flour, the second your egg wash, and the third your coconut flakes. This organized approach prevents messy cross-contamination and streamlines the breading process. Having everything within easy reach makes the process much smoother, especially when working with a larger batch of shrimp.
The Flour Dredge: In the first dish, place approximately 1 cup of all-purpose flour. Season the flour generously with salt and pepper to taste. You can also add other spices here, such as garlic powder, paprika, or even a pinch of cayenne for a little kick. This initial seasoning permeates the shrimp, adding depth of flavor to the final product. Remember, don’t be shy with the seasoning – it will be partially absorbed and enhance the taste beautifully.
Creating the Egg Wash: In the second dish, whisk together 2 large eggs with 2 tablespoons of milk or water. The milk or water helps thin the egg wash, ensuring a smoother, more even coating on the shrimp. A thin wash prevents a thick, gummy layer that can hinder crispiness. Whisk vigorously until the egg yolks and whites are fully incorporated and the mixture is light and frothy. This light and airy texture will help the coconut adhere better.
The Coconut Coating: For the final coat, use approximately 2 cups of unsweetened shredded coconut. Ensure your coconut is finely shredded for optimal adhesion and a more even coating. Coarsely shredded coconut may fall off during frying. You can also toast the coconut lightly before using it for a deeper, richer flavor and enhanced browning during the frying process. Simply spread it on a baking sheet and bake at 350°F (175°C) for about 5-7 minutes, stirring occasionally, until lightly golden.
Breading the Shrimp: Now, gently dredge each peeled and deveined shrimp in the seasoned flour, ensuring it’s fully coated. Shake off any excess flour. Next, dip the floured shrimp into the egg wash, allowing any excess to drip off. Finally, press the shrimp firmly into the coconut flakes, ensuring a completely even coating. Pressing firmly helps the coconut adhere properly, preventing it from falling off during frying and resulting in a beautifully consistent final product.
Important Note: Work in batches to avoid overcrowding the dishes and ensure each shrimp receives a thorough coating. Overcrowding can lead to uneven breading and result in some shrimp being undercooked or overcooked. Once breaded, you can either fry immediately or place them on a wire rack until you are ready to fry. This prevents the breading from becoming soggy.
Cooking the Shrimp (Frying, Baking, etc.)
Once your shrimp are prepped and coated in the delicious coconut mixture, it’s time to cook them to perfection! Several methods work well, each offering a slightly different texture and flavor profile. We’ll explore frying, baking, and air frying, outlining the best approach for each.
Frying: The Classic Approach
For the crispiest, most classic coconut shrimp, deep frying is the way to go. Heat about 2 inches of vegetable oil in a heavy-bottomed pot or deep fryer to 350°F (175°C). Use a thermometer to ensure accurate temperature; this is crucial for even cooking and preventing burning. Gently place about 6-8 shrimp into the hot oil, ensuring not to overcrowd the pot. Overcrowding will lower the oil temperature and result in soggy shrimp. Fry for 2-3 minutes per side, or until golden brown and cooked through. The shrimp should be opaque and pink throughout. Remove with a slotted spoon and place on a wire rack lined with paper towels to drain excess oil.
Baking: A Healthier Option
For a healthier alternative, baking your coconut shrimp is a great choice. Preheat your oven to 400°F (200°C). Line a baking sheet with parchment paper to prevent sticking. Arrange the coated shrimp in a single layer on the baking sheet, leaving some space between each shrimp for even browning. Avoid overcrowding the baking sheet, as this can lead to uneven cooking and steaming instead of baking. Bake for 12-15 minutes, flipping halfway through, until golden brown and cooked through. The internal temperature should reach 145°F (63°C).
Air Frying: The Fastest Method
Air frying offers a faster cooking time and a satisfyingly crispy result with less oil. Preheat your air fryer to 400°F (200°C). Arrange the coated shrimp in a single layer in the air fryer basket, again avoiding overcrowding. Do not overcrowd the basket; this will prevent proper air circulation and result in uneven cooking. Air fry for 8-10 minutes, shaking the basket halfway through, until golden brown and cooked through. Check the internal temperature to ensure it reaches 145°F (63°C).
Important Considerations for All Methods:
Shrimp Size: Smaller shrimp will cook faster than larger ones. Adjust cooking times accordingly. Don’t overcook! Overcooked shrimp will be tough and rubbery.
Internal Temperature: Always use a food thermometer to ensure the shrimp reach an internal temperature of 145°F (63°C) to guarantee they are safely cooked. This is crucial for food safety.
Cooling Rack: Using a wire rack to cool the cooked shrimp allows for better air circulation and prevents sogginess. This is particularly important for fried shrimp.
Serving: Serve your delicious coconut shrimp immediately with your favorite dipping sauce, such as sweet chili sauce, mango salsa, or a creamy remoulade.
Recommendations for the Perfect Coconut Shrimp
To achieve truly exceptional coconut shrimp, several key recommendations should be followed. First, ensure your shrimp are completely dry before breading. Excess moisture will prevent the coconut from adhering properly, resulting in a soggy end product. Pat them down thoroughly with paper towels after rinsing. Secondly, don’t overcrowd the pan when frying. Overcrowding will lower the oil temperature, leading to greasy shrimp that are not cooked through. Fry in batches, ensuring each piece has ample space to brown evenly.
For optimal flavor, use high-quality coconut flakes. Toasted coconut flakes add a delightful depth of flavor and a pleasing crunch. Experiment with different types of coconut flakes – sweetened or unsweetened – to find your preferred taste. Consider adding a pinch of salt to the coconut mixture for enhanced savory notes. Finally, adjust the frying temperature as needed. Maintaining a consistent oil temperature between 350-375°F (175-190°C) is crucial for achieving perfectly golden-brown, crispy shrimp without burning them.
Serving Suggestions: Coconut shrimp is incredibly versatile and pairs well with a variety of accompaniments. Serve them with a zesty dipping sauce, such as a sweet chili sauce, mango salsa, or a creamy remoulade. A classic cocktail sauce also complements the shrimp’s sweetness beautifully. Consider offering a selection of sauces to cater to diverse preferences. Fresh lime wedges are a wonderful addition, providing a bright, acidic counterpoint to the richness of the coconut.
Storage: For optimal freshness, store leftover coconut shrimp in an airtight container in the refrigerator for up to 3 days. Reheating can be done in a preheated oven at 350°F (175°C) for about 5-7 minutes, or in a skillet with a little oil until heated through. Avoid reheating in a microwave, as this can result in a soggy texture. For longer storage, consider freezing the cooked shrimp. Freeze in a single layer on a baking sheet before transferring them to a freezer-safe bag to prevent them from sticking together. They should last for up to 3 months in the freezer.
Complementary Dishes: Coconut shrimp makes a fantastic appetizer or part of a larger meal. It pairs wonderfully with rice dishes, such as coconut rice or jasmine rice. A fresh salad with a light vinaigrette adds a refreshing contrast to the richness of the shrimp. Consider serving it with grilled pineapple or mango for a tropical twist. For a more substantial meal, serve the coconut shrimp with a side of roasted vegetables or a vibrant slaw.
Nutritional Information (per serving, approximate): The exact nutritional content will vary depending on the size of the shrimp and the amount of oil used. However, a typical serving of 3-4 medium-sized coconut shrimp will contain approximately 250-350 calories. The nutritional breakdown will include a significant amount of protein from the shrimp, some healthy fats from the coconut, and a moderate amount of carbohydrates from the breading. Specific values should be determined using a nutritional calculator based on your exact recipe ingredients and portion sizes. Please note that this information is an estimate and may vary.


