Chocolate pudding, a seemingly simple dessert, boasts a surprisingly rich and complex history, far exceeding its status as a childhood favorite. While pinpointing its exact origins is difficult, evidence suggests that early forms of chocolate pudding emerged centuries ago, long before the processed cocoa powder we use today. Ancient civilizations, particularly the Olmec and Maya, consumed a bitter chocolate drink, often thickened with various ingredients, that served as a ceremonial beverage and a source of nourishment. This early form, far removed from the smooth, creamy texture we associate with modern chocolate pudding, laid the groundwork for the dessert’s evolution.
The journey of chocolate pudding from ancient Mesoamerica to its current global popularity is a fascinating one. The introduction of cocoa beans to Europe, following the Columbian Exchange, marked a turning point. However, early European adaptations often incorporated spices and other ingredients, reflecting the tastes of the time. It wasn’t until the 19th and 20th centuries, with advancements in food processing and the increased availability of cocoa powder, that chocolate pudding began to resemble its modern form. The development of commercial instant pudding mixes in the mid-20th century further democratized the dessert, making it accessible to a wider audience and contributing to its immense popularity.
Today, chocolate pudding holds a significant place in numerous cultures worldwide. It’s a staple dessert in many Western countries, frequently appearing on children’s menus and in casual dining settings. Globally, the market for chocolate and chocolate-based products is enormous. In 2022, the global chocolate confectionery market was valued at over $100 billion, a testament to the enduring appeal of chocolate in all its forms, including pudding. Its versatility shines through in variations ranging from the classic cornstarch-thickened version to those incorporating ingredients like eggs, cream, or even spices, reflecting regional preferences and culinary traditions. Whether enjoyed as a simple after-school treat or as an elegant component of a sophisticated dessert, chocolate pudding’s enduring legacy is undeniable.
This recipe will guide you through making a delicious homemade chocolate pudding from scratch, allowing you to experience the satisfaction of crafting this beloved dessert from its fundamental ingredients. You’ll discover the nuances of achieving the perfect texture and flavor, appreciating the simplicity and richness this classic dessert offers. Get ready to embark on a culinary journey that spans centuries, culminating in a bowl of creamy, chocolatey perfection.
Ingredients and Measurements
Creating a truly decadent chocolate pudding from scratch requires careful attention to the quality and quantity of your ingredients. Using high-quality chocolate will significantly impact the final flavor and richness of your pudding. Don’t skimp here; the best chocolate makes the best pudding!
For this recipe, we’ll be using bittersweet chocolate, which provides a balanced sweetness and intense chocolate flavor. You can adjust the type of chocolate to your preference – semi-sweet or even dark chocolate will work, but bear in mind that the sweetness and intensity will vary. Experiment to find your perfect chocolate profile!
Here’s a detailed breakdown of the ingredients and their precise measurements:
- 6 ounces (170 grams) bittersweet chocolate, finely chopped: Using a high-quality bittersweet chocolate (70% cacao or higher) is crucial. Finely chopping the chocolate ensures it melts smoothly and evenly, preventing lumps in your finished pudding. A food processor can be incredibly helpful for this task, achieving a consistent chop in seconds. If using a knife, aim for pieces no larger than a pea.
- 1/2 cup (120ml) whole milk: Whole milk contributes to the creaminess of the pudding. Using lower-fat milk will result in a thinner, less rich pudding. Avoid using skim milk or milk alternatives as they lack the fat content necessary for the desired texture.
- 1/4 cup (60ml) heavy cream: Heavy cream adds an extra layer of richness and luxurious texture. While you can substitute with whole milk, the pudding will be noticeably less decadent. Ensure your heavy cream is cold; this helps stabilize the emulsion.
- 1/4 cup (50g) granulated sugar: This amount provides a balanced sweetness that complements the bitterness of the chocolate. Adjust to your taste preference, but remember that too much sugar can overpower the chocolate flavor. Start with the recommended amount and add more gradually if needed.
- 2 large egg yolks: The egg yolks act as an emulsifier, binding the ingredients together and creating a smooth, glossy texture. Make sure your eggs are fresh; this is paramount for food safety. Using room temperature egg yolks will help them incorporate more easily into the mixture.
- 1 tablespoon cornstarch: Cornstarch is used as a thickening agent. Do not substitute with flour; it will result in a different texture and flavor. Ensure the cornstarch is well incorporated to prevent lumps.
- 1/4 teaspoon salt: A pinch of salt enhances the chocolate flavor and balances the sweetness. Don’t skip this step! It might seem insignificant, but it makes a noticeable difference.
- 1 teaspoon vanilla extract: High-quality vanilla extract adds a depth of flavor and aroma. Avoid using imitation vanilla, as it has a distinctly different flavor profile.
Accurate measurements are essential for achieving the desired consistency and flavor. Using a kitchen scale for weighing ingredients, especially the chocolate and sugar, is highly recommended for the most accurate results. Happy pudding making!
Equipment Preparation
Before you embark on the delightful journey of making homemade chocolate pudding, ensuring you have the right equipment readily available is crucial for a smooth and efficient process. Proper preparation minimizes mid-recipe scrambling and ensures a superior final product. Let’s outline the essential tools and how to prepare them.
First, you’ll need a medium-sized saucepan (approximately 2-quart capacity). This saucepan will be the heart of your pudding-making operation. Ensure it’s clean and free of any lingering odors or residues from previous cooking. A non-stick saucepan is preferable, but not strictly necessary. However, be mindful that even with a non-stick pan, using a whisk or spatula to prevent sticking is highly recommended.
Next, gather your measuring tools. Accuracy is key in baking and dessert-making. You’ll need a set of accurate measuring cups (1 cup, ½ cup, ¼ cup, and 1 tablespoon) and measuring spoons (1 teaspoon, ½ teaspoon, ¼ teaspoon). Avoid using nested measuring cups as this often leads to inaccurate measurements. Use separate measuring cups for wet and dry ingredients to maintain accuracy and avoid unwanted dilution.
A whisk is your best friend when making chocolate pudding. A sturdy balloon whisk, about 8-10 inches long, is ideal for incorporating ingredients smoothly and preventing lumps. A strong whisk is essential for creating a creamy, smooth texture, so opt for one with strong wires that won’t bend easily. Before you start, inspect the whisk to ensure there are no bent wires that might hinder its effectiveness.
You’ll also need a spatula, preferably a rubber spatula or silicone spatula. This will be crucial for scraping down the sides of the saucepan to ensure all ingredients are incorporated evenly and prevent burning. A heat-resistant spatula is recommended to withstand the heat of the saucepan. Having a second bowl (medium-sized) is also beneficial for preparing your ingredients ahead of time, preventing unnecessary mess and ensuring a more streamlined cooking process.
Finally, prepare your serving dishes. Whether you prefer individual ramekins, small bowls, or a larger serving dish, ensure they are clean and ready to receive your delicious homemade pudding. If you plan to chill the pudding, ensure your serving dishes are refrigerator-safe. Consider covering the pudding with plastic wrap before refrigerating to prevent the formation of a skin on the surface. This will maintain the pudding’s smooth texture and prevent it from drying out.
By meticulously preparing your equipment beforehand, you’ll set the stage for a stress-free and enjoyable chocolate pudding-making experience, resulting in a perfectly smooth and decadent dessert.
Making the Chocolate Sauce
The rich chocolate sauce is the heart of this decadent chocolate pudding. Its quality directly impacts the final flavor and texture, so take your time and pay attention to detail. We’ll be creating a luscious, velvety sauce that’s both intensely chocolatey and subtly nuanced.
Begin by gathering your ingredients: 1/2 cup (1 stick) of unsalted butter, 1 cup of granulated sugar, 1/2 cup of unsweetened cocoa powder (Dutch-processed cocoa powder is highly recommended for its deeper, richer flavor and smoother texture), 1/4 teaspoon of salt, and 1 cup of whole milk. Having everything measured and ready to go will streamline the process.
In a medium saucepan over medium heat, melt the butter completely. Don’t rush this step; ensure the butter is fully melted and smooth before proceeding. This prevents lumps from forming later in the sauce.
Next, gradually whisk in the sugar. Avoid adding the sugar all at once, as this can cause clumping. Continue whisking until the sugar is fully dissolved and the mixture is smooth and homogenous. This step helps create a perfectly balanced sweetness without any gritty texture.
Now, add the cocoa powder and salt. Whisk vigorously and continuously to prevent lumps. This is crucial for a smooth, lump-free sauce. If you notice any lumps forming, use a whisk to aggressively break them up. A fine-mesh sieve can be used after mixing to ensure ultimate smoothness.
Slowly pour in the milk, whisking constantly to create a smooth, consistent mixture. Continue whisking until the sauce is completely smooth and there are no visible streaks of cocoa powder. Bring the mixture to a gentle simmer, stirring frequently to prevent scorching. The sauce should thicken slightly as it simmers.
Once the sauce has reached a gentle simmer, reduce the heat to low and let it simmer for 2-3 minutes, stirring occasionally. This allows the flavors to meld and deepen, resulting in a more complex and delicious chocolate sauce. The sauce should have a slightly glossy sheen and a thick, pourable consistency.
Remove the saucepan from the heat and let the chocolate sauce cool slightly before using it in your chocolate pudding recipe. Allowing it to cool slightly prevents the pudding from becoming too thin or watery. You can cover it loosely with plastic wrap, pressing it directly onto the surface to prevent a skin from forming.
Professional Tip: For an even richer flavor, consider adding a teaspoon of vanilla extract or a pinch of espresso powder to the sauce. Experiment with different types of milk (like almond or oat milk) to adjust the richness and flavor profile to your liking.
Preparing the Custard Base
The custard base is the heart of your homemade chocolate pudding, providing the creamy texture and rich foundation for the chocolate flavor. Getting this step right is crucial for a flawlessly smooth and delicious pudding. We’ll be making a classic pastry cream, which is a versatile base for many desserts.
Begin by whisking together 1/2 cup (50g) granulated sugar and 1/4 cup (25g) cornstarch in a medium saucepan. This initial whisking is important to prevent lumps from forming in your custard. Make sure there are no clumps of cornstarch; a smooth mixture is key to a lump-free pudding.
Next, gradually whisk in 2 cups (475ml) whole milk. Whole milk provides the richest and creamiest texture. Using lower-fat milk will result in a thinner pudding. Whisk vigorously until the mixture is completely smooth and the sugar and cornstarch are fully incorporated. There should be no visible granules remaining.
Now, add 2 large egg yolks to the milk mixture. Whisk constantly as you add the yolks to prevent them from scrambling. The yolks will add richness and creaminess to your custard. If you prefer a slightly less rich pudding, you can use just one egg yolk.
Place the saucepan over medium heat. Continuously whisk the mixture as it heats. This constant whisking is absolutely essential to prevent the eggs from scrambling and to ensure a smooth, lump-free custard. The mixture will begin to thicken as it heats up.
Bring the mixture to a gentle simmer, stirring constantly. Do not let it boil vigorously, as this can cause the eggs to curdle and create a grainy texture. The custard is ready when it thickens enough to coat the back of a spoon. It should be thick enough to leave a clear trail when you run your finger across the back of the spoon. This usually takes about 5-7 minutes.
Once the custard has thickened, remove it from the heat immediately. This prevents further cooking, which could lead to a curdled or overly thick custard. Pour the hot custard through a fine-mesh sieve into a clean bowl. This step removes any stray lumps or cooked egg bits, ensuring a perfectly smooth texture. Stir gently to prevent a skin from forming on the surface.
Finally, press a piece of plastic wrap directly onto the surface of the custard to prevent a skin from forming. Allow the custard to cool completely before proceeding to the next step of adding your chocolate and other flavorings. Cooling the custard completely ensures that your final pudding will be perfectly set and won’t be too runny.
Combining and Cooking the Pudding
This section details the crucial process of combining the ingredients and cooking your homemade chocolate pudding to perfection. Accurate measurements and gentle handling are key to achieving a smooth, creamy texture and rich chocolate flavor.
Begin by whisking together the dry ingredients. In a medium-sized heatproof bowl, combine 1/4 cup (30g) of cornstarch, 1/2 cup (50g) of unsweetened cocoa powder, and 1/2 cup (100g) of granulated sugar. Whisk vigorously to eliminate any lumps. Ensure the cocoa powder is well incorporated; any clumps will result in a lumpy pudding. A fine-mesh sieve can be used to sift the dry ingredients for extra smoothness, though it’s not strictly necessary if you whisk thoroughly.
Next, gradually whisk in the wet ingredients. Slowly add 2 cups (475ml) of whole milk to the dry ingredients, whisking constantly to prevent lumps from forming. The milk should be at room temperature; cold milk can cause the cornstarch to clump, while hot milk might cook the cornstarch prematurely. Continue whisking until the mixture is completely smooth and free of any visible lumps. This step is crucial for a silky texture.
Now, incorporate the remaining wet ingredients. Whisk in 1/4 cup (60ml) of heavy cream, 1 teaspoon of vanilla extract, and a pinch of salt. The heavy cream adds richness and a luxurious mouthfeel. The vanilla enhances the chocolate flavor, while the salt balances the sweetness. Again, whisk thoroughly to ensure everything is well combined.
The cooking process requires careful attention. Place the bowl over a medium heat, preferably a double boiler or a saucepan with simmering water in the bottom (bain-marie). This gentle, indirect heat prevents scorching and ensures even cooking. Constantly stir the mixture with a heatproof spatula or whisk. This prevents sticking and ensures the pudding thickens evenly. The pudding will begin to thicken as the cornstarch cooks. Continue stirring for approximately 5-7 minutes, or until the pudding reaches a thick, pudding-like consistency that coats the back of the spoon. It should be thick enough to hold its shape when you lift the spatula.
Important Note: Do not let the pudding boil. Boiling can cause it to become grainy or lumpy. Maintain a gentle simmer and continuous stirring throughout the cooking process. If the pudding becomes too thick, you can always add a tablespoon or two of extra milk to adjust the consistency.
Once the pudding has reached the desired consistency, remove it from the heat immediately. Pour the hot pudding into a heatproof bowl or container. Cover the surface of the pudding with plastic wrap to prevent a skin from forming. This is crucial as it prevents the pudding from drying out. Allow the pudding to cool completely before refrigerating for at least 2 hours, or preferably overnight. This allows the flavors to meld and the pudding to set properly.
Cooling and Setting the Chocolate Pudding
Once your luscious chocolate pudding is cooked, the crucial next step is cooling and setting it properly. This process ensures a smooth, creamy texture and prevents a grainy or lumpy final product. Improper cooling can also lead to the pudding separating or developing a skin.
The first, and arguably most important, step is to immediately transfer the hot pudding from the stovetop to a heatproof bowl. A large, preferably glass or stainless steel bowl, is ideal. This prevents further cooking from residual heat trapped in the saucepan. Avoid using a metal bowl if your pudding contains acidic ingredients, as this can cause a metallic taste.
Next, press a piece of plastic wrap directly onto the surface of the pudding. This prevents a skin from forming on top as it cools. Make sure the plastic wrap is in full contact with the pudding to eliminate any air pockets. This is a vital step for maintaining a smooth, silky texture.
Now, allow the pudding to cool completely at room temperature. This typically takes about 30-45 minutes, depending on the ambient temperature and the quantity of pudding you’ve made. Do not refrigerate the pudding immediately after cooking, as the rapid temperature change can cause it to become grainy.
Once the pudding has cooled to room temperature, you can transfer it to an airtight container. A glass or plastic container with a tight-fitting lid works best. Ensure the container is completely clean and dry to prevent contamination.
Finally, refrigerate the pudding for at least 2-3 hours, or preferably overnight. This allows the pudding to fully set and develop its characteristic creamy consistency. The longer it chills, the firmer it will become. For a firmer pudding, increase the chilling time; for a softer consistency, reduce it.
Before serving, gently stir the pudding to ensure a uniform consistency. You may notice a slight separation after chilling, but a gentle stir should easily remedy this. If you find the pudding is too thick, you can add a tablespoon or two of milk or cream at a time, stirring until you reach your desired consistency. Remember to adjust the amount of liquid according to the quantity of your pudding.
Troubleshooting: If you notice your pudding is still grainy even after following these steps, it’s possible you cooked it over too high a heat or didn’t whisk the ingredients thoroughly enough. Always follow the recipe instructions carefully and use a low to medium heat for even cooking.
Following these steps will ensure your homemade chocolate pudding sets perfectly, resulting in a delightful, creamy dessert that will impress your friends and family. Enjoy!
Recommendations
To achieve the richest, creamiest chocolate pudding, follow these recommendations carefully. Start with high-quality ingredients. The better the cocoa powder and chocolate, the more intense and delicious your pudding will be. Using good quality milk also contributes significantly to the final texture and flavor. Don’t be afraid to experiment with different types of cocoa powder (Dutch-processed or natural) to find your preferred taste profile. Natural cocoa powder offers a more tart and acidic flavor, while Dutch-processed cocoa has a milder, more mellow taste.
Proper cooking is crucial. Ensure the cornstarch mixture is thoroughly cooked to avoid a raw, starchy taste. The pudding should thicken considerably as it simmers. If it seems too thin, continue cooking for a few more minutes, stirring constantly to prevent scorching. Conversely, if it’s too thick, add a tablespoon or two of milk to adjust the consistency. Remember to whisk continuously while cooking to prevent lumps and ensure even heating. A smooth and lump-free texture is key to a perfect pudding.
Cooling is essential. Allow the pudding to cool completely before serving. This allows the flavors to meld and the pudding to set properly. Covering the pudding during cooling prevents a skin from forming on the surface. For a smoother texture, cover the pudding with plastic wrap, pressing it directly onto the surface to prevent air pockets.
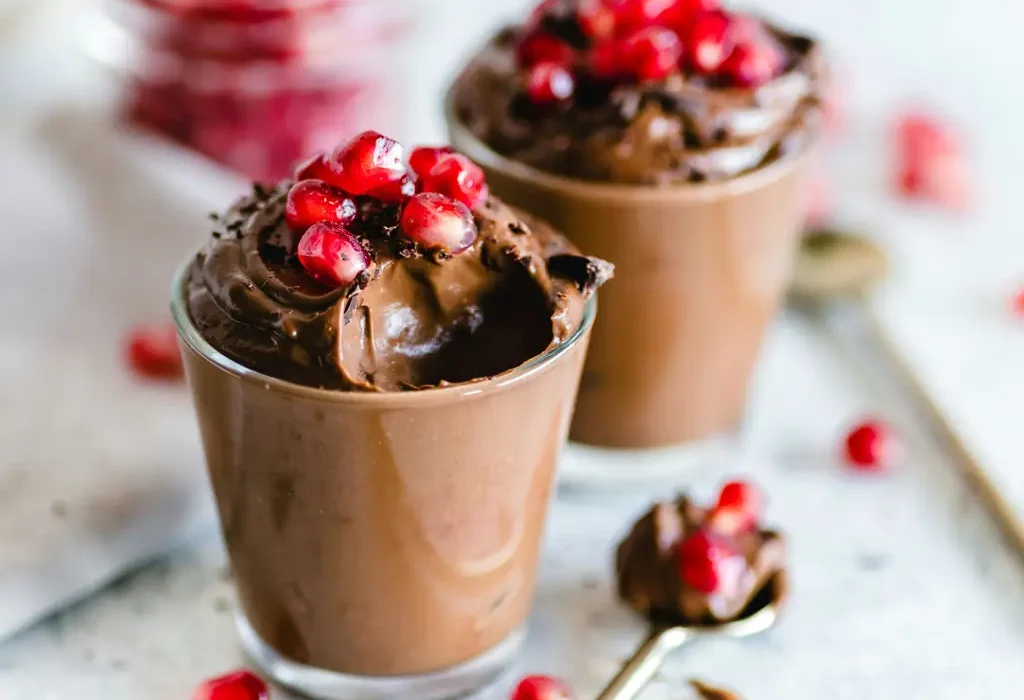
Serving Suggestions: Enjoy your homemade chocolate pudding as is, or elevate it with a variety of toppings. Consider fresh whipped cream, a sprinkle of cocoa powder, chocolate shavings, chopped nuts (like pecans or walnuts), a drizzle of caramel sauce, or even fresh berries for a delightful contrast in flavor and texture. A scoop of vanilla ice cream or a crunchy cookie crumble would also make a fabulous addition.
Storage: Store leftover pudding in an airtight container in the refrigerator for up to 3-4 days. Do not freeze chocolate pudding, as it will likely separate and change texture upon thawing.
Complementary Dishes: This decadent chocolate pudding pairs beautifully with a variety of dishes. It’s a perfect dessert after a light meal such as grilled chicken or fish. It also complements richer dishes, offering a sweet contrast. Consider serving it alongside shortbread cookies, angel food cake, or even a simple fruit salad for a balanced meal.
Nutritional Information (per serving, approximate): The exact nutritional content will depend on the specific ingredients and quantities used. However, a typical serving of homemade chocolate pudding will contain approximately 250-300 calories, with varying amounts of fat, protein, and carbohydrates. This is an estimate and may vary. For a more precise nutritional breakdown, use a nutrition calculator with your specific recipe ingredients and quantities. It is generally a good source of calcium if whole milk is used.
Enjoy! Making chocolate pudding from scratch is a rewarding experience. Experiment with different flavors and toppings to create your own signature pudding. The effort is well worth the delicious results.