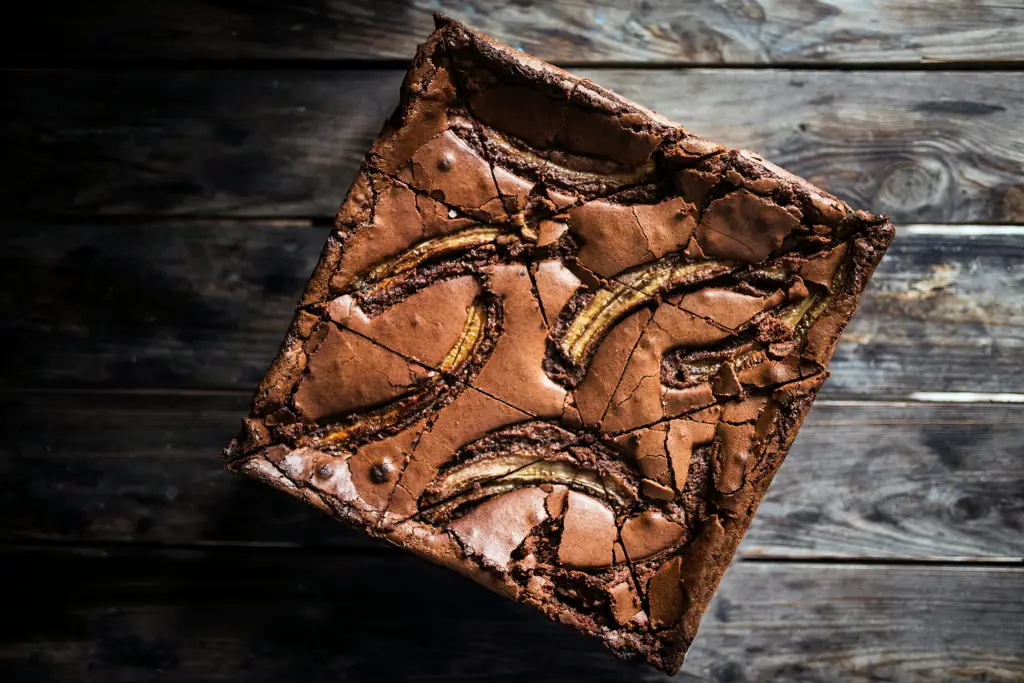
Prepare yourself for a decadent journey into the world of chocolate fudge brownies, a dessert so beloved it’s practically a cultural icon. While pinpointing the exact origin is difficult, the story of the brownie is a fascinating blend of happy accidents and culinary evolution. Early recipes, appearing in the late 19th and early 20th centuries, often describe variations that lacked the signature fudgy texture we associate with brownies today. These early iterations were often more cake-like, possibly a result of variations in baking techniques and ingredient availability. Some historians point to the women’s clubs of the late 19th century, particularly in the American Midwest, as potential early pioneers in brownie development, adapting existing recipes to create this delicious treat.
The evolution from cake-like squares to the rich, intensely chocolatey brownies we know and love is a testament to culinary experimentation. The addition of more butter and chocolate, combined with adjustments to baking times and temperatures, gradually transformed the brownie into the intensely fudgy delight we crave. The rise of packaged brownie mixes in the mid-20th century further cemented the brownie’s place in American kitchens and culture, making this once-laborious dessert accessible to everyone. Today, the humble brownie enjoys a global presence, with countless variations incorporating nuts, frosting, and a spectrum of chocolate types. It’s estimated that over 75% of American households bake or purchase brownies annually, highlighting its enduring appeal.
Brownies hold a significant cultural position, transcending simple dessert status. They’re synonymous with celebrations, bake sales, and casual gatherings. From school bake-offs to office potlucks, brownies are a universally appreciated treat, capable of bringing people together. Their versatility allows for personal expression – a simple brownie can be easily transformed into a personalized masterpiece with the addition of customized ingredients and toppings. This adaptability, coupled with their inherent deliciousness, explains their enduring popularity and global reach. The simple pleasure of a warm, gooey brownie is a powerful reminder of the joy found in simple things, a timeless comfort food that continues to captivate generations.
Ingredients and Measurements
Creating the perfect chocolate fudge brownie hinges on precise measurements and high-quality ingredients. Don’t be tempted to substitute or guess – the results will be worth the effort of careful preparation. This recipe yields 16 generously sized brownies.
For the Dry Ingredients:
We’ll start with the dry ingredients, ensuring they’re all properly measured for even baking and texture. Accuracy is key here. Use a kitchen scale for the most precise measurements, especially for the flour and cocoa powder. If using measuring cups, use the spoon and level method: gently spoon the ingredient into the cup and level it off with a straight edge, avoiding packing it down.
- 1 ½ cups (190g) all-purpose flour – Using all-purpose flour provides the right balance of structure and tenderness. Avoid using cake flour or bread flour as they will significantly alter the texture.
- ¾ cup (60g) unsweetened cocoa powder – Dutch-processed cocoa powder will yield a richer, darker brownie with a less acidic taste. Ensure your cocoa powder is fresh for optimal flavor.
- 1 ½ teaspoons baking powder – This leavening agent is crucial for lift and a light, airy texture. Don’t substitute baking soda unless you adjust the recipe accordingly.
- ¾ teaspoon baking soda – This helps to neutralize the acidity of the cocoa powder and contributes to the overall rise of the brownies. Use a fresh container for best results.
- ½ teaspoon salt – Salt enhances the chocolate flavor and balances the sweetness. Don’t skip the salt!
- 1 ½ cups (300g) granulated sugar – Granulated sugar provides sweetness and structure. Using brown sugar will significantly alter the texture and flavor, resulting in a chewier brownie.
For the Wet Ingredients:
The wet ingredients are equally important in achieving that fudgy texture. Make sure your eggs are at room temperature for optimal emulsification with the other wet ingredients. This will create a smoother batter and contribute to a more even rise.
- ½ cup (115g) unsalted butter, melted – Using unsalted butter allows you to control the salt content in the recipe. Make sure your butter is completely melted before adding it to the batter; otherwise, it may cause lumps.
- 2 large eggs – Room temperature eggs create a more consistent batter. Avoid using cold eggs as they can cause the batter to curdle.
- 1 teaspoon vanilla extract – Vanilla extract enhances the overall flavor profile of the brownies. Use high-quality vanilla extract for the best results.
- 1 cup (240ml) boiling water – The boiling water helps to create a fudgy texture and enhances the chocolate flavor. Pour the boiling water slowly and carefully into the batter to avoid splattering.
Optional Additions:
Feel free to customize your brownies! You can add ½ cup of chocolate chips, chopped nuts, or espresso powder for an extra layer of flavor and texture. Remember to adjust baking time if adding extra ingredients.
Equipment List
Making delicious chocolate fudge brownies requires the right tools to ensure a smooth and successful baking process. This equipment list details everything you’ll need, from measuring tools to baking pans, along with professional recommendations to help you achieve perfect results.
Mixing Bowls: You’ll need at least two mixing bowls of varying sizes. A large bowl (approximately 8-10 quart capacity) is crucial for combining the wet ingredients and another medium-sized bowl (approximately 4-6 quart capacity) is ideal for whisking together the dry ingredients. Choose stainless steel bowls as they are durable, easy to clean, and won’t react with the ingredients. Glass bowls are also a good alternative.
Measuring Cups and Spoons: Accurate measurements are essential for baking. Invest in a set of both liquid and dry measuring cups. Dry measuring cups should be used for dry ingredients only, using the spoon and level method to ensure accuracy. Liquid measuring cups, preferably glass or clear plastic, should be used for liquids like oil and milk. A separate set of measuring spoons is needed for smaller quantities of ingredients like baking powder and salt. Avoid using nested measuring cups or spoons as this can lead to inaccurate measurements.
Whisk: A sturdy whisk is essential for effectively combining dry ingredients and preventing lumps in your batter. A balloon whisk is recommended for its ability to incorporate air and create a smooth batter. A flat whisk can also be used, but ensure you whisk thoroughly.
Rubber Spatula or Scraper: A flexible rubber spatula or scraper is invaluable for scraping down the sides of the bowls, ensuring all ingredients are incorporated into the batter. A silicone spatula is preferred for its heat resistance and ease of cleaning. This tool is particularly helpful for getting every last bit of brownie batter into the pan.
8×8 inch Baking Pan: An 8×8 inch baking pan is the standard size for brownies. Use a dark-colored pan for even browning and to help prevent over-baking. If you don’t have a dark-colored pan, a light-colored one will work, but you may need to reduce the baking time slightly. Line the pan with parchment paper, leaving an overhang on two opposite sides for easy removal of the baked brownies.
Baking Sheet: While not directly involved in mixing, a baking sheet is helpful for placing the brownie pan on during baking. This provides stability and prevents the pan from warping in the oven. A rimmed baking sheet is recommended to catch any spills.
Oven: An oven, of course, is essential. Ensure your oven is properly calibrated for accurate baking temperatures. Use an oven thermometer to verify the accuracy of your oven’s temperature gauge. A malfunctioning oven can lead to under-baked or over-baked brownies.
Cooling Rack: Once the brownies are baked, you will need a cooling rack to let them cool completely before cutting and serving. This prevents the brownies from becoming soggy and allows them to set properly. A wire rack is ideal for air circulation.
Optional Equipment: A stand mixer can be used for mixing the batter, although a hand mixer or even vigorous whisking by hand will work perfectly well. A kitchen scale can provide more precise measurements, especially for professional results. A serrated knife is ideal for cutting the brownies into neat squares.
Preparation of Dry Ingredients
The success of your chocolate fudge brownies hinges significantly on the proper preparation of your dry ingredients. Precise measuring and careful handling are key to achieving that perfect fudgy texture and rich chocolate flavor. We’ll be using standard measuring cups and spoons for accuracy.
Begin by gathering all your dry ingredients: 1 ½ cups (190g) all-purpose flour, ¾ cup (60g) unsweetened cocoa powder, 1 teaspoon (4g) baking powder, ½ teaspoon (2g) baking soda, and ¾ teaspoon (4g) salt. It’s crucial to use a good quality unsweetened cocoa powder for the richest chocolate flavor. Dutch-processed cocoa powder will yield a slightly darker and less acidic brownie, while natural cocoa powder will provide a brighter, more tangy flavor. Choose the type that best suits your preference.
Accuracy in measuring is paramount. For the flour, use the spoon and level method. This means gently spooning the flour into your measuring cup, avoiding scooping directly from the bag, which can compact the flour and lead to inaccurate measurements. Once the cup is full, level the top with a straight edge, such as a butter knife or the back of a spoon. This ensures you’re using the correct amount of flour and prevents overly dry or dense brownies.
Similarly, for the cocoa powder, use the spoon and level method. Cocoa powder is often more compact than flour, so taking extra care to avoid packing it down is essential. Lumps in the cocoa powder can create uneven texture in your brownies, so make sure to gently break up any clumps with a whisk or fork before proceeding.
The baking powder and baking soda are leavening agents responsible for the rise of your brownies. Ensure these are fresh; old baking powder and baking soda can lose their effectiveness, resulting in flat, dense brownies. Check the expiration dates on the packaging. Use a level teaspoon for precise measurement to ensure the proper level of leavening.
Salt plays a crucial role in enhancing the chocolate flavor and balancing the sweetness. While it may seem like a small amount, don’t skip the salt! It’s essential for the overall flavor profile of your brownies. Again, use a level teaspoon for accurate measurement.
Once all your dry ingredients are accurately measured, sift them together in a large bowl. Sifting the dry ingredients helps to aerate them, ensuring a smooth batter and preventing lumps. If you don’t have a sifter, you can use a whisk to thoroughly combine the ingredients and break up any remaining clumps. This step ensures a consistent texture throughout the brownies.
After sifting, set the bowl aside and prepare your wet ingredients. The dry ingredients are now ready for combination with the wet ingredients to create your delicious chocolate fudge brownie batter.
Preparation of Wet Ingredients
The success of your chocolate fudge brownies hinges significantly on the proper preparation of your wet ingredients. This seemingly simple step requires attention to detail to ensure a perfectly moist and fudgy texture. We’ll be using a combination of melted butter, granulated sugar, brown sugar, eggs, and vanilla extract. The precise measurements are crucial for achieving the desired outcome.
Begin by measuring out 1 cup (2 sticks) of unsalted butter. Using unsalted butter allows you to control the salt content in your brownies, preventing them from becoming overly salty. Ensure the butter is at room temperature. This is vital; cold butter will not emulsify properly with the sugar, leading to a less smooth batter. Room temperature butter means it should be soft enough to easily indent with a finger, but not melted.
Next, measure 1 ½ cups of granulated sugar and ¾ cup of packed light brown sugar. Packed brown sugar means you’ve firmly pressed the brown sugar into the measuring cup to remove any air pockets. This ensures accuracy in your measurements. The combination of granulated and brown sugar contributes to both the sweetness and the characteristic moistness of the fudge brownies. Add both sugars to a large bowl.
Now, it’s time to incorporate the melted butter. Melt the butter in a microwave-safe bowl in 30-second intervals, stirring between each interval, until completely melted and smooth. Avoid overheating the butter, as this can affect its flavor and texture. Once melted, gently pour the melted butter into the bowl with the sugars.
Using a hand mixer or a stand mixer fitted with a paddle attachment, cream the butter and sugars together until light and fluffy. This process incorporates air into the batter, resulting in a lighter and chewier brownie. Creaming should take approximately 2-3 minutes on medium speed. Scrape down the sides of the bowl as needed to ensure all ingredients are incorporated.
Next, add 2 large eggs, one at a time, to the creamed butter and sugar mixture. Beat well after each addition to ensure proper emulsification. Cracking the eggs directly into the bowl can introduce bits of shell, so crack them individually into a small bowl first to check. The eggs bind the ingredients together and add richness to the brownies.
Finally, stir in 1 teaspoon of pure vanilla extract. Vanilla extract enhances the overall flavor profile of the brownies. Use a high-quality vanilla extract for the best results. Once the vanilla extract is added, gently mix until just combined. Overmixing at this stage can develop the gluten in the batter, resulting in tough brownies.
Your wet ingredients are now ready to be combined with the dry ingredients to complete your delicious chocolate fudge brownie batter. Remember that precision in measuring and careful attention to the creaming process will yield superior results.
Combining Wet and Dry Ingredients
This section details the crucial step of combining the wet and dry ingredients for your decadent chocolate fudge brownies. Proper technique ensures a perfectly textured and evenly baked brownie. We’ll be working with two distinct mixtures: the wet ingredients and the dry ingredients, which will then be gently combined.
Preparation of Wet Ingredients: Begin by gathering your wet ingredients: 1/2 cup (1 stick) unsalted butter, melted and slightly cooled; 1 cup granulated sugar; 1/2 cup packed light brown sugar; 2 large eggs; 1 teaspoon pure vanilla extract; and 1/4 cup unsweetened cocoa powder. Ensure the butter is not scorching hot; lukewarm is ideal to prevent the eggs from cooking prematurely. In a large bowl, whisk together the melted butter, granulated sugar, and brown sugar until well combined. The sugars should be mostly dissolved. Then, whisk in the eggs one at a time, ensuring each is fully incorporated before adding the next. Finally, stir in the vanilla extract and cocoa powder until a smooth, homogenous mixture is formed. Set this aside.
Preparation of Dry Ingredients: Next, prepare your dry ingredients: 1 cup all-purpose flour; 1/4 teaspoon baking powder; 1/4 teaspoon salt; and 1/2 cup semisweet chocolate chips. In a separate medium-sized bowl, whisk together the flour, baking powder, and salt. This ensures even distribution of the leavening agent and prevents pockets of saltiness in your final product. Thorough whisking is essential here. Once the dry ingredients are well combined, gently fold in the chocolate chips. Avoid overmixing at this stage to prevent tough brownies.
Combining Wet and Dry Ingredients: Now comes the delicate part – combining the wet and dry ingredients. Avoid overmixing, as this develops the gluten in the flour, resulting in tough brownies. Gradually add the dry ingredients to the wet ingredients, mixing with a spatula or wooden spoon using a folding motion. Begin by adding about 1/3 of the dry ingredients and gently fold them into the wet ingredients until just combined. Repeat this process with the remaining dry ingredients, adding them in two more batches. Stop mixing as soon as the dry ingredients are just moistened; a few streaks of flour are acceptable. Overmixing will lead to dense, chewy brownies, while undermixing may result in unevenly baked brownies.
Professional Tip: For the most even distribution of ingredients, use a spatula to scrape down the sides and bottom of the bowl several times during the mixing process. This will ensure that all the dry ingredients are incorporated into the batter and prevent any pockets of dry flour from forming.
Once the wet and dry ingredients are combined, your brownie batter is ready to be poured into a prepared baking pan. Remember, the key to perfect brownies lies in the gentle and careful blending of these two components. Follow the baking instructions carefully for the best results.
Baking the Brownies
Preheat your oven to 350°F (175°C). This is crucial for achieving the perfect texture; a lower temperature will result in gummy brownies, while a higher temperature will lead to dry, cracked ones. Ensure your oven is properly preheated before placing the brownie batter in. Use an oven thermometer to verify the accuracy of your oven’s temperature if you are unsure.
Grease and flour a 9×13 inch baking pan. You can also line the pan with parchment paper, leaving an overhang on two opposite sides to easily lift the brownies out later. Generously greasing the pan prevents sticking and ensures easy removal. If using flour, lightly dust the greased pan, tapping out any excess. This extra step provides an insurance policy against sticking.
Pour the prepared brownie batter into the prepared pan. Spread it evenly using a spatula or offset spatula. Avoid over-mixing the batter at this stage, as it can lead to tough brownies. A few gentle strokes to level the surface is all that’s needed.
Bake for 25-30 minutes, or until a wooden skewer inserted into the center comes out with moist crumbs attached. Do not overbake. Overbaked brownies will be dry and crumbly. Start checking for doneness around the 25-minute mark. Brownies baked in darker pans will often require a slightly shorter baking time, while lighter-colored pans may need a few extra minutes.
The edges of the brownies will appear set and slightly pulled away from the sides of the pan, while the center will still be slightly gooey. This is a sign of perfectly baked fudgy brownies. If the skewer comes out completely clean, the brownies are overbaked. A slightly moist crumb indicates that the brownies are perfectly fudgy.
Once baked, remove the pan from the oven and let the brownies cool completely in the pan before cutting. This cooling process allows the brownies to set properly and makes them easier to cut into neat squares. Allowing the brownies to cool completely is essential for maintaining their structure and preventing them from crumbling. Resist the urge to cut into them while they are still warm!
After cooling completely, lift the brownies out of the pan (if using parchment paper). Cut into squares using a sharp knife. A sharp knife ensures clean cuts and prevents the brownies from crumbling. Wipe the knife clean between cuts for the best results. Dust with powdered sugar, if desired, for an extra touch of sweetness and elegance.
Professional Tip: For even baking, rotate the pan halfway through the baking time. This ensures that all parts of the brownie batter receive equal heat, preventing uneven browning and ensuring consistent texture throughout the entire pan.
Professional Tip: If you prefer chewier brownies, reduce the baking time by a couple of minutes. If you prefer cakier brownies, increase the baking time by a couple of minutes and check for doneness more frequently.
Recommendations
For the richest, most decadent chocolate fudge brownies, follow these recommendations carefully. Using high-quality ingredients, such as good quality cocoa powder and dark chocolate, will significantly elevate the flavor profile. Don’t be tempted to substitute ingredients; each component plays a vital role in achieving the perfect texture and taste.
Proper baking is crucial. Overbaking will result in dry, crumbly brownies, while underbaking will leave them gooey and undercooked in the center. A toothpick inserted into the center should come out with a few moist crumbs attached, not completely clean. A digital thermometer can also be helpful, aiming for an internal temperature of around 190-200°F (88-93°C).
Cooling is just as important as baking. Allow the brownies to cool completely in the pan before cutting. This allows them to set properly and prevents them from crumbling. Cutting warm brownies will result in uneven pieces and a messy presentation.
Storage is key to maintaining freshness. Store leftover brownies in an airtight container at room temperature for up to 3 days. For longer storage, you can freeze them for up to 2 months. Wrap individual brownies tightly in plastic wrap before placing them in a freezer-safe bag or container to prevent freezer burn.
Serving suggestions are endless! Enjoy these brownies as they are, perhaps with a dusting of powdered sugar or a scoop of vanilla ice cream. They also pair beautifully with a dollop of whipped cream, a drizzle of chocolate sauce, or a sprinkle of sea salt to enhance the chocolate flavor. For a more sophisticated touch, consider serving them with a glass of cold milk, a cup of coffee, or a scoop of salted caramel ice cream.
Complementary dishes can elevate the brownie experience. A simple fruit salad, offering a refreshing contrast to the richness of the brownies, is a perfect accompaniment. A light and airy dessert, such as a lemon sorbet or a berry mousse, can also provide a lovely balance. For a more substantial pairing, consider serving the brownies alongside a scoop of vanilla bean ice cream, a rich espresso, or a glass of robust red wine.
Nutritional Information (per serving, approximate): It’s important to note that the precise nutritional content will vary based on the specific ingredients and portion size. However, a general estimate per brownie (assuming a 12-brownie pan) might be approximately: Calories: 300-350; Fat: 18-22g; Saturated Fat: 10-14g; Carbohydrates: 35-40g; Sugar: 25-30g; Protein: 3-4g. This information is an approximation and should be considered a guideline only. For more precise figures, use a nutrition calculator with your exact recipe ingredients and serving size.
Remember to always adjust baking times and temperatures based on your oven and altitude. If you’re unsure, start checking for doneness a few minutes earlier than indicated in the recipe. Enjoy your homemade chocolate fudge brownies!