Indulge in the rich, decadent world of chocolate fudge, a confectionery treat with a history as captivating as its taste. While pinpointing its exact origin is difficult, the earliest forms of fudge likely emerged in the United States during the 19th century, possibly in the northern states. Early recipes often varied widely, reflecting the improvisational nature of home cooking at the time, with ingredients ranging from butter and sugar to nuts and even marshmallows. The name fudge itself remains somewhat mysterious, with theories suggesting it might derive from a playful description of the confection’s texture – soft, malleable, and slightly uneven. Regardless of its precise beginnings, fudge quickly captured hearts (and taste buds).
The rise of fudge’s popularity is inextricably linked to the growth of the American confectionery industry. By the early 20th century, fudge had transcended its homemade origins, making its way into candy shops and eventually mass production. This industrialization helped standardize recipes and distribute fudge across a wider population, solidifying its place as a beloved treat. The smooth, creamy texture and intensely chocolatey flavour proved universally appealing. Today, the global market for chocolate confectionery alone is a multi-billion dollar industry, with fudge holding a significant, albeit niche, position within this vast landscape. Annual global sales of chocolate exceed $100 billion, highlighting the enduring appeal of this much-loved ingredient.
Fudge’s cultural significance extends beyond simple enjoyment. It’s frequently associated with celebrations, holidays, and special occasions. From homemade batches gifted to friends and family to commercially produced boxes appearing at holiday gatherings, fudge has become a symbol of sharing and togetherness. It often features prominently in bake sales, fundraisers, and even as a nostalgic element in popular culture, appearing in books, films, and television shows, further cementing its place in the collective consciousness. The simple act of making fudge, a process often involving family and friends, adds another layer of meaning, transforming it from mere confection into a cherished activity and a timeless tradition.
Ingredients and Measurements
Creating perfectly smooth and creamy chocolate fudge requires precise measurements and high-quality ingredients. Using a kitchen scale is highly recommended for accuracy, especially when measuring the sugar and butter. However, if using volume measurements, ensure you use accurate measuring cups and spoons and employ the proper techniques, such as spooning flour into a measuring cup and leveling it off with a straight edge, to prevent packing.
Butter: 1 cup (2 sticks) of unsalted butter. Using unsalted butter allows you to control the salt level in your fudge. Salted butter can make the fudge too salty. Make sure the butter is at room temperature; this ensures it emulsifies properly with the sugar and creates a smoother texture. If your butter is too cold, it will be difficult to incorporate fully.
Sugar: 2 cups (400g) of granulated sugar. Granulated sugar is essential for the correct texture and sweetness of the fudge. Do not substitute with other types of sugar, as they will alter the final product’s consistency and taste significantly. Using a kitchen scale to measure the sugar ensures consistency in your results.
Evaporated Milk: 1 (12-ounce) can of evaporated milk. Full-fat evaporated milk is crucial for richness and creaminess. Do not substitute with sweetened condensed milk or regular milk as this will impact the texture and sweetness. Ensure the can is well-shaken before measuring.
Chocolate: 12 ounces (340g) of semi-sweet chocolate chips or chopped semi-sweet chocolate. The type of chocolate significantly impacts flavor. Use high-quality chocolate for the best results. Milk chocolate, dark chocolate, or even a combination can be used, depending on your preference. However, ensure that the total weight remains consistent.
Vanilla Extract: 1 teaspoon of pure vanilla extract. Pure vanilla extract enhances the overall flavor of the fudge. Avoid using imitation vanilla, as it will result in a less desirable taste. Adding a little extra, to your liking, is perfectly acceptable.
Salt: 1/4 teaspoon of fine sea salt. Salt balances the sweetness of the fudge and enhances the overall flavor profile. Start with 1/4 teaspoon and adjust to taste. Too much salt will ruin the fudge.
Optional additions: Feel free to experiment with additions such as nuts, marshmallows, or other candies. If incorporating these, remember that the additional ingredients will affect the final texture and sweetness. Add these in the last few minutes of cooking to prevent burning or melting too much.
Equipment Preparation
Before you begin making your decadent chocolate fudge, ensuring you have the right equipment is crucial for a smooth and successful process. Proper preparation will prevent frustration and ensure a perfectly textured final product. Let’s start with the essentials.
A heavy-bottomed saucepan (2-quart capacity minimum) is essential. This prevents scorching and ensures even heating of the sugar mixture, vital for achieving the correct consistency. A lighter saucepan may result in uneven cooking and burning. Avoid using non-stick cookware, as the sugar can react with the coating.
A sturdy wooden spoon or heat-resistant spatula is your primary stirring tool. A wooden spoon is preferred for its ability to withstand high temperatures and its gentle stirring action, preventing the sugar from crystallizing. Avoid using metal utensils, as they can scratch your saucepan and potentially introduce unwanted metallic flavors.
A 9×13 inch baking dish (or similar sized square or rectangular dish) is needed for setting the fudge. Line this dish with parchment paper, leaving a significant overhang on the sides. This will make removing the set fudge much easier. Ensure the parchment paper is large enough to completely cover the bottom and sides of the dish, creating a seamless lining.
A candy thermometer is absolutely vital for achieving the correct fudge consistency. This will allow you to monitor the temperature of the sugar syrup precisely. Without a candy thermometer, achieving the correct setting point is almost impossible, resulting in either a grainy or runny fudge. Choose a thermometer specifically designed for candy making for accurate readings.
Prepare a bowl of ice water. This is for testing the fudge’s doneness. You’ll need this for the soft-ball stage test, where a small amount of the hot fudge is dropped into the ice water to check its consistency. Have this readily available near your stovetop for easy access during the cooking process.
Gather two mixing bowls: One for preparing the dry ingredients (sugar, cocoa powder, etc.) and another for combining the wet ingredients (milk, butter, vanilla extract). Having separate bowls will prevent lumps and ensure a smoother, more consistent fudge.
Finally, prepare a spatula or knife for cutting the fudge once it has set. A sharp knife will give you clean, neat cuts. You might also consider using a bench scraper for the task.
Melting and Combining Ingredients
This section details the crucial step of melting the chocolate and butter, and then expertly combining it with the other ingredients to create a smooth and luscious fudge base. Precise measurements and gentle handling are key to achieving the perfect texture.
Begin by preparing a double boiler or a heatproof bowl set over a pan of simmering water. Ensure the bottom of the bowl doesn’t touch the water; the steam should do the melting. This prevents scorching the chocolate and butter, which can ruin the final product’s flavor and texture. If using a microwave, opt for short bursts of 30 seconds, stirring in between, to avoid overheating.
In your prepared double boiler or microwave-safe bowl, combine 12 ounces (340g) of high-quality semi-sweet chocolate, chopped into small pieces for even melting, and 1/2 cup (113g) of unsalted butter, cut into cubes. Use good quality chocolate; it significantly impacts the final taste. The butter adds richness and helps create a creamy texture.
Stir the chocolate and butter gently and continuously as they melt. Avoid vigorous stirring, as this can incorporate air bubbles, leading to a less smooth fudge. Patience is key here; allow the chocolate to melt completely and smoothly before proceeding. This usually takes about 5-7 minutes in a double boiler, or slightly less in a microwave.
Once the chocolate and butter are fully melted and combined into a smooth, glossy mixture, remove from the heat immediately. Overheating can lead to seizing the chocolate, resulting in a grainy texture. Let the mixture cool slightly, for about 5-10 minutes, to prevent the subsequent ingredients from melting.
In a separate bowl, whisk together 14 ounces (397g) of sweetened condensed milk, 1 teaspoon of pure vanilla extract, and a pinch of salt. The sweetened condensed milk is the key to the fudge’s sweetness and creamy consistency. Whisk until well combined and smooth. Gradually pour the sweetened condensed milk mixture into the melted chocolate and butter, stirring gently but thoroughly until everything is fully incorporated and you have a homogenous mixture. Avoid overmixing, as this can incorporate too much air.
Your melted and combined ingredients are now ready for the next stage of fudge making!
Cooking and Simmering (if applicable)
While some fudge recipes utilize a no-cook method, many rely on a crucial cooking and simmering stage to achieve the perfect creamy texture and glossy finish. This section details the process for recipes requiring heat.
Begin with precise measurements: Accuracy is paramount in fudge making. Use a kitchen scale to measure your ingredients, especially the sugar, for consistent results. A recipe calling for, say, 1 cup of sugar (approximately 200g) will yield vastly different results if you use a loosely packed cup versus a tightly packed one. Using a scale ensures uniformity.
Combine ingredients carefully: Typically, you’ll combine sugar, butter, and milk (or cream) in a heavy-bottomed saucepan. A heavy-bottomed pan distributes heat evenly, preventing scorching and ensuring smooth melting. Avoid using non-stick pans as they can react negatively with the sugar and affect the final texture.
Gentle heating is key: Over high heat, the sugar can burn easily, resulting in a bitter taste and grainy texture. Begin heating over medium-low heat, stirring constantly with a wooden spoon or heat-resistant spatula. This constant stirring prevents sticking and ensures even melting. Do not leave the mixture unattended.
Reaching the soft-ball stage: Many fudge recipes require the mixture to reach a specific temperature, often referred to as the soft-ball stage (approximately 235-240°F or 113-116°C). A candy thermometer is essential for accurately monitoring the temperature. Always clip the thermometer to the side of the pan, ensuring it doesn’t touch the bottom.
Simmering and thickening: Once the mixture reaches the desired temperature, continue to stir gently. The simmering helps to evaporate excess moisture and thicken the mixture, creating the signature fudge consistency. Be patient; this stage may take several minutes. The mixture will gradually become thicker and take on a glossy sheen.
Recognizing doneness: Beyond the temperature, you can also check for doneness by dropping a small amount of the mixture into a glass of ice water. If it forms a soft ball that flattens slightly when removed, it’s ready. If it’s too firm, it’s overcooked. If it’s too soft, continue simmering.
Careful removal from heat: Once the fudge mixture reaches the soft-ball stage, immediately remove it from the heat. Continuing to cook even for a short time can result in a grainy or overly-hard fudge. Allow it to cool slightly before adding chocolate and other ingredients.
Cooling and Setting
Cooling and setting your fudge correctly is crucial for achieving its signature smooth, creamy texture and preventing it from becoming grainy or crumbly. The process involves a delicate balance of controlled cooling and proper storage.
Once your fudge is fully cooked and removed from the heat, pour it immediately into a well-greased 8×8 inch baking pan. Grease the pan thoroughly – using cooking spray, butter, or parchment paper – to prevent sticking. This step is often overlooked but is absolutely essential for easy removal later.
Allow the fudge to cool completely at room temperature, undisturbed, for at least 2-3 hours. Avoid refrigerating at this stage. Refrigeration can cause the fudge to set too quickly, resulting in a grainy texture. The slow cooling at room temperature allows the sugar crystals to properly align and create that signature smooth consistency.
As the fudge cools, you’ll notice it starts to thicken and set around the edges. This is a good sign! After the initial 2-3 hours, you can gently check the center with a clean finger. If it’s still slightly soft but not completely liquid, it’s ready for the next step. If it’s still too soft, allow it to cool further. Patience is key here, rushing this process can ruin your fudge.
Once the fudge is set but still slightly soft to the touch, cover the baking pan tightly with plastic wrap, pressing it directly onto the surface of the fudge to prevent a skin from forming. This prevents the fudge from drying out and helps maintain its moisture and creamy texture. Pressing the plastic wrap directly onto the fudge avoids air pockets, which can cause a crust to form.
Now, you can refrigerate the fudge for at least 4 hours, or preferably overnight. This final refrigeration step firms up the fudge and makes it easier to cut into neat squares. Refrigerate for longer than 4 hours for a firmer fudge, but avoid leaving it in the refrigerator for extended periods as it may become too hard.
Before serving, remove the fudge from the refrigerator about 15-20 minutes before cutting. This allows it to soften slightly, making it easier to cut cleanly. Use a sharp knife, wiping it clean after each cut to prevent sticking and ensure neat, even pieces. A sharp knife is essential for clean cuts. Enjoy your delicious homemade fudge!
Cutting and Serving
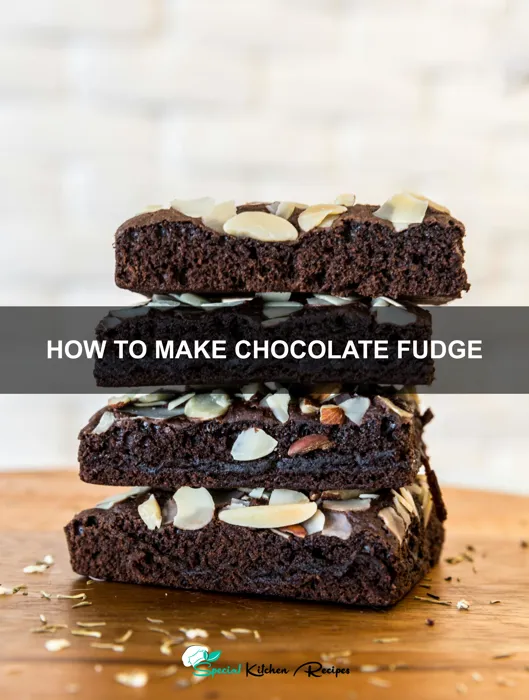
Once your fudge has completely cooled and set, the most enjoyable part begins: cutting and serving! This seemingly simple step can significantly impact the presentation and overall enjoyment of your homemade fudge. Proper technique ensures neat, evenly sized pieces, making your fudge look as delicious as it tastes.
Before you begin cutting, ensure your fudge is completely firm. This typically takes at least 4-6 hours at room temperature, or even longer in a cooler environment. Attempting to cut warm fudge will result in a sticky, messy disaster. If you’re unsure, gently press a finger onto the surface; if it doesn’t leave an indentation, it’s ready.
For best results, use a sharp, long knife, preferably a serrated knife or a chef’s knife. A dull knife will crush and crumble the fudge, creating uneven pieces and a less appealing finished product. Before each cut, wipe your knife clean with a damp paper towel. This prevents the fudge from sticking to the blade and ensures clean, precise cuts.
To achieve perfectly sized pieces, first use a ruler to lightly score the fudge into even squares or rectangles. A simple 1-inch grid creates bite-sized pieces, ideal for serving. You can adjust the size according to your preference. However, avoid making the pieces too small, as they may become difficult to handle.
After scoring the fudge, carefully cut along the scored lines using your sharp, clean knife. Work slowly and deliberately, applying gentle, even pressure to avoid tearing or breaking the fudge. If you encounter resistance, use a sawing motion rather than a straight push. For perfectly straight lines, use a metal bench scraper for the final cuts; it provides a firm, clean edge.
Once cut, carefully lift the fudge pieces and arrange them on a serving platter or in a decorative container. Consider lining your container with parchment paper to prevent sticking. You can garnish your fudge with additional chocolate shavings, sprinkles, or nuts for an extra touch of elegance.
Proper storage is crucial to maintain the fudge’s quality. Store your fudge in an airtight container in a cool, dry place. It should remain fresh for up to a week, although it rarely lasts that long! Enjoy your delicious homemade fudge!
Recommendations
For the richest, most decadent chocolate fudge, using high-quality cocoa powder and chocolate is paramount. Consider using Dutch-processed cocoa for a deeper, less acidic flavor. Experiment with different types of chocolate, such as dark, milk, or even white chocolate, to find your perfect fudge profile. Don’t be afraid to add mix-ins! Nuts, pretzels, dried fruit, or even sea salt can elevate your fudge to the next level.
Proper storage is key to maintaining the fudge’s texture and flavor. Store your fudge in an airtight container in the refrigerator to prevent it from drying out or absorbing odors. It will keep for up to two weeks in the refrigerator. If you prefer a softer fudge, bring it to room temperature for about 30 minutes before serving. Avoid storing it in a warm place, as this can cause the fudge to melt and become sticky.
Serving suggestions are endless! Cut the fudge into small, bite-sized squares for easy serving. They are delightful on their own, but also pair wonderfully with a glass of cold milk, a cup of coffee or tea, or a scoop of vanilla ice cream. Consider serving your fudge with a dollop of whipped cream or a sprinkle of cocoa powder for an extra touch of elegance.
Complementary dishes that pair beautifully with chocolate fudge include rich desserts like brownies or cookies. It also makes a wonderful addition to a dessert platter or a festive gathering. The contrasting flavors of salty and sweet can also be a delicious combination; serve it alongside salted caramel ice cream or a sprinkle of sea salt.
Approximate Nutritional Information (per serving, based on a 1-inch square): Calories: 150-200 (this varies greatly depending on ingredients and portion size), Fat: 10-15g, Sugar: 15-20g, Protein: 2-3g. Note: This is an estimate and may vary based on specific recipe and ingredients used. For accurate nutritional information, use a nutrition calculator with your exact ingredients and quantities.