The Chicken Parmesan sandwich: a culinary masterpiece born from the humble beginnings of its namesake, Chicken Parmesan. While pinpointing the exact origin is difficult, the dish’s story is deeply intertwined with the history of Italian-American cuisine. Italian immigrants, arriving in the United States primarily in the late 19th and early 20th centuries, brought with them their rich culinary traditions, adapting and evolving them to incorporate readily available ingredients and American tastes. The transformation of Chicken Parmesan from a plated dish into a convenient and satisfying sandwich likely occurred sometime in the mid-20th century, fueled by the rise of fast-casual dining and the increasing popularity of handheld meals.
Chicken Parmesan, in its original form, is believed to have roots in Southern Italy, possibly originating in the Naples region. However, its exact evolution and timeline remain shrouded in culinary mystery. What we do know is that the dish gained immense popularity throughout the United States, becoming a staple in Italian-American restaurants and family kitchens. The sandwich adaptation cleverly repurposed the classic dish, making it more portable and perfect for lunch or a quick bite. This innovation perfectly captured the American spirit of practicality and convenience, ensuring the dish’s continued success.
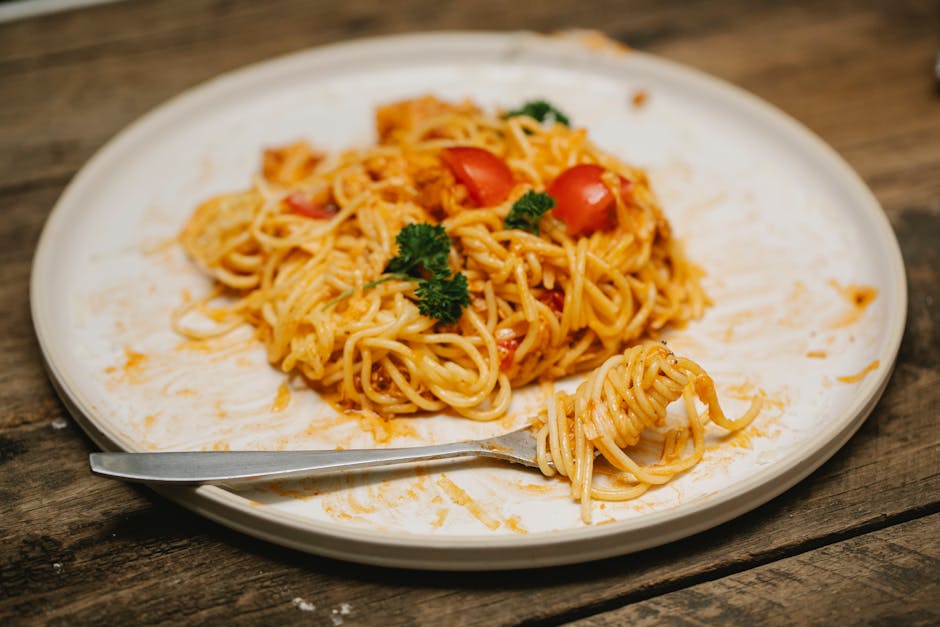
The cultural significance of the Chicken Parmesan sandwich extends beyond its simple ingredients. It represents a fusion of cultures, a testament to the power of culinary adaptation and innovation. It’s a dish that speaks to the accessibility of Italian-American food, transcending traditional fine dining settings and becoming a beloved comfort food across various demographics. While precise statistics on the sandwich’s consumption are unavailable, its widespread presence in delis, restaurants, and home kitchens across the country undeniably points to its enormous popularity. Many consider it a quintessential example of American comfort food, a satisfying blend of crispy breading, savory chicken, and rich, melted mozzarella cheese.
The Chicken Parmesan sandwich’s enduring appeal lies in its versatility. From simple variations with marinara sauce and mozzarella to more elaborate creations featuring pesto, roasted red peppers, or even spicy jalapeños, the possibilities are endless. This adaptability allows for personal preferences and creative culinary expression, further contributing to its widespread popularity and continuous evolution. Its simplicity in preparation, alongside its satisfying flavor profile, ensures that this iconic sandwich will continue to be a beloved dish for generations to come, representing a unique chapter in the ongoing story of American culinary heritage.
Ingredients and Measurements
Crafting the perfect Chicken Parmesan sandwich hinges on using high-quality ingredients and precise measurements. This recipe yields two generously sized sandwiches.
For the Chicken Cutlets:
We’ll start with 2 boneless, skinless chicken breasts. Aim for breasts that are roughly the same size for even cooking. About 6-8 ounces each is ideal. Thicker breasts will require a slightly longer cooking time, so you might consider pounding them thinner to ensure even cooking throughout. Using a meat mallet, gently pound the chicken breasts to about 1/4-inch thickness. This ensures they cook quickly and evenly and prevents overly dry chicken in the finished sandwich.
For the Breading:
You’ll need three shallow dishes for the breading process: one for the flour, one for the egg wash, and one for the breadcrumbs. For the flour, use 1/2 cup all-purpose flour. Seasoning the flour adds depth of flavor. I recommend adding 1 teaspoon of salt, 1/2 teaspoon of black pepper, and 1/4 teaspoon of garlic powder to the flour for a savory base. For the egg wash, whisk together 2 large eggs with 2 tablespoons of milk or water. This helps the breadcrumbs adhere to the chicken. Finally, for the breadcrumbs, use 1 1/2 cups of Italian-seasoned breadcrumbs. Using panko breadcrumbs is highly recommended as they create a wonderfully crispy crust. If you don’t have Italian-seasoned breadcrumbs, you can easily make your own by adding 1 teaspoon of dried oregano, 1/2 teaspoon of dried basil, and 1/4 teaspoon of dried thyme to regular breadcrumbs.
For the Sauce and Cheese:
A high-quality marinara sauce is crucial. Use 1 1/2 cups of your favorite marinara sauce. Choose a sauce with a good balance of sweetness and acidity. Avoid overly watery sauces, as they can make the sandwich soggy. For the cheese, you’ll need 1 1/2 cups of shredded mozzarella cheese. Freshly shredded mozzarella is best, as pre-shredded often contains cellulose which can affect melting and texture. You can also add a sprinkle of Parmesan cheese for an extra layer of flavour if desired.
For the Sandwich Assembly:
You will need 2 large hero rolls or sub rolls. Choose rolls that are sturdy enough to hold all the ingredients without falling apart. Slightly toasted rolls enhance the overall experience. You’ll also need some extra virgin olive oil for brushing the rolls and some fresh basil leaves for garnish (optional).
Optional Additions:
Consider adding a few slices of fresh tomato and a few leaves of fresh basil for extra freshness and flavor. A drizzle of balsamic glaze after assembly adds a touch of sweetness and acidity that complements the savory flavors. Remember to adjust quantities based on your preferences and the size of your rolls.
Equipment Preparation
Before you even think about touching that chicken breast, ensuring you have the right equipment and it’s properly prepared is crucial for a smooth and efficient Chicken Parmesan sandwich creation. This isn’t just about having the right tools; it’s about setting yourself up for success and avoiding mid-recipe scrambling.
First, let’s tackle the breading station. You’ll need three shallow dishes, ideally about 9 inches in diameter. Avoid using overly deep dishes, as this makes dredging the chicken cumbersome and messy. The first dish will hold your all-purpose flour (approximately 1 ½ cups), the second will contain your beaten eggs (2 large eggs whisked with 2 tablespoons of milk or water for extra binding), and the third will be for your breadcrumbs (about 2 cups of panko breadcrumbs are recommended for their excellent crispness). Ensure each dish is easily accessible and within arm’s reach to minimize the time your chicken spends unbreaded.
Next, consider your cooking equipment. A large, heavy-bottomed skillet (12 inches or larger) is ideal for evenly browning the chicken cutlets. A non-stick skillet is highly recommended to prevent sticking and ensure easy flipping. You’ll need enough vegetable oil to coat the bottom of the pan to a depth of about ¼ inch. Don’t skimp on the oil; a sufficient amount is necessary for achieving a golden-brown crust without burning the chicken. A meat thermometer is also essential for ensuring the chicken is cooked through to a safe internal temperature of 165°F (74°C). Having this readily available eliminates guesswork and ensures food safety.
For assembling the sandwich, you’ll need a baking sheet lined with parchment paper. This prevents sticking and makes clean-up a breeze. If you plan on broiling your Chicken Parmesan for extra browning, ensure your oven rack is positioned appropriately. You’ll also need a sturdy spatula for flipping the chicken and transferring it to the baking sheet. A clean work surface is also essential to avoid cross-contamination. Wipe down your countertops with a damp cloth before you begin to ensure a clean and safe workspace.
Finally, don’t forget the tools for assembling your sandwich! You’ll need a good chef’s knife for slicing the chicken and tomatoes, and a sturdy cutting board. You’ll also need serving plates and, of course, your choice of bread – sub rolls, hoagie rolls, or even toasted Italian bread all work perfectly. Prepare your bread ahead of time by slicing it open and toasting it lightly if desired. This small step enhances both the texture and the overall eating experience of your Chicken Parmesan sandwich.
By meticulously preparing your equipment beforehand, you’ll create a streamlined cooking process, minimizing interruptions and maximizing the enjoyment of preparing and savoring your delicious Chicken Parmesan sandwich.
Chicken Preparation (Breading, Frying)
This section details the preparation of the chicken cutlets for your Chicken Parmesan Sandwich. Proper breading and frying are crucial for achieving a crispy, juicy result. We’ll be using a classic three-step breading process for optimal texture and flavor.
Start with the right chicken: Begin with about 1 pound of boneless, skinless chicken breasts. Pound them to an even 1/4-inch thickness. This ensures even cooking and prevents dry, tough chicken. Use a meat mallet or the bottom of a heavy pan to gently pound the breasts, working from the center outwards to avoid tearing the meat. Aim for a consistent thickness; otherwise, some parts will overcook while others remain undercooked.
Prepare your breading station: Set up three shallow dishes. In the first, whisk together 1/2 cup all-purpose flour with 1 teaspoon salt and 1/2 teaspoon black pepper. This seasoned flour will form the base of your breading. The second dish will hold 2 large eggs, lightly beaten with 2 tablespoons of milk or water. This egg wash acts as a binder, adhering the flour and breadcrumbs to the chicken. The third dish will contain 1 1/2 cups of Italian-seasoned breadcrumbs. You can use panko breadcrumbs for an extra-crispy texture, but regular breadcrumbs work perfectly well.
Breading the chicken: Dredge each chicken breast in the seasoned flour, ensuring it’s fully coated. Gently shake off any excess flour. Next, dip the floured chicken into the egg wash, making sure to coat it completely. Finally, press the chicken firmly into the breadcrumbs, ensuring a good, even coating. Pressing firmly helps the breadcrumbs adhere better and creates a crispier crust.
Frying the chicken: Heat about 1/2 inch of vegetable oil in a large skillet over medium-high heat. The oil is ready when a pinch of breadcrumb sizzles immediately upon contact. Carefully place the breaded chicken cutlets into the hot oil, avoiding overcrowding the pan. Overcrowding will lower the oil temperature and result in soggy chicken. Fry in batches if necessary. Don’t overcrowd the pan!
Cooking time: Fry for about 3-4 minutes per side, or until the chicken is golden brown and cooked through. Use a meat thermometer to ensure the internal temperature reaches 165°F (74°C). Once cooked, remove the chicken from the skillet and place it on a wire rack set over a baking sheet to drain excess oil. This allows for better crispiness and prevents the chicken from becoming soggy.
Important Note: Always exercise caution when working with hot oil. Use a deep-fry thermometer to monitor the oil temperature and avoid splattering. Never leave hot oil unattended.
Once the chicken is cooked and cooled slightly, it’s ready to be layered onto your delicious Chicken Parmesan Sandwich! Enjoy!
Sauce Preparation (Marinara)
The marinara sauce is the heart of a great Chicken Parmesan sandwich, so taking the time to make a delicious one is crucial. This recipe focuses on a classic, simple marinara, but feel free to adapt it to your taste with added herbs or spices.
Ingredients:
- 28 ounces (794g) canned crushed tomatoes
- 1 (28 ounce/794g) can of whole peeled tomatoes, roughly chopped
- 1/2 cup (120ml) extra virgin olive oil
- 4 cloves garlic, minced
- 1 teaspoon dried oregano
- 1/2 teaspoon dried basil
- 1/4 teaspoon red pepper flakes (optional, for a touch of heat)
- 1 teaspoon salt
- 1/2 teaspoon black pepper
- 1 tablespoon sugar (optional, to balance acidity)
Instructions:
Step 1: Sauté the Garlic: Heat the olive oil in a large saucepan over medium heat. Add the minced garlic and cook, stirring frequently, for about 1 minute, or until fragrant. Be careful not to burn the garlic, as this will impart a bitter taste.
Step 2: Add the Tomatoes and Spices: Add the crushed tomatoes, chopped whole tomatoes, oregano, basil, red pepper flakes (if using), salt, pepper, and sugar (if using) to the saucepan. Stir well to combine.
Step 3: Simmer the Sauce: Bring the sauce to a gentle simmer, then reduce the heat to low. Cover the saucepan and let the sauce simmer for at least 30 minutes, or up to 2 hours for a richer flavor. The longer it simmers, the more the flavors will meld together. Stir occasionally to prevent sticking.
Step 4: Blend (Optional): If you prefer a smoother sauce, use an immersion blender to partially or fully blend the sauce once it has finished simmering. Leave some texture for a more rustic feel if desired.
Step 5: Taste and Adjust: Taste the sauce and adjust the seasoning as needed. You may want to add more salt, pepper, or sugar to achieve your desired flavor profile. Remember to taste before and after blending, as the flavors may change.
Professional Recommendations:
- For a deeper flavor, use high-quality canned tomatoes. Look for San Marzano tomatoes if possible.
- Don’t be afraid to experiment with different herbs and spices. Fresh basil, parsley, or thyme can add complexity to the sauce.
- If you have time, making your marinara sauce a day ahead and letting it rest in the refrigerator will allow the flavors to deepen even further.
- If the sauce is too thick, add a splash of water to thin it out. If it’s too thin, simmer it uncovered for a longer period to reduce the liquid.
Once your marinara sauce is ready, it’s time to move on to the next steps in preparing your delicious Chicken Parmesan sandwich!
Cheese Preparation (Shredding, Melting)
The cheese in a Chicken Parmesan sandwich is key to its deliciousness. Proper preparation ensures a gooey, flavorful melt that complements the crispy chicken and tangy marinara. For this recipe, we’ll be using a blend of mozzarella and Parmesan cheese, offering the best of both worlds: the stretchy pull of mozzarella and the sharp, salty bite of Parmesan.
Shredding the Cheese: We recommend using approximately 2 cups of shredded mozzarella and ½ cup of grated Parmesan cheese for a standard Chicken Parmesan sandwich. While pre-shredded cheese is convenient, freshly shredded cheese melts better and results in a smoother, less stringy texture. If using a block of cheese, ensure it’s cold from the refrigerator. This helps prevent it from becoming gummy during shredding.
To shred the mozzarella, use a box grater with large holes. Work in a consistent motion, applying even pressure to achieve uniformly sized shreds. Avoid pressing too hard, as this can lead to clumping. If your grater becomes clogged, use a stiff brush to remove any cheese residue. This prevents sticking and ensures even shredding.
For the Parmesan cheese, using a microplane or a fine grater is ideal. Parmesan’s harder texture requires a finer grate to achieve a smooth melt and prevent large, unmelted chunks in your finished sandwich. Grate the Parmesan just before using it, as it can lose its flavor and aroma when stored for long periods. A finer grate also ensures a better distribution of flavor throughout the sandwich.
Melting the Cheese: The best way to melt the cheese in your Chicken Parmesan sandwich is directly on the chicken cutlet while it’s still hot from the pan. This ensures a complete, even melt that adheres beautifully to the chicken and bread. After assembling your sandwich (chicken, marinara, cheese), you can use one of two methods for melting:
Method 1: Broiler Method: Place the assembled sandwich under a preheated broiler for 2-3 minutes, or until the cheese is melted and bubbly. Keep a close eye on it to prevent burning. The broiler’s intense heat will melt the cheese quickly and create a slightly browned, crispy top layer.
Method 2: Pan-frying Method: Place the assembled sandwich in a lightly oiled skillet over medium-low heat. Cover the skillet with a lid and cook for 3-5 minutes, or until the cheese is melted and the bottom of the sandwich is lightly toasted. This method is gentler and prevents the cheese from browning too quickly. It’s ideal if you prefer a softer, less browned cheese texture.
Important Note: Regardless of the melting method you choose, ensure the chicken is fully cooked before adding the cheese. Adding cheese too early can prevent the chicken from browning properly. Experiment with both methods to determine your preferred cheese texture and browning level. Enjoy your perfectly melted, delicious Chicken Parmesan sandwich!
Sandwich Assembly
With your perfectly breaded and fried chicken cutlets and your flavorful marinara sauce prepared, it’s time to assemble the star of the show: the Chicken Parmesan Sandwich. This stage is all about balance and achieving the perfect textural and flavor harmony. We’ll be aiming for a sandwich that’s juicy, flavorful, and satisfying without being overly messy.
Begin by selecting your bread. A sturdy roll or sub roll is ideal, capable of holding all the delicious ingredients without collapsing. A 6-inch roll is a good size for a single serving. If using a larger roll, adjust the quantities of the other ingredients accordingly. Lightly toast the cut sides of the roll for a few seconds in a pan or toaster oven to add a pleasant crispness; this also helps prevent the bread from becoming soggy from the sauce.
Next, generously spread a thin layer of marinara sauce on the bottom half of the roll. Avoid over-saturating the bread; a thin layer will enhance the flavor without making the sandwich overly wet. Approximately 2-3 tablespoons should suffice, depending on the size of your roll and personal preference. The sauce acts as a base, adding moisture and flavor.
Carefully place one or two breaded chicken cutlets onto the sauced bottom half of the roll. The number of cutlets will depend on the size of your roll and the thickness of the cutlets. One large cutlet or two slightly smaller ones should be perfect for a 6-inch roll. Arrange them neatly to maximize space and prevent spillage. If your cutlets are very large, consider slicing them in half to better fit the roll.
Now, add a layer of fresh mozzarella cheese. About 2-3 ounces of fresh mozzarella, sliced thinly, is recommended. This adds a creamy, salty counterpoint to the richness of the chicken and sauce. The cheese will melt slightly when the sandwich is warmed, making it even more delicious. You can use shredded mozzarella if preferred, but thinly sliced mozzarella provides a better texture.
Top the cheese with another thin layer of marinara sauce, similar in quantity to the first layer (2-3 tablespoons). This extra layer of sauce helps to keep the sandwich moist and adds extra flavor. It also acts as a binder, helping to hold all the ingredients together. After this layer, add a generous sprinkle of freshly grated Parmesan cheese for an extra layer of cheesy, salty goodness.
Finally, gently place the top half of the roll on the sandwich, pressing down lightly to compress the ingredients. Avoid pressing too hard, as this could squish the chicken and cause the sandwich to become messy. You can use a sandwich press or a heavy skillet to lightly warm and press the sandwich for a few minutes if desired, resulting in a melty cheese filling and a warm, toasted roll. Your delicious Chicken Parmesan Sandwich is now ready to serve!
Pro Tip: For added freshness and a vibrant flavor profile, consider adding a few fresh basil leaves between the cheese and the top layer of sauce.
Recommendations for the Perfect Chicken Parmesan Sandwich
To elevate your Chicken Parmesan Sandwich experience, consider these recommendations. For the best flavor and texture, use high-quality ingredients. Opt for freshly grated Parmesan cheese for a sharper, more intense flavor compared to pre-grated. Similarly, using fresh basil leaves will significantly enhance the overall taste profile. Don’t skimp on the marinara sauce; a robust, flavorful sauce is crucial to the sandwich’s success. Consider making your own marinara for a truly customized experience.
Bread choice is paramount. A crusty Italian roll or a sturdy sub roll provides the perfect structural support for the rich filling. Avoid overly soft bread, which may become soggy under the weight of the ingredients. Toasting the bread lightly before assembling the sandwich will add a pleasing crunch and prevent sogginess. Experiment with different bread types to discover your favorite combination. Ciabatta or focaccia could also offer interesting textural contrasts.
The chicken cutlet preparation is key. Ensure the chicken breasts are pounded evenly to a uniform thickness for even cooking. This prevents some parts from being overcooked while others remain undercooked. A light breading is sufficient; over-breading can lead to a heavy, greasy sandwich. Consider using panko breadcrumbs for a crispier coating. Proper frying is crucial for a golden-brown, crispy chicken cutlet. Maintain the oil at the correct temperature; too low, and the chicken will be greasy; too high, and it will burn before cooking through.
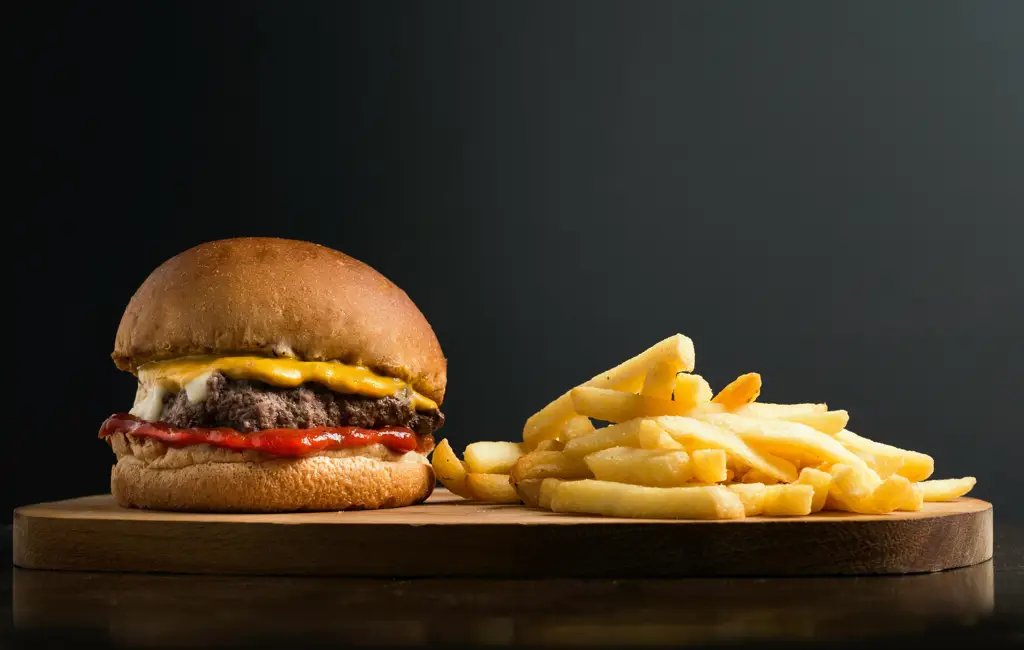
Serving suggestions are abundant. A simple side salad with a light vinaigrette perfectly complements the richness of the sandwich. French fries or potato wedges provide a classic pairing, while roasted vegetables offer a healthier alternative. Consider adding a side of marinara sauce for dipping. For a complete meal, a small Caprese salad adds a fresh and vibrant counterpoint to the sandwich’s hearty flavors.
Storage: Leftover Chicken Parmesan sandwiches should be stored in an airtight container in the refrigerator. They are best enjoyed fresh, but can be stored for up to 2 days. To refresh a leftover sandwich, you can lightly toast it in a pan or toaster oven to crisp up the bread and reheat the filling. Do not freeze the assembled sandwich, as the bread will become soggy upon thawing.
Nutritional Information (approximate per sandwich, varies based on ingredients used): Calories: 800-1000, Fat: 40-50g, Saturated Fat: 15-20g, Cholesterol: 150-200mg, Sodium: 1000-1500mg, Carbohydrates: 80-100g, Fiber: 5-10g, Sugar: 10-15g, Protein: 40-50g. Note: This is an estimate and can vary significantly depending on the specific ingredients and portion sizes used.
Disclaimer: Nutritional information is an approximation and may vary depending on the specific ingredients and portion sizes used. This information is not intended as a substitute for professional dietary advice. Consult a nutritionist or dietician for personalized dietary recommendations.