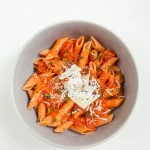
Chicken enchiladas, a culinary cornerstone of Mexican cuisine, represent a delicious fusion of indigenous and Spanish influences. Their exact origins are difficult to pinpoint definitively, but the dish’s evolution likely began centuries ago with the arrival of the Spanish in Mexico. Pre-Hispanic civilizations already had a tradition of corn-based tortillas, and the introduction of poultry (chickens) and dairy (sour cream, a later addition) by the Spanish provided the key ingredients to what would eventually become the beloved chicken enchilada. While specific recipes weren’t documented in the way we see today, the basic concept of filling tortillas with meat and sauce, then baking, has ancient roots in various cultures across the Americas.
The evolution of the enchilada itself is fascinating. Early versions likely involved simpler fillings and sauces, possibly utilizing indigenous ingredients like chili peppers and herbs. Over time, the recipe diversified, influenced by regional variations and the availability of different ingredients. The addition of cheese, for instance, is a relatively later development, becoming more prevalent with the spread of dairy farming. The use of sour cream, a significant element in our recipe, is a more modern adaptation, likely popularized in the 20th century as a way to add a creamy, tangy contrast to the richness of the sauce and cheese. This evolution highlights the dynamic nature of food, constantly adapting and evolving as cultures interact and ingredients become available.
Today, chicken enchiladas are a hugely popular dish, both in Mexico and internationally. While precise sales figures for enchiladas specifically are hard to come by, the overall market for Mexican food in the United States alone is estimated to be tens of billions of dollars annually, with enchiladas consistently ranking among the most popular choices. This speaks volumes about the dish’s enduring appeal and its widespread cultural impact. Beyond simply being a delicious meal, chicken enchiladas are often associated with family gatherings, celebrations, and comforting home-cooked meals. They represent a significant part of the Mexican culinary heritage, showcasing the ingenuity and deliciousness of the country’s diverse food traditions. Our recipe aims to capture the essence of this beloved classic while incorporating the creamy tang of sour cream for a modern twist.
Interestingly, the word enchilada itself comes from the Nahuatl word chilli, meaning chili pepper, highlighting the fundamental role of chili peppers in the dish’s composition. The en- prefix indicates in or covered in, suggesting the tortillas are covered in the chili sauce. This etymology further underscores the dish’s deep connection to Mexican history and culinary heritage. The seemingly simple act of assembling and baking enchiladas encapsulates a rich cultural history and culinary journey, a legacy that we celebrate with this recipe.
Ingredients and Measurements
This recipe yields approximately 8-10 generously sized chicken enchiladas. Accurate measurements are crucial for achieving the perfect balance of flavors and textures. We recommend using a kitchen scale for the most precise results, especially when measuring spices.
For the Chicken Filling:
- 1.5 lbs boneless, skinless chicken breasts: Choose high-quality chicken breasts for optimal flavor. You can use rotisserie chicken for a time-saving shortcut, but be sure to shred it thoroughly.
- 1 medium yellow onion, finely chopped (approximately 1 cup): Finely chopping the onion ensures it cooks evenly and doesn’t overpower the other flavors.
- 2 cloves garlic, minced: Fresh garlic provides the best flavor. If using pre-minced garlic, use less to avoid a strong, overpowering taste.
- 1 (10 ounce) can diced tomatoes and green chilies (Rotel), undrained: The undrained juice adds moisture and flavor to the filling. You can adjust the spiciness by selecting mild or medium Rotel.
- 1 (4 ounce) can chopped green chilies: These add a nice kick and texture. Adjust the amount based on your preferred spice level.
- 1 teaspoon ground cumin: Cumin is essential for authentic Mexican flavor; use freshly ground for the best aroma.
- 1/2 teaspoon chili powder: Adjust the amount to your preferred level of spiciness. Using a blend of chili powders can enhance the complexity of flavor.
- 1/4 teaspoon smoked paprika: Smoked paprika adds a depth of smoky flavor that complements the chicken beautifully.
- 1/4 teaspoon oregano: Dried oregano works well in this recipe. Fresh oregano can also be used, but reduce the amount by about half.
- Salt and freshly ground black pepper to taste: Seasoning is critical; taste the filling and adjust accordingly.
- 2 tablespoons olive oil: Use a high-quality olive oil for the best flavor.
For the Enchilada Sauce:
- 1 (15 ounce) can enchilada sauce: Choose your preferred level of spiciness (mild, medium, or hot). You can also make your own enchilada sauce from scratch for a more customized flavor profile.
- 1/2 cup chicken broth: This adds moisture and depth of flavor to the sauce.
For the Assembly and Topping:
- 12 corn or flour tortillas: Corn tortillas are traditional, but flour tortillas are also a great option. Warm the tortillas slightly before assembling to make them more pliable.
- 1.5 cups sour cream: Use full-fat sour cream for the richest flavor and texture. For a lighter option, you can use Greek yogurt.
- 1 cup shredded Monterey Jack cheese: Monterey Jack melts beautifully, but you can substitute with other melting cheeses like cheddar or a Mexican cheese blend.
- 1/4 cup chopped fresh cilantro (optional): Fresh cilantro adds a bright, herbaceous note to the finished dish.
Important Note: Always taste and adjust seasonings throughout the cooking process to achieve your preferred flavor balance. Don’t be afraid to experiment with different spices and ingredients to create your own unique version of this classic dish.
Chicken Preparation
The foundation of delicious chicken enchiladas lies in perfectly cooked and seasoned chicken. We’ll be using about 1.5 lbs (680g) of boneless, skinless chicken breasts for this recipe. You can adjust the quantity based on your desired number of enchiladas. The method we recommend is roasting, as it yields incredibly tender and flavorful chicken, perfect for shredding.
Preheat your oven to 400°F (200°C). While the oven is heating, prepare the chicken. Rinse the chicken breasts under cold water and pat them completely dry with paper towels. Thoroughly drying the chicken is crucial for achieving a nice sear and preventing steaming during roasting. This will lead to a more flavorful and evenly cooked result.
Place the chicken breasts in a baking dish. Drizzle them generously with 2 tablespoons of olive oil. Then, season liberally with 1 teaspoon of salt, 1/2 teaspoon of black pepper, 1/2 teaspoon of paprika, and 1/4 teaspoon of garlic powder. Feel free to experiment with other spices, such as cumin, chili powder, or oregano, to customize the flavor profile to your liking. Remember to season generously, as the flavors will get distributed throughout the shredded chicken.
Roast the chicken for 30-40 minutes, or until a meat thermometer inserted into the thickest part registers 165°F (74°C). The cooking time may vary slightly depending on the size and thickness of your chicken breasts. Do not overcook the chicken, as this will result in dry, tough meat. If you prefer, you can also cook the chicken in a skillet over medium heat until cooked through, but roasting generally results in more tender and juicy chicken.
Once the chicken is cooked, remove it from the oven and let it rest for 10-15 minutes before handling. This allows the juices to redistribute, resulting in more tender and flavorful meat. After resting, use two forks to shred the chicken into small, manageable pieces. Discard any visible fat or connective tissue. You should have roughly 3 cups of shredded chicken, ready to be incorporated into your enchilada filling.
Professional Tip: For an even more flavorful chicken, consider marinating the chicken breasts for at least 30 minutes before roasting. A simple marinade of olive oil, lime juice, and your favorite spices will significantly enhance the taste of your enchiladas. Alternatively, you can use leftover rotisserie chicken to save time. Just shred it and proceed with the recipe.
With your perfectly prepared chicken, you’re one step closer to creating delicious chicken enchiladas. Now, let’s move on to preparing the other components of this flavorful dish!
Sauce Preparation
The success of your chicken enchiladas hinges significantly on a delicious and well-balanced sauce. This recipe utilizes a creamy, slightly tangy sauce that complements the richness of the chicken and the warmth of the cheese. We’ll be making a versatile sauce that can be easily adjusted to your taste preferences.
Ingredients for the Sour Cream Sauce:
- 1 cup sour cream (full-fat recommended for best texture and flavor)
- 1/2 cup chicken broth (low sodium preferred)
- 1/4 cup finely chopped green chilies (canned, adjust to your spice preference)
- 2 tablespoons finely chopped fresh cilantro
- 1 tablespoon lime juice (freshly squeezed is best)
- 1 teaspoon ground cumin
- 1/2 teaspoon garlic powder
- 1/4 teaspoon onion powder
- 1/4 teaspoon cayenne pepper (optional, for extra heat)
- Salt and freshly ground black pepper to taste
Instructions:
Begin by combining all the sauce ingredients in a medium-sized bowl. Ensure your sour cream is at room temperature; this will prevent the sauce from curdling when you add the other ingredients. If your sour cream is cold, let it sit out for about 15-20 minutes before proceeding.
Whisk the ingredients together thoroughly until they are completely combined and smooth. You can use a fork or a whisk for this step. Make sure there are no lumps of sour cream remaining. The consistency should be smooth and creamy.
Taste the sauce and adjust the seasoning as needed. You may want to add more lime juice for extra tang, more chilies for heat, or more cumin for a deeper flavor. Remember, salt should be added cautiously and tasted at each step. Start with a small amount and add more gradually until you’ve achieved your desired level of saltiness.
Once you’re happy with the flavor, set the sauce aside. Do not add the sauce to the enchiladas until you are ready to bake them. Adding the sauce too early can cause the tortillas to become soggy.
Professional Tip: For a smoother, richer sauce, you can blend the sauce using an immersion blender. This will create a perfectly smooth and creamy texture, ideal for coating the enchiladas. However, a simple whisk will work just as well if you prefer a slightly chunkier sauce.
Alternative: If you prefer a spicier sauce, you can add a few dashes of your favorite hot sauce. Alternatively, for a milder sauce, reduce or omit the cayenne pepper and green chilies entirely. Feel free to experiment with different herbs and spices to create your signature enchilada sauce.
Storage: Leftover sauce can be stored in an airtight container in the refrigerator for up to 3 days. It’s best to allow the sauce to come to room temperature before using it again.
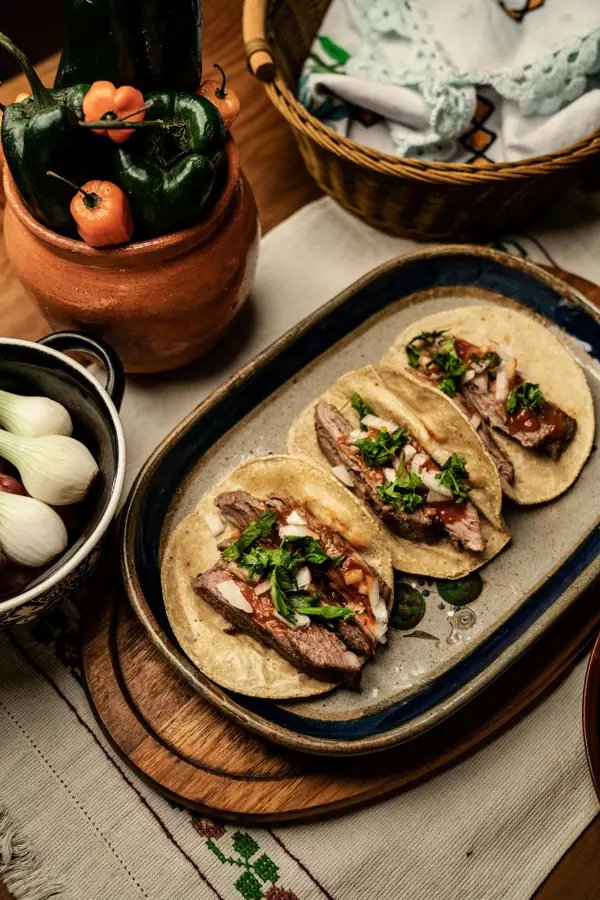
Enchilada Assembly: Building Your Flavor-Packed Rolls
With your delicious chicken filling and vibrant sauce prepared, it’s time to assemble your enchiladas! This stage requires a bit of finesse to ensure perfectly rolled and evenly cooked enchiladas. We’ll be making approximately 12 enchiladas with this recipe, but you can easily adjust the quantities based on your needs and pan size.
Preheat your oven to 375°F (190°C). This is crucial for achieving that perfectly bubbly, melted cheese topping and ensuring the enchiladas are heated through. Lightly grease a 9×13 inch baking dish with cooking spray or a thin layer of oil. This prevents sticking and makes cleanup a breeze.
Prepare your tortillas: You’ll need about 12 corn tortillas. Warming the tortillas is essential for flexibility and preventing breakage. You can achieve this by either briefly microwaving them (wrapped in a damp paper towel for 15-20 seconds), or by warming them in a dry skillet over medium heat for about 15-20 seconds per side, until pliable. Be careful not to burn them.
Filling and Rolling: Lay a warmed tortilla flat. Add approximately 1/4 cup of the chicken filling to the center of the tortilla. Don’t overload the tortillas; too much filling will make them difficult to roll and may cause them to burst during baking. Spread the filling evenly across the center.
The Rolling Technique: Fold in the sides of the tortilla, then tightly roll it up from the bottom, tucking the filling securely inside. Place the rolled enchilada seam-down in the prepared baking dish. Repeat this process with the remaining tortillas and filling until the dish is full.
Sauce and Cheese: Once all the enchiladas are neatly arranged in the baking dish, generously pour the remaining enchilada sauce over the top, ensuring each enchilada is fully coated. Don’t be shy with the sauce! It adds incredible flavor and prevents the tortillas from drying out.
Topping with Cheese: Sprinkle a generous 1 1/2 cups of shredded Monterey Jack cheese (or your preferred Mexican blend) evenly over the sauced enchiladas. The cheese will melt beautifully during baking, creating a delicious, gooey topping. You can also add a sprinkle of chopped cilantro or green onions for extra visual appeal and freshness.
Baking: Bake for 20-25 minutes, or until the cheese is melted, bubbly, and golden brown, and the enchiladas are heated through. Keep an eye on them during the last few minutes of baking to prevent over-browning.
Resting: Once baked, let the enchiladas rest for about 5-10 minutes before serving. This allows the filling to set slightly and makes them easier to serve. Serve immediately with a dollop of sour cream, extra chopped cilantro, and your favorite toppings. Enjoy!
Baking Instructions
Preheat your oven to 375°F (190°C). This temperature ensures even cooking and a perfectly bubbly, golden-brown topping. Ensure your oven rack is positioned in the center of the oven for consistent heat distribution.
Carefully transfer the assembled enchiladas to a lightly greased 9×13 inch baking dish. Using a 9×13 inch dish allows for even baking and prevents overcrowding. If you’re using a smaller dish, the enchiladas may bake unevenly and potentially become dry. Lightly greasing the dish prevents sticking and makes for easier cleanup. You can use cooking spray or a small amount of oil or butter.
Once the enchiladas are nestled in the baking dish, generously pour the remaining enchilada sauce evenly over the top. Don’t be shy with the sauce! The sauce not only adds flavor but also helps to keep the enchiladas moist and prevents them from drying out during baking. A generous layer of sauce will also create a beautiful, rich topping.
Next, dollop the sour cream evenly over the sauce-covered enchiladas. You can use a spoon or piping bag for a more decorative presentation. Using full-fat sour cream is highly recommended, as it will provide a richer flavor and creamier texture that holds its shape better during baking than low-fat alternatives. Approximately 1 cup of sour cream should be sufficient for a 9×13 inch pan.
Finally, sprinkle the shredded cheese (approximately 1 ½ cups of your choice of Mexican blend or Monterey Jack) over the sour cream. Distribute the cheese evenly to ensure that each enchilada gets its share of cheesy goodness. The cheese will melt beautifully during baking, creating a delicious, crispy topping.
Bake for 20-25 minutes, or until the cheese is melted, bubbly, and golden brown, and the enchiladas are heated through. Keep a close eye on them during the last 5-10 minutes to prevent burning. Oven temperatures can vary, so it’s best to start checking for doneness around the 20-minute mark.
Once baked, let the enchiladas rest for 5-10 minutes before serving. This allows the filling to set slightly, making them easier to serve and preventing them from falling apart. Serving with extra sour cream, guacamole, and your favorite toppings is highly recommended! Enjoy your delicious homemade chicken enchiladas!
Important Note: Baking times may vary depending on your oven and the size of your enchiladas. If using larger enchiladas, you may need to add a few minutes to the baking time. Always check for doneness by inserting a knife into the center of an enchilada; it should be heated through.
Sour Cream Preparation (optional)
While many recipes call for using store-bought sour cream directly in chicken enchiladas, preparing your own sour cream can elevate the dish with a fresher, tangier flavor and a creamier texture. This optional step allows for greater control over the ingredients and ensures a consistently delicious result. This recipe provides instructions for making a simple, yet flavorful, sour cream at home.
Important Note: Homemade sour cream requires a period of fermentation, typically 24 hours. Plan accordingly and prepare it a day in advance of making your enchiladas.
Ingredients:
- 1 cup heavy cream (at least 36% milkfat for best results)
- 2 tablespoons buttermilk (or 2 tablespoons of plain yogurt with active cultures)
- 1/4 teaspoon salt (optional, adjust to taste)
Instructions:
1. Sterilize your equipment: Clean a glass jar (a half-pint mason jar works perfectly) and its lid thoroughly. You can sterilize them by washing in hot, soapy water, rinsing well, and then placing them in boiling water for 5 minutes. This step helps prevent unwanted bacteria from spoiling your sour cream.
2. Combine ingredients: In the sterilized jar, combine the heavy cream, buttermilk (or yogurt), and salt (if using). Stir gently but thoroughly until everything is well incorporated. Avoid overmixing, as this can incorporate too much air and potentially affect the texture.
3. Ferment: Cover the jar with the lid and let it sit at room temperature (ideally between 68-72°F or 20-22°C) for 24 hours. The temperature is crucial; a warmer environment will speed up the process but may also result in a less desirable taste and texture. A cooler environment will slow the process considerably, potentially taking longer than 24 hours.
4. Check for thickening: After 24 hours, check the consistency of the mixture. It should have thickened noticeably and have a slightly tangy aroma. If it’s still quite thin, allow it to sit for a few more hours. Do not leave it at room temperature for more than 36 hours.
5. Refrigerate: Once thickened to your liking, refrigerate the sour cream for at least 4 hours to slow down the fermentation process. This will also help solidify the texture and improve its overall consistency.
6. Taste and adjust: After refrigeration, taste your homemade sour cream. You can add more salt if needed. If it’s too tangy, you can slightly dilute it with a tablespoon or two of heavy cream.
Professional Recommendations:
- Use high-quality heavy cream for the best results. The higher the milkfat content, the richer and creamier your sour cream will be.
- For a smoother texture, strain the sour cream through a fine-mesh sieve after refrigeration. This will remove any whey that may have separated.
- Store homemade sour cream in an airtight container in the refrigerator. It will keep for up to 10 days.
- Always practice good hygiene when making homemade dairy products. Wash your hands thoroughly before handling ingredients and ensure all equipment is properly sterilized.
Enjoy your homemade sour cream in your delicious chicken enchiladas!
Recommendations for Chicken Enchiladas with Sour Cream
To elevate your Chicken Enchiladas with Sour Cream experience, consider these recommendations for preparation, serving, and storage. Careful attention to these details will ensure a delicious and satisfying meal every time.
Preparation Enhancements: For richer flavor, marinate the shredded chicken in a mixture of your favorite spices (cumin, chili powder, paprika) and lime juice for at least 30 minutes before assembling the enchiladas. This will infuse the chicken with incredible depth. Experiment with different types of cheese for a unique flavor profile; Monterey Jack, Queso Oaxaca, or a blend of cheddar and pepper jack all work wonderfully. Don’t be afraid to add a touch of heat with diced jalapeños or a sprinkle of your favorite hot sauce. Consider using corn tortillas for a slightly sweeter taste that complements the sour cream.
Serving Suggestions: These enchiladas are fantastic on their own, but a few additions can take them to the next level. A dollop of extra sour cream and a sprinkle of fresh cilantro add a vibrant freshness. Garnish with sliced green onions or red onions for a contrasting color and texture. A side of Mexican rice and refried beans is a classic accompaniment that provides a balanced meal. Consider adding a simple salad with a lime vinaigrette for a lighter, refreshing counterpoint to the richness of the enchiladas.
Complementary Dishes: To create a complete Mexican-inspired feast, pair your enchiladas with some of these dishes: a vibrant guacamole and pico de gallo for a fresh, chunky topping or as a side dish; a flavorful salsa verde or a smoky chipotle salsa; warm tortillas for scooping up any leftover sauce; and a refreshing margarita or a Mexican beer. For a spicier option, serve alongside a side of jalapeño poppers or a spicy Mexican street corn salad. Remember to adjust the spice level of accompanying dishes to match your preference.
Storage and Reheating: Leftover enchiladas can be stored in an airtight container in the refrigerator for up to 3 days. To reheat, you can either bake them in a preheated oven at 350°F (175°C) for 15-20 minutes, or microwave them in short bursts until heated through. Avoid over-microwaving to prevent the enchiladas from becoming dry. For best results, always reheat gently and check frequently.
Nutritional Information (Approximate per serving, will vary based on ingredients and portion size): Calories: 400-500; Protein: 25-30g; Fat: 20-25g; Carbohydrates: 40-50g; Fiber: 5-7g. This is an estimate and the actual nutritional content will depend on the specific ingredients used and the portion size. For a more precise analysis, use a nutrition calculator and input your exact ingredients and quantities.
Enjoy your delicious and satisfying Chicken Enchiladas with Sour Cream! Remember to adjust the recipe to your liking and have fun experimenting with different flavors and ingredients.