Chicken enchiladas, a beloved dish across the globe, boast a rich history deeply rooted in Mexican cuisine. While pinpointing the exact origin is difficult, their ancestry traces back to ancient Aztec cooking techniques involving corn tortillas. These early iterations likely involved simpler fillings, perhaps beans or squash, wrapped in corn tortillas and cooked in a pit or on a comal. The arrival of the Spanish in the 16th century introduced new ingredients like chickens and various cheeses, fundamentally altering the culinary landscape and paving the way for the enchiladas we know and love today.
The evolution of enchiladas is a testament to culinary adaptation and innovation. The word enchilada itself comes from the Nahuatl words chilli (meaning chili) and en-, meaning in, thus translating to in chili . This highlights the crucial role of chili peppers in the dish’s development, providing both flavor and a vibrant red hue. Over centuries, regional variations emerged, showcasing the diversity of Mexican cooking. From the creamy green enchiladas of Puebla to the fiery red enchiladas rojas of the north, each region boasts its unique spin on this classic dish. This regional diversity is a testament to the dish’s adaptability and enduring appeal.
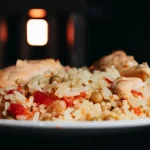
Today, chicken enchiladas stand as a cornerstone of Mexican-American cuisine. Statistics show that Mexican food, including dishes like enchiladas, is one of the most popular ethnic cuisines in the United States, with an estimated annual market value exceeding $100 billion. This immense popularity reflects not only the deliciousness of the food but also its cultural significance. Enchiladas frequently appear at family gatherings, celebrations, and casual meals, acting as a symbol of communal sharing and cultural heritage. Many families hold cherished recipes passed down through generations, each bearing unique twists and flavors that add to their personal story. The simple act of making enchiladas often becomes a cherished family tradition, connecting individuals to their roots and fostering a sense of belonging.
Furthermore, the versatility of chicken enchiladas is a key factor in their widespread appeal. The basic recipe can be easily adapted to suit individual preferences and dietary restrictions. From using different types of cheese to incorporating vegetables or substituting the chicken for other proteins, the possibilities are nearly endless. This adaptability has propelled chicken enchiladas into the mainstream, making them a crowd-pleaser at potlucks, parties, and family dinners across diverse cultures. This recipe will guide you through creating a delicious and authentic version of this iconic dish.
Ingredients and Measurements
This recipe yields approximately 8-10 generous chicken enchiladas. Adjust quantities as needed depending on your serving size and pan dimensions. Accurate measurements are key to achieving the perfect consistency and flavor.
For the Chicken Filling:
- 1.5 lbs boneless, skinless chicken breasts: Choose high-quality chicken breasts for optimal flavor and tenderness. Avoid using frozen chicken breasts unless you thoroughly thaw them overnight in the refrigerator.
- 1 tbsp olive oil: Use extra virgin olive oil for its superior flavor. A neutral oil like canola or vegetable oil can be substituted if preferred.
- 1 medium yellow onion, finely chopped: Approximately 1 cup. For a milder flavor, you can use half a yellow onion and half a white onion.
- 2 cloves garlic, minced: Freshly minced garlic provides the best flavor. Jarred minced garlic can be used as a substitute, but use it sparingly as it can be quite potent.
- 1 (10 ounce) can diced tomatoes and green chilies (Rotel), undrained: The undrained juice adds moisture and flavor to the filling. Consider using fire-roasted diced tomatoes for a smokier taste.
- 1 (4 ounce) can chopped green chilies: Adjust the amount depending on your spice preference. For a milder dish, start with half a can and add more to taste.
- 1 tsp ground cumin: Use freshly ground cumin for the best flavor. Store-bought ground cumin can be used, but its flavor will be slightly less intense.
- 1/2 tsp chili powder: Adjust the amount to your desired level of spiciness. Start with less and add more gradually to taste. Different chili powders offer varying levels of heat.
- 1/4 tsp smoked paprika: Adds a subtle smoky flavor to complement the other spices. Cayenne pepper can be added for extra heat.
- 1/2 cup chicken broth: Use low-sodium chicken broth to control the salt content. Alternatively, you can use water, but the flavor will be slightly less rich.
- Salt and black pepper to taste: Season generously throughout the cooking process.
For the Enchilada Sauce:
- 1 (10 ounce) can red enchilada sauce: Choose a high-quality brand for the best flavor. You can also make your own enchilada sauce from scratch for a more authentic taste.
- 1/2 cup water: This helps thin the sauce to a pourable consistency.
Other Ingredients:
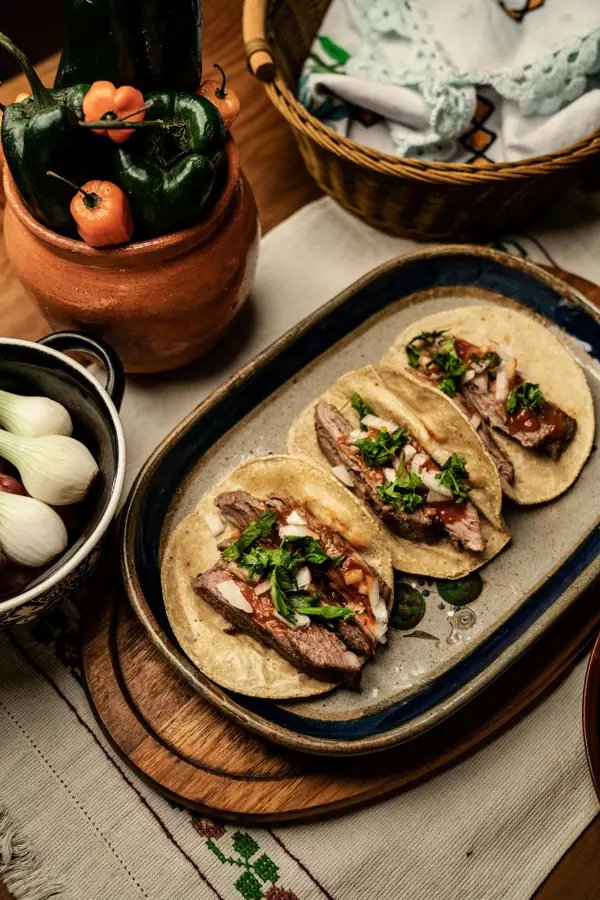
- 12 corn or flour tortillas: Choose your preferred type of tortilla. Warming the tortillas slightly before filling makes them more pliable and less likely to break.
- 2 cups shredded Mexican cheese blend: A blend of Monterey Jack, cheddar, and pepper jack cheeses works well. You can use your preferred type of cheese.
- Optional toppings: Sour cream, chopped cilantro, sliced green onions, avocado slices.
Important Note: Always taste and adjust seasonings to your preference throughout the cooking process. This recipe provides a guideline, feel free to experiment and personalize it to your liking!
Chicken Preparation
The success of your chicken enchiladas hinges significantly on the quality of the prepared chicken. We’ll be using about 1.5 lbs (680g) of boneless, skinless chicken breasts for this recipe. You can adjust the quantity depending on how many enchiladas you’re making, but maintaining a good chicken-to-sauce ratio is key.
Begin by rinsing the chicken breasts under cold water and patting them thoroughly dry with paper towels. This step is crucial for achieving even browning and preventing excess moisture from steaming the chicken instead of searing it.
There are several methods for cooking the chicken; you can boil, bake, or pan-fry it. For the most flavorful result, we recommend pan-frying. Season the chicken generously on both sides with 1 teaspoon of salt, ½ teaspoon of black pepper, and ½ teaspoon of chili powder. You can also add other spices like cumin, paprika, or garlic powder to enhance the flavor profile. Let the chicken sit for at least 15 minutes to allow the seasoning to penetrate.
Heat 2 tablespoons of olive oil in a large skillet over medium-high heat. Once the oil is shimmering, carefully place the chicken breasts in the skillet, ensuring not to overcrowd the pan. Overcrowding will lower the temperature and result in steaming instead of searing. If necessary, cook the chicken in batches.
Sear the chicken for about 4-5 minutes per side, until a nice golden-brown crust forms. Then, reduce the heat to medium-low, cover the skillet, and cook for another 10-15 minutes, or until the internal temperature reaches 165°F (74°C). Use a meat thermometer to ensure the chicken is cooked through. This method ensures the chicken is both flavorful and juicy.
Once cooked, remove the chicken from the skillet and let it rest for about 10 minutes before shredding. This resting period allows the juices to redistribute, resulting in more tender and flavorful chicken. Using two forks, shred the chicken into small, manageable pieces. Discard any excess fat or connective tissue.
Important Note: If you prefer a quicker method, you can boil or bake the chicken. For boiling, simply simmer the seasoned chicken breasts in water until cooked through. For baking, place the seasoned chicken breasts in a baking dish with a little bit of water or broth at the bottom, cover with foil and bake at 375°F (190°C) until cooked through. However, pan-frying offers superior flavor development.
Once shredded, your chicken is ready to be incorporated into your delicious chicken enchilada filling. Remember to taste the chicken and adjust seasoning as needed before adding it to the sauce and tortillas.
Sauce Preparation
The sauce is the heart and soul of any good chicken enchilada. A well-made sauce elevates the dish from good to exceptional, balancing the richness of the chicken and cheese with its vibrant flavor. We’ll be making a classic red enchilada sauce, but feel free to experiment with variations once you’ve mastered this recipe.
For this recipe, we’ll need the following ingredients: 2 tablespoons of vegetable oil, 1 large white onion, finely chopped (approximately 1 cup), 4 cloves garlic, minced, 28 ounces (794g) of canned crushed tomatoes, 1 (15 ounce/425g) can of tomato sauce, 1 teaspoon of dried oregano, 1 teaspoon of ground cumin, ½ teaspoon of cayenne pepper (or more, to taste), ½ teaspoon of salt, and ¼ teaspoon of black pepper. Adjust the cayenne pepper to your preferred level of spiciness; start small and add more gradually.
Begin by heating the vegetable oil in a large, heavy-bottomed saucepan over medium heat. A heavy-bottomed pan prevents scorching and ensures even cooking. Add the chopped onion and cook, stirring occasionally, until softened and translucent, about 5-7 minutes. This slow cooking process allows the onions to caramelize slightly, adding depth of flavor to the sauce.
Next, add the minced garlic and cook for another minute, until fragrant. Don’t burn the garlic; it will become bitter. Stir constantly to prevent sticking. Now, add the crushed tomatoes, tomato sauce, oregano, cumin, cayenne pepper, salt, and black pepper. Stir well to combine all ingredients thoroughly.
Bring the sauce to a gentle simmer, then reduce the heat to low, cover the saucepan, and let it simmer for at least 30 minutes, or up to 1 hour. The longer the sauce simmers, the richer and more complex the flavor will become. Stir occasionally to prevent sticking and to ensure even cooking. As the sauce simmers, the flavors will meld and deepen, creating a truly delicious base for your enchiladas.
Once the sauce has simmered to your liking, taste and adjust the seasoning as needed. You may want to add more salt, pepper, or cayenne pepper depending on your preferences. Remember, you can always add more seasoning, but you can’t take it away. If the sauce is too thick, you can add a little water to thin it out. If it’s too thin, simmer uncovered for a longer period to reduce the liquid.
Once you’re satisfied with the flavor and consistency of your sauce, remove it from the heat and set it aside. Allow the sauce to cool slightly before using it to assemble your enchiladas. This will prevent the cheese from melting too quickly and will help ensure that the filling stays put.
Your delicious homemade enchilada sauce is now ready! Use it generously to coat your chicken enchiladas for an unforgettable culinary experience.
Tortilla Preparation
Preparing the tortillas is a crucial step in making delicious chicken enchiladas. The success of your dish hinges on having pliable, warm tortillas that won’t tear easily when rolled. We’ll cover several methods to ensure perfect tortillas every time.
Quantity: You’ll need approximately 12-15 corn or flour tortillas, depending on their size and your desired enchilada size. Choose tortillas that are about 6-8 inches in diameter. Smaller tortillas will require more, while larger ones will reduce the overall number needed.
Method 1: Warming Tortillas on a Comal or Dry Skillet (Recommended): This method yields the best results, offering evenly warmed tortillas with a slightly softened texture. Heat a large, ungreased comal or heavy-bottomed skillet over medium heat. Place 2-3 tortillas on the hot surface, cooking for about 30-45 seconds per side, or until they are warm, pliable, and slightly softened. Do not allow them to brown or become crispy. Keep the warmed tortillas wrapped in a clean kitchen towel or placed in a tortilla warmer to maintain their heat and suppleness.
Method 2: Microwaving Tortillas: This is a quicker method but may result in slightly less evenly warmed tortillas. Wrap 2-3 tortillas in a damp paper towel. Microwave on high for 30-45 seconds, or until heated through and pliable. Be careful not to overcook, as this can lead to dry and brittle tortillas. Again, keep warmed tortillas wrapped in a clean kitchen towel to prevent drying.
Method 3: Steaming Tortillas: For a truly soft and pliable tortilla, steaming is a great option. Place a damp kitchen towel in a steamer basket and arrange 2-3 tortillas on top. Steam for 1-2 minutes, or until heated and pliable. This method is excellent for thicker tortillas that require more thorough softening. Ensure the steamer is not too hot, otherwise the tortillas will dry out.
Important Considerations:
Type of Tortilla: Corn tortillas offer a traditional, slightly more rustic texture, while flour tortillas provide a softer, more pliable option. The choice is largely a matter of personal preference.
Avoiding Cracks and Tears: Proper warming is key to preventing cracks and tears. Overheating will dry out the tortillas, making them brittle and prone to breaking. Underheating will leave them stiff and difficult to roll.
Working Quickly: Once warmed, work quickly to fill and roll the enchiladas to prevent the tortillas from cooling and becoming difficult to handle. If you’re making a large batch, warm tortillas in small batches to maintain their optimal temperature.
Professional Tip: For the most authentic flavor, use fresh, high-quality tortillas. Avoid using pre-packaged tortillas that have been sitting on the shelf for a long time, as they tend to be drier and less pliable.
Assembly
With your flavorful chicken filling prepared and your tortillas warmed, it’s time to assemble your enchiladas. This step requires a bit of finesse to ensure even cooking and a pleasing presentation. We’ll be making approximately 12 enchiladas with this recipe, but you can easily adjust the quantities based on your needs and pan size.
Preheat your oven to 375°F (190°C). This ensures the cheese melts perfectly and the enchiladas bake through evenly. A preheated oven is crucial for consistent results.
Prepare your baking dish: Choose a 9×13 inch baking dish, or a similar sized oven-safe dish. Lightly grease it with cooking spray or a thin layer of oil to prevent sticking. This will make cleanup significantly easier.
Fill the tortillas: Take one warmed corn tortilla. Using a spoon or a small cup, carefully add approximately ⅓ cup of the chicken filling to the center of the tortilla. Don’t overfill! Overfilling will lead to messy enchiladas that are difficult to roll and may leak during baking. Aim for a neat mound of filling that won’t overflow when rolled.
Rolling the enchiladas: Gently fold in the sides of the tortilla, then tightly roll it up from the bottom, creating a neat cylinder. Place the rolled enchilada seam-down in the prepared baking dish. Repeat this process with the remaining tortillas and filling until the baking dish is full or you’ve used all your ingredients. Arrange the enchiladas snugly together, but don’t overcrowd the dish.
Adding the sauce: Once all the enchiladas are in the baking dish, generously pour the enchilada sauce over them, ensuring each enchilada is fully coated. You might need to use a spoon or spatula to get the sauce underneath and between the enchiladas. Don’t be shy with the sauce! It adds flavor and moisture to the dish.
Topping with cheese: Sprinkle a generous layer of shredded Monterey Jack cheese (approximately 2 cups) over the enchiladas. You can also add other cheeses, such as cheddar or pepper jack, for a more complex flavor profile. The cheese will melt beautifully during baking, creating a delicious, gooey topping.
Optional additions: For extra flavor and texture, consider adding sliced black olives, chopped green onions, or a sprinkle of chili powder on top of the cheese before baking. These additions can elevate the dish to the next level.
Baking: Bake for 20-25 minutes, or until the cheese is melted, bubbly, and golden brown, and the enchiladas are heated through. Keep an eye on them to prevent burning. Use oven mitts when removing the baking dish from the oven, as it will be hot.
Resting: Once baked, let the enchiladas rest for about 5-10 minutes before serving. This allows the filling to set slightly, making them easier to handle and serve. Garnish with fresh cilantro or sour cream before serving, if desired.
Enjoy your delicious homemade chicken enchiladas!
Baking Instructions
Preheat your oven to 375°F (190°C). This temperature ensures even cooking and a beautifully browned top on your enchiladas. Using a preheated oven is crucial for consistent results. A cold oven will shock the filling and cause uneven cooking, potentially leading to a soggy bottom.
Lightly grease a 9×13 inch baking dish with cooking spray or a thin layer of oil. This prevents sticking and makes cleanup a breeze. Don’t skip this step! Even a non-stick dish can benefit from a little extra lubrication, especially when dealing with cheese.
Carefully arrange the filled enchiladas in the prepared baking dish. Place them seam-down to prevent the filling from spilling out during baking. Work efficiently to ensure the enchiladas are evenly spaced in the dish. Overcrowding can lead to uneven cooking and soggy enchiladas. Aim for a single layer if possible; if you need a second layer, ensure the enchiladas are not stacked too high.
In a medium bowl, whisk together the enchilada sauce (approximately 1 ½ cups) with 1/4 cup of water. This creates a thinner consistency, ensuring the enchiladas are adequately coated and preventing them from drying out during baking. Don’t use too much water, as this can result in a watery sauce. Adjust the amount of water depending on the thickness of your sauce.
Pour the sauce evenly over the enchiladas, ensuring they are completely coated. You may need to gently tilt the baking dish to ensure the sauce reaches every enchilada. Don’t be shy with the sauce! A generous coating adds flavor and moisture.
Sprinkle the shredded cheese (approximately 2 cups) evenly over the top of the enchiladas. Use a good quality cheese that melts well, such as Monterey Jack, cheddar, or a blend. The cheese adds a delicious topping and helps create a beautiful, golden crust.
Bake for 20-25 minutes, or until the cheese is melted, bubbly, and golden brown, and the enchiladas are heated through. Keep an eye on them during the last 5-10 minutes. Ovens vary, so the baking time may need some adjustment. If the cheese is browning too quickly, you can loosely tent the top with aluminum foil.
Once baked, let the enchiladas rest for 10-15 minutes before serving. This allows the filling to set and makes them easier to serve. Allowing them to rest prevents the filling from being too runny. Serve immediately and enjoy your delicious homemade chicken enchiladas!
Pro Tip: For extra flavor, consider adding a sprinkle of chopped fresh cilantro or green onions before serving. You can also add a dollop of sour cream or guacamole for an extra layer of deliciousness.
Recommendations for the Perfect Chicken Enchiladas
To elevate your chicken enchilada experience, consider these recommendations. For optimal flavor, marinate the chicken for at least 30 minutes, or even overnight, in a mixture of your favorite spices, lime juice, and perhaps some chipotle peppers for a smoky kick. This will ensure the chicken is incredibly tender and flavorful, permeating the entire dish.
Don’t overcrowd the pan when browning the chicken. This will result in steaming rather than browning, leading to a less flavorful and potentially tougher result. Work in batches to ensure even browning and a delicious crust.
When it comes to the enchilada sauce, experiment with different levels of heat. Start with a mild sauce and add a pinch of cayenne pepper or a few dashes of your favorite hot sauce to customize the spice level to your preference. You can also try using different types of chiles for a unique flavor profile.
The cheese is crucial! Use a blend of cheeses for the best results. A combination of Monterey Jack, cheddar, and pepper jack provides a delicious flavor and melt beautifully. Make sure the cheese is shredded finely for even distribution and melting.
Assembly is key to success. Don’t overfill the tortillas, as this can make them difficult to roll and may cause them to break. A firm but not overly tight roll ensures even cooking and prevents spills. Using a slightly larger baking dish than you anticipate needing allows for better distribution and prevents overcrowding.
Baking temperature and time are essential. Bake until the cheese is bubbly and golden brown, and the filling is heated through. Overbaking can dry out the enchiladas, so keep a close eye on them during the last few minutes of cooking. A food thermometer inserted into the thickest part of the filling should read at least 165°F (74°C).
Serving suggestions: These enchiladas are delicious on their own, but you can enhance the experience with various toppings. A dollop of sour cream or Mexican crema, a sprinkle of fresh cilantro, and a few slices of avocado add richness and freshness. A side of Mexican rice and refried beans complements the dish perfectly.
Complementary dishes: Consider serving your enchiladas with a simple side salad, a vibrant pico de gallo, or some warm tortillas for scooping up any leftover sauce. A margarita or a Mexican beer pairs beautifully with the spicy and savory flavors of the enchiladas.
Storage: Leftover enchiladas can be stored in an airtight container in the refrigerator for up to 3 days. Reheat gently in the microwave or oven until heated through. Avoid over-reheating, as this can make the tortillas dry.
Nutritional Information (approximate per serving, will vary based on ingredients): Calories: 400-500, Protein: 25-30g, Fat: 20-25g, Carbohydrates: 40-50g. This is an estimate and may vary depending on the specific ingredients used and portion size. For more precise nutritional information, use a nutrition calculator with your exact recipe details.
Enjoy your delicious homemade chicken enchiladas!