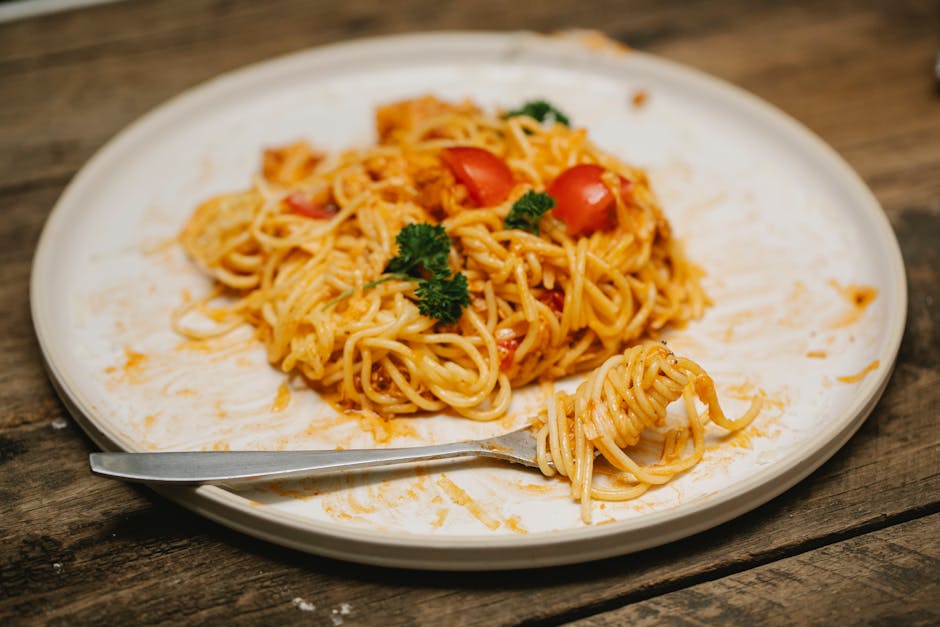
Baked ziti, a comforting and deeply satisfying casserole, is a beloved dish across the United States, though its roots lie firmly in Italian-American cuisine. While pinpointing an exact origin is difficult, it’s widely believed to have emerged from the resourceful kitchens of Italian immigrants in the early to mid-20th century. These resourceful cooks adapted traditional Italian pasta dishes, utilizing readily available ingredients and oven-baking to create hearty, family-style meals. Unlike its more structured Italian cousin, ziti al forno, baked ziti in the American context often features a richer, cheesier sauce and a more liberal use of meat, reflecting the preferences and culinary traditions of its adopters. The dish truly embodies the spirit of adaptation and innovation that is central to the evolution of many American comfort foods.
The popularity of baked ziti soared in the mid-20th century, coinciding with the rise of readily available processed cheese and the increasing accessibility of ovens in American homes. Cookbooks from this era often feature variations of baked ziti, solidifying its place in the American culinary landscape. The dish’s appeal stems from its versatility; it can easily be adapted to accommodate various dietary needs and preferences. Meat-lovers might add sausage or meatballs, while vegetarians can opt for a hearty vegetable ragu. The use of ziti pasta, a ridged tube shape, is crucial; its texture allows it to hold the flavorful sauce and melted cheese exceptionally well. This creates a satisfying textural contrast between the soft pasta, the rich sauce, and the delightfully gooey mozzarella.
Today, baked ziti remains a staple at family gatherings, potlucks, and casual dinners across the country. While precise statistics on its consumption are difficult to obtain, its widespread presence in restaurant menus, home kitchens, and online recipe databases speaks volumes about its enduring appeal. It’s a dish that transcends generations, with many families passing down their own unique recipes and variations. The simple act of baking a tray of ziti evokes feelings of warmth, comfort, and shared meals, making it more than just a dish; it’s a cultural symbol of family and togetherness. Its adaptability allows it to retain its core identity while also embracing regional and personal preferences, ensuring its continued relevance in the ever-evolving world of American cuisine.
Ingredients and Measurements
This recipe for Baked Ziti with Mozzarella yields approximately 8-10 servings. Accurate measurements are crucial for achieving the perfect texture and flavor balance. Use a kitchen scale whenever possible for the most precise results, especially for the cheeses.
Pasta: 1 pound (450g) ziti pasta. Choose a good quality ziti; the shape is important for holding the sauce and cheese. Avoid using broken pieces, as they’ll cook unevenly. Recommendation: Look for bronze-die cut pasta for a superior texture.
Meat Sauce: This recipe uses a classic meat sauce, but feel free to substitute with your favorite marinara sauce if you prefer a vegetarian option. For the meat sauce, you will need:
- 1 tablespoon olive oil
- 1 large onion, finely chopped (approximately 1 cup)
- 2 cloves garlic, minced
- 1 pound (450g) ground beef (or Italian sausage, or a combination)
- 1 (28 ounce) can crushed tomatoes
- 1 (15 ounce) can tomato sauce
- 1 teaspoon dried oregano
- 1 teaspoon dried basil
- 1/2 teaspoon salt
- 1/4 teaspoon black pepper
- 1/4 cup chopped fresh parsley (optional, for garnish)
Cheese Filling: The cheese filling is the star of this dish! Here’s what you’ll need:
- 15 ounces (425g) ricotta cheese (whole milk for best results)
- 1 large egg
- 1/2 cup grated Parmesan cheese (about 1 ounce)
- 1/4 cup chopped fresh parsley (optional)
- 1/4 teaspoon salt
- 1/4 teaspoon black pepper
Mozzarella Topping: A generous layer of mozzarella is essential for that melty, bubbly topping. Use high-quality fresh mozzarella for the best flavor.
- 16 ounces (450g) fresh mozzarella cheese, shredded. Important Note: Avoid pre-shredded mozzarella as it often contains cellulose which prevents proper melting.
Other:
- 2 tablespoons olive oil for greasing the baking dish
- 1 (9×13 inch) baking dish
Professional Recommendation: Taste and adjust seasonings as needed throughout the process. The meat sauce can be made ahead of time and stored in the refrigerator for up to 3 days, making this a great make-ahead dish. Remember to bring the sauce to room temperature before incorporating it into the ziti.
Following these precise measurements will ensure a delicious and satisfying Baked Ziti with Mozzarella every time. Enjoy!
Equipment Preparation
Before you begin crafting your delicious baked ziti with mozzarella, ensuring you have the right equipment ready will streamline the cooking process and contribute to a superior final product. Proper preparation prevents potential cooking mishaps and ensures a smooth, efficient workflow.
Oven Preheating: Start by preheating your oven to 375°F (190°C). This is crucial for achieving the perfect bake. A preheated oven ensures even cooking and prevents the ziti from becoming soggy or undercooked. Allow at least 15-20 minutes for your oven to reach the desired temperature. Using an oven thermometer is highly recommended to verify the accuracy of your oven’s temperature setting.
Baking Dish Selection: Choose a 9×13 inch baking dish. This size is ideal for a standard recipe and allows for even distribution of the ziti and sauce. Avoid using a dish that’s too small, as this will lead to overflowing and uneven cooking. Similarly, a dish that’s too large will result in a thin layer of ziti, impacting the texture and overall taste. A glass or ceramic baking dish is preferred, as it retains heat well, contributing to a meltier, cheesier outcome.
Mixing Bowls: You’ll need at least three mixing bowls of varying sizes. A large bowl (approximately 5-quart capacity) is essential for combining the cooked ziti, sauce, and cheese. A medium-sized bowl (approximately 3-quart capacity) will be perfect for preparing the meat sauce (if using) or for whisking together any additional seasonings. A small bowl (approximately 1-quart capacity) can be used for holding grated mozzarella cheese, preventing it from sticking together.
Measuring Utensils: Accurate measurements are paramount for consistent results. Gather a set of reliable measuring cups and spoons. Ensure your measuring cups and spoons are clean and dry before using them to avoid affecting the consistency of your ingredients. For precise measurements of liquids, use a liquid measuring cup; for dry ingredients, use a dry measuring cup.
Other Essential Tools: Don’t forget essential cooking tools such as a large pot for boiling the ziti, a wooden spoon or spatula for stirring the sauce and ziti mixture, and a cheese grater for shredding the mozzarella cheese. A large spoon or serving spatula will be needed for transferring the cooked ziti into the baking dish. Invest in high-quality, durable tools for optimal performance and longevity.
Preparing the Baking Dish: Before adding the ziti mixture, lightly grease the baking dish with cooking spray or olive oil. This prevents the ziti from sticking to the bottom and sides of the dish, making serving easier and preventing a messy cleanup. Ensure the oil is evenly distributed across the entire surface of the dish to prevent sticking in specific areas.
By meticulously preparing your equipment beforehand, you set the stage for a successful and enjoyable baking experience. Taking these preparatory steps is a crucial element in creating a perfect baked ziti with mozzarella.
Sauce Preparation
The success of your baked ziti hinges significantly on the quality of your sauce. A vibrant, flavorful sauce elevates the entire dish, so take your time with this crucial step. We’ll be making a classic marinara, but feel free to adapt it to your preferences – a touch of pesto, a splash of red wine, or even some sautéed mushrooms can add exciting dimensions.
Ingredients:
- 2 tablespoons olive oil
- 1 large onion, finely chopped (approximately 1 cup)
- 3 cloves garlic, minced
- 28 ounces (794g) canned crushed tomatoes
- 15 ounces (425g) canned tomato sauce
- 1 teaspoon dried oregano
- 1 teaspoon dried basil
- 1/2 teaspoon dried parsley
- 1/4 teaspoon red pepper flakes (optional, for a touch of heat)
- 1 teaspoon salt
- 1/2 teaspoon black pepper
- 1 tablespoon sugar (optional, to balance acidity)
Instructions:
Begin by heating the olive oil in a large, heavy-bottomed saucepan over medium heat. Using a heavy-bottomed pan prevents scorching and ensures even cooking. Add the chopped onion and cook, stirring occasionally, until softened and translucent, about 5-7 minutes. Don’t rush this step; properly sautéed onions contribute significantly to the depth of flavor.
Next, add the minced garlic and cook for another minute, until fragrant. Be careful not to burn the garlic, as this will impart a bitter taste. Stir constantly to prevent browning.
Pour in the crushed tomatoes and tomato sauce. Add the oregano, basil, parsley, red pepper flakes (if using), salt, pepper, and sugar (if using). Stir well to combine all the ingredients.
Bring the sauce to a gentle simmer, then reduce the heat to low. Partially cover the saucepan to allow for some evaporation while preventing the sauce from drying out completely. Simmer for at least 30 minutes, stirring occasionally. The longer it simmers, the richer and more flavorful the sauce will become. For the best results, simmer for 1-2 hours, stirring occasionally. This allows the flavors to meld beautifully.
Taste and adjust seasonings as needed. You may want to add more salt, pepper, or sugar depending on your preference and the acidity of the tomatoes. Some prefer a slightly sweeter sauce, while others prefer a tangier one. This is your chance to personalize the flavor profile.
Once the sauce has reached your desired consistency and flavor, remove it from the heat and set aside. Allow it to cool slightly before using it in your baked ziti. The sauce can be made ahead of time and stored in the refrigerator for up to 3 days, making it a great option for meal prepping.
Pasta Cooking
Before you even think about assembling your baked ziti, mastering the art of cooking the pasta is crucial. Undercooked pasta will be crunchy and unpleasant in the final dish, while overcooked pasta will become mushy and fall apart, ruining the texture of your ziti. We’ll be using 1 pound (450g) of ziti pasta for this recipe, but you can adjust this amount based on your needs and the size of your baking dish.
Choose the right pot: Select a large, wide pot. This allows for proper water circulation and prevents the pasta from sticking together. A pot that’s too small will lead to a sticky, gummy mess. Aim for a pot that’s at least 6 quarts in capacity.
Use plenty of water: Don’t skimp on the water! At least 6 quarts (5.7 liters) of water are needed for 1 pound of pasta. This ensures the pasta cooks evenly and prevents the starch from becoming too concentrated. More water means less sticking.
Salt the water generously: This is a crucial step often overlooked. Add at least 2 tablespoons of kosher salt (or 1 tablespoon of table salt) to the boiling water. This seasons the pasta from the inside out, resulting in much tastier pasta. Don’t be afraid to be generous – the salt will not make the dish overly salty.
Bring the water to a rolling boil: Before adding the pasta, make sure the water is at a full, vigorous boil. Adding the pasta to lukewarm water will result in uneven cooking and sticking.
Add the pasta slowly: Add the ziti slowly to the boiling water, stirring gently to prevent it from sticking together. This is especially important with a shape like ziti, which can clump easily. Give it a good stir after a minute or two to ensure all the pasta is separated.
Cook according to package directions: Always check the package for the recommended cooking time. However, it’s crucial to taste test the pasta a minute or two before the recommended time. Pasta continues to cook even after it’s removed from the heat, so it’s better to slightly undercook it. Aim for *al dente*, which means to the tooth in Italian – it should be firm to the bite, with a slight resistance.
Reserve some pasta water: Before draining the pasta, reserve about 1 cup of the starchy cooking water. This water is pure pasta magic! It can help to create a creamier sauce and bind the ingredients together in the baked ziti, adding richness and preventing dryness.
Drain the pasta immediately: Once the pasta is cooked, drain it immediately in a colander. Rinse the pasta only if you intend to use it in a cold pasta salad – for baked ziti, the starchy coating is important for the sauce to cling to.
Properly cooked pasta is the foundation of a great baked ziti. Following these steps will ensure your pasta is perfectly cooked, setting the stage for a delicious and satisfying meal. Remember, practice makes perfect! Don’t be discouraged if your first attempt isn’t flawless; keep experimenting and refining your technique.
Cheese Preparation
The success of your baked ziti hinges significantly on the proper preparation of the cheese. Using the right techniques ensures a creamy, melty, and flavorful outcome, avoiding a stringy, rubbery mess. This section details the crucial steps for achieving perfect mozzarella magic in your baked ziti.
Start with high-quality mozzarella: Fresh, whole milk mozzarella is ideal. Avoid pre-shredded mozzarella, as it often contains cellulose which prevents proper melting and creates a gummy texture. Instead, purchase a block of fresh mozzarella (approximately 16 ounces) and shred it yourself. This allows for better control over the consistency and melting process.
Shredding the mozzarella: Using a box grater, shred the mozzarella into relatively uniform pieces. Avoid grating it too finely, as this can lead to a pasty texture. Aim for a slightly coarse shred, allowing for some larger pieces to remain. These larger pieces will create pockets of melty cheese throughout the ziti, adding a satisfying textural contrast.
Consider adding other cheeses: While mozzarella is the star, incorporating other cheeses can enhance the flavor profile and texture of your baked ziti. A common addition is ricotta cheese, which adds creaminess and richness. Use about 1 cup of whole milk ricotta for a balanced flavor. Remember to drain any excess liquid from the ricotta before incorporating it into the cheese mixture. This prevents a watery ziti.
Mixing the cheeses: Once the mozzarella and ricotta are prepared, gently combine them in a large bowl. Avoid overmixing, as this can cause the cheese to become stringy. A simple fold is sufficient to blend the cheeses. Adding a pinch of salt and freshly ground black pepper at this stage enhances the overall flavor. You can also experiment with other spices, such as a touch of nutmeg or garlic powder, depending on your preference.
Preparing for baking: Before adding the cheese mixture to the ziti, ensure it’s at room temperature. Cold cheese will take longer to melt and may not achieve the desired creamy consistency. Allowing the cheese to come to room temperature for about 15-20 minutes before incorporating it into the baked ziti recipe will ensure even melting.
Optional additions: For an even richer and more flavorful cheese blend, consider adding a small amount of Parmesan cheese (about 1/4 cup, finely grated). Parmesan adds a sharp, salty counterpoint to the sweetness of the mozzarella and creaminess of the ricotta. Alternatively, a sprinkle of provolone can add a subtle smoky flavor.
Important Note: The quantity of cheese is a matter of personal preference. Feel free to adjust the amounts based on your taste. However, don’t be too stingy! A generous amount of cheese is crucial for achieving the desired cheesy, comforting experience of a classic baked ziti.
Assembly
Assembling your baked ziti is crucial for achieving a perfectly cooked and evenly textured dish. This stage requires careful layering to ensure every bite is delicious and the pasta doesn’t become mushy. We’ll be using a 9×13 inch baking dish for this recipe, but you can adjust the quantities proportionally if using a different sized dish.
Preheat your oven to 375°F (190°C). This is vital for achieving the perfect bake; preheating ensures even cooking throughout the casserole. While the oven heats, prepare your baking dish by lightly greasing it with olive oil or cooking spray. This prevents sticking and makes for easier cleanup.
Begin by spreading about 1 ½ cups of your prepared meat sauce evenly across the bottom of the prepared baking dish. This forms the base layer of flavor and moisture. Don’t spread it too thinly; you want a good layer of sauce to prevent the bottom layer of pasta from drying out.
Next, layer approximately half (about 4 cups) of your cooked ziti pasta over the meat sauce. Arrange the pasta evenly, trying to avoid overcrowding any one area. Don’t press down hard on the pasta; this can compact it and lead to uneven cooking. A gentle spread is all that’s needed.
Now, generously sprinkle 1 ½ cups of your ricotta cheese mixture over the layer of pasta. Use a spoon or spatula to spread it evenly, ensuring full coverage. The ricotta cheese acts as a creamy, flavorful binder, adding moisture and richness to the dish.
Following the ricotta, add another 1 ½ cups of your meat sauce. Again, spread evenly to ensure consistent flavor throughout. This layer will add more depth of flavor and prevent the pasta from becoming dry.
Repeat the layering process: add another 4 cups of cooked ziti, followed by the remaining 1 ½ cups of ricotta cheese mixture. Evenly distribute the ricotta to create a smooth, creamy top layer.
Finally, top the entire casserole with the remaining 1 ½ cups of meat sauce. This will create a rich, flavorful topping and help prevent the cheese from burning during baking. Spread the sauce evenly to ensure an even browning and to prevent any dry spots.
The last and most important step is the mozzarella. Evenly distribute 2 cups of shredded mozzarella cheese all over the top. This creates a beautiful, golden-brown crust and adds a delightful stretchiness to each bite. You may want to sprinkle a little extra Parmesan cheese over the mozzarella for added flavor.
Important Note: Adjust the amount of sauce and cheese according to your preference. Some people like a cheesier ziti, while others prefer a saucier version. Feel free to experiment and find your perfect balance!
Baked Ziti with Mozzarella: Recommendations
This section offers recommendations to enhance your Baked Ziti with Mozzarella experience, from serving suggestions to storage and nutritional information. Following these tips will ensure you create a delicious and satisfying meal.
Serving Suggestions: For a truly memorable meal, consider serving your Baked Ziti with a crisp, fresh salad. A simple Caprese salad with fresh mozzarella, tomatoes, and basil would complement the richness of the ziti beautifully. Alternatively, a lighter green salad with a vinaigrette dressing would provide a refreshing contrast. For a heartier side, consider roasted vegetables like broccoli, zucchini, or bell peppers. A crusty Italian bread, lightly brushed with olive oil and garlic, is also a perfect accompaniment, allowing you to soak up the delicious sauce.
Storage: Leftover Baked Ziti with Mozzarella can be stored in an airtight container in the refrigerator for up to 3-4 days. Ensure the ziti is completely cooled before refrigerating to prevent bacterial growth. When reheating, you can either microwave individual portions or bake the entire dish in a preheated oven at 350°F (175°C) until heated through. Avoid repeated reheating as this can affect the texture and flavor.
Complementary Dishes: Beyond the salad and bread suggestions, you can expand your meal with a variety of complementary dishes. A simple antipasto platter with cured meats, olives, and marinated artichoke hearts would make a fantastic appetizer. For a more substantial addition, consider serving a side of Italian sausage, either grilled or sauteed. The savory flavors will pair perfectly with the cheesy ziti. A light and refreshing lemon sorbet would make a delightful palate cleanser after the rich main course.
Nutritional Information (Approximate per serving, based on a 12-serving recipe): These values are estimates and will vary depending on the specific ingredients used. It is crucial to use a nutrition calculator with your exact ingredients for precise values.
Calories: Approximately 400-500 calories per serving.
Fat: Approximately 20-25 grams per serving.
Saturated Fat: Approximately 10-15 grams per serving.
Cholesterol: Approximately 50-70 mg per serving.
Sodium: Approximately 600-800 mg per serving.
Carbohydrates: Approximately 50-60 grams per serving.
Fiber: Approximately 4-6 grams per serving.
Protein: Approximately 15-20 grams per serving.
Important Note: These nutritional values are estimates and can vary based on the specific ingredients used, portion sizes, and cooking methods. For accurate nutritional information, it’s recommended to use a nutrition calculator with the exact ingredients and measurements used in your recipe.
By following these recommendations, you can create a truly memorable and delicious Baked Ziti with Mozzarella experience. Enjoy!