Chicken wings, a seemingly simple food, hold a surprisingly rich and complex history, far exceeding their humble beginnings. While pinpointing the exact origin of the dish is difficult, their rise to global culinary stardom is a relatively recent phenomenon. Before becoming the ubiquitous bar snack and party staple we know today, chicken wings were largely considered a byproduct of the poultry industry, often discarded or used for stock. Their transformation began in Buffalo, New York, in the 1960s, at the Anchor Bar, where Teressa Bellissimo famously created the first Buffalo wings, a spicy, deep-fried delight that quickly gained a devoted following.
The popularity of Buffalo wings exploded, leading to a plethora of variations and interpretations. From the classic fiery hot sauce to milder options like honey garlic, barbecue, and teriyaki, the versatility of chicken wings has made them a canvas for culinary creativity. Today, the chicken wing industry is a multi-billion dollar enterprise, with annual consumption in the United States alone reaching staggering numbers. Interestingly, Super Bowl Sunday is considered the single biggest day for wing consumption, with estimates suggesting millions of pounds are consumed across the nation. This demonstrates not only the enduring appeal of this snack but also its integration into significant cultural events.
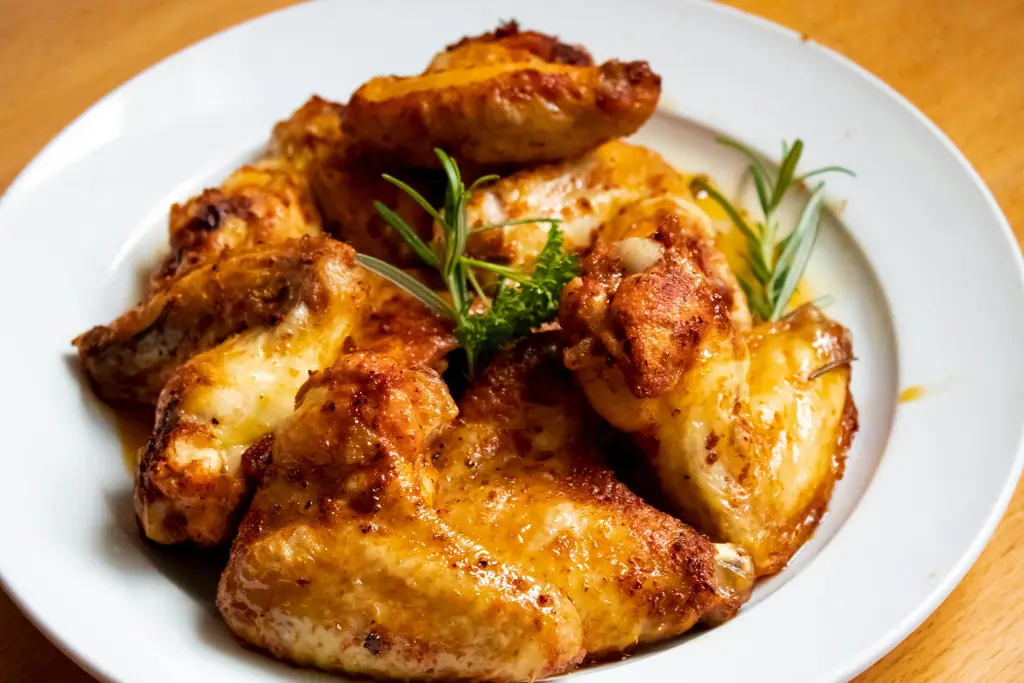
The honey garlic variation, the focus of this recipe, represents a delicious departure from the fiery origins of the Buffalo wing. This sweeter, more savory profile highlights the natural juiciness of the chicken, offering a balance of sweet honey and pungent garlic. It’s a flavor combination that appeals to a broad range of palates, making it a crowd-pleaser at gatherings and a satisfying meal on its own. This recipe will guide you through the process of achieving perfectly crispy, succulent baked chicken wings coated in a luscious honey garlic sauce, a testament to the ongoing evolution and adaptability of this beloved dish.
Ingredients and Measurements
This recipe yields approximately 2 pounds of delicious baked honey garlic chicken wings. Accurate measurements are key to achieving the perfect balance of flavors and texture. We’ll be using both weight and volume measurements where appropriate to cater to different cooking styles.
Chicken Wings: You’ll need 2 pounds (approximately 24-30) of chicken wings, separated into drumettes and flats. Avoid using frozen wings as they may not cook evenly. If using frozen, thaw them completely in the refrigerator overnight before proceeding. The size and weight of wings can vary, so adjust the quantities of other ingredients slightly if needed, based on the actual weight of your wings.
Honey Garlic Sauce: This is where the magic happens! We’ll be making a flavorful and sticky sauce from scratch. The following measurements are crucial: 1/2 cup (120ml) of honey – choose a good quality honey for the best flavor; 1/4 cup (60ml) of soy sauce (low sodium preferred for better control of saltiness); 2 tablespoons (30ml) of rice vinegar – this adds a touch of acidity to balance the sweetness; 2 tablespoons (30ml) of minced garlic – freshly minced garlic offers the best aroma and flavor; 1 tablespoon (15ml) of sesame oil – for a nutty aroma and subtle flavor enhancement; 1 teaspoon (5ml) of grated ginger – fresh ginger is highly recommended; 1/2 teaspoon (2.5ml) of ground black pepper – adjust to your preference; 1/4 teaspoon (1.25ml) of red pepper flakes (optional) – for a hint of heat.
Coating: To ensure even browning and a crispy exterior, we’ll use a simple coating. 2 tablespoons (30g) of cornstarch is sufficient to coat the wings. You can also use all-purpose flour as a substitute, but cornstarch provides a crispier finish.
Optional additions: Feel free to experiment with other flavors. A tablespoon of your favorite hot sauce can add an extra kick. A sprinkle of sesame seeds before baking provides a nice visual appeal and adds a pleasant crunch. Remember to adjust the amount of seasoning to your taste preferences.
Important Note: Always ensure your ingredients are fresh for the best results. Measuring accurately is essential for a balanced and delicious outcome. Don’t be afraid to experiment and adjust the quantities slightly based on your preferences.
Equipment List
Creating delicious baked honey garlic chicken wings requires the right tools for optimal results. This list outlines the essential equipment, along with recommendations for maximizing efficiency and achieving professional-quality wings.
Baking Sheet: You’ll need at least one large baking sheet (approximately 18 x 13 inches) to accommodate your chicken wings. A non-stick baking sheet is highly recommended to prevent sticking and make cleanup easier. Alternatively, you can line your baking sheet with parchment paper for even easier cleanup and to prevent the wings from sticking. Avoid using a flimsy baking sheet as it may warp under the heat.
Wire Rack: For perfectly crispy wings, a wire rack placed on top of the baking sheet is crucial. This allows for even air circulation around the wings, preventing them from steaming and ensuring a crispy skin. A standard 18 x 13 inch wire rack will work perfectly. Ensure the rack fits comfortably within your baking sheet to prevent spills and ensure stability.
Mixing Bowls: You will need at least two medium-sized mixing bowls. One will be used for marinating the chicken wings in the honey garlic sauce, and the other for whisking the sauce itself. Opt for bowls that are large enough to comfortably accommodate the wings and sauce without overcrowding.
Whisk: A whisk is essential for creating a smooth and well-combined honey garlic sauce. A standard balloon whisk is ideal for this task. Ensure your whisk is clean and dry before using it to prevent the sauce from becoming watery.
Measuring Cups and Spoons: Accurate measurements are key to achieving the perfect balance of flavors. Invest in a set of measuring cups (dry and liquid) and measuring spoons to ensure consistency in your recipe. Use accurate measurements to ensure the desired taste and consistency of the honey garlic sauce.
Oven Mitts or Gloves: Always protect your hands when handling hot baking sheets and removing them from the oven. Use oven mitts or heat-resistant gloves to prevent burns. Never handle hot baking sheets without proper protection.
Tongs or Spatula: You’ll need tongs or a spatula to carefully flip the chicken wings during baking and to transfer them from the baking sheet to a serving dish. Using tongs is recommended for flipping to avoid damaging the wings.
Optional: Meat Thermometer: For extra assurance that your chicken wings are cooked through, a meat thermometer is recommended. The internal temperature should reach 165°F (74°C) for safe consumption.
Preparation of Chicken Wings (Cleaning, Cutting, Patting Dry)
Before embarking on the delightful journey of creating honey garlic baked chicken wings, proper preparation of the wings is crucial for achieving optimal results. Begin with approximately 2 pounds of fresh chicken wings. Ensure your hands are clean and that you’re working on a sanitized surface to prevent cross-contamination.
First, rinse the chicken wings thoroughly under cold running water. This step helps remove any loose debris or potential contaminants. Avoid washing the chicken in the sink for an extended period, as this can spread bacteria. A quick and thorough rinse is sufficient.
Next, we’ll separate the wings into their three sections: the drumette (the small part closest to the body), the flat (the middle part), and the tip (the small, pointed end). The tips are generally discarded as they tend to be bony and less flavorful. However, you can save them for making stock if desired. To separate the sections, simply bend the wing at the joints until they naturally break apart. You may need a sharp knife for a cleaner separation, but careful bending is often sufficient.
Once separated, it’s important to pat the chicken wings completely dry with paper towels. This step is critical for achieving crispy skin. Excess moisture inhibits browning and can lead to soggy wings. Take your time and thoroughly pat each drumette and flat, ensuring all surfaces are dry. You can even use multiple layers of paper towels to absorb as much moisture as possible.
For even cooking and better browning, consider making a small slit on the thicker parts of the flat section. This allows for better penetration of heat and ensures the wings cook evenly throughout. Don’t cut too deeply; a shallow slit is all that’s necessary. After this step, your chicken wings are ready for marinating or seasoning, ensuring a delicious and perfectly baked final product.
Remember to always practice safe food handling techniques throughout the entire process. Wash your hands frequently and clean your work surfaces thoroughly after handling raw chicken.
Making the Honey Garlic Sauce
The honey garlic sauce is the star of this recipe, so let’s make sure it’s perfect! This recipe yields approximately 1 cup of sauce, enough to generously coat about 2 pounds of chicken wings. You can easily double or halve the recipe depending on your needs.
First, gather your ingredients: 1/2 cup honey (preferably a lighter honey for a less intense flavor), 1/4 cup soy sauce (low sodium is recommended to control saltiness), 2 tablespoons rice vinegar (adds brightness and acidity to balance the sweetness), 2 tablespoons minced garlic (freshly minced is best, but jarred is acceptable), 1 tablespoon butter (unsalted), and 1 teaspoon sesame oil (for a subtle nutty aroma). You’ll also need a small saucepan.
In your small saucepan, combine the honey, soy sauce, rice vinegar, minced garlic, butter, and sesame oil. Make sure to use a saucepan that’s not too large, as this prevents the sauce from reducing too quickly and burning. A medium-small saucepan works perfectly.
Place the saucepan over medium heat. Stir frequently to prevent the honey from sticking to the bottom and burning. This is crucial; burnt honey is bitter and will ruin your sauce. Continue stirring until the butter is melted and the sauce is smooth and well combined.
Once the butter is melted, bring the sauce to a gentle simmer. Reduce the heat to low and let it simmer for about 5-7 minutes, stirring occasionally. The sauce will begin to thicken slightly as the liquids reduce. The simmering process helps to meld the flavors together and create a more complex and delicious sauce.
After simmering, remove the sauce from the heat. Taste the sauce and adjust the seasoning as needed. You might want to add a pinch more garlic, soy sauce, or honey depending on your preference. If it’s too thick, you can add a teaspoon of water at a time until you reach your desired consistency. If it’s too thin, continue simmering until it reaches the desired thickness.
Once you’re happy with the flavor and consistency, your honey garlic sauce is ready! Set it aside and allow it to cool slightly before glazing your baked chicken wings. For an even richer flavor, you can let the sauce cool completely and then store it in the refrigerator for an hour or two before using. This allows the flavors to further develop.
Baking the Chicken Wings
Preheat your oven to 400°F (200°C). This temperature ensures the wings bake through evenly without drying out. Using a preheated oven is crucial for consistent results. Line a large baking sheet with parchment paper or aluminum foil for easy cleanup. This also prevents sticking and makes transferring the cooked wings much simpler.
Arrange the prepared chicken wings in a single layer on the baking sheet. Avoid overcrowding the pan; this will lead to steaming instead of browning, resulting in soggy wings. If necessary, use two baking sheets to ensure adequate space. Ensure the wings aren’t touching each other as much as possible. This allows for even heat distribution and crispy skin.
Bake the wings for 30-40 minutes, flipping them halfway through. The cooking time may vary depending on the size of your wings and your oven. Use a meat thermometer to check for doneness; the internal temperature should reach 165°F (74°C). This guarantees the wings are cooked safely and thoroughly.
During the last 10 minutes of baking, you can increase the oven temperature to 425°F (220°C) for extra crispiness. Keep a close eye on the wings during this time to prevent burning. This higher temperature helps achieve that desirable golden-brown, crispy exterior.
Once the wings are cooked through and golden brown, remove them from the oven and let them rest for a few minutes before tossing them in the honey garlic sauce. Allowing them to rest helps them retain their juices, resulting in more tender and flavorful wings. This short rest period also makes them easier to handle when coating them in the sauce.
Important Note: Baking times may vary depending on your oven and the size of your chicken wings. Always use a meat thermometer to ensure the wings reach a safe internal temperature of 165°F (74°C). Overcrowding the baking sheet will lead to soggy wings, so ensure the wings have ample space.
Broiling (Optional, for extra crispiness)
For an extra layer of crispy deliciousness, consider broiling your baked honey garlic chicken wings after they’ve finished baking. This step is optional, but highly recommended if you crave that intensely crisp skin. Broiling will add a significant amount of browning and texture to the wings, taking them from tender and juicy to truly exceptional.
Once your chicken wings have baked according to the recipe instructions and are cooked through (internal temperature of 165°F or 74°C), carefully remove them from the oven. Arrange them in a single layer on a baking sheet lined with parchment paper or a wire rack placed over a baking sheet. Avoid overcrowding the wings; ensure they have space between them for even broiling. Overcrowding will lead to uneven cooking and steaming instead of crisping.
Preheat your broiler to high. Position the baking sheet with the wings on the upper rack of your oven, keeping a close eye on them. Broiling is a very intense heat source, and wings can burn quickly. Start with a broiling time of 2-3 minutes. Watch carefully during this time, and use tongs to gently flip the wings halfway through to ensure even browning on all sides.
After the initial 2-3 minutes, continue to broil in 1-minute increments, checking frequently. The ideal level of crispiness will depend on your oven and your preference. Look for deeply golden brown, almost caramelized skin. If the wings start to look dark brown or black, remove them immediately to prevent burning.
Safety is paramount when broiling. Always keep a close watch on the wings during the entire broiling process. Never leave the oven unattended while broiling. Keep a spray bottle of water nearby in case of any flare-ups. If a flare-up occurs, carefully turn off the broiler and allow the flames to subside before removing the wings. Once the wings reach your desired level of crispiness, remove them from the oven and let them rest for a few minutes before serving. Enjoy your perfectly crispy, honey garlic chicken wings!
Important Note: Broiling times will vary depending on your oven. Always start with a shorter broiling time and add increments as needed, rather than risking burning your wings. It’s better to have slightly less crispy wings than burnt ones.
Recommendations
For optimal flavor and texture, ensure your chicken wings are patted completely dry before tossing them in the honey garlic sauce. This helps the sauce adhere better and promotes crispier skin. Don’t overcrowd the baking pan; arrange the wings in a single layer for even cooking and browning. If necessary, bake in batches to avoid steaming instead of crisping.
Serving Suggestions: These baked honey garlic chicken wings are incredibly versatile. Serve them hot as an appetizer, alongside your favorite dipping sauces like ranch dressing, blue cheese dressing, or even a spicy sriracha mayo. They also make a fantastic main course, especially when paired with some sides.
Complementary Dishes: These wings pair wonderfully with a variety of sides. Consider serving them with classic options like crispy fries, creamy coleslaw, or a refreshing cucumber salad to balance the richness of the sauce. A simple side of steamed rice or quinoa can also help soak up the delicious honey garlic glaze. For a more substantial meal, try serving them with roasted vegetables like broccoli, carrots, or sweet potatoes.
Storage: Leftover honey garlic chicken wings can be stored in an airtight container in the refrigerator for up to 3 days. Reheat them in the oven or microwave until heated through. Avoid reheating in a pan as this can cause the sauce to become sticky and less appealing.
Nutritional Information (Approximate per wing, will vary based on size and ingredients): Calories: 150-200; Fat: 10-15g; Saturated Fat: 2-4g; Cholesterol: 70-100mg; Sodium: 200-300mg; Carbohydrates: 5-10g; Sugar: 5-8g; Protein: 10-15g. Note: This is an estimation and the actual nutritional content may vary depending on the specific ingredients used and portion size.
Important Note: Always ensure that your chicken is cooked to an internal temperature of 165°F (74°C) to ensure food safety. Use a meat thermometer to check for doneness.