Baked chicken drumsticks, a seemingly simple dish, boast a surprisingly rich history interwoven with global culinary traditions. While pinpointing an exact origin is impossible, the practice of roasting poultry dates back millennia. Archaeological evidence suggests that humans have been cooking birds, including chickens (after their domestication thousands of years ago), over open fires for at least 4,000 years. Early methods likely involved simple spit-roasting, evolving over time to encompass various techniques influenced by different cultures. The specific preparation of chicken drumsticks as a standalone dish, however, is a more recent development, likely gaining popularity alongside the rise of readily available ovens in the 20th century. This made the process of even cooking a whole chicken less necessary, and the individual drumstick became a convenient and appealing option.
The cultural significance of chicken, and by extension, baked chicken drumsticks, varies greatly across the globe. Chicken is a staple protein source in countless cuisines, representing affordability, accessibility, and nourishment. In many Western cultures, roast chicken, including drumsticks, often symbolizes family gatherings and celebrations, appearing frequently on holiday tables. In contrast, some Asian cultures utilize chicken in a wider variety of dishes, emphasizing diverse flavor profiles and cooking methods. The simplicity of the baked drumstick, however, lends itself to adaptation and interpretation, making it a globally accessible and beloved food. Statistics show that chicken is the most consumed meat globally, exceeding beef and pork consumption significantly. This widespread popularity naturally translates to a high demand for various chicken preparations, with baked drumsticks forming a significant part of this consumption.
Interestingly, the humble chicken drumstick has also become a prominent feature in popular culture. From fast-food chains featuring them as a budget-friendly option to their presence in countless cookbooks and online recipes, the drumstick enjoys a widespread appeal. Its versatility in terms of flavor combinations is a key factor. From simple salt and pepper seasoning to more elaborate spice rubs and glazes, the drumstick can accommodate a vast array of tastes and preferences. This adaptability, combined with its relatively low cost and ease of preparation, contributes to its enduring popularity. Furthermore, the drumstick’s inherent juiciness and satisfying texture make it a favorite amongst both children and adults, solidifying its place as a culinary classic.
This recipe will guide you through the process of creating delicious and perfectly baked chicken drumsticks, highlighting techniques to ensure juicy, flavorful results. We’ll explore various seasoning options and provide tips for achieving that ideal balance of crispy skin and tender meat. Get ready to elevate this humble yet versatile dish to new heights!
Ingredients and Measurements
This recipe yields approximately 6 servings of succulent baked chicken drumsticks. The quantities listed below are carefully chosen to balance flavor and ensure tender, juicy results. Feel free to adjust the number of drumsticks based on your needs, remembering to proportionally increase or decrease the other ingredients accordingly.
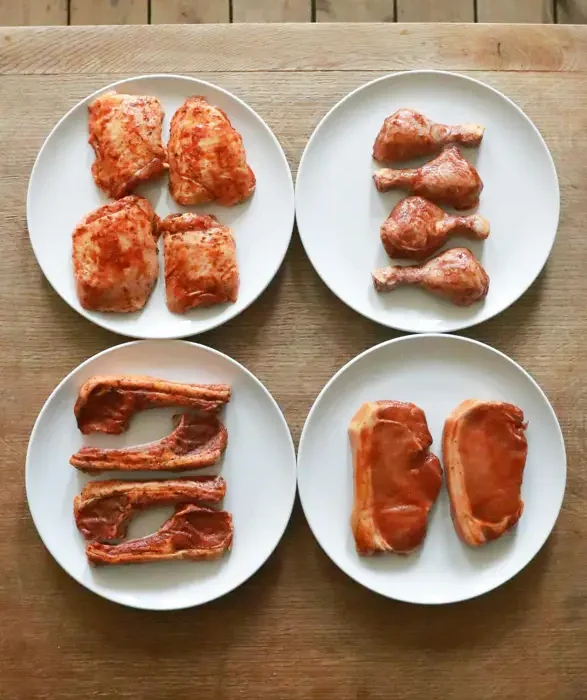
Chicken Drumsticks: 6 large chicken drumsticks (approximately 2.5 – 3 lbs total). Ensure your chicken is thoroughly thawed before beginning. Using frozen chicken will significantly increase cooking time and may result in uneven cooking. Patting the drumsticks dry with paper towels is crucial for achieving crispy skin. This removes excess moisture which can hinder browning.
Olive Oil: 3 tablespoons. Extra virgin olive oil is preferred for its rich flavor, but any good quality olive oil will work. Do not substitute with butter or other oils with a lower smoke point as this will affect the flavor and potentially burn at the high oven temperature.
Salt: 1.5 teaspoons. Kosher salt is recommended for its even distribution and larger grain size, but table salt can be used. Reduce the amount of table salt to about 1 teaspoon as it is more concentrated than kosher salt. Seasoning generously is key to flavorful chicken; don’t be shy with the salt!
Black Pepper: 1 teaspoon freshly ground black pepper. Freshly ground pepper offers a superior flavor compared to pre-ground. Adjust the amount of pepper to your liking; some prefer a more peppery kick.
Garlic Powder: 1 teaspoon. Garlic powder adds a subtle yet distinct garlicky aroma and flavor. For a more intense garlic flavor, consider adding 1-2 cloves of minced fresh garlic in addition to the powder.
Paprika: 1 teaspoon. Paprika provides a lovely color and a slightly smoky flavor. Smoked paprika will enhance the smoky notes if you desire a more intense flavor profile.
Onion Powder: ½ teaspoon. Onion powder adds depth of flavor and complements the other spices beautifully. Consider adding finely chopped fresh onion for a more pronounced onion flavor and added texture.
Dried Thyme: ½ teaspoon. Thyme adds an earthy and slightly lemony note that pairs well with chicken. Fresh thyme can be substituted – use approximately 1 tablespoon of chopped fresh thyme. Remember that fresh herbs are more potent than dried herbs.
Optional Additions: Consider adding other spices to customize the flavor profile. Popular options include cayenne pepper for a spicy kick, oregano for a Mediterranean twist, or rosemary for a herby aroma. Experiment with different spice combinations to find your perfect blend!
Important Note: Always wash your hands thoroughly before and after handling raw chicken to prevent cross-contamination. Ensure all utensils and surfaces are properly cleaned as well.
Preparation of Chicken Drumsticks
Before you embark on baking delicious chicken drumsticks, proper preparation is key to achieving juicy, flavorful results. This section details the steps involved in prepping your chicken for a perfect bake.
Start with the right quantity: Plan on approximately 2-3 chicken drumsticks per person, depending on appetites. For this recipe, we’ll assume we’re preparing 6 drumsticks. Adjust quantities as needed for your desired serving size.
Thawing (if frozen): If using frozen drumsticks, proper thawing is crucial. Never thaw at room temperature, as this increases the risk of bacterial growth. Instead, thaw overnight in the refrigerator, or use the defrost setting on your microwave (following manufacturer’s instructions carefully). A completely thawed drumstick will be pliable and not feel frozen in the center.
Washing: Contrary to popular belief, washing chicken is generally discouraged. Splashing water around can spread bacteria to other surfaces in your kitchen. Instead, focus on cleaning the area where you’ll be preparing the chicken thoroughly before and after handling the raw meat.
Patting Dry: Once thawed, pat the chicken drumsticks thoroughly dry with paper towels. This is essential for achieving crispy skin. Excess moisture will steam the chicken during baking, resulting in a less appealing texture.
Trimming Excess Fat (Optional): You can trim away any excess visible fat from the chicken skin, but this is optional. Leaving a moderate amount of fat actually contributes to the flavor and helps keep the meat moist during baking. If you choose to trim, do so carefully to avoid cutting into the meat.
Making Incisions (Optional): For even cooking and enhanced flavor absorption, you can make a few shallow incisions into the thicker parts of the drumstick meat. Be careful not to cut all the way through. This allows the marinade or seasoning to penetrate more deeply.
Seasoning: Seasoning is where the magic happens! Generously season each drumstick with salt and freshly ground black pepper. Don’t be shy with the salt! It’s crucial for enhancing the flavor of the chicken. You can also add other seasonings like garlic powder, onion powder, paprika, or your favorite spice blend at this stage. Rub the seasoning into the skin and any incisions you made.
Marinating (Optional but Recommended): For extra flavor and moisture, marinating the chicken drumsticks for at least 30 minutes, or preferably several hours in the refrigerator, is highly recommended. A simple marinade could be made with olive oil, lemon juice, garlic, and herbs. Ensure the chicken is fully submerged in the marinade if possible.
Once your chicken drumsticks are prepared, you’re ready to move on to the baking process! Remember, careful preparation is the foundation of a delicious meal.
Marinade (if using)
Marinating your chicken drumsticks before baking is highly recommended, as it significantly enhances both the flavor and tenderness of the final product. A well-chosen marinade will infuse the meat with delicious tastes, while also helping to keep it moist and juicy during the baking process. The longer you marinate, the more flavorful your chicken will be, but a minimum of 30 minutes is sufficient, while 4-6 hours is ideal, and overnight is even better.
Choosing your marinade: The options are virtually limitless! You can create a simple marinade with just a few ingredients, or go for something more complex and flavorful. Consider your preferences and what flavors you want to highlight. Popular choices include citrus-based marinades (lemon, lime, orange), herb-infused marinades (rosemary, thyme, oregano), or spicy marinades (chipotle peppers, cayenne pepper).
Example Marinade (Citrus Herb): This recipe yields enough marinade for approximately 2 pounds of chicken drumsticks.
- 1/4 cup olive oil
- 1/4 cup fresh lemon juice
- 2 tablespoons fresh orange juice
- 2 cloves garlic, minced
- 1 tablespoon dried oregano
- 1 tablespoon dried thyme
- 1 teaspoon salt
- 1/2 teaspoon black pepper
Instructions for preparing the marinade: In a medium bowl, whisk together the olive oil, lemon juice, orange juice, minced garlic, oregano, thyme, salt, and pepper until well combined. Ensure all the ingredients are thoroughly mixed to create a uniform marinade.
Marinating the chicken: Place the chicken drumsticks in a resealable plastic bag or a shallow dish. Pour the marinade over the chicken, ensuring that all the pieces are fully coated. Seal the bag tightly or cover the dish to prevent the marinade from evaporating. If using a resealable bag, gently massage the marinade into the chicken to ensure even distribution.
Refrigeration is crucial: Always marinate your chicken in the refrigerator. This helps to prevent bacterial growth and ensures safe food handling practices. Never marinate chicken at room temperature.
Using the marinade after baking: Do not reuse the marinade that has been in contact with the raw chicken. Discard it after marinating. If you want extra flavor for your baked chicken, you can make a fresh batch of marinade for basting during the baking process. This fresh batch should be made with fresh ingredients and should not include any marinade that has touched the raw chicken.
Experiment with flavors: Don’t be afraid to experiment with different herbs, spices, and liquids to create your own unique marinade. Consider adding honey for sweetness, soy sauce for umami, or a touch of hot sauce for a kick. The possibilities are endless! Remember to adjust the seasoning to your personal taste preferences.
Important Note: When using a marinade with acidic ingredients like lemon juice or vinegar, avoid marinating for excessively long periods, as it can make the chicken tough. Stick to the recommended marinating time for optimal results.
Baking Preparation
Before you even think about preheating your oven, meticulous preparation is key to achieving perfectly baked chicken drumsticks. This stage sets the foundation for juicy, flavorful results, so don’t rush through it!
Start with the right ingredients: Begin by gathering your chicken drumsticks. Aim for about 1.5 lbs (approximately 6-8 drumsticks), ensuring they are thawed completely if frozen. Partially thawed chicken will cook unevenly, resulting in some parts being undercooked while others are overcooked. Pat them thoroughly dry with paper towels. This is crucial; excess moisture prevents the skin from crisping up properly. Removing excess moisture is one of the most important steps in achieving crispy skin.
Seasoning is your secret weapon: The flavor profile of your baked chicken drumsticks entirely depends on your seasoning. For a classic approach, use 1 teaspoon of salt, ½ teaspoon of black pepper, ½ teaspoon of paprika, and ¼ teaspoon of garlic powder per pound of chicken. Feel free to experiment! Consider adding other spices such as onion powder, cayenne pepper for a kick, or even a blend of herbs like thyme and rosemary. Generously season all sides of each drumstick, ensuring the seasoning penetrates the crevices. For even better flavor penetration, you can gently massage the seasoning into the chicken.
Prepare your baking dish: Choose a baking dish that is appropriately sized for your chicken. A 9×13 inch baking dish is usually sufficient for 1.5 lbs of drumsticks, allowing for even airflow around the chicken. Line the dish with parchment paper for easy cleanup and to prevent sticking. Alternatively, you can lightly grease the dish with oil or cooking spray. Using parchment paper is highly recommended for easier cleanup and to prevent sticking.
Optional marinades and brines: For extra juicy and flavorful chicken, consider marinating or brining your drumsticks. A simple marinade could involve olive oil, lemon juice, garlic, and your chosen herbs and spices. Marinate for at least 30 minutes, or preferably overnight in the refrigerator. Brining involves soaking the chicken in a saltwater solution for several hours, which helps retain moisture. Marinating or brining is optional but highly recommended for enhanced flavor and juiciness.
Arranging the drumsticks: Once seasoned (or marinated/brined), arrange the drumsticks in a single layer in your prepared baking dish. Avoid overcrowding; this restricts airflow and prevents even cooking. If necessary, use two baking dishes to ensure proper spacing. Ensure that the drumsticks are not touching each other to allow for even browning and cooking.
Preheating your oven: Preheat your oven to 400°F (200°C). This is essential for ensuring the chicken cooks evenly and achieves a crispy skin. Do not place the chicken in the oven until it’s fully preheated. This is a crucial step for consistent cooking results.
With your chicken prepared and your oven preheated, you’re ready to move on to the baking process. Remember, proper preparation is half the battle in achieving delicious, perfectly baked chicken drumsticks!
Cooking Process & Timing
Preheat your oven to 400°F (200°C). This is crucial for ensuring the chicken cooks evenly and develops a crispy skin. Don’t skip this step; oven temperature significantly impacts cooking time and results.
While the oven preheats, prepare your baking dish. A 9×13 inch baking dish is ideal for about 6-8 average-sized chicken drumsticks. Line it with parchment paper for easy cleanup and to prevent sticking. This also allows for easier transfer of the cooked chicken to a serving platter.
Arrange the chicken drumsticks in a single layer in the prepared baking dish. Avoid overcrowding the dish; this will impede airflow and result in uneven cooking and potentially steamed, rather than baked, chicken. If necessary, use two baking dishes to ensure proper spacing.
Now, it’s time to add your chosen seasonings. For a simple and flavorful recipe, I recommend using 1 teaspoon of paprika, 1 teaspoon of garlic powder, 1 teaspoon of onion powder, 1/2 teaspoon of salt, and 1/4 teaspoon of black pepper per drumstick. You can adjust these quantities to your preference. Generously season all sides of each drumstick, ensuring the spices are evenly distributed. For extra flavor, consider adding a tablespoon of olive oil or melted butter before seasoning.
Once seasoned, place the baking dish into the preheated oven. The cooking time will vary depending on the size of your drumsticks and your oven’s consistency. As a general guideline, expect to bake for approximately 45-60 minutes. Smaller drumsticks will require less time, while larger ones will need more. The internal temperature of the chicken is the most reliable indicator of doneness.
After about 30 minutes of baking, check the chicken’s progress. You should see the skin starting to brown and crisp up. At this point, you can carefully flip the drumsticks to ensure even browning on all sides. This step is optional but recommended for optimal results. Continue baking.
To ensure the chicken is fully cooked and safe to eat, use a meat thermometer. Insert the thermometer into the thickest part of the drumstick, avoiding the bone. The internal temperature should reach 165°F (74°C). Do not rely solely on visual cues; a meat thermometer provides the most accurate measurement of doneness.
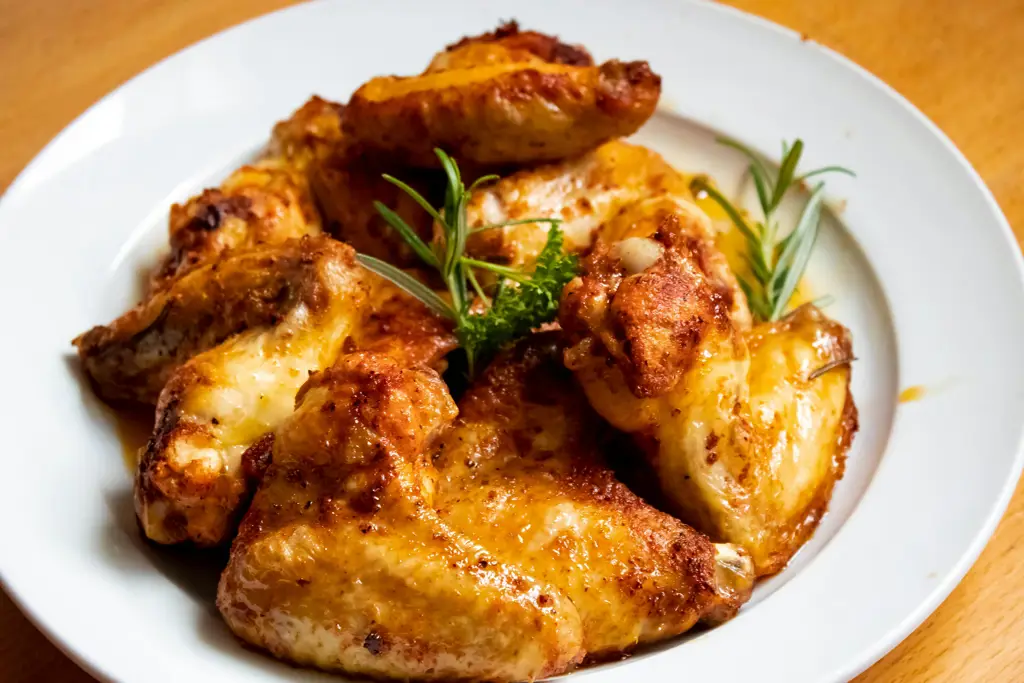
Once the chicken reaches the safe internal temperature, remove it from the oven. Let it rest for about 5-10 minutes before serving. This allows the juices to redistribute, resulting in more tender and flavorful chicken. Serve hot and enjoy your perfectly baked chicken drumsticks!
Important Note: Oven temperatures can vary, so keep a close eye on your chicken during the last 15 minutes of cooking. If the skin is browning too quickly, you can loosely tent the baking dish with aluminum foil to prevent over-browning.
Checking for Doneness
Ensuring your baked chicken drumsticks are cooked through is crucial for both food safety and deliciousness. Undercooked chicken can harbor harmful bacteria, while overcooked chicken becomes dry and tough. Therefore, mastering the art of checking for doneness is paramount.
The most reliable method is using a food thermometer. Insert the thermometer into the thickest part of the drumstick, avoiding the bone. The internal temperature should reach a minimum of 165°F (74°C). This ensures that the chicken is cooked throughout and safe to eat. Don’t rely solely on visual cues like color; chicken can appear cooked on the outside while remaining raw inside.
While a thermometer provides the most accurate reading, there are other methods you can use in conjunction with it, or if you don’t have a thermometer readily available. One visual clue is the color of the juices. When you pierce the thickest part of the drumstick with a fork or knife, the juices should run clear, not pink or reddish. Pink juices indicate undercooked chicken and require further baking.
Another less precise method is to gently press on the meat. Cooked chicken will feel firm and spring back slightly when pressed. Raw or undercooked chicken will feel soft and yielding. However, this method is subjective and should not be relied upon entirely, especially for larger drumsticks.
Timing alone is not a reliable indicator of doneness. Oven temperatures can vary, and the size of your drumsticks will influence cooking time. Therefore, always use a food thermometer to confirm that the internal temperature has reached the safe minimum of 165°F (74°C). Even if your drumsticks have been baking for the recommended time, always check the temperature to avoid foodborne illness.
If your drumsticks are not yet cooked through after the estimated baking time, continue baking them in 15-minute increments, checking the temperature with the thermometer after each interval. Avoid opening the oven door too frequently, as this can cause temperature fluctuations and prolong cooking time. Once the internal temperature reaches 165°F (74°C), remove the drumsticks from the oven and allow them to rest for 5-10 minutes before serving. This resting period allows the juices to redistribute, resulting in more tender and flavorful chicken.
Remember, food safety is paramount. Always prioritize accurate temperature checks using a reliable food thermometer. Don’t hesitate to bake your drumsticks for a few extra minutes if they haven’t reached the safe internal temperature. It’s better to err on the side of caution and ensure your chicken is thoroughly cooked.
By following these guidelines and using a food thermometer, you can confidently prepare perfectly cooked and safe baked chicken drumsticks every time. Enjoy!
Recommendations
For optimal flavor and texture, marinate your chicken drumsticks for at least 30 minutes, or preferably overnight. This allows the flavors to penetrate the meat, resulting in a more juicy and flavorful final product. Experiment with different marinades – from classic lemon-herb to spicy chipotle – to find your favorite.
Ensure your oven is preheated to the correct temperature before placing the drumsticks inside. This is crucial for even cooking and prevents the chicken from drying out. Using a meat thermometer is highly recommended to guarantee the chicken reaches a safe internal temperature of 165°F (74°C). Overcooked chicken will be dry, while undercooked chicken poses a food safety risk.
Don’t overcrowd the baking pan. Allowing adequate space between the drumsticks ensures even air circulation, leading to crispy skin and evenly cooked meat. If necessary, use two baking sheets instead of one.
Consider adding vegetables to the baking pan. Roasting vegetables like potatoes, carrots, or broccoli alongside the chicken adds flavor and nutrition, minimizing cleanup and maximizing efficiency. Toss the vegetables with olive oil, herbs, and spices before adding them to the pan.
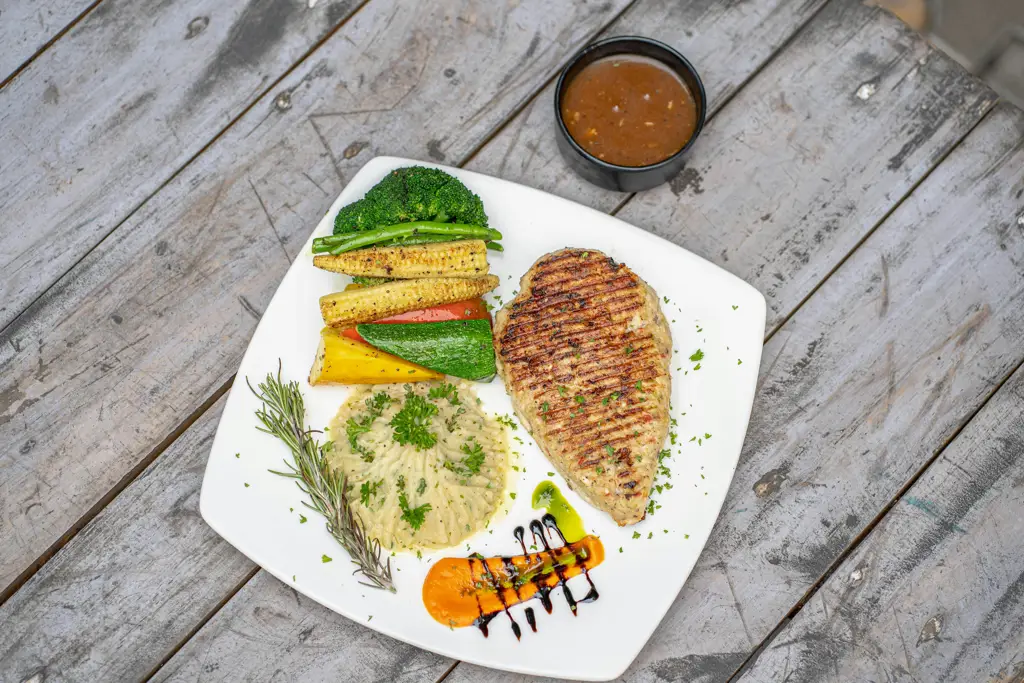
Serving Suggestions: Baked chicken drumsticks are incredibly versatile. They are delicious served on their own with a side of your favorite dipping sauce (e.g., BBQ sauce, honey mustard, ranch dressing). They also pair exceptionally well with various sides such as roasted vegetables, mashed potatoes, rice pilaf, coleslaw, or a simple green salad. For a complete meal, consider serving them with crusty bread to soak up the delicious juices.
Storage: Properly stored leftover baked chicken drumsticks can last for 3-4 days in the refrigerator. Store them in an airtight container to maintain freshness and prevent them from drying out. To freeze, allow the chicken to cool completely, then place it in a freezer-safe bag or container. Frozen chicken drumsticks can be stored for up to 3 months. Always thaw frozen chicken drumsticks completely in the refrigerator before reheating.
Complementary Dishes: To create a balanced and satisfying meal, consider pairing your baked chicken drumsticks with dishes that complement their flavor profile. A creamy potato salad, a vibrant green bean casserole, or a refreshing cucumber salad would all be excellent choices. For a spicier kick, consider serving them with a side of jalapeño cornbread or a spicy coleslaw.
Nutritional Information (per drumstick, approximate): The nutritional information will vary depending on the size of the drumstick and the ingredients used in the recipe. However, a typical baked chicken drumstick (without skin) will contain approximately 150-200 calories, 20-30 grams of protein, 5-10 grams of fat, and 0-2 grams of carbohydrates. These values are estimates and may differ based on preparation methods and specific ingredients. Consult a nutrition calculator for a more precise analysis of your specific recipe.
Enjoy your delicious and healthy baked chicken drumsticks!