Few desserts evoke as much joy and comfort as a perfectly baked chocolate cake. Its rich, decadent flavor and satisfying texture have made it a global favorite for centuries, transcending cultural boundaries and becoming a staple at celebrations worldwide. While pinpointing the exact origin is difficult, the history of chocolate cake is intricately woven with the history of chocolate itself. The earliest forms of chocolate, consumed by the ancient Olmec and Maya civilizations, were far from the sweet treat we know today. These cultures used cacao beans to create bitter beverages, often spiced and considered sacred.
The transformation of cacao into the sweet, palatable ingredient we use today is a story spanning centuries and continents. The addition of sugar, a crucial element in chocolate cake, significantly altered the course of chocolate’s history, making it accessible to a wider population. The rise of sugar plantations in the Americas during the colonial era played a significant role in this transformation, although it’s a history inextricably linked to exploitation and injustice. As sugar became more readily available, so too did the opportunity to create the delectable cakes we enjoy today. The precise moment when a chocolate cake emerged is debatable, but recipes resembling modern versions began appearing in cookbooks during the 19th century.
Chocolate cake’s cultural significance is undeniable. It’s a ubiquitous symbol of celebration, appearing at birthdays, anniversaries, and other joyous occasions. Statistics show that chocolate cake remains one of the most popular cake flavors globally, consistently ranking high in surveys and sales data. In the United States alone, billions of dollars are spent annually on chocolate cake ingredients and pre-made versions. Beyond its commercial success, chocolate cake holds a significant place in personal memories and traditions. Many individuals associate specific recipes or cakes with cherished moments, making them powerful reminders of family, friends, and important life events.
This enduring popularity speaks volumes about chocolate cake’s universal appeal. Its versatility is another key factor in its success. From simple one-bowl recipes to elaborate multi-layered creations, chocolate cake offers endless possibilities for customization. Adding different frosting, fillings, and decorations allows for endless creative expression, making it a canvas for both amateur and professional bakers alike. Whether you prefer a classic fudge frosting, a creamy ganache, or a light and airy whipped cream, this guide will help you master the art of baking the perfect chocolate cake, a timeless treat that continues to delight generation after generation.
Ingredients and Measurements
Baking a perfect chocolate cake hinges on precision, so using a kitchen scale is highly recommended for accurate measurements, especially for the dry ingredients. While volume measurements (cups, teaspoons) are provided below, weighing your ingredients will ensure consistency and the best results every time. Remember to use level measurements for all dry ingredients, avoiding packing them down.
For the Cake:
- 2 cups (250g) all-purpose flour: Using cake flour will result in a more tender crumb, but all-purpose works well too. Ensure your flour is spooned into the measuring cup and leveled off, not scooped directly from the bag. This prevents packing and ensures accuracy.
- 2 cups (400g) granulated sugar: Granulated sugar provides sweetness and structure. Using a different type of sugar will alter the taste and texture of the cake. Again, weighing is preferred for accuracy.
- ¾ cup (60g) unsweetened cocoa powder: Choose a high-quality cocoa powder for the richest chocolate flavor. Dutch-processed cocoa powder will give a darker, less acidic cake, while natural cocoa powder will have a slightly more acidic, brighter flavor. Sift the cocoa powder to eliminate lumps and ensure smooth batter.
- 1 ½ teaspoons baking powder: This is the leavening agent, crucial for a light and airy cake. Check the expiration date on your baking powder; old baking powder may not work effectively.
- 1 ½ teaspoons baking soda: Baking soda reacts with the acidic components in the recipe to help the cake rise.
- 1 teaspoon salt: Salt enhances the chocolate flavor and balances the sweetness. Don’t skip this!
- 1 cup (240ml) buttermilk: Buttermilk adds moisture and tanginess to the cake. If you don’t have buttermilk, you can make a substitute by adding 1 tablespoon of white vinegar or lemon juice to 1 cup of milk and letting it sit for 5 minutes.
- 2 large eggs: Ensure your eggs are at room temperature for optimal emulsification with the other ingredients, leading to a smoother batter.
- 1 cup (240ml) vegetable oil: Oil adds moisture and richness to the cake. You can substitute with melted unsalted butter, but be sure it’s cooled slightly before adding.
- 2 teaspoons vanilla extract: Adds depth and complexity to the chocolate flavor. Use a high-quality vanilla extract for the best results.
- 1 cup (240ml) freshly brewed hot coffee or boiling water: The hot liquid will help activate the cocoa powder and create a moister cake. Let the coffee cool slightly before adding it to prevent the batter from becoming too thin.
For the Chocolate Frosting (Optional): The frosting recipe will be detailed in a separate section. However, ensure you have all the necessary ingredients readily available before starting the frosting process.
Important Note: Always measure your ingredients accurately. Slight variations in measurements can significantly impact the final outcome of your cake. Using a kitchen scale is the most accurate method for consistent results. Happy Baking!
Equipment Preparation
Before you even think about cracking an egg, meticulous equipment preparation is key to baking a perfect chocolate cake. This isn’t just about having the right tools; it’s about ensuring they’re in optimal condition for a flawless bake. Neglecting this step can lead to uneven cooking, sticking, and a less-than-perfect presentation.
Gathering Your Tools: You’ll need two 9-inch round cake pans, ideally with removable bottoms for easy cake extraction. If you only have one, you’ll need to bake in batches, which can slightly affect the consistency. Also gather two pieces of parchment paper, each roughly 12 inches square. This will prevent the cakes from sticking. You’ll also need a stand mixer or a hand mixer (a sturdy whisk will work in a pinch, but it will be more strenuous), two large mixing bowls (one for wet ingredients and one for dry), a rubber spatula or wooden spoon for scraping down the bowl, a measuring cup (both liquid and dry), measuring spoons, a wire rack, and a set of offset spatulas (for frosting).
Preparing the Cake Pans: This step is crucial to prevent sticking and ensures even baking. First, grease the pans thoroughly. Use a neutral-flavored oil like vegetable oil or canola oil. A light coating of baking spray works well, too. Next, line the bottoms of the pans with parchment paper. To do this, cut out two circles slightly larger than the bottom of your pans. This prevents the cake from sticking to the bottom and makes removal significantly easier. Finally, lightly grease the parchment paper as well, just to be extra safe. This is your insurance policy against any sticking whatsoever.
Preparing Your Mixing Bowls and Utensils: Cleanliness is paramount. Make sure your bowls and utensils are completely clean and dry. Any residual water can affect the batter’s consistency, leading to a less-than-ideal texture. For best results, use stainless steel or glass bowls; avoid using reactive materials like aluminum, which can affect the color and flavor of your cake.
Preheating the Oven: Preheat your oven to the temperature specified in your recipe (usually around 350°F or 175°C). This is vital for even baking. Don’t start mixing your batter until your oven is fully preheated. Checking the temperature with an oven thermometer is recommended, especially if your oven is older. Allow the oven to preheat for at least 15 minutes to ensure it reaches the correct temperature.
Other Important Considerations: Having your ingredients at room temperature is essential for optimal mixing. This allows for better emulsion and a smoother batter. Also, ensure your baking powder and baking soda are fresh. Expired leavening agents can lead to a flat and dense cake. Finally, consider preparing your frosting in advance so it’s ready to go once the cake is cooled. This allows for a more efficient and less stressful baking experience.
Cake Batter Preparation (including creaming butter and sugar)
The success of your chocolate cake hinges significantly on the proper preparation of the batter. This crucial step, often overlooked, involves the meticulous creaming of butter and sugar, a process that incorporates air and creates a light and fluffy texture. We’ll be making a classic chocolate cake, so let’s get started!
Begin by gathering your ingredients: 2 sticks (1 cup) of unsalted butter, softened to room temperature, and 1 ¾ cups of granulated sugar. The butter’s temperature is paramount; if it’s too cold, it won’t cream properly, resulting in a dense cake. Conversely, if it’s melted, it will lack the necessary structure. Room temperature butter is key – it should be pliable enough to easily indent with your finger.
Using a stand mixer fitted with the paddle attachment (or a hand mixer), cream the butter and sugar together. Start on low speed to avoid splattering, then gradually increase to medium-high. Creaming means beating the mixture until it’s light, fluffy, and pale in color – a process that typically takes around 5-7 minutes. This step incorporates air into the butter, creating tiny air pockets that will give your cake its volume and tender crumb.
Pay close attention to the texture. As you cream, the mixture will gradually transform from a grainy, yellowish mass to a smooth, pale yellow, almost white, and fluffy consistency. If you’re using a hand mixer, be prepared for some arm work! Scrape down the sides of the bowl frequently to ensure all the butter and sugar are incorporated evenly. This prevents pockets of uncreamed ingredients that can lead to uneven baking and a less-than-perfect texture.
The goal is to achieve maximum volume. Don’t rush this step; insufficient creaming will result in a dense, compact cake. Take your time and observe the texture and color changes. If you notice the mixture becoming too warm (from the friction of mixing), pause for a minute or two to allow it to cool slightly before resuming.
Once the butter and sugar are perfectly creamed, you’re ready for the next stage of batter preparation. The well-creamed mixture will form the foundation of a light and airy chocolate cake. Remember, a perfectly creamed butter-sugar mixture is the cornerstone of a successful bake. Take your time, be patient, and you’ll be well on your way to baking the perfect chocolate cake!
Professional Tip: For even better results, consider using a pastry blender to initially break up the butter before creaming. This will ensure a more even distribution of butter and sugar and facilitate a smoother creaming process.
Baking the Cake (oven temperature, baking time, checking for doneness)
Preheating your oven to the correct temperature is crucial for achieving a perfectly baked chocolate cake. For most chocolate cake recipes, the ideal temperature is 350°F (175°C). However, always refer to your specific recipe, as variations can occur depending on the ingredients and desired texture. Using an oven thermometer is highly recommended to ensure accuracy, as oven temperatures can fluctuate. Place the thermometer on a rack in the center of the oven to get the most accurate reading.
Once the oven is preheated, carefully place your prepared cake batter into your greased and floured (or parchment paper-lined) cake pans. Evenly distribute the batter to ensure even baking. For a standard 9-inch round cake pan, a recipe yielding approximately 12 cups of batter should be sufficient. If using two 9-inch pans, divide the batter equally between them. Overfilling the pans can lead to uneven rising and a sunken center. For layers, use a kitchen scale to ensure the pans contain the exact same weight of batter.
The baking time for a chocolate cake typically ranges from 30 to 35 minutes for two 9-inch round pans, or slightly longer for larger or deeper pans. However, this is just an estimate. Baking times can vary significantly depending on your oven, the type of pan used, and the altitude. Always check for doneness starting at the minimum baking time specified in your recipe. Don’t open the oven door repeatedly during baking, as this can cause the cake to collapse.
The most reliable way to check for doneness is using a wooden skewer or toothpick inserted into the center of the cake. If it comes out clean, or with just a few moist crumbs attached, the cake is ready. If the skewer comes out with wet batter clinging to it, the cake needs more time. Bake in 2-3 minute increments, checking each time until the cake is done. Avoid overbaking, as this will result in a dry and crumbly cake.
Another way to check for doneness is by gently pressing the center of the cake with your finger. A baked cake will spring back slightly. If it feels too soft or jiggly, it needs more time in the oven. However, this method is less reliable than the toothpick test, especially for dense cakes.
Once the cake is baked, immediately remove it from the oven and let it cool in the pans for 10-15 minutes before inverting it onto a wire rack to cool completely. Cooling the cake in the pans allows it to set slightly, preventing it from crumbling when you remove it. Allowing the cake to cool completely before frosting is essential to prevent the frosting from melting or sliding off.
Remember, practice makes perfect. Don’t be discouraged if your first attempt isn’t flawless. Pay close attention to your oven’s quirks and adjust baking times accordingly. With some experience, you’ll master the art of baking the perfect chocolate cake every time!
Cooling the Cake (Preventing Cracking)
Cooling your chocolate cake correctly is crucial to achieving a flawlessly smooth and moist crumb. Rushing this process often leads to cracking, a common issue that can significantly detract from the cake’s appearance and even its texture. The key is a gradual, controlled cooling that prevents the rapid shrinkage and stress that cause cracks.
The first step is to let the cake cool in the pan for 10-15 minutes after it comes out of the oven. This allows the internal structure to firm slightly, preventing it from collapsing when you invert it. Don’t skip this step! During this time, the cake will continue to cook slightly from residual heat.
After the initial cooling period, carefully invert the cake onto a wire rack. Use a thin spatula to gently loosen the edges if needed. A wire rack provides crucial air circulation, allowing heat to escape evenly from all sides. Do not place the cake directly on a flat surface; this will trap heat and increase the likelihood of cracking.
Let the cake cool completely on the wire rack, undisturbed, for at least 1-1.5 hours. Resist the temptation to touch or move it during this time. A completely cooled cake is less prone to cracking because it’s less susceptible to stress from handling.
To further prevent cracking, particularly in larger or layered cakes, consider these additional tips:
- Use a parchment paper base: Lining the bottom of your cake pan with parchment paper can help create a more even bake and prevent sticking, reducing stress on the cake during inversion.
- Avoid opening the oven door frequently: Sudden temperature changes during baking can cause the cake to collapse or crack. Check for doneness using a toothpick only at the end of the recommended baking time.
- Don’t overbake: Overbaking dries out the cake, making it much more prone to cracking during cooling. A toothpick inserted into the center should come out with just a few moist crumbs attached, not wet batter.
- Adjust oven temperature: If your oven tends to run hot, reduce the temperature by 25°F (14°C) to prevent overbaking. Conversely, if it runs cool, increase the temperature slightly.
- Embrace the humidity: A slightly humid environment can help keep the cake moist during cooling. If you live in a very dry climate, consider placing a shallow dish of water near the cooling cake (but not so close that it gets splashed).
By following these steps, you’ll greatly reduce the risk of cracking and ensure your chocolate cake is as beautiful as it is delicious. Remember, patience is key when it comes to cooling a cake. A perfectly cooled cake is a testament to careful baking practices!
Frosting Preparation
The perfect chocolate cake deserves a perfect frosting, and achieving that involves careful preparation. This section details how to create a luscious, smooth chocolate buttercream frosting that will complement your delicious cake.
We’ll be making a classic American buttercream frosting, known for its creamy texture and ability to hold its shape beautifully. Start with room temperature ingredients. This is crucial for achieving a smooth, emulsified frosting. Cold butter will result in a grainy texture, while overly warm butter will create a runny mess. Let your butter sit out at room temperature for at least an hour before you begin.
Ingredients:
- 1 cup (2 sticks) unsalted butter, softened to room temperature
- 3 cups powdered sugar, sifted
- ¾ cup unsweetened cocoa powder, sifted (Dutch-processed is recommended for a richer flavor)
- ½ cup milk (whole milk is best for richness, but you can use your preferred type)
- 1 teaspoon vanilla extract
- Pinch of salt
Instructions:
1. Cream the butter: In a large bowl, using a stand mixer fitted with the paddle attachment (or a hand mixer), beat the softened butter on medium speed until it’s light and fluffy. This usually takes about 3-5 minutes. Scrape down the sides of the bowl frequently to ensure everything is incorporated evenly.
2. Gradually add the powdered sugar and cocoa powder: Begin by adding the sifted powdered sugar and cocoa powder in alternating additions with the milk, starting and ending with the powdered sugar. Add about a third of the powdered sugar, then half the milk, then another third of the powdered sugar, the remaining milk, and finally the last third of the powdered sugar. Mix on low speed to avoid a powdered sugar cloud. Increase the speed to medium once everything is combined.
3. Incorporate the flavorings: Once the frosting is smooth and creamy, add the vanilla extract and salt. Mix on medium speed for another minute to ensure everything is well incorporated.
4. Adjust consistency: If your frosting is too thick, add a tablespoon of milk at a time until you reach your desired consistency. If it’s too thin, add a tablespoon of powdered sugar at a time. Taste and adjust sweetness as needed. Some prefer a sweeter frosting, while others prefer a more balanced flavor.
5. Chill (optional): For easier handling and a firmer frosting, you can chill the frosting in the refrigerator for about 30 minutes before using. Just remember to bring it back to room temperature before frosting the cake to ensure smooth application.
Professional Tip: For an extra decadent frosting, consider adding a tablespoon or two of melted high-quality dark chocolate to the finished frosting. This will enhance the chocolate flavor and add a beautiful sheen.
With this perfectly prepared frosting, your chocolate cake is ready to be transformed into a masterpiece!
Recommendations for the Perfect Chocolate Cake
To achieve the ultimate chocolate cake experience, careful attention to detail is key throughout the baking process. Precise measurements of ingredients are crucial for achieving the desired texture and consistency. Using a kitchen scale for dry ingredients is highly recommended for accuracy. Don’t overmix the batter, as this can lead to a tough cake. Mix until just combined, ensuring there are no streaks of dry flour remaining. Properly preheating your oven is also essential for even baking. Use an oven thermometer to verify the accuracy of your oven’s temperature setting.
Once baked, allow the cake to cool completely in the pan before frosting. This prevents the frosting from melting and ensures a clean, sharp look. Gentle handling is important to avoid crumbling. Use a cake lifter or two spatulas to transfer the cake to a serving plate. For even frosting, consider using a crumb coat – a thin layer of frosting applied before the final layer to trap any stray crumbs. This will give you a smooth, professional finish.
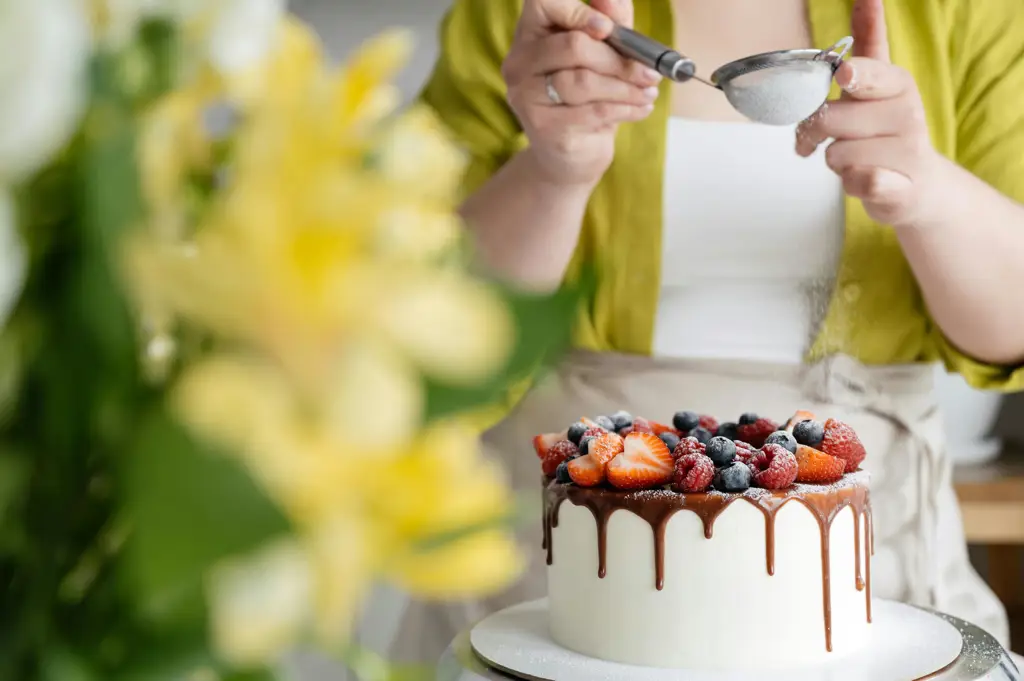
Serving suggestions are plentiful! Classic pairings include fresh berries (strawberries, raspberries, blueberries), whipped cream, and a dusting of powdered sugar. For a more decadent experience, consider serving slices with a scoop of vanilla ice cream or a dollop of chocolate ganache. A drizzle of caramel sauce or a sprinkle of chocolate shavings can also add an extra touch of elegance.
Storage is important for maintaining the cake’s freshness and quality. Store leftover cake airtight at room temperature for up to 3 days. For longer storage, wrap the cake tightly in plastic wrap and then foil, and freeze for up to 3 months. Thaw the cake overnight in the refrigerator before serving. Remember that frosting can sometimes separate when frozen, so it’s best to enjoy it within the first few days.
To complement your chocolate cake, consider serving it alongside complementary dishes that offer a contrast in texture and flavor. A light and refreshing fruit salad, a scoop of lemon sorbet, or a simple green salad can provide a nice counterpoint to the richness of the chocolate. For a more substantial pairing, a cup of strong coffee or a glass of chilled milk can enhance the chocolate’s flavor profile.
Nutritional Information (per slice, approximate): This will vary based on the specific recipe and ingredients used. However, a typical slice of chocolate cake might contain approximately 400-500 calories, 20-25g of fat, 50-60g of carbohydrates, and 5-7g of protein. These values are estimates and can change significantly depending on the recipe’s ingredients and portion size. Always consult a nutrition calculator or label for precise values based on your specific recipe.
Remember, baking is a journey of experimentation and personal preference. Don’t be afraid to adjust the recipe to your liking and create your own signature chocolate cake masterpiece! Enjoy!