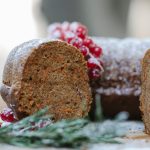
Prepare yourself for a journey to the heart of Turkish culinary tradition with our homemade Baklava. This exquisite dessert, renowned globally for its rich, nutty flavor and delicate, flaky layers, boasts a history as captivating as its taste. Originating in the Ottoman Empire, Baklava’s precise origins remain shrouded in some mystery, with claims dating back centuries and varying accounts surrounding its invention. Some historians trace its roots to ancient Mesopotamia, suggesting variations existed even then, while others point to Byzantine influences, emphasizing the dessert’s evolution through trade routes and cultural exchange across the vast empire.
The Ottoman Empire’s vast reach significantly impacted Baklava’s evolution and dissemination. As the empire expanded, so did the variations of Baklava, with regional differences emerging in ingredients, shapes, and sweetness levels. This culinary diversity reflects the empire’s multicultural tapestry, a testament to the shared history and cultural fusion that shaped its cuisine. The influence is still felt today; Turkey remains the undisputed heartland of Baklava production, with an estimated annual output exceeding billions of pieces, a testament to its enduring popularity both domestically and internationally.
Beyond its deliciousness, Baklava holds significant cultural importance in Turkey and throughout the wider Middle East. It’s a staple at celebrations, festivals, and special occasions, symbolizing abundance, prosperity, and sweetness in life. The meticulous preparation process, often involving multiple family members, transforms Baklava into more than just a dessert; it becomes a shared experience, connecting generations through a time-honored tradition. The intricate layering – sometimes numbering dozens – represents the layers of history and culture that have contributed to its creation, making it a truly symbolic sweet.
Interestingly, the ingredients themselves – layers of filo pastry, chopped nuts (typically pistachios, walnuts, or hazelnuts), and a generous drizzle of sweet syrup – are often seen as symbolic as well. The delicate filo symbolizes fragility and the importance of careful handling in life, while the abundance of nuts represents wealth and prosperity. The rich, sweet syrup represents the sweetness of life and the rewards of hard work and patience. This careful attention to detail and the rich symbolism make our homemade Baklava not just a treat, but a taste of history and culture.
Ingredients and Measurements
Creating authentic Turkish Baklava hinges on the precision of your ingredients and their measurements. Using a kitchen scale is highly recommended for accuracy, especially when working with phyllo (yufka) pastry, nuts, and the delicate syrup.
For the Phyllo Pastry (Yufka): You will need approximately 1 pound (450g) of high-quality phyllo pastry sheets. Look for phyllo that is thin and pliable; thicker sheets will result in a less delicate and potentially soggy baklava. Keep the phyllo tightly wrapped in its original packaging and refrigerated until ready to use. Working with phyllo requires speed and efficiency to prevent it from drying out. Have a bowl of cold water nearby to brush the sheets with to prevent them from drying out during layering.
For the Nut Filling: The heart of baklava lies in its rich nut filling. Traditionally, pistachios are used, but you can experiment with a blend of pistachios, walnuts, or even almonds. For this recipe, let’s focus on a classic pistachio filling. You’ll need 2 cups (200g) of shelled pistachios, finely ground. Avoid using pre-ground pistachios, as they often lack the desirable texture and freshness. Grind your pistachios yourself using a food processor, ensuring they are finely ground but not pulverized into a paste. A slightly coarse texture adds a pleasant contrast to the crispy phyllo.
For the Clarified Butter (Tereyağı): Clarified butter is crucial for achieving that signature baklava crispness. You’ll need 1 cup (2 sticks or 225g) of unsalted butter, clarified. Clarifying the butter removes the milk solids and water, preventing the baklava from becoming soggy. To clarify butter, gently melt the butter over low heat. Allow the solids to settle at the bottom, then carefully pour off the clear golden liquid, leaving behind the milky residue. Ensure your clarified butter is completely free of any water or milk solids before using it.
For the Syrup (Şerbet): The syrup is just as important as the pastry and filling. It’s what balances the richness of the nuts and butter, creating that perfect harmony of flavors and textures. For this recipe, you will need: 1 ½ cups (300g) of granulated sugar, 1 cup (240ml) of water, ½ cup (120ml) of fresh lemon juice, and 2 tablespoons (30ml) of orange blossom water (optional, but highly recommended for authentic flavour). The quality of your ingredients contributes significantly to the overall flavour of the syrup. Use fresh lemon juice for the best results.
Other Ingredients: You may need a pinch of ground cinnamon to add a subtle spice to the nut filling (optional). Also, have some extra clarified butter on hand to brush the top layer of phyllo for added crispness. Remember to always use high quality ingredients for best results.
Important Note: These measurements are approximate. You may need to adjust slightly depending on the size of your baking pan and the thickness of your phyllo sheets. Always trust your senses and make adjustments as needed to achieve the desired consistency and result.
Phyllo Dough Preparation
Working with phyllo dough can seem daunting, but with the right approach, it becomes manageable and rewarding. The key is to keep the dough pliable and prevent it from drying out. This section details the preparation process, ensuring your baklava layers are delicate and crisp.
Before you begin: Ensure you have all your ingredients and equipment ready. You’ll need a clean, flat work surface, several clean kitchen towels or damp cheesecloths, a pastry brush, and a large, shallow dish filled with lukewarm water. The most crucial element is the environment: work in a cool, low-humidity area to prevent the phyllo from drying out too quickly. A kitchen with an air conditioner is ideal.
Thawing the Phyllo: If using frozen phyllo dough, carefully remove it from the freezer and place the entire package in the refrigerator for at least 24 hours to thaw completely. Thawing slowly and evenly is essential to prevent cracking and tearing. Never attempt to thaw phyllo at room temperature; it will dry out too quickly and become unusable.
Preparing the Dough: Once completely thawed, gently open the package of phyllo. You should find several sheets of very thin dough stacked neatly. Examine the sheets carefully. If you find any damaged ones, set them aside; you won’t need them for the baklava.
Keeping the Phyllo Moist: This is the most important step. Cover the entire stack of phyllo sheets with a damp (not soaking wet) kitchen towel or cheesecloth. This prevents the phyllo from drying out and becoming brittle, which will make it difficult to work with and will result in a tough baklava. Keep the remaining unused sheets covered at all times. You can even place a slightly damp paper towel directly on the top sheet you are currently working with while you brush it with butter or oil.
Working with the Sheets: When ready to use a sheet, carefully peel it off the stack, being gentle to avoid tearing. Lay it on your work surface. Work quickly and efficiently, using only the sheets you need immediately. If a sheet starts to dry, lightly brush it with water using a pastry brush. This will rehydrate it slightly.
Butter Application: Once the phyllo is laid out, use a pastry brush to lightly brush the surface with melted unsalted butter or clarified butter (for a richer flavor). Avoid using too much butter, as this can make the baklava greasy. A thin, even layer is sufficient. Repeat this process for each layer of phyllo in your baklava recipe.
Important Note: The number of phyllo sheets you need will depend on your specific recipe. Typically, baklava uses many layers (at least 15-20), creating a flaky, crispy texture. Always follow the instructions in your chosen baklava recipe for the exact number of sheets required. Remember to continually keep the unused sheets covered with damp cloths to maintain optimal moisture levels throughout the entire baklava assembly process.
Nut Mixture Preparation
The heart of a truly exceptional Turkish baklava lies in its rich and flavorful nut mixture. This section details the precise preparation necessary to achieve that perfect balance of texture and taste. Accuracy in measurement and careful attention to roasting are crucial for a superior result.
For this recipe, we’ll be using a classic combination of pistachios, walnuts, and hazelnuts. Feel free to adjust the ratios to your personal preference, but maintain a balance to avoid any single nut overpowering the others. We recommend the following quantities for a large baklava (approximately 12×18 inches):
- 1 cup shelled pistachios
- 1 1/2 cups shelled walnuts
- 1 cup shelled hazelnuts
Begin by preheating your oven to 350°F (175°C). Ensure your nuts are completely dry before roasting. Any excess moisture will lead to uneven roasting and potentially burning. Spread the nuts in a single layer on a large baking sheet. Avoid overcrowding; this will hinder even heat distribution. Roast for 8-10 minutes, stirring halfway through, until the nuts are fragrant and lightly browned. Do not over-roast; burnt nuts will impart a bitter taste to your baklava.
Once roasted, immediately transfer the nuts to a clean kitchen towel or wire rack to cool completely. This step is crucial to prevent the nuts from continuing to cook and becoming overly browned or brittle. Allow them to cool for at least 15-20 minutes. Cooling is essential to prevent the nuts from releasing their oils prematurely, which can affect the texture of the final baklava.
After the nuts have completely cooled, use a food processor to coarsely grind them. Avoid over-processing; you want a coarse grind, not a fine powder. The goal is to retain some texture within the filling. Pulse the nuts in short bursts, checking frequently to avoid creating nut butter. The mixture should have a slightly chunky consistency with visible pieces of nuts.
Once ground, transfer the nut mixture to a large bowl. You can optionally add a touch of ground cinnamon or cardamom for extra flavor complexity. Start with 1/2 teaspoon of each and adjust according to your taste. Gently mix the spices into the nut mixture, ensuring even distribution. Your nut mixture is now ready to be layered into your baklava.
Important Note: The quality of your nuts significantly impacts the final taste of your baklava. Use fresh, high-quality nuts for the best results. Storing the roasted and ground nuts in an airtight container at room temperature for up to a week will maintain their freshness and flavor.
Syrup Preparation
The syrup, or şerbet, is just as crucial to a perfect Turkish baklava as the delicate layers of phyllo pastry and the rich, nutty filling. A well-made syrup contributes significantly to the overall texture and flavor, balancing the richness of the baklava and preventing it from becoming dry. It’s important to understand that the syrup is not simply a sweet liquid; it’s a complex interplay of sugar, water, and flavorings that undergo a specific cooking process.
For this recipe, we will prepare a classic light and fragrant syrup. The quantities are designed for a standard-sized baklava, but you can easily adjust them proportionally for larger or smaller batches. Always use high-quality granulated sugar for the best results. Avoid using powdered sugar as it can lead to a grainy syrup.
Ingredients:
- 2 cups (400g) granulated sugar
- 1 ½ cups (360ml) water
- ½ cup (120ml) fresh lemon juice (approximately 2 large lemons)
- 1 cinnamon stick (about 3 inches long)
- 6-8 whole cloves
- (Optional) 1 tablespoon orange blossom water for a more floral aroma
Instructions:
- In a medium-sized, heavy-bottomed saucepan, combine the sugar and water. Using a heavy-bottomed pot is crucial to prevent the sugar from burning or crystallizing. Gently stir until the sugar dissolves completely. Avoid stirring vigorously once the sugar has dissolved.
- Add the lemon juice, cinnamon stick, and cloves to the saucepan. Lemon juice is critical, not only for flavor but also to prevent crystallization and add a subtle tang that cuts through the sweetness.
- Bring the mixture to a boil over medium-high heat, then immediately reduce the heat to low and simmer gently, uncovered, for approximately 20-25 minutes. Do not stir the syrup during simmering, as this can also cause crystallization. Skim off any foam that may form on the surface.
- If using orange blossom water, add it during the last 2 minutes of simmering. Be careful not to overcook the syrup, as this will result in a too-thick consistency.
- After 20-25 minutes, the syrup should reach a light-to-medium consistency. To test for doneness, take a small amount of the syrup and drop it onto a chilled plate. It should form a slightly viscous puddle that doesn’t spread too easily. Or you can use a candy thermometer – the syrup should reach approximately 235°F (113°C).
- Remove the saucepan from the heat and carefully remove the cinnamon stick and cloves. Allow the syrup to cool completely before pouring it over the freshly baked baklava. Pouring the hot syrup over the baklava will result in a soggy, undesirable texture. Allowing both the baklava and syrup to cool completely is essential for optimal absorption and texture.
Important Considerations:
The success of your syrup depends largely on the quality of your ingredients and attention to detail during the cooking process. Precise measurements are key. Don’t rush the process, and be patient as the syrup simmers. With practice, you’ll perfect your own technique and create a truly exceptional syrup that complements your homemade Turkish baklava perfectly.
Assembly of Baklava Layers
This section details the crucial process of layering your baklava. Precision and patience are key to achieving perfectly crisp and flaky layers. We’ll be using approximately 1 pound (450g) of high-quality phyllo dough, thawed completely and covered with a damp cloth to prevent drying. Do not rush this step; properly assembled layers are the foundation of amazing baklava.
Begin by lightly brushing the bottom of your baking pan (approximately 9×13 inches) with melted unsalted butter. Use a pastry brush for even distribution. You’ll need approximately ¼ cup (55g) of melted butter for this initial layer. Avoid using too much butter at this stage, as it can lead to soggy baklava.
Carefully lay down 3-4 sheets of phyllo dough, one at a time, overlapping them slightly if necessary to cover the entire pan. Work quickly to prevent the phyllo from drying out. After each layer, brush generously with melted butter. Use approximately 1 tablespoon of melted butter per layer. Aim for even coverage, ensuring the butter penetrates between the layers. This creates the characteristic flaky texture.
Repeat this process, layering phyllo sheets and brushing with butter, until you have approximately 8-10 layers of phyllo dough. The exact number may vary depending on the size of your phyllo sheets and your pan. Consistency is more important than an exact count. If your phyllo sheets are particularly large, you might need to trim them to fit the pan after layering a few sheets. Discard the trimmings; they can be used for another baking project.
Now, it’s time to add the filling. You should have prepared your pre-made nut mixture (approximately 4 cups). Spread the nut mixture evenly over the phyllo layers, ensuring it reaches the edges of the pan. Press the filling gently to create an even layer. This prevents uneven baking and ensures a consistent texture throughout the baklava.
Next, repeat the layering process, starting with 3-4 sheets of phyllo dough and brushing each layer with melted butter. Continue this until you’ve used up the remaining phyllo sheets. You should aim for approximately 8-10 layers on top of the filling, mirroring the bottom layers. The top layer should be completely sealed with butter.
Finally, using a sharp knife, carefully score the baklava into diamond or rectangular shapes. Cut all the way through to the bottom. This will allow the baklava to be easily separated after baking. Don’t worry about the cuts getting buttery; this will enhance the flavor. After scoring, brush the top layer generously with the remaining melted butter, ensuring all the scored lines are well-coated. This will create a beautiful golden-brown crust.
Your baklava is now ready for baking! Refer to the baking instructions for the next step. Remember, patience and attention to detail during this layering process are crucial for achieving the perfect baklava.
Baking the Baklava
Baking baklava is the culmination of your hard work, and getting it right will reward you with crispy layers and a perfectly caramelized syrup. This section details the crucial steps to baking the most delicious baklava imaginable. We’ll be using a 9×13 inch baking pan for this recipe, but you can adjust accordingly for larger or smaller pans, remembering to adjust baking time as needed.
Preheat your oven to 350°F (175°C). This is vital for even baking. Make sure your oven is properly preheated before placing the baklava inside. A preheated oven ensures the pastry layers cook evenly and become crisp, rather than soggy.
Carefully place the assembled baklava in the prepared baking pan. Remember, we’ve already brushed the phyllo layers with melted butter. Gently transfer the baklava into your baking pan. Try not to jostle it too much, as this could disrupt the layers. If you find it difficult to transfer, use a large, flat spatula to help maneuver it.
Bake for 45-55 minutes, or until the baklava is golden brown. This is where careful observation is key. Every oven varies, so keep a close eye on your baklava. Start checking at the 45-minute mark. The top should be a deep, rich golden brown, and the edges should be nicely browned as well. If it browns too quickly, loosely tent the top of the pan with aluminum foil to prevent over-browning.
The internal temperature should reach around 190°F (88°C). While the visual cues are important, using a food thermometer inserted into the thickest part of the baklava will ensure it’s cooked through. This will prevent a soggy center while ensuring the outside is golden. Do not open the oven door frequently during baking, as this can cause the baklava to collapse.
Let the baklava cool completely in the pan before adding the syrup. This is arguably the most crucial step. Adding the syrup while the baklava is still hot will result in a soggy, undesirable texture. Allowing it to cool completely ensures the baklava absorbs the syrup evenly and maintains its crispness. Patience is key here; it should take at least 2-3 hours to completely cool.
Pour the warm syrup evenly over the cooled baklava. Once the baklava is completely cool, slowly and carefully pour the prepared syrup over the entire surface. Ensure every part of the baklava is evenly coated. You might need to gently tilt the pan to help the syrup reach all the corners.
Allow the baklava to absorb the syrup for at least 4-6 hours, or preferably overnight. This allows the baklava to fully absorb the syrup, creating that perfect balance of crunchy layers and sweet, syrupy goodness. The longer it sits, the more flavorful it becomes. Covering the baklava loosely with plastic wrap while it sits helps retain moisture.
Once the syrup is absorbed, cut the baklava into diamonds or squares and serve. Use a very sharp knife to cut the baklava into neat, even pieces. A serrated knife works best for cutting through the layers cleanly. Serve and enjoy your homemade Turkish baklava! Storing in an airtight container at room temperature will keep it fresh for several days.
Homemade Turkish Baklava: Recommendations
Your homemade Turkish baklava is a masterpiece! To ensure you enjoy it at its best, follow these recommendations for serving, storage, and pairing with complementary dishes.
Serving Suggestions: Baklava is best served at room temperature, allowing the flavors to fully develop and the phyllo layers to soften slightly. For an elegant presentation, cut the baklava into neat diamond or square shapes before serving. Consider dusting the top with powdered sugar immediately before serving for an extra touch of sweetness and visual appeal. You can also garnish with chopped pistachios or a drizzle of honey for added texture and flavor. Serve small portions, as baklava is quite rich and decadent.
Storage Conditions: To maintain the crispness and freshness of your baklava, store it in an airtight container at room temperature for up to 3 days. Beyond that, the phyllo layers may start to lose their crispness. For longer storage, you can freeze the baklava for up to 2 months. Wrap it tightly in plastic wrap and then in aluminum foil to protect it from freezer burn. To thaw, simply remove it from the freezer and let it come to room temperature before serving. Do not refrigerate baklava, as this will make the phyllo layers soggy.
Complementary Dishes: Baklava’s richness pairs beautifully with contrasting flavors and textures. A simple scoop of vanilla ice cream or a dollop of clotted cream provides a delightful cool counterpoint to the warm, sweet baklava. A strong Turkish coffee or a glass of sweet dessert wine, such as a late-harvest Riesling or a Moscato d’Asti, would also complement the baklava’s flavors perfectly. For a more savory contrast, consider serving it alongside a light, refreshing salad with citrus vinaigrette or a plate of fresh fruit, such as berries or oranges.
Nutritional Information (Approximate per serving – 1 piece, size may vary): Calories: 250-350 (depending on size and ingredients). Fat: 15-20g. Saturated Fat: 5-8g. Cholesterol: 10-15mg. Sodium: 50-100mg. Carbohydrates: 30-40g. Sugar: 20-25g. Protein: 2-3g. Note: This is an estimate and can vary significantly based on the specific recipe and ingredients used. For a more precise nutritional analysis, use a nutrition calculator with your specific recipe details.
Important Note: While delicious, baklava is a high-calorie and high-sugar dessert. Enjoy it in moderation as part of a balanced diet. Individuals with dietary restrictions or health concerns should adjust their consumption accordingly or consult a healthcare professional or registered dietitian.