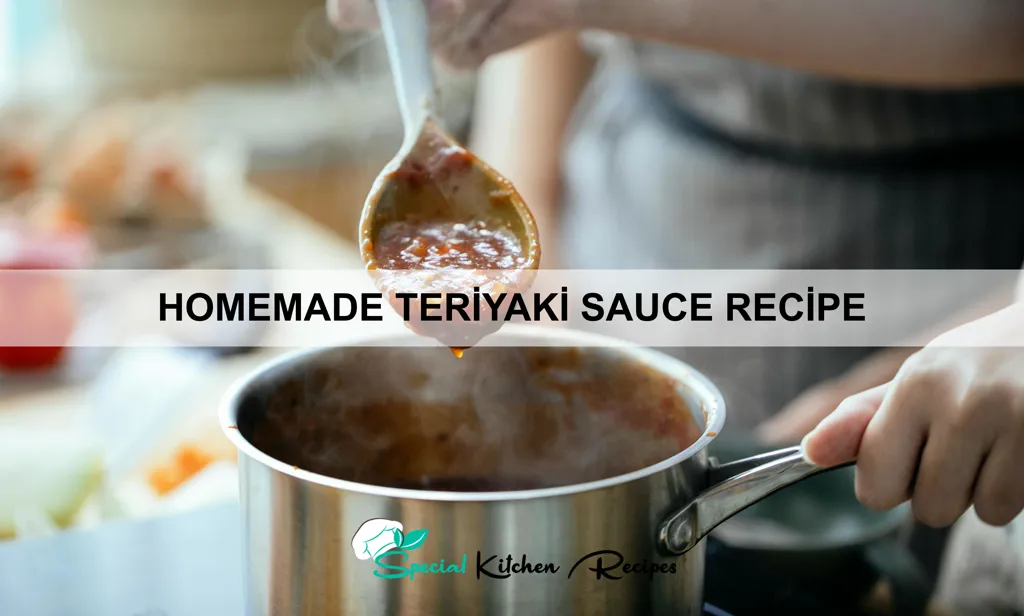
Prepare to embark on a culinary journey to Japan with this homemade teriyaki sauce recipe! Teriyaki, a beloved staple of Japanese cuisine, isn’t just a sauce; it’s a culinary experience steeped in history and tradition. While pinpointing its exact origin is difficult, its evolution is fascinating. The word teriyaki itself combines teri, meaning glossy, and yaki, meaning grilled, perfectly capturing the essence of the cooking method where foods are glazed with this sweet and savory sauce during grilling or broiling.
Although teriyaki’s precise origins remain debated, its popularity exploded in the mid-20th century, propelled by the post-war economic boom and increased globalization. Early forms likely involved simple marinades using soy sauce, mirin (sweet rice wine), and sake, evolving over time to include a wider array of ingredients. It’s important to note that while often associated with specific dishes like teriyaki chicken or salmon, the sauce itself is incredibly versatile, applicable to a vast range of proteins and vegetables. Its widespread adoption has made it one of the most recognizable Japanese dishes globally.
The cultural significance of teriyaki extends beyond its delicious flavor. It represents a blend of sweet and savory, mirroring the Japanese appreciation for balance and harmony. The glossy sheen achieved through the cooking process is visually appealing, representing a level of care and attention to detail valued in Japanese culinary arts. Furthermore, teriyaki’s versatility reflects the adaptability and innovation within Japanese cuisine, constantly evolving to incorporate new flavors and techniques while retaining its core identity. Estimates suggest that globally, billions of servings of teriyaki-based dishes are consumed annually, a testament to its enduring appeal and international recognition.
This recipe aims to capture the authentic flavors of teriyaki, providing a simple yet satisfying homemade alternative to commercially available options. By making your own sauce, you gain complete control over the ingredients, allowing you to adjust the sweetness, saltiness, and overall flavor profile to your liking. Get ready to experience the rich history and delicious taste of homemade teriyaki!
Ingredients and Measurements
Crafting a truly delicious homemade teriyaki sauce hinges on using high-quality ingredients and precise measurements. The following recipe yields approximately 1 ½ cups of sauce, perfect for marinating and glazing various meats, vegetables, and tofu.
Soy Sauce: We’ll start with 1 cup (240ml) of high-quality soy sauce. Avoid using low-sodium soy sauce unless you specifically want a less salty teriyaki. The umami depth of a good soy sauce is crucial to the overall flavor profile. Look for a soy sauce with a rich, dark color and a pronounced aroma.
Mirin: ½ cup (120ml) of mirin adds sweetness and depth. Mirin is a sweet rice wine, and its subtle sweetness balances the saltiness of the soy sauce beautifully. Ensure you use genuine mirin, not mirin-style seasoning, as the latter often contains added sugar and salt, which can alter the balance of flavors in your sauce.
Sake: ¼ cup (60ml) of sake contributes to the overall complexity of the sauce. Sake, a Japanese rice wine, adds a delicate dryness and subtle fruity notes. You can substitute dry sherry if sake is unavailable, but be aware that the flavor profile will subtly change.
Sugar: ¼ cup (50g) of granulated sugar (or brown sugar for a richer flavor) provides the necessary sweetness. Adjust the sugar quantity to your preference; some prefer a sweeter teriyaki, while others prefer a more savory version. Start with ¼ cup and taste-test before adding more.
Ginger: 1 tablespoon of freshly grated ginger adds a vibrant, spicy kick. Using fresh ginger is highly recommended over ground ginger, as the fresh ginger offers a superior aroma and flavor. If you don’t have fresh ginger, you can use about ½ teaspoon of ground ginger, but keep in mind the flavor will be less intense.
Garlic: 1 tablespoon of minced garlic complements the ginger perfectly. Similar to ginger, freshly minced garlic is preferable. If using pre-minced garlic from a jar, reduce the amount slightly to avoid overpowering the other flavors.
Cornstarch (Optional): 1-2 tablespoons of cornstarch, mixed with 2 tablespoons of cold water, can be added for thickening the sauce. Add the cornstarch slurry slowly towards the end of cooking, whisking constantly to prevent lumps. If you prefer a thinner sauce, omit the cornstarch altogether.
Note: All measurements are approximate. Feel free to adjust the ingredients to your liking after your first attempt. The beauty of homemade teriyaki sauce lies in its customization possibilities!
Equipment List
Making delicious homemade teriyaki sauce requires the right tools to ensure smooth and efficient cooking. While you might already have most of these items in your kitchen, having the correct equipment will significantly enhance your experience and the final product’s quality. This list details the necessary equipment, along with recommendations for optimal performance.
1. Medium-Sized Saucepan (2-quart capacity): This is the workhorse of your teriyaki sauce creation. A 2-quart saucepan provides ample space for simmering the sauce without overflowing. Choose a saucepan with a heavy bottom, preferably stainless steel or heavy-gauge aluminum, for even heat distribution and prevention of scorching. Avoid non-stick pans for this recipe, as high heat and acidic ingredients can damage their coating.
2. Measuring Cups and Spoons: Accurate measurements are crucial for achieving the desired balance of flavors in your teriyaki sauce. Invest in a set of accurate measuring cups and spoons, preferably those made of stainless steel or durable plastic for longevity. Using imprecise measurements can lead to inconsistencies in taste and texture.
3. Whisk: A whisk is essential for thoroughly combining all the ingredients and preventing lumps from forming. Opt for a balloon whisk; its larger surface area effectively incorporates air and ensures a smooth, lump-free sauce. A smaller whisk can also work, but a balloon whisk is ideal for the volume of liquid used in this recipe.
4. Wooden Spoon or Spatula: While a whisk is great for initial mixing, a wooden spoon or spatula is needed for stirring the sauce during the simmering process. A heat-resistant silicone spatula is a great alternative as it won’t scratch your saucepan. These tools help prevent sticking and ensure even cooking.
5. Fine-Mesh Sieve or Strainer (Optional): For a smoother, lump-free teriyaki sauce, you can strain the sauce through a fine-mesh sieve after simmering. This optional step removes any solids or spices that may have clumped together. If you choose to strain, ensure your sieve is large enough to accommodate the volume of sauce.
6. Airtight Container for Storage: Once your teriyaki sauce has cooled completely, store it in an airtight container in the refrigerator. This prevents spoilage and maintains its freshness. Glass containers are ideal for storing sauces, as they are non-reactive and easy to clean.
7. Small Bowl (for measuring ingredients): Having a small bowl to pre-measure your ingredients will make the cooking process much smoother and more efficient. This prevents you from having to constantly switch between measuring tools.
Preparation of Ingredients
Before you begin crafting your homemade teriyaki sauce, meticulous preparation of the ingredients is key to achieving the perfect balance of flavors and textures. We’ll start with the aromatics, the foundation of any great teriyaki sauce.
First, we’ll tackle the ginger. You’ll need approximately 2 inches of fresh ginger, peeled. Using a spoon, gently scrape off the tough outer skin. Avoid using a vegetable peeler, as this can remove too much of the flavorful flesh. Once peeled, finely mince the ginger. A sharp knife is essential here; a dull knife will bruise the ginger, releasing bitter compounds. Aim for a consistency where you have small, almost granular pieces rather than large chunks. For even finer results, you can grate the ginger using a microplane grater.
Next, prepare 4 cloves of garlic. Again, a sharp knife is your best friend. Peel the garlic cloves and either mince them finely, similar to the ginger, or use a garlic press for a smoother paste. If using a garlic press, be cautious not to over-press, as this can result in a bitter taste. If mincing, aim for a consistency that is relatively fine, but not so fine that it becomes a paste.
Now let’s move on to the scallions (also known as green onions). You’ll need approximately 4 scallions. Carefully wash the scallions and slice the white and light green parts thinly, reserving the dark green tops for garnish (optional). The white and light green parts provide a subtle oniony flavor that complements the other ingredients. Avoid using the dark green parts in the sauce itself, as they can be slightly bitter.
Finally, if your recipe calls for additional ingredients like chili peppers or other aromatics, prepare them according to the recipe instructions. Remember that consistency is key. Uniformly sized pieces of ingredients will ensure even cooking and distribution of flavor throughout the sauce. Proper preparation not only enhances the taste but also makes the cooking process smoother and more enjoyable.
Sauce Preparation (Combining Ingredients, Whisking)
This section details the crucial step of combining the ingredients for your homemade teriyaki sauce and achieving the perfect consistency through whisking. Precise measurements are key to achieving the ideal balance of sweet, savory, and umami flavors. We’ll be creating a versatile sauce suitable for marinades, dipping, or glazing.
Begin by gathering all your ingredients: 1 cup (240ml) soy sauce (low sodium preferred), ½ cup (120ml) mirin (sweet rice wine), ¼ cup (60ml) sake (Japanese rice wine, can substitute with dry sherry), ¼ cup (50g) granulated sugar, 2 tablespoons (30ml) honey or brown sugar (for added depth), 2 tablespoons (15g) cornstarch, and 1 tablespoon (15ml) grated fresh ginger. Ensure all your ingredients are at room temperature for optimal mixing and dissolving.
In a medium-sized saucepan, combine the soy sauce, mirin, sake, granulated sugar, and honey (or brown sugar). Gently stir the mixture to ensure the sugar dissolves completely. Avoid vigorous stirring at this stage to prevent excessive foaming. If using brown sugar, it may take a little longer to dissolve completely.
Next, in a separate small bowl, whisk together the cornstarch with 2 tablespoons (30ml) of cold water. This creates a slurry which will thicken the sauce. Whisk vigorously until the cornstarch is completely dissolved and the mixture is smooth, ensuring no lumps remain. Adding the cornstarch slurry gradually prevents clumping in the final sauce.
Once the sugar is fully dissolved in the saucepan, slowly pour in the cornstarch slurry while continuously whisking. Whisking constantly prevents the sauce from becoming lumpy. Bring the mixture to a simmer over medium heat, stirring continuously. The sauce will begin to thicken as it simmers.
Reduce the heat to low and continue to simmer for 2-3 minutes, or until the sauce has reached your desired thickness. Stir frequently to prevent sticking and burning. The sauce should coat the back of a spoon smoothly. Remove from heat and stir in the grated ginger. Allow the sauce to cool slightly before using. Store leftovers in an airtight container in the refrigerator for up to a week.
Enjoy your delicious homemade teriyaki sauce! Remember that adjusting the sweetness and thickness is easily achieved by modifying the sugar and cornstarch quantities. Experiment to find your perfect balance.
Simmering and Reduction (Cooking the Sauce to Desired Consistency)
Once you’ve combined all your teriyaki sauce ingredients (refer to the recipe for quantities), it’s time for the crucial simmering and reduction process. This step concentrates the flavors and thickens the sauce to the perfect consistency. We’ll be aiming for a sauce that coats the back of a spoon, neither too thin nor too thick.
Begin by bringing the mixture to a gentle simmer over medium-low heat. Avoid high heat, as this can scorch the sugar and lead to a burnt flavor. A consistent, low simmer is key.
Once simmering, reduce the heat to the lowest setting possible while still maintaining a gentle bubbling. This is where patience is crucial. The simmering process should take approximately 15-20 minutes, but this can vary depending on your stove and the amount of liquid you started with. Stir the sauce frequently to prevent sticking and ensure even cooking. Use a wooden spoon or spatula to scrape the bottom of the pan, incorporating any browned bits that may cling to the surface—these add depth of flavor.
As the sauce simmers, it will gradually thicken. To check for doneness, take a small spoonful and let it cool slightly on a plate. Tilt the plate; the sauce should coat the back of the spoon in a smooth, syrupy layer. If it’s too thin, continue simmering for a few more minutes, checking regularly. If it becomes too thick, immediately remove it from the heat to prevent burning. You can always add a teaspoon or two of water or broth to adjust the consistency if needed.
During the reduction process, you’ll notice the volume of the sauce decreasing. This is expected and a sign that the flavors are concentrating. Pay close attention to the sauce’s color and consistency. It should deepen in color and become glossy and rich. The ideal teriyaki sauce has a beautiful, dark amber hue.
Once the sauce reaches your desired consistency, remove it from the heat immediately. Allow the sauce to cool slightly before transferring it to a clean, airtight container. Store in the refrigerator for up to two weeks. Enjoy your homemade teriyaki sauce!
Important Note: The reduction time may vary depending on factors such as humidity and altitude. Be patient and monitor the sauce closely to achieve the perfect consistency.
Cooling and Storage (Proper Storage for Optimal Flavor and Longevity)
Proper cooling and storage are crucial for maintaining the delicious flavor and extending the shelf life of your homemade teriyaki sauce. Freshly made teriyaki sauce is best enjoyed immediately, allowing you to savor its vibrant, freshly cooked taste. However, if you’re making a larger batch, understanding the correct storage methods is essential.
Immediately after cooking, allow your teriyaki sauce to cool completely. This prevents condensation from forming inside the container, which can lead to bacterial growth and potentially spoil your sauce. You can speed up the cooling process by transferring the sauce from the cooking pot into a shallow, wide-bottomed container. This maximizes surface area, facilitating faster heat dissipation. Aim for a temperature of approximately 40°F (4°C) or lower before storage.
Choose the right container. Glass jars or food-grade airtight plastic containers are ideal for storing teriyaki sauce. Avoid using metal containers, as the acidity in the sauce may react with the metal, altering the flavor and potentially causing discoloration. Ensure the container is thoroughly clean and completely dry before adding the sauce.
Properly seal the container. Airtight sealing is critical to prevent oxidation, which can lead to a decrease in flavor and quality over time. Make sure the lid is securely fastened to prevent air from entering. Leaving even small amounts of air inside can accelerate spoilage.
Refrigerate your teriyaki sauce. Store the cooled teriyaki sauce in the refrigerator at or below 40°F (4°C). This temperature range significantly inhibits the growth of harmful bacteria, keeping your sauce safe and fresh for a longer period. Under ideal conditions, your homemade teriyaki sauce should last for approximately 1-2 weeks in the refrigerator.
Freezing for longer storage. For even longer storage, you can freeze your teriyaki sauce. Pour the cooled sauce into freezer-safe containers, leaving about ½ inch of headspace to allow for expansion during freezing. Frozen teriyaki sauce can last for 2-3 months. Remember to thaw it completely in the refrigerator before using and discard any unused portion after thawing.
Important Note: Always inspect your teriyaki sauce before using it. Discard any sauce that exhibits signs of spoilage, such as mold growth, unusual color changes, or an off-putting odor. Your safety is paramount.
Recommendations
This homemade teriyaki sauce is incredibly versatile and can elevate a wide range of dishes. For optimal flavor, allow the sauce to rest for at least 30 minutes after preparation to allow the flavors to meld. This will result in a richer, more complex taste.
Serving Suggestions: The classic application is as a marinade for grilled chicken, beef, pork, or tofu. Baste your protein with the sauce during cooking for a beautiful glaze. It’s also delicious as a dipping sauce for spring rolls, gyoza, or tempura. Try brushing it over grilled vegetables like asparagus or bell peppers for a sweet and savory twist. You can even use it as a glaze for baked salmon or other fish.
Complementary Dishes: This teriyaki sauce pairs perfectly with rice, noodles (udon, soba, or ramen), and stir-fried vegetables. Consider serving it with a side of steamed broccoli, edamame, or a simple green salad to balance the richness of the sauce. It also complements dishes like sushi rice bowls (poke bowls) and teriyaki-glazed salmon with quinoa.
Storage: Store leftover teriyaki sauce in an airtight container in the refrigerator for up to one week. For longer storage, freeze the sauce in ice cube trays or small containers for up to three months. Thaw completely before using.
Nutritional Information (per 2 tablespoons): (Note: This is an approximation and will vary depending on specific ingredients used. Use a nutrition calculator for a precise value based on your recipe.) Calories: Approximately 70-80, Protein: 1-2g, Fat: 0-1g, Carbohydrates: 15-20g, Sodium: High (due to soy sauce), Sugar: Moderate (depending on the amount of sugar used). Important: Please be mindful of sodium intake, especially if you have health concerns.
Important Note: The nutritional information provided is an estimate and may vary depending on the specific ingredients and quantities used in your recipe. For precise nutritional information, it is recommended to use a nutrition calculator with the exact ingredients and measurements.